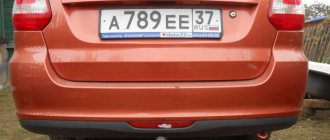
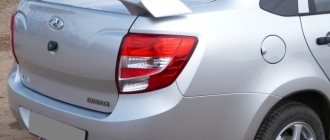
A parking sensor, also known as parking sensors, is installed as standard equipment on the Lada Granta Liftback in the Luxury Premier configuration. Previous modifications do not have this bonus.
You can install parking sensors on the Granta Liftback (hereinafter referred to as DP) yourself; the installation work is not complicated. The main thing is to follow the instructions and avoid haste.
We will tell you further about how to professionally install the DP on the Lada Granta Liftback.
How to install parking sensors on a Lada Granta with your own hands in a sedan or liftback body
A modern and common option is parking sensors. It is responsible for determining the distance from the vehicle to the nearest obstacles. Not all cars are equipped with this element, so many add it themselves. Installing parking sensors on Grant involves the use of various tools and consumables.
Distance between parking sensors
Where to place the sensors depends on the design features of your machine, in particular its width. When installing 4 sensors on the bumper, the interval between them varies within 30-40 cm. If 2 devices are installed, the distance is from 60 to 80 cm.
The distance from the sensor installation sites to the road surface is 50-80 centimeters. The exact value is usually specified in the manufacturer's instructions. It is important to install the sensors strictly vertically in relation to the road surface.
Original equipment
There is a wide range of products on the market, but the equipment is not always of the required quality. Several system options can be installed on the Lada Granta; standard parking sensors are characterized by the following features:
- The sensors are located in the front and rear bumpers.
- The signal goes to the controller and converter, which creates the signal. Based on the frequency of the signal, you can determine the degree of proximity to the object.
The original device costs much more, but is highly accurate. There are also Chinese sensors on sale that also cope with the task.
General questions about body kit 2190
Let's answer a couple of basic questions about Granta bumpers.
Differences between sedan and liftback bumpers
The principle of working with front and rear bumpers on a sedan and a liftback is the same! There are no fundamental differences.
Why you may need to replace the bumper
Possible reason for replacing the body kit on a VAZ 2190:
- Minor (or major) accident;
- Installation of a non-original body kit;
- Installation of additional devices: emergency parking sensors, rear view camera, etc.;
- Curiosity.
There are many options for non-standard body kits for Lada today.
Non-native body kits are made unofficially. This can lead to problems with joints and color mismatches.
Where to find the front bumper amplifier
Unlike pre-restyling Kalinas, Grant comes with a bumper reinforcement from the factory . Many people confuse it with a regular mount. You will gain access to the part only after dismantling the front body kit.
The amplifier on the Lada is rather symbolic, like the factory crankcase protection. But there is no such thing on Kalina.
Video: How to remove and install the rear bumper of a Lada Granta
What to replace with
If the car is not equipped with a device to simplify maneuvering during parking, you can install parking sensors on the Lada Granta liftback yourself.
There are a large number of different devices available in Chinese online stores.
The main selection criteria are:
- Sensing distance range. In most cases 0.3-2 m.
- The voltage required to power the device is 9-12 V. Therefore, power can be supplied from various electrical elements of the vehicle.
- Operating temperature (varies within -35…+45°C).
- Sound signal with volume up to 80 dB.
- The presence of a housing with protection from environmental influences.
- Installing a display that shows the location of the sensor.
The Chinese Myhung driver can be downloaded on the Internet and is also included in the package.
Typical characteristics of parking sensors
| Distance range | 0.3 – 2.0 m. |
| Voltage | 9-12 V |
| Sound signal | 80 dB |
| Working temperature | -35C + 45C |
| Possibility to mute sound | Eat |
| LED display with built-in speaker | Depending on the configuration |
| Sound notification when an obstacle is detected | Eat |
| Waterproof sensors with connectors | Eat |
| DOUBLESENSOR technology (reduction of blind spots) | Eat |
| Two types of obstacle indication | Eat |
Preparatory stage before self-installation of parking sensors on the Lada Granta Liftback
Required tools and materials:
- parking sensor complete with a cutter for cutting holes in the bumper;
- rags, masking tape for covering the perimeter of the rear bumper;
- a set of car tools for removing the bumper.
How to install and connect
You can install parking sensors yourself. The instructions look like this:
- The sensors are placed in the bumper. It is recommended to install 4 sensors front and rear.
- For convenient work, it is recommended to dismantle the front and rear bumpers. Otherwise, you won’t be able to get high-quality holes.
- After dismantling the bumper, masking tape is applied. It is required in order to carry out correct markings and eliminate the possibility of damage to the paintwork.
- The recommended sensor placement height is 50-60 cm above ground level. The optimal distance between individual elements is 1/3 of the length.
- The surface is being marked. This requires measuring instruments and a pencil. The quality of the result depends on the correct marking, so you need to be careful.
- Appropriate holes are required to position the sensors. They can be obtained by drilling when selecting a suitable nozzle. When working, you need to be careful, because a mistake can cause damage to the bumper.
- Once the holes are created, the masking tape is removed and the edges are cleaned. To do this, you can use a knife and needle files.
- The wire passing through to connect the sensor is lowered into the hole. It is placed so that it is slightly recessed into the hole. If necessary, you can press on the sensor ears with a sharp object; a tight fit ensures long-term operation.
- All sensors must be positioned strictly horizontally. Many manufacturers mark the housing with a corresponding arrow, which simplifies installation. If the device is pointed at the ground, it can be triggered by the ground. Fastening is carried out using special glue and silicone.
- Secure the control unit in the luggage compartment. It is recommended to create a special sealed box for it, which will protect the main elements from environmental influences. The wires are routed through a standard rubber seal; additional insulation is provided to eliminate the possibility of damage.
- From the front bumper the wires are routed backwards. To do this, they are located under the casing or plastic protection.
After this, the bumper is installed in place and the entire system is tested. The instructions are as follows:
- Maneuvering is carried out in the courtyard; it is not recommended to immediately drive onto a public road.
- The vehicle should be approached at different angles towards obstacles. Mistakes made can cause dead zones to appear.
- When the system is activated, you should stop the car and check the distance.
At first, you have to get used to the way the parking sensors work. When installing it yourself, you have the opportunity to carry out subsequent repairs and maintenance.
Malfunctions and their elimination
Most often the problem is poor contact. High humidity causes corrosion. Repair consists of removing the oxide mechanically. If the integrity of the main elements is damaged, they will have to be replaced.
Source
Removal, installation, repair and replacement of the air conditioning compressor Lada Granta VAZ 2190
Tool:
- Driver for socket attachment
- 8mm wrench attachment
- Knob attachment 10 mm
- 12mm wrench attachment
- Knob attachment 17 mm
- Torque wrench
- Medium Phillips screwdriver
- Pliers
Parts and consumables:
- Air conditioning compressor
- Refrigerant
- Accessory drive belt
- Plugs for plugging holes in the air conditioning system
- Compressor pulley bearing
- O-rings for air conditioning pipes
- Compressor oil ATMOS GU-10
Note:
To make it easier to remove, install, repair and replace the air conditioning compressor, place the car on a lift or inspection hole.
1. Disconnect the wire from the negative terminal of the battery.
2. Remove refrigerant from the air conditioning system as described here.
3. Remove the engine splash guard and oil pan guard (if equipped) as described here.
4. Remove the accessory drive belt.
5. Check the condition of the drive belt.
Note:
Replace the belt if, upon inspection, you find: - signs of wear on the working surface, cracks, undercuts, folds or separation of the fabric from the rubber; — cracks, folds, depressions or bulges on the outer surface of the belt; — fraying or delamination on the end surfaces of the belt; - traces of oil on the surface of the belt.
6. Disconnect the wiring harness connector from the air conditioning compressor electromagnetic clutch connector.
7. Remove the bolt securing the high-pressure pipeline flange to the air conditioning compressor flange, remove the washer and disconnect the pipeline.
Warning:
Immediately after disconnecting, plug the air conditioning compressor and pipe openings to prevent moisture and dirt from entering the air conditioning system.
8. Similarly, disconnect the low pressure pipe flange from the air conditioning compressor flange.
9. Remove the three bolts securing the air conditioning compressor to the engine bracket.
10. Remove the air conditioning compressor by lowering it down.
11. If you suspect problems with the air conditioning compressor pulley bearing, rotate the pulley by hand. The air conditioning compressor pulley should rotate on the bearing evenly, silently, and without jamming. There should be no axial or radial play.
If the air conditioner compressor bearing seizes and rotates tightly, then it is necessary to repair the air conditioner and replace the bearing without waiting for it to be completely destroyed.
12. Install the air conditioning compressor on the Lada Granta VAZ 2190 car in the reverse order of removal, taking into account the following: - tighten the bolts securing the air conditioning compressor to the engine bracket to a torque of 25-29 Nm; — install new sealing rings on the pipelines and lubricate them with ATMOS GU-10 compressor oil; — attach the pipelines to the compressor and tighten the bolts securing their flanges to a torque of 7-9 Nm.
Warnings:
Open the process plugs of the flanges of the new air conditioning compressor only immediately before connecting the pipelines. When installing, be sure to lubricate the new sealing rings of the pipeline flanges with oil for the air conditioning compressor.
13. Make sure that when installing the drive belt, the wedge tracks coincide with the pulley grooves, and the belt tension is normal.
14. Refill the air conditioner and air conditioning system with refrigerant at a specialized center for servicing automobile air conditioners.
Helpful advice:
When purchasing a new air conditioning compressor, check with the seller about the amount and type of oil poured into the new compressor. This information may be useful to mechanics who will subsequently charge the system with refrigerant.
The article is missing:
- Photo of the instrument
- Photos of parts and consumables
- High-quality photos of the instrument
What is parking sensors in a car?
The vast majority of modern motorists prefer this useful device. Very often, especially novice drivers, have difficulty parking their car. They struggle with anxiety and fear of harming their own or a nearby car, and all these worries are in vain if they have equipped their car with parking sensors.
Parking sensors are designed to help motorists in the most inconvenient and difficult situations - for example, when you need to park with your back to a wall or another car and there is no way to visually assess the distance to an obstacle. By installing parking sensors in your car, you will greatly facilitate the process of parking, even in the most inconvenient places, you will be able to protect your car from accidental damage, and yourself from waste associated with such troubles. Therefore, many people prefer the parking sensors comfortable parking system and know what it is firsthand.
A parking radar, or an acoustic parking system (APS), is installed to provide easier maneuvering and avoid collisions while parking and driving the vehicle. The “smart” system is able to recognize all objects that are in an area poorly visible to the driver, and those that are completely impossible to see from the driver’s seat. The system notifies the driver through sounds and/or graphics that the vehicle is approaching an obstacle, and the alerted driver performs the necessary maneuvers to avoid a collision.
The first parking sensors were equipped with high-class cars of very popular brands. This new invention immediately received positive responses from owners of expensive cars and became very popular. Now, thanks to large-scale production, parking sensors are installed by many manufacturers. If the car does not have parking sensors, then it can be installed without any problems at any car service center. If you have the skills to repair a car, or are familiar with maintenance, then you can carry out the procedure for installing parking sensors yourself, having previously selected the type of parking system you need.
Improvements in the “Norma” package
The “Norma” option was supplemented with an optional package – heated mirrors and seats. A speed limiter, cruise control, and a set of necessary elements appeared:
- PTF headlights;
- 12 Volt cartridge in the trunk;
- The low beam can be turned off with a delay (40 seconds).
The 2DIN height radio remained in place. The BC received a gear shift prompt function. The upper display shows the temperature, and the lower display shows the “hint”.
Car dealerships offer you a large selection of new cars at prices affordable to everyone! Here is a wide range of KIA, Suzuki, LADA, Lifan, UAZ, Hyundai and other brands. Customers with any budget can purchase cars from us. We provide individual conditions and favorable prices, which you can clarify by phone or on the website.
AutoHermes, the official representative of eight automakers, offers to buy a new car in Moscow. Dealer status allows us to offer profitable programs and provide warranty service.
How does the parking sensor work?
The parking sensor device is quite simple, and it can be divided into several components. These are an indication unit, a control unit and special sensors. There are models in which the control unit is single. In this case, the indicator unit can be either a buzzer or an LED or liquid crystal display.
So what is parking sensors, and what is its operating principle based on? The operation of an acoustic parking system is based on the properties of sound waves. Ultrasonic radar is able to correctly determine the distance from the car's bumper to the closest obstacle. The system transmits an impulse using a transmitting device; upon reaching an obstacle, it is reflected. The device receives the reflected signal, and with the help of a controller, based on the time it takes the beam to travel to the obstacle and back, calculates the distance to the obstacle.
Information about the distance between the vehicle and the obstacle is instantly displayed on the display. It is usually attached to the car's dashboard or rearview mirror. If desired, it can be mounted in any other place. The system is also equipped with speakers that warn the driver with sound. Typically, the parking sensors emit the first signals when the car approaches an object closer than 1-2 meters. If the obstacle is at a distance of 0.1-0.4 m, the signal does not stop until the reason for the system’s response is eliminated.
If you engage reverse gear and start moving backwards, the parking sensors also engage simultaneously with reverse gear. The system, with sensors mounted on the rear bumper, will receive power from the reversing light circuit.
If the car has corner or front parking sensors, the system is activated when the car is moving at low speed, namely up to 20 km/h.
Installing a parking radar is not difficult - usually a wire is laid along the car body, which connects the display unit with the sensors. In addition, there are wireless systems. This type of parking sensors is much more convenient to install than wired ones.
Preparing for installation
- To ensure that nothing gets in the way during work, we take out everything unnecessary from the trunk.
- We unscrew the plastic thumb at the right headlight protection, disconnect the wires going to it and disassemble the lamp.
Unscrew the lamb (photo of the editorial car)
Before drilling holes in the bumper, we check the functionality of all devices in place. Especially if you ordered parking sensors from Uncle LYAO through AliExpress.
To do this, connect (solder) the red parking sensor power wire to the reverse power supply track. We connect the ground wire to the body or to the flashlight wiring block. Next, turn on reverse gear and ignition.
You can see how in the photo the red wire is soldered to the reverse power track.
After this, we check the functionality of all sensors and the display.
Tools for work
In order to install parking sensors, you will need the following tools:
- Parktronic.
- Insulating tape.
- Soldering iron.
- Additional wires.
- Milling cutter.
- Screwdriver.
- Pliers.
- Double sided tape.
- Masking tape.
- Marker.
- Steel wire.
Step-by-step process for installing parking sensors
- First of all, we mark the cutout locations on the bumper for the touch sensors, having previously marked the areas at a distance of 50-60 centimeters from the ground .
- For convenience and practicality, we stick masking tape on the bumper and draw the markings directly on it. Since you are working on the rear bumper, you can also attach the towbar!
- Using a cutter, cut holes at symmetrically equal distances. This way you will get 4 holes located approximately 40 centimeters .
We cut the hole using a cutter and clean the edges using a file or needle file.
It is best to use wire that is both strong and flexible.
It is best to fix the block using 3M type double-sided tape.
This is what the parking sensor looks like after installation is complete.
What types of parking sensors are there?
Ultrasonic parking systems are loved by most residents of the CIS and Russia. Although, many have not yet fully understood the concept of parking sensors and what it is in a car. And also what types they are. The operation of parking sensors can be based on the work of either ultrasonic or electromagnetic waves. Let's look at how such parking sensors work and what is their difference.
Ultrasonic parking sensors are usually installed on the bumper. This type of parking system determines the distance to the nearest obstacles using ultrasound reflected from these objects. This is similar to the principle of operation of an echo sounder. First, the system detects an approaching object, then a momentum is generated (most often ultrasonic). After this, the sensor perceives the reflected sound signal. The distance to the obstacle is calculated based on the time measured by the electronic unit and the speed of the reflected signal. Before displaying data on the display, several sensors are polled. As a result, the radar will notify you of approaching an object using signals.
The standard system includes two sensors that are mounted on the rear bumper. There are also parking sensors with 4 sensors. They are designed to monitor blind spots. In addition, there are complex parking sensors - with 6 or 8 sensors, which are installed on both bumpers. The parking systems market can offer very unusual solutions - there are parking sensors in which sensors need to be attached to the sides of the car. Today, it is ultrasonic radar that makes up the bulk of parking radars.
The second type of acoustic parking system is electromagnetic parking sensors. The main role in it is played by a special metal-coated tape. She is a sensor, i.e. the heart of the system. Usually it is glued inside the car, on the back of the bumper. The metallized tape is responsible for creating an electromagnetic field. When any object appears in the area of this field, it causes “irritation” and the system notifies the driver about the obstacle.
The most popular electromagnetic parking sensors are Audi's APS (brand DP1). This type of parking sensors is usually installed by most Americans and Europeans.
These are the basic principles on which the work of parking sensors is based, and in their diversity, today, they can be different. Parking sensors equipped with a rear view camera are one of the most convenient models. Thus, the driver not only receives audible warnings, but can also see what is happening behind the car. The camera gives a full overview and a good picture. At the same time, sound sensors give signals, telling the driver the distance to the obstacle.
Wireless parking sensor systems are easy to install; the absence of wires eliminates the work required to install them. This greatly simplifies the process of installing the device in a car.
Selection of parking sensors for Lada Granta
A special device with parking sensors will allow you to leave your car, even if there are obstacles in the form of other cars. In addition to the cars of other car owners mentioned above, examples of obstacles include low curbs, bumps, fences, enclosing flower beds, and so on. Most of these obstacles do not fall into the driver's field of vision, as a result of which he may not notice them and cause a collision. Parktronic will not allow the latter, warning the motorist about the interference with an audible signal. Parking sensors are also able to determine the distance to an obstacle.
The number of parking sensors on one device varies: there can be from 2 to 8. There are usually 4 sensors mounted on the rear bumper of a car.
What functions do parking sensors have?
Parking sensors for Lada Granta cars have a variety of capabilities, it all depends on the model of the parking device:
- presence of radar and the ability to sound a signal. The device will warn the driver about approaching an object blocking the road, and the radar will be activated;
- parking radar visual warning. In addition to the sound signal that the parking sensors for Lada Granta cars will emit, if there is a risk of hitting something, the driver will be able to see the outline of the obstacle, which will be displayed on the display.
- CCTV camera located in the rear of the car. With such a video device, the problem with a limited field of view when moving backwards disappears by itself.
A useful device that has deservedly received a large number of positive reviews from users.
WE WILL DELIVER TODAY*
If you order before 15-00 hours - at the price of regular delivery. After 15-00 there is urgent delivery.
* on weekdays, subject to availability of couriers, we will DELIVERY for FREE
in Moscow and Russia -
more details
Parking radars (or parking sensors) are often purchased by novice car owners, which greatly simplifies their task of maneuvering in confined spaces. However, they are often included in the package of very expensive cars, and you should not take them as a sign of an incompetent driver - rather, they are a very useful accessory.
On cars with poorly calculated visibility in the rear hemisphere, parking sensors will be by no means useless.
What are the features of using parking sensors?
Having studied enough information about the parking system and looked at the parking sensors in the photo, you have made your choice and installed the miracle device in your car. It should be remembered that technology needs human care. And in order for its operation to be trouble-free and correct, it is necessary to take into account the nuances listed below and try to prevent them. Problems in the operation of parking sensors can be created by:
- dirt, ice and snow stuck to the sensors;
- if the car is moving on an uneven road or on an incline;
- rough terrain can also cause misleading signals;
- increased noise;
- adverse weather conditions;
- radio;
- dents and holes in the asphalt;
- not closed sewer hatches;
- sharp or thin objects.
Be sure to take note of this and do not rely 100% on technology, because it cannot always ensure your safety.
The main prerogative of parking sensors is the ability to monitor areas that the driver cannot control from his seat, i.e. so-called “blind spots”. This will help avoid accidents and other difficulties for the driver on the road.
Autolikbez October 25, 2017
Not every driver is able to “feel” the dimensions of the vehicle and accurately drive close to various obstacles and other cars, which is quite important in urban conditions. An assistant in such a situation is a parking radar (parking sensors), which appeared in the design of imported cars back in the 90s of the last century. The task of the electronic device is to prevent a collision by giving a warning signal when approaching any object. What is parking sensors in a car and how it functions, read in this publication.
Review of Manufacturer Prices
| Name / article number / catalog index | Price, rub.) |
| SPY LP-121 with sensors (016961) | from 1700 |
| SPY LP-213 (016963) | —/— |
| CYCLON PS4 K9 (129255) | from 800 |
| CYCLON PS4 K8 (129254) | —/— |
| SPY LP-016 (016959) | —/— |
| Falkon 2612 (064387) | from 950 |
| —/— (064388) | —/— |
| CYCLON SK-4T (129257) | —/— |
| SK-5T (129256) | —/— |
| ST-5T1 (129259) | —/— |
| LP-113 (016960) | —/— |
| Falkon 2680 (064399) | —/— |
| Galaxy PS4-01A LCD with sensors (045091) | from 1700 |
| CYCLON AV-4W (129268) | —/— |
| Galaxy PS4-01A LCD (064429) | —/— |
| CYCLON LW-4WS (129270) | —/— |
| LV-8T (045092) | from 2500 |
| PS8-01A LCD (064427) | —/— |
| Parkcity Madrid (017586) | —/— |
| PS8-01B LCD (064411) | —/— |
| Brees Longhorn H-065-6 (016956) | from 1900 |
| ParkMaster 8-DJ-29 (054347) | —/— |
| 8-DJ-31 (054986) | —/— |
| 8-DJ-45 (054871) | —/— |
| 8-DJ-87 (054235) | —/— |
| 8-DJ-02 (054641) | —/— |
*prices are current as of October 11, 2018
Recommendations for choosing a manufacturer
There is a wide range of products on the market, but not always of high quality. Carefully check the package contents and the presence of a warranty card. Be sure to request the provision of a sales receipt as a guarantee of the legality of the transaction and the possibility of return if defects are detected.
How does parking radar work?
Parktronic is a complex electronic system consisting of several main elements:
- control and signal processing unit;
- ultrasonic sensors mounted in elements of the car body (usually the front and rear bumpers);
- device for sound and visual warning of the driver.
Each sensor continuously sends an ultrasonic signal that is reflected by the surfaces of surrounding objects. If an obstacle is at close range, the device detects the reflection and transmits information to the control unit controller. The latter determines the distance to the obstacle by wavelength and response speed, after which it gives the appropriate command to the sound device and display.
How parking sensors of the simplest design work:
- Two sensors are installed in the rear bumper of the car, distributing ultrasound in a coverage sector of approximately 45° in front of them.
- When you back up and approach an obstacle within 2 m, the electronics beep the first sound.
- As you approach the object, the signal sounds more frequently, and at a distance of 30 cm from the surface it becomes continuous.
In some car models, the unpleasant sound of the buzzer is replaced by a voice warning, telling you how many meters are left before the collision.
The budget version of the device has a visual indication through a simple display on which strips of different heights light up. The closer the surface of the object, the more stripes flash on the screen. When the distance is reduced to critical, the indication is reflected in red.
While driving along city streets, other road users often approach the car (especially in traffic jams). In order not to irritate the driver with a useless buzz, the parking sensors are activated after engaging reverse gear.
The operating principle of parking sensors, based on the reflection of ultrasonic signals, has long been used in road patrol radars. Based on the wavelength and response speed, the device calculates not only the distance to the object, but also the speed of movement.
Comments • 48
Hello ! Doesn't the tow bar interfere with the parking sensors? does not work? I have a towbar, I want to install parking sensors,
It shouldn't, at least it didn't work for me
It is necessary to blur the numbers, as without this.
I did not like. Not informative.
I have a 2107 towbar, will it interfere?
There wouldn't be a squeak yet
I think it will be enough to put three sensors in the middle like on Priors or Renaults, for such a small car four buttons somehow look a bit too much
I think one sensor will work. They are also ultrasonic. stick it in the center and it will work, it will work on walls and cars when parking
There are never too many sensors! the accuracy of the determination depends on this
If three sensors place a distance, what distance is allowed, approximately 33 cm?!
look in the documentation specific to your kit
Is it possible to hang both wires on the headlight?
specify which “both”?
Why do you need 2 parking sensors? You already have a towbar!))))
This type of parking sensor will not work on stumps and posts)
The car I purchased already had one of these, but recently the numbers stopped being displayed, but the stripes visually indicating to stop remained, what could this be related to?
this clarification changes things, but in such a situation I still ordered a new, complete, similar set and would change it sequentially - starting with the ex. block.
Kit Shopping the right side signals stop, constantly, and accordingly shows 00, and the rest react normally when approaching an obstacle
Apparently the LED display is faulty
Tell me, a false alarm is triggered. China, repainted black. False signal for a clean signal at dusk. Thank you.
When installing multitronics pu4tc parking sensors, can these dimensions be used? 33 45 33 52 the instructions for multitronics indicate the same distances between sensors of 40 cm
Thank you! I will install according to the instructions 42.5 cm side sensors will be closer to the sides of the bumper, thereby, when turning in reverse, both sides of the grant will be covered.
Types of systems
The parking sensor design described above is considered outdated and primitive. Two sensors built into the rear bumper are able to “see” only solid obstacles located behind the car. Objects in the form of poles and street trash cans that are shifted away from the center of the car may not be detected by the devices. The reason is that the area behind the vehicle is too narrow. There is no front collision insurance at all.
Therefore, the following types of parking radars are installed on modern cars:
- Budget version - 3 sensors in the rear bumper, one in the middle, two on the sides. Unfortunately, with such an arrangement, there are “blind” spots behind the car.
- Full coverage of the space without “blind” spots is provided by 4 ultrasonic devices mounted in the rear body kit at intervals of 40 cm.
- Two sensors in the front bumper and 4 in the rear. This system allows you to safely park in reverse and maintain a distance from large objects located in front.
- The most expensive version - eight devices (4 pieces in each body kit) is relevant for novice drivers. Parking sensors fully control the space in front and behind the car.
Note. To prevent sound or voice signals from distracting the driver while driving, a group of tracking devices has been disabled, and in some modifications one specific parking sensor can be deactivated.
The screen with a scale does not give the driver a clear picture of what is happening behind and in front of the vehicle. It indicates approaching an obstacle and signals when the distance to the surface of the object becomes dangerous. The full picture can be seen on the liquid crystal display installed on the center console of many modern cars.
The display receives the image from at least two cameras combined with ultrasonic sensors. A marking grid is superimposed on the picture, using which the driver can easily determine the remaining distance to the object. Reversing is also accompanied by voice prompts (the function can be turned off if necessary). The parking sensors are designed in such a way that they are activated after switching to reverse gear; the system does not function while driving.
The latest modifications of electronic devices are equipped with several additional functions:
- the screen shows not only a picture with a superimposed grid, but also the trajectory of the car;
- instead of a display, the image is displayed directly on the windshield (the so-called projection), the driver does not need to look from the road to the screen;
- display of various useful data - date, current time, mileage and outside temperature.
Removing parking safety parts
Removing the System Sensor
We install the car on a lift or inspection ditch.
Disconnect the negative terminal of the battery.
We disconnect the sensor block 2, Figure 1, of the safe parking system from the block 3 of the sensor wires.
We remove the latches and disconnect cover 1, Figure 2, from the safe parking sensor, remove the cover and sensor 3 with spring 2 from the bumper.
Install the sensor in reverse order.
When installing the sensor on the rear bumper, mark A, Figure 2, on sensor cover 1 should be in the upper position.
Removing the parking safety control unit
We prepare the car for the job.
Disconnect the negative terminal of the battery.
We take out two buttons, disconnect them from the body and unscrew the left upholstery 1, Figure 3, arches and sidewalls.
We unscrew the two self-tapping screws securing the bracket for control and parking alarm unit 3 to the arch of the inner left rear wheel.
We disconnect blocks 1 and 2, Figure 4, of the wires from the parking alarm unit.
We are going to the East, perhaps they didn’t blow it out after washing, the ice is in the cracks. Describe in more detail - how did it start? If warming it up and blowing it out doesn’t help, then apparently the warranty is waiting for you.
parking is warm + 5 always, started yesterday, when reversing it started beeping
problem with parking sensors, it beeps even when there is no obstacle, parking sensors are clean
After installing parking sensors myself, I also had the same problem. After scouring the Internet, I found out that when installing, it is necessary to fill the entire housing and the back of the sensor with sealant (the sensor must be clean and dry), which of course I did. The problem disappeared, but one sensor sometimes triggered falsely. (it turned out to be the most sensitive) Having carefully examined the front part of the sensor, I discovered that there was a gap between the ultrasonic emitter (a nickel in the center) and the body. I think it’s not difficult to guess what I did!? Well, of course, I pushed the sealant into this gap with my finger, and removed the excess with a cloth until it was perfectly clean. Now the carttronic works clearly, without a single false positive. You may have another reason.
problem with parking sensors, it beeps even when there is no obstacle, parking sensors are clean
I changed the bumper to a sports one and couldn’t disassemble the parking sensor, so I broke it. After studying it, I understood how to figure it out (I can post a photo). The second one survived. Now I have one sensor left. It starts beeping when driving in reverse for about 4-5 seconds when there is not even an obstacle. Only the squeak is lower than before when an obstacle approaches less than 30cm. I think your sensors have fallen off.
problem with parking sensors, it beeps even when there is no obstacle, parking sensors are clean
Hello everyone! Today my Grandochka fell ill on the street - minus five degrees. Problems with the parking sensors began. I turn on the reverse speed, the parking sensors start beeping intermittently for about 10 seconds, then just beep. .What to do?What to do?The car is luxury for six months.
Granta has no experience communicating with standard parking sensors, I’ll tell you about others, assuming that the sensors are more or less standard.
So, there was the same problem. You engage the rear - after a couple of seconds (response time) a constant squeak begins, like that's it, point-blank. The seats in the back are abysmal, the sensors are clean. Conclusion - the sensors are buggy, they don’t work - the electronic unit thinks that’s it. Apparently made specifically for safety. It’s easy to find a sensor that isn’t working; you need to turn them off one by one.
I don’t know how well this idea will apply to standard parking sensors, but it’s worth thinking about.
The guys bought parking sensors with 8 sensors: 4 back and 4 forward. I connected the rear ones to the reversing light. The question is: is it possible to connect the front sensors to the right steering column switch. There is nothing connected in position 7 - reserve. 11706
Where is the chamber block located in the car?
I didn’t start a new topic, I’ll write here. Liftback luxury car (without navigation) 2015 I decided to buy myself a parking radar ParkMaster 4-FJ-47, everyone is happy with it, but when I looked at the instructions, I was alarmed by the line that for cars equipped with a CAN bus it is necessary to use an additional relay in the power supply circuit of the parking system. On the Internet I found that you need a Starline automotive 5-pin relay with normally closed and normally open contacts. As I understand it, you need a permanent plus? Or our CAN does not look at the light bulbs and can simply be screwed to the reverse wire, can anyone in the subject tell me?
photo of the connection diagram (https://da.d-cd.net/d8bd862s-960.jpg)
Luxury without parking sensors? Just screw the reversing lamp to the wire. I don’t know whether KAN sees it or not, but the reflashed MMS shows which lights are on on the additional panel.
Liftbacks that come without navigation and without parking sensors, auto lights, auto wipers and others like them.
So it's probably all through the relay. although you can install it first and see how it works.
Added after 12 minutes More precisely, the configurations differ between MT and AMT
Liftbacks that come without navigation and without parking sensors, auto lights, auto wipers and others like them. For me, this is already “norm+”
Cling on, don't bother))). https://polosedan-myclub.ru/choosing-parking sensors-for-polo-sedan/ I looked at the power in the descriptions - it’s simply meager. 2.5 - 5 Watt. What relay? ))))
For me, this is already “norm+”
Cling on, don't bother))). https://polosedan-myclub.ru/choosing-parking sensors-for-polo-sedan/ I looked at the power in the descriptions - it’s simply meager. 2.5 - 5 Watt. What relay? ))))
Yes, indeed, the power is less than 2.5 W, I didn’t look at it right away, thank you.
Good afternoon everyone! Tell me how to disable the standard parking sensors on the luxury when towing a trailer? The squeaking sound is annoying when reversing.
There is a detachable contact on the harness to the left rear light - black/blue-black wire, open it and that’s it.
There is a detachable contact on the harness to the left rear light - black/blue-black wire, open it and that’s it.
Thank you very much, I'll try it today.
Good afternoon, such a small task is not a big deal. I bought a park master chamber. I wanted to install it, but then bad luck came up when I started the installation and then I noticed such an unpleasant thing specifically for the Grant bumper that the chamber sensors themselves are positioned at an angle of 6 degrees to the top, and if you put them in the Grant sedan bumper, it turns out that they look up. what kind of chamber to choose instead of this.
Well, I don’t know, where are you going to put them so that they look up? All sensors are almost the same, if you put them in places as in the photo, everything works great. https://163-samara.buyreklama.ru/samara/pic_800_600/27023482/156005c5baf40ff51a327f1c34f2975b.jpg
It just looks like that in the photo, but in life they all look in the right place.
That's right, at an upward angle - it's clearly stated in the instructions.
It makes sense to install or look for another parking sensor
Bet, don't worry.
A week ago I installed Flashpoint FP-400B silver parking sensors, I did it not myself, but in a certified center. It worked great for two days, but on the third the glitches started. Once it works normally, but when you turn on the rear, it starts beeping without interruption, although there are no obstacles behind. And it goes away on its own. I have to go and complain under the warranty (they gave me 6 months), but suddenly it starts working normally. Then everything starts all over again. What should I do, I can’t imagine?
Have you read the instructions (https://www.flashpoint-alarm.ru/content/files/flashpoint_400b.pdf)? The self-diagnosis process is described on page 7.
Have you read the instructions (https://www.flashpoint-alarm.ru/content/files/flashpoint_400b.pdf)? The self-diagnosis process is described on page 7.
The fact of the matter is that I read and am aware of self-diagnosis. During self-diagnosis, it emits a single squeak and goes silent, but here it beeps constantly and continuously while reverse is engaged. I think that one sensor is faulty. But why is it that sometimes it works fine, but sometimes it’s buggy? You have to somehow get to the moment of the glitch and send it to the service. But here’s the ambush, I’ve already come twice, and at that moment it began to work adequately)))
Who installed the parking sensors themselves and painted the sensors? I have a grant color, the sensor is black - I’m wondering whether it’s worth painting it.
And does the quality of coloring reduce its sensitivity?
Well, the parking sensor has arrived. I'll install it on the weekend.
Added after 37 seconds Sensors are black, glossy. Against the glossy background, I think the color of the grants need not be painted.
Well, the parking sensor has arrived. I'll install it on the weekend.
Please provide a detailed photo report. And we will also follow in your footsteps. Of particular interest is the location of the harness from the display unit to the control unit.
I don't have a harness there, just one wire (a kind of local network). The display unit is a multitronics on-board computer; in addition to the main functions of the on-board computer, it has an additional parking sensor function.
I drilled 4 holes in the bumper (the drill was included), removed the clip on the left and folded the trunk lining. There is an elastic band in the corner for bringing out the wires (standard) for the state license plate illumination). I threaded wires from 4 sensors into it without removing the bumper. And there, on the wing, I attached the electronics unit (which only works in tandem with the multitronics).
And from this block a single wire went up along the standard harness, then he bent the upholstery from the arch and under the upholstery. Under the upholstery along the driver's pillar (I didn't unscrew anything), I threaded a wire and hooked a single wire onto it and pulled it right next to the gas pedal, and then to the nozzle (where the "cartoon" is located and connected it to it).
As I understand it, a regular parking sensor requires pulling a whole harness (from all sensors) with their connectors? Then it’s a little more complicated, the wire easily passes under the floor covering, and the connectors will probably get stuck.
The most difficult thing for me is drilling two holes in the bumper in the center because... There is a metal bumper reinforcement (homemade). I had to drill a 20mm hole in the metal with a bit - the bit on the 2nd hole was dull, but partially sawed through the hole and I already broke out the metal with a chisel and hammer.
The second most difficult thing is to pull the wires inside the bumper through my metal protection - I also used wire and within 30 minutes I had already pulled all 4 wires into the interior.
In the harness, I connected “Reverse” to the green wire, “Brake light” to the red wire, and “ground” to the black wire. I soldered it and wrapped it with electrical tape. And stretching a thin wire through the interior turned out to be the easiest task; to do this, you just need to remove the door seal from below and you can easily operate your hand under the carpet, pulling the wire. And then I connected the wire to my wiring and simply pulled it out (the soft wire in the insulation, without clinging, easily went through all the bends). There’s not even much to take pictures of because... I didn’t remove or disassemble anything.
Added after 12 minutes I placed the sensors in the center of the bumper and, as per the instructions, the distance between them (L/4 and L/8 from the edges, where L - This is the whole car 1700mm). And then I narrowed it a little - I took L/4 = 39cm.
But our bumper is rounded at the edges and it seemed to me that at the edges the sensors should have been placed a little closer to the center, or a spacer should have been made for it. When they drive into the garage, they swear at the walls. Those. With this rounding, it’s better to think something through before drilling a hole. At maximum sensitivity when driving backwards, the outermost sensor on a car in a parallel row beeps - it shows approximately 70 cm (with a lateral interval of about 40-50).
The sensors are at a height of 55 cm (this is the height from the floor to the center of the bumper above the number plate). In principle, there are no problems with them, but sometimes they catch some irregularities from the ground (if you drive on a frozen road). I thought 55cm would not be too high, but it turns out 60-70 is probably even better. But I still haven’t checked the barrier, which the rear does not pass through the ground clearance, or simply some obstacles to understanding how the sensor works.
Installing a parking radar significantly improves driving safety. Devices with rear sensors are most often used, but the use of front or combined parking sensors also brings its own advantages. Connecting such systems has its own characteristics and can be a rather complex procedure. Car owners often also have the question of how to disable the front parking sensors. Below we will look at the main nuances that arise during their installation and connection.
Recommendations for choosing and installing parking sensors
Manufacturers do not provide parking radars on budget models of passenger cars. This is not a problem for a car enthusiast who is concerned about safe driving: parking sensors can be purchased and installed yourself. It is necessary to purchase an installation kit, which includes sensors, a small remote display and an electronic control unit with wires.
Note. A screen in the center console is found on many cars that are not equipped with parking electronics. To connect the display to the controller, you will have to contact a dealer car service - doing this yourself is quite difficult. It's easier to install a remote indicator.
When choosing parking sensors with an ultrasonic operating principle, consider the following recommendations:
- There are kits with overhead (glued) and mortise sensors. It is better to choose the second option, although a similar set is more expensive. Experience shows that cheap stick-on devices often fall off and come off.
- Take a kit that includes at least 4 ultrasonic scanners installed in the rear body kit. If you want to monitor the front of your vehicle, buy a set of six sensors.
- Always relevant advice: try not to buy cheap products made in the Republic of China.
Before installing parts, read the instructions and diagram included with the installation kit . Prepare a drill with a core drill, which can be used to make neat holes for each parking sensor. During the connection process, you may need a tester or multimeter to test the wires.
The most difficult moment is drilling holes and attaching ultrasonic elements. Ideally, you need to remove the bumper, mark the mounting points at intervals of 30–40 cm and make holes. Observe the direction of drilling from outside to inside so as to minimally cling to the paintwork. Then attach the sensors and install the body kit on the car.
The next steps are installing the indicator with the electronic unit and routing the wires. The placement of these elements is individual for each car brand, so the only recommendation is to fix the display in a convenient place so that it does not interfere with your view, and hide the controller under the dashboard. Place the wiring under the floor covering.
In this article we will talk about what parking sensors are in a car, how they work and how to install them yourself. In short, parking sensors or parking radar (in English literature Parking sensor) is a sensor system with an electronic warning system that helps the driver maneuver in confined spaces. If there is a risk of collision, the parking sensors warn the driver about this with an audible signal, and also display the distance to the obstacle on the display.
Additional installations and features of interior equipment Grants “Standard”
The initial equipment of the Granta Standard cabin is quite modest, but this in turn is a kind of advantage. The buyer, if desired, will be able to ideally re-equip the vehicle for personal use and supplement it with everything necessary.
When purchasing from a car dealer, you can find out the cost of all installations and their availability. And since the price of the car itself is quite small, with a minimal investment you can buy everything you need and even re-equip it yourself. The most popular modifications among new owners of the standard equipment are the following:
1. Passenger handrails.
2. Central locking.
3. Airbags.
4. Anti-theft alarm.
5. Lamp lamps for the rear row and trunk.
6. Rear seat headrests.
The car is initially equipped with ISOFIX child seat mounts and special latches for locking the rear locks. Additionally, the standard Lada Granta equipment to provide increased protection includes an immobilizer that allows you to lock the vehicle systems. The vehicle is equipped with daytime running lights.
The rear seats have a common design without a 40:60 split, and a special automotive fabric with increased strength and wear resistance is used as a cover for the seats. Like all other models in this series, there is a sun visor for the driver.
The model is equipped with 13-inch wheels; in addition, the owner receives a spare 13-inch full-size wheel. The model's bumpers are painted in body color, which allows you to give the car a perfect look.
The buyer is offered the Grant Standard equipment in a color scheme consisting of classic colors (white, black, silver). Metallic tones for this modification must be ordered separately.
It is also possible to further re-equip the exterior with new bumpers and a radiator grille, since the standard assembly features simplified but durable body elements.
How does parking sensor work?
The operating principle of the parking radar.
Parking radar sensors are its “working” sensitive elements, which are installed on the rear and front bumper. Sensors detect obstacles at distances from 2 m to 0.2 m, which the driver is notified about through signals and display.
Parking radar sensors operate using ultrasonic signals that are reflected from surfaces around the car (the body of another car, a tree stump, a pole, etc.). Sensors record these reflected waves and transmit information to the electronic parking sensor unit. In the block, the information is processed (the distance to the obstacle is calculated based on the wavelength), and then displayed on a scale in the form of bars, or on a display in the form of numbers. At the same time, a sound signal is given using the built-in beeper. The closer the distance to the obstacle, the more often the sound signal sounds. If the distance is less than 30 cm, then it becomes continuous.
If an obstacle is in the zone of a possible collision, the driver hears a signal and can see on the parking sensor display the distance to the obstacle in meters or centimeters. However, if the number of sensors is insufficient, the parking sensor may “not notice” objects that are thin or that fall into the “dead zone”.
Activating parking sensors manually
This option is the simplest. Switching on is carried out manually by pressing a special button. It is installed in a place that is easily accessible to the driver (on the dashboard, next to the display unit, etc.). The front sensors are activated when entering a courtyard, a parking lot, an internal passage, etc. If necessary, you can turn off the device in the same way.
It is most convenient to use this connection option when installing autonomous front parking sensors. In this case, the easiest way is to install the button in the open circuit of the device’s power supply.
A number of parking radars allow you to disable or enable the front sonar directly from the display unit. In this case, installation of a separate toggle switch is not required.
Which parking sensor is better to choose?
Four sensors in the rear bumper of a car
When choosing parking sensors, you first need to focus on the number of sensors. Models currently available for:
- Two or three sensors. Parking radars with 2 or 3 sensors are generally considered to be outdated and uninformative. To cover all possible blind spots, there must be at least four parking sensors in the rear.
- Four sensors. All of them are installed on the rear bumper. And this amount is sufficient to “see” everything that is happening behind the car. Parking sensors with 4 sensors are very popular due to their low price, but do not provide information about obstacles ahead.
- Six sensors. Most drivers consider parking sensors consisting of six sensors (the so-called “all-round” parking sensors) to be optimal in terms of the combination of price and information content. Four are installed on the rear bumper, approximately 40 cm apart. Two more are mounted in the front bumper. This installation scheme for parking sensors has good information content and reliability. Modern models have the option of turning off sensors in the front or rear. If desired, the driver activates sensors only on the front or rear of the vehicle.
- Eight sensors . These are expensive models of parking sensors. But many novice drivers choose them, since parking radars with eight sensors detect any obstacles. The use of parking sensors with a large number of sensors has some peculiarities. Often, when driving, an overly sensitive radar distracts the driver. Therefore, devices with eight or ten sensors turn on for approximately 20 seconds at the beginning of movement. Then they are activated only when braking. Some models can be turned off by the driver using a button.
Engagement through first gear
This option can be implemented by installing a special sensor, which can also be used as a regular button. When you engage first gear, the gearshift lever presses the switch, as a result of which the parking radar is activated.
First you will need to remove or disassemble the gearbox selector housing. Under it there is usually enough free space for installing additional components, as well as the fasteners we need. Most likely, you won’t be able to simply install a button; you will need to first make a special bracket for it (or use something suitable from what you have).
After installing and connecting the components, you should check the operation of the system. Additional design adjustments may be required. It is better to use a button with a click, this will make adjustments easier and will be useful in a number of situations.
When using a separate front parking sensor, the described device can be connected to the power supply circuit. Changing from the first speed to any other will automatically turn off the device.
The natural question is how to turn on the front parking sensors according to this scheme on cars with automatic transmission. Here, gear shifting is controlled by a special sensor connected to a unit located in the engine compartment. Depending on the gear currently engaged, a voltage of 12 V appears on certain contacts. This voltage can be used to power the radar directly or through a relay (if there is not enough current). It is also convenient to use if a parking system with a special control input is installed (see below).
Comments • 48
Hello ! Doesn't the tow bar interfere with the parking sensors? does not work? I have a towbar, I want to install parking sensors,
It shouldn't, at least it didn't work for me
It is necessary to blur the numbers, as without this.
I did not like. Not informative.
I have a 2107 towbar, will it interfere?
There wouldn't be a squeak yet
I think it will be enough to put three sensors in the middle like on Priors or Renaults, for such a small car four buttons somehow look a bit too much
I think one sensor will work. They are also ultrasonic. stick it in the center and it will work, it will work on walls and cars when parking
There are never too many sensors! the accuracy of the determination depends on this
If three sensors place a distance, what distance is allowed, approximately 33 cm?!
look in the documentation specific to your kit
Is it possible to hang both wires on the headlight?
specify which “both”?
Why do you need 2 parking sensors? You already have a towbar!))))
This type of parking sensor will not work on stumps and posts)
The car I purchased already had one of these, but recently the numbers stopped being displayed, but the stripes visually indicating to stop remained, what could this be related to?
this clarification changes things, but in such a situation I still ordered a new, complete, similar set and would change it sequentially - starting with the ex. block.
Kit Shopping the right side signals stop, constantly, and accordingly shows 00, and the rest react normally when approaching an obstacle
Apparently the LED display is faulty
Tell me, a false alarm is triggered. China, repainted black. False signal for a clean signal at dusk. Thank you.
When installing multitronics pu4tc parking sensors, can these dimensions be used? 33 45 33 52 the instructions for multitronics indicate the same distances between sensors of 40 cm
Thank you! I will install according to the instructions 42.5 cm side sensors will be closer to the sides of the bumper, thereby, when turning in reverse, both sides of the grant will be covered.
Thank you! I will install according to the instructions 42.5 cm side sensors will be closer to the sides of the bumper, thereby, when turning in reverse, both sides of the grant will be covered.
It is advisable to follow the manufacturer's recommendations in this matter. But in the case of purely Chinese parking sensors, you can deviate from the “recommended”. Before installation, I talked with other car owners and realized that they either repeated the same after others - or considered this option more aesthetically pleasing.
The quality is up to par. I will continue to watch you. One question: Is it possible to turn off the sound of the parking sensors, or muffle them?
Thank you for your feedback!
only off — for more details see here: ru-clip.com/video/v8R5Osd8vM4/video.html
At the beginning of the year, I ordered an ultrasonic chamber from China. Arrived in 35 days. I bought it for 650 rubles. In our country, these cost an order of magnitude more + installation (I didn’t even want to find out). After receiving the parcel I installed it. The kit includes a drill bit for the bumper. I pasted masking tape onto the bumper and marked the locations for the holes on it, after which I drilled (with a screwdriver), connected the wires, checked and installed everything in its place. Works good. No complaints. Here is the link (there are also different colors) - ali.pub/dc61j Those who do not want to drill their own bumper, you can buy a belt chamber for the same price - ali.pub/cmxdf. A friend of mine installed one for himself. It seems to me that ultrasonic is more reliable))) So you can choose.
Why 33 cm * 45 cm * 33 cm? Why is it not done with the same distance between the sensors?
Installation of the control unit
The control unit is installed in the rear of the car, since it must be connected to the reverse signal and the vehicle's ground, as well as to the positive after the ignition switch. The equipment is connected to the reverse signal for the operation of the rear bumper sensors, and to the plus signal for the operation of the front radars.
The easiest way to connect is through the positive of the fuel pump. True, in this case the equipment will only work when the engine is running, but this is even better and more convenient.
Important. The wire from the reverse gear can be easily identified using an LED tester.
