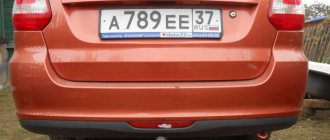
According to most car enthusiasts, the original mud flaps on the Grant are not sufficiently effective and in some situations are not able to fully cope with their intended purpose.
There is a need to determine which mudguards are best suited for the Grant and how to install them correctly?
Review of mudguards on Granta Liftback. Installation recommendations
Basic modifications of the Lada Granta Liftback are equipped with standard front and rear mudguards. However, most car owners are unhappy with their functionality. Due to the short shield, the car tilts when driving through puddles.
Types of mudguards for Lada Granta Liftback
In order to eliminate a factory defect, motorists install universal type mud flaps on the Granta Liftback. They are compatible not only with the Lada family, but also with other brands.
Let's look at ways to install non-standard "lockers" (as mud flaps are called) using the example of a Lada Granta Liftback car.
Sequence of actions when installing (replacing) mudguards
- We take priority safety measures: install wheel chocks, engage first gear, and squeeze the handbrake.
- We jack up the “necessary” side of the car and remove the wheel.
- We apply an apron and mark the location of the factory holes. We mark new ones as needed.
- We drill the missing holes and lubricate them with anti-corrosion mastic to prevent the formation of rust.
- We remove the factory locker and install it on top of the standard one if you purchase a SPARCO.
By analogy, we fix the rear mudguards on the Grant Liftback.
What kind of mudguards are there on the Lada Granta Liftback?
Standard lockers are “short” due to the protection protrusion at the bottom of only 6.0 cm. This is not enough to fully protect the fender and sills of the car.
Protection - mud flaps for Lada Granta Liftback
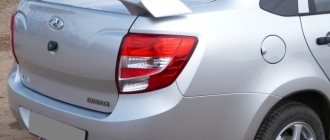
The protection protrusion in universal lockers is increased by 2–4 cm depending on the model. This allows you to direct the flow of water (dirt) at an angle, preventing contamination of the body and sills.
At the same time, enlarged mudguards (lockers) have a significant drawback - the holes do not match the standard ones. Often, car enthusiasts drill new mounting sockets for mounting with self-tapping screws.
Lada Granta Liftback Norma 8 grade. › Logbook › Working mudguards on the Lada Granta (front, rear)
For the first 10 months and 9200 km after purchasing a new car, I drove with standard short mud flaps.
Despite very careful operation within the city, after 10 months. I found traces of use on the thresholds.
Immediately after this, I installed “Elegant 2” REZAW-PLAST 120702 front mudguards and drove almost 10 thousand km with them in 4 months. (vacation, sea)
In September I decided to check the condition of the paintwork under the mudguards.
The peculiarity of fastening the front standard locker is that it is not rigidly fixed, and there is also a massive mudguard on top.
I didn’t want to make additional holes in the metal; the fender liner was secured with standard screws, and the additional screws were screwed into the plastic of the locker.
I decided to stick a film under the mudguard at the points of contact.
I studied the topic of protective films and chose the “mega-expensive” 3M film for thresholds. The toad was very choking, but I didn’t want to spoil the paintwork with cheap Chinese films.
I was indignant for a long time about the price (5240 rubles/m2), but when I pasted two films side by side: 3M and “Chinese armor” from the car market for 300 rubles/m2, and tried to scratch both with a sharp object, questions about the price of 3M disappeared.
The sticker process is not tricky:
I washed the wing with shampoo, cleaned it of adhering debris, bitumen and other slag, using 3M sanding clay, and dried it with a hairdryer.
I made a pattern with masking tape to cut the film exactly to size.
I degreased the surface, glued the film, and installed the mudguard.
It turned out something like this
During the first installation in May, I didn’t have a drill at hand and “clogged” the drain holes, this time I fixed everything.
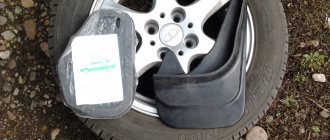
Taking advantage of the opportunity and good weather, I installed rear mudguards from Kalina (11118-8404412/13).
New holes are marked in red; the fasteners in them are standard from the original mudguards. Yellow - new holes with additional fasteners (black self-tapping screw with a press washer in the bumper)
I slightly trimmed the edge of the mudguard adjacent to the bumper and adjusted it to the shape of the bumper so that there were no gaps.
The rear mudguards are attached very tightly, do not wobble and I think that nothing will rub.
Source
Review of Manufacturer Prices
| Name / article | Price, rub.) |
| Original | |
| Front 2190-8404413 | from 500 – 550 |
| 2190-8404412 | —/— |
| Rear 21900-8403512 | —/— |
| 21900-8403513 | —/— |
| Analogs | |
| Lada 8450101294 | from 500 |
| Novline NLF52.25.F10 | from 800 – 900 |
| NLF.52.25.F11 | —/— |
| REZAW-PLAST 120702 | —/— |
| Elegant 2 8463299 | —/— |
| FROSCH Lada Granta / Granta Liftback 135496808 | from 800 |
| LADA BI.NI.52.25.F10 | from 900 |
| SPARCOMR86535 | from 1200 |
*prices are current as of October 13, 2018.
Note to the driver! Lockers from the SPARCO brand are installed on top of standard mudguards. Fixation with three self-tapping screws into factory holes.
Recommendations for car owners to choose
For maximum protection of the car body from water, dirt and snow, install extended mudguards. If the machine is used in climatic regions with minimal precipitation, leave the factory lockers.
Selection of mud flaps for Lada Granta Liftback
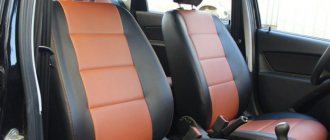
Material for the manufacture of front and rear aprons: rubber, polymer compounds of varying strength and elasticity. Plastic accessories are cheaper, but of poorer quality. With frequent use in winter, the material becomes deformed and cracks.
Rubber lockers are elastic, adapted for use at negative (positive) temperatures. The cost of accessories is 7–15% more expensive than analogues, depending on the modification and technical parameters.
Mud flap material for Lada Granta Liftback When purchasing original aprons, the quality of products from domestic and foreign manufacturers is identical.
Basic information about mud flaps
Any car is, first of all, a means of transportation and in order to ensure its normal functioning, it is necessary to take care of its components, even those that initially seem insignificant, for example, mud flaps. In accordance with Russian legislation, all vehicles, without exception, must be equipped with mud flaps, regardless of the brand and country of manufacture. Therefore, the presence of aprons is the main factor that is paid attention to when undergoing technical inspection.
Mud flaps, or as they are also called aprons, are special flexible rubber or plastic shields that are attached behind the wheels of a vehicle.
Mud flaps are divided depending on their location into front and rear aprons, and their functions depend on their location. Front aprons protect the underbody of the vehicle from the penetration of dirt, stones, dust, water and many other foreign elements. Rear aprons are more functional, as they not only protect the lower part of the car body, but also vehicles moving behind. Rear mud flaps are necessary not only to protect your car, but also other road users, because dirt and dust that flies from under the wheels of the car reduces the visibility of drivers moving behind you, and this can cause an emergency.
The choice of a mudguard must be approached very responsibly, choosing the optimal price-quality ratio. Mud flaps are also divided depending on the material from which they are made.
So let's look at these types:
- Plastic mudguard. Keeps its shape well, is not afraid of the cold, and can be painted to match the color of the car body. But after hitting a stone or curb, the mudguard may break into pieces.
- Rubber mudguard. It is more versatile and flexible, but hardens in the cold season and can crack.
- Rubber-plastic mudguard. It is considered the best option of all types of aprons, but it also has a corresponding cost.
Unfortunately, not all modern manufacturers include such a necessary thing as mud flaps in the car package, so car owners need to purchase and install aprons themselves. When choosing a splash guard, you need to pay attention to the temperature that it can withstand, because its service life directly depends on this. Mud flaps are made from high-quality, frost- and shock-resistant polymer material, so they are quite durable and can withstand various temperature changes. Today we will talk in more detail about car mud flaps from Sparco. That is, this company has incorporated the best solutions for motor sports. For example, their equipment is convenient, comfortable and safe. The Italian company Sparko is considered a world-famous manufacturer of goods for automotive transport, as well as clothing and accessories for racers. Sparco's product range includes steering wheels, seats, pedal covers, helmets, overalls, gear knobs, gloves, seat belts and much more. The presented company puts forward the best solutions for motor sports, as their equipment is the most convenient, safe and comfortable. That is why Sparco is considered one of the largest and best manufacturers of automotive accessories in the world. Products manufactured by this company are quite often found on sports cars participating in rallies, as well as simple cars with basic equipment. Products from this company have minimal weight, maximum strength and ergonomics, but high cost.
During the development of universal aprons from the Sparko company, a 3D scanning method of vehicle wheel arches is used. How are universal car mud flaps made?
So, let's look at the main stages of developing car aprons:
- 3D scanning of car wheel arches;
- The product is being designed;
- The product is being manufactured.
Reviews
| № | Positive |
| 1. | Vasily: Factory lockers are enough for me. They look nicer than other analogues. If you encounter a large puddle along the route, then nothing will save you from the mud. |
| 2. | Vladimir : A year has already passed since the purchase of the car, there are no comments, the aprons are holding tight, they survived the winter and did not crack. |
| 3. | Kirill: I caught a snowdrift several times in winter, I thought I would tear off the apron, but nothing, they held on confidently. |
| 4. | Vladislav: I’m pleased with the quality of production of the factory aprons, they repeatedly clung to the curb, they held up and did not deform. |
| 5. | Ignat: I’ve heard a number of negative reviews about the quality of the plastic, but I can’t confirm it. I've been using the car for over a year, factory lockers are installed. |
| Negative | |
| 1. | Victor: The standard aprons lasted six months, after which they fell off in the winter. I didn’t bother and bought new universal ones. |
| 2. | Ivan: the quality of production of my native aprons is poor, they are fragile, in the cold they become deformed and burst. They recommended installing it from Renault Logan, the location of the fasteners is identical. |
| 3. | Gennady: I don’t recommend factory lockers, install universal ones from Renault Logan. The quality is poor, they become deformed in the cold. |
Conclusion
Lada Granta Liftback must be equipped with mud flaps to protect the body from dirt, snow, and sand. Since the width of the standard lockers is not enough for effective protection, we recommend installing long mudguards on the Granta Liftback.
Installation of mudguards for Lada Granta Liftback
When purchasing aprons, give preference to those made of rubber; plastic ones are more likely to become deformed and subject to damage. Be sure to check for the presence of a mounting hole in the top of the mudguard. If not available, drill it yourself.
Reliable fixation is the key to long service life.
Source
Installation of front and rear mudguards on a Lada Granta car
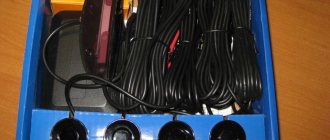
Selected mud flaps can be installed on a car yourself, without the involvement of specialists. To do this, you need to prepare the following tools in advance:
The installation of front and rear mudguards on the Lada Granta is practically no different.
The algorithm for installing front car protection parts is as follows:
To install the rear mudguards on the Grant, first use a flat-tip screwdriver to pry up and pull out the arch piston retainer. Then the latch on the rear bumper is removed in the same way. Next, the rear protection elements of the car are installed according to the fastening algorithm described above.
Thus, after the simple installation of mud flaps, Granta is equipped with additional protection for the bottom and doors from sand and stones.
Any responsible driver tries to take care of his car from the very moment of purchase. Protecting the body from dirt, sand and stones is the minimum it should do.
Unfortunately, VAZ manufacturers did not take care of this well. Mud flaps on the Grant are either absent (basic equipment) or are small in size, which does not allow them to perform the required functions. Of course, this is not a reason to refuse to buy a car. It is not at all difficult to purchase and install suitable mudguards yourself.
Installation of model mudguards SRTK (SARMAT)
Since purchasing the Cross, I didn’t like one thing about it - the factory mudguards are frankly short, although on the sedan and liftback, as well as the regular station wagon, they are noticeably longer.
Apparently the designers thought that since this is a cross-version, with more ground clearance, it’s worth installing short mudguards so that they don’t get torn off when crawling along dirt roads in a forest or field. On the one hand, the idea is correct, but on the other hand, short mudguards during winter operation are “almost useless”; on the sills, after the front wheels, a noticeable coat of snow, ice, and mud grows; there was no such problem on my previous Grant sedan .
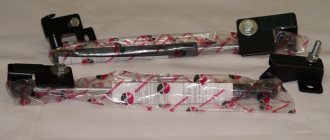
And I decided to fix this problem, I looked at how people honestly do it: Some people install mudguards from the liftback, some install universal “flaps” (they don’t stick out very nicely), and some install model ones from third-party manufacturers. My choice fell on model mudguards SRTK (SARMAT) because... They melt bolt-on, without any cutting or finishing.
Set of front mudguards, suitable ONLY for Cross, because we have a plastic trim on the sills, because of this the mudguard has a special shape Set of rear mudguards, suitable for all grants (FL)
I’ll immediately write the article numbers for these parts: Front - BR.P.LD.GR.CR.18G.06038 Rear - BR.Z.LD.GR.11G.06X37
Actually, please take a look:
Changing mud flaps is generally quite simple; it is not necessary to remove the wheel, but you need either a short Phillips-head screwdriver or a high-quality ratchet with a good Phillips-head bit. It is necessary to unscrew several “cross” screws; they are screwed into plastic pistons inserted into holes in the body, remove the “original” mudguard and screw the new one in the reverse order.
The new mudguards fit well, the gap is perfect, no cutting/twisting/twisting was required. I was pleased with the result achieved.
Source
Front mudguards from Granta FL
Hi all! I haven’t written anything for a long time, and nothing significant is happening with Granta, and writing about changing tires every year is somehow neither informative nor interesting to readers. After painting the thresholds, I thought about increasing the area of the mudguards, so that the appearance would not look like a “collective farm park”. It was decided to buy front mudguards from Granta Fl.
I bought them on Emex, catalog numbers: 8450101294-right 8450101295-left In comparison with the stock shields, from Fl they are twice as long and have additional fastenings to the threshold, which is not provided for in the design of my Grant.
To install it on a simple Grant, you will have to cut off the ear that attaches the mudguard to the threshold.
The mudguards are ready for installation; I removed the drain shield on the right side.
I immediately cleaned the cavity behind the mudguard, there was dirt, snow and leaves, so I screwed on a new mudguard, it fits like a original.
They sit in place without any problems, they didn’t cut or finish anything.
It’s clear that they won’t save the thresholds from sandblasting, they’ll just throw it a little further from the wheel arch, so we’ll take a ride and see. And most importantly, they do not affect the appearance of the car in any way!
I'll end here, thank you all and see you again.
Source
Installation of mudguards from Kalina (almost preparation for winter protection part 1)
Good afternoon, colleagues!
Our mudguards, or rather the name, have been discussed for a long time. For a change, I compared my “mud flaps” with Kalinov’s – the latter look better. In general, I bought it. Shouts about “Fargo should have been taken” or what others I reject into the firebox. A long mudguard is good in the summer, but in winter a long mudguard can seriously damage the paintwork at the installation sites - they are like snowdrifts. In general, everyone chooses for themselves. So we bought STANDARD left front, right front and a set of rear mudguards from Kalina. The discounted mudguards cost 442 rubles. For the work you need: - TORX 20 wrench - TORX 25 wrench - Phillips screwdriver PH2 - thick awl (the front mudguards do not fit in the holes) - a clean car (I washed it two days after arriving from the sea, shame, I drove it dirty) - silicone grease ( although it’s probably superfluous) - a jack and a safety support (whoever has one, I put the wheels - one under the body near the jack, the second under the stand and lower the jack. - galvanized self-tapping screws with a press washer and a 4.25 * 25mm drill - 6 pieces, for additional fasteners, one for the front and 2 for the rear (were on the farm
We unscrew the front mudguard, use TORX 20/25 keys, and clean the dirt from the box
, wash it a little. Let's compare the standard and new mudguards:
You can see by eye that they differ greatly, in general the height could be higher, relative to the mounting line, the wheel throws dirt high. We place a new mudguard behind the locker and carefully pierce holes with an awl. We take out the mudguard, treat the mudguard with lubricant along the lines of possible friction on the paintwork
(probably unnecessary, and they will collect dirt here, but I did it). We screw it into place, put it behind the locker, the result is obvious and so far pleasing to the eye:
Well, the left front one is in place, for comparison I took a photo of the right one before dismantling:
He also waved to the right, you can’t ride with different people. Let's go back. Photo before the process, the wheel was removed, the car was jacked up and secured
:
I broke the plastic clips last time, but now they won’t be needed. The comparison is again in favor of Kalinovsky:
We mount it in place, additionally screw in 2 self-tapping screws for each: one almost under the top of the mudguard, the second in the middle of the lower arc (although you can get by, an M5 screw holds the mudguard from below):
After installation, a small defect is visible (probably it would be necessary to insert an elastic band) - a small hole:
Also, during installation, points of possible friction were treated with lubricant. Result: In use for two days, there was no increase in noise, which means it was secured well, the rest of the time will tell. The weather is dry, so I can’t say anything about throwing mud and dust yet. In my opinion, the length is optimal, considering my jumping over the curb when entering/exiting the house. Advantages and disadvantages:
+ larger mud flaps + they will throw less dirt + the mud flaps are placed behind the locker, we’ll see how it will be with the dirt + the drain hole in the front ones is significantly larger than in the standard one - so the box will have to be washed better - the fastening of the front mud flaps does not coincide with the standard one, you have to prick holes - a small hole remains when installing the rear mudguard
Who needs mudguard codes: front - 1118-8403513 and 1118-8403512, video (not mine) -
Source
What mudguards should I put on the Granta?
LADA "Granta" is a popular car for Russian citizens today, which combines such qualities as accessibility, reliability and versatility. Many people use it as a second or work car, an inexpensive means of transportation both to purchase and to maintain. But such operation, coupled with frequent and long trips - often not in the most favorable conditions - leads to the fact that the Grants' consumables wear out faster than those of a purely "city" car, used only for shopping trips, taking children to the nursery garden or visits to the cinema. And one of the most pressing problems that owners of this car often face is which mud flaps to order?
At the same time, it is noteworthy that owners often face this issue almost immediately after purchasing a car, since it is noted that a feature of this VAZ model range is the absence of “original” front mudguards. Sometimes, instead of them, on the Lada Granta you can see small decorative protective structures that are unlikely to fulfill their intended purpose of protecting the car.
Choosing mud flaps for the Lada Granta
Mud flaps of any car are designed to perform 2 main functions:
A special feature of VAZ vehicle configurations is that not all of them are equipped with front mudguards. In some cases, aesthetically pleasing small-sized protective devices are installed on the Granta, which are not able to perform their main functions. These problems can be solved by installing oversized mud flaps from other car models or using their universal version.
When choosing them, you need to pay attention to the material of manufacture, which includes:
Rubber mud flaps are considered the simplest. They are easy to install, generally cope with the task, but in the cold they become dull and crack easily. In this regard, the motorist will have to replace rubber mud flaps almost every season.
Mud flaps made of plastic are considered more reliable. They have a higher degree of machine protection, are durable, and aesthetically pleasing. The disadvantages of this option are:
More often than others, protective devices are installed made of modern material - elastic thermoplastic, which differ:
The disadvantage of these thermoplastic car protection parts is their inability to withstand large volumes of dirt and large stones.
Now we can name the options for mudguards suitable for Grants:
Modern protective elements are designed in such a way that with their help, when the car moves, an air flow is created that flows around the body, preventing mud drizzle from settling on its surface.
Features of operation
For any car, mud flaps are one of the most vulnerable and, at the same time, necessary accessories. This is especially true for vehicles actively used on less than ideal roads and on rough terrain.
The main purpose of front mud flaps is to protect the underbody and body of the car from stones, dirt and dust flying out from under the wheels. The rear mudguards protect cars following from the same thing. So, high-quality mudguards on a car are the key to safety on the road. Therefore, mudguards are undoubtedly necessary. Which ones should I buy?
Original or universal mudguards
Universal rear and front mudguards usually fit a number of models with similar parameters and characteristics. If we talk specifically about the Grant, then universal mudguards are suitable for it, as well as for the entire LADA model range. For example, the AEP assortment offers a set of universal front and rear mudguards for the Lada Granta. The assortment also includes original mud flaps for LADA “LARGUS”.
The main difference between universal and original products is different sizes, shapes and, if desired, color. Thanks to this, such car accessories have a number of advantages:
From experience, we can say that AEP universal mud flaps will not only reliably protect the Granta body from damage, thanks to their increased size, but will also prevent it from getting dirty - due to improved aerodynamics and the removal of air flows from the wings, doors and other elements of the car.
Replacing standard mudguards
Replacing standard mudguards on the Lada Granta is more of a necessity than tuning. It is enough to look at those small pieces of plastic that are screwed to the car at the factory to be convinced of this.
The problem with stock mudguards is that they are very small. And because of this, they do not fulfill their direct functions - they do not protect either from splashes or from sand and gravel flying out from under the wheels. The result is sandblasted sills and rear bumper.
Agree that it’s better to go broke and buy normal (wide and long) mudguards than to spend money on painting the sills after a year of driving. But here’s an interesting thing. In auto parts stores there is no real, 100% suitable replacement for the standard Granta mudguards! In any case, in my city, I could not find mudguards that I could buy and simply install without bothering with alterations on the knee. All those “universal” mudguards required such dancing with a tambourine, and the end result was so ambiguous that at some point I was already thinking that maybe it would be worth somehow adding something to the standard mudguards?
And then, oh, miracle! On the Internet, I finally came across rezkon mud flaps. But it turned out that only the rear ones were available on the manufacturer’s website. However, on the manufacturer’s website, the catalog numbers of both the front and rear mudguards were indicated, and I used them to find them in the autodoc.
I want to say right away that the mud flaps are not cheap - each pair costs 427 rubles. Total: 854 rubles. For me, the price from the manufacturer is really high. For example, rear mudguards for Kalina 2 cost around 180-200 rubles. But, when you estimate how much painting the thresholds might cost in the future, you realize that it is better to pay 900 rubles today than several thousand in a year.
So, I bought a set of front and rear mud flaps. And I decided to change them.
In general, I can say that rezkon mudguards are not poorly made. They actually have a larger area than the standard ones, the places for fastening to the body completely coincide with the standard fasteners, they are soft, that is, when they hit an obstacle they will not burst, bend and, most likely, will not come off. The only thing you need to pay attention to is this. that when installing them, you need to place a washer under the screws (just in case, so as not to push through the mudguard).
So. Replacing the standard mudguards on a Grant will require you to have a T25 and T20 star wrench (for removing the front mudguards), a Phillips screwdriver (for removing the rear ones), a jack and a wheel wrench for removing the rear wheels.
Yes, in Grant, the front and rear mudguards are screwed on with different screws - some with an asterisk, others with a Phillips screwdriver.
Replacing the standard front mudguards is a simple matter. To remove the front left one, turn the steering wheel all the way to the left. Unscrew the 4 screws that secure the mudguard in the area of the wheel arch and 1 screw that secures it to the threshold. After which, put a new, enlarged one in its place. Do the same manipulations with the right one. It will take about 20 minutes to do everything.
With the rear ones it won’t be so easy and fast! To replace them you will need to remove the rear wheels. Yes, this is not a “classic”, where the rear mudguards were attached from the outside to a metal corner. In the case of Granta, they are attached to the car from the inside. The problem is that there is so little space between the rear wheel and the fender liner that it is difficult for a hand to fit there, let alone insert a screwdriver there. Therefore, we take a jack with a balloon and remove the rear wheels.
After removing the wheels, the picture completely changes and you can easily unscrew all the screws (here they are for a Phillips screwdriver). But AvtoVAZ cannot live without surprises. In one place the mudguard is attached to the bumper using a plastic fastener (clip). They must be removed carefully. Using a flat-head screwdriver, pick up the head of the clip and carefully pull it out towards you. I only managed to pull out one. I broke the second one. Then I replaced it with one that was the right size.
Please note that the rear mudguards, like the front ones, have lower fasteners. The front ones are screwed with one screw to the threshold, and the rear ones to the bumper. So here it is. There is a special metal bracket on the rear bumper into which the screw is screwed. Be careful not to lose it, as it has a tendency to jump off the bumper.
After installing the rear mudguards, put the rear wheels in place and admire the new look of the Granta. Oddly enough, the appearance of the car really changes a little.
Car accessories wholesale in St. Petersburg
All products are sold only in wholesale quantities. Mud flaps and other car accessories are made to order. Products manufactured by AEP are distinguished by high performance, durability and affordability. Individual mudguards and other products can be purchased at chain supermarkets: Lenta, Magnit, Maxidom, IKEA, Auchan and others.
For wholesale buyers, mudguards are delivered throughout Russia and the CIS countries. To purchase a batch of car accessories or order the production of other plastic products according to your sizes and samples, call us at +7 (812) 320-07-34.
Source