The standard factory signal is often very weak and is not enough for other road users to notice the car. It is for this reason that a different signal will be installed, which used to be on the Volga car. Before installation, you must make sure that the noise level is no more than 120 dB, because otherwise there will be problems with maintenance. How to make the beep louder? Should you completely replace the standard system or simply install additional signals in the car's engine compartment?
There are several ways to install a signal from the Volga on a VAZ 2112, 2111, 2110. Simply replacing is not an option. The problem is that two wires are connected to the standard sound signal - positive and negative: ground is supplied through the case, and the positive wire gives direct current and in this case it also powers the radiator fan. In order for the new signal from the Volga to work, only one positive wire is needed. The minus is supplied through the body.
In this case, different current consumptions are also realized here. The standard signal consumes only 5 amperes, and the signal from the Volga consumes 8 amperes. For this reason, you will need to install a 4-pin relay. The relay can be installed in the fuse box or in the engine compartment of the car. To install a relay inside the cabin for operation, you need the sound signal itself, a single-core wire, a wide female terminal, a 4-pin 30 ampere relay and a relay block. The sound signal is much larger than the standard signal, so in this case it is necessary to install it on the bracket so that the standard sound is not lost. It is best to install the relay in a free fuse block cell.
Pin 85 is used to connect a 13-pin relay (signal switch on the steering wheel). If you look at the diagram, it is indicated in gray-black color, but in the photograph it is white. You need to connect the wire of the 87th contact of the relay to the free space. To supply the positive wire, you must first route the wire of the 'Ш5-6' connector to the 30th contact of the relay and, using a jumper, to contact 86. The plus is supplied when the signal is pressed through contact 87. There is no need to use the red-white wire for the signals, but current is supplied to it and in this case it is better to install insulation on it. There are many advantages to this method: the relay is located in the mounting block and moisture or water will not get there, the factory wiring is located in the engine compartment and in this case the wire will be taken separately and not from the fan.
Now we need to consider the case of installing a relay in the engine compartment. There are many differences here from the first option, because all the work will be carried out in the engine compartment. All the same materials are used, only in this case you will also need to purchase: a hanging fuse, 8 pieces of female terminals, a two-meter plastic tube. The horn can be installed wherever it is convenient and you need to connect it according to one of the circuits. In the first scheme, the current is taken from the fuse block through its own fuse, and in the second scheme, the plus must be taken directly from the battery and through a separate 20 ampere fuse. Many people recommend installing the signal according to the second scheme.
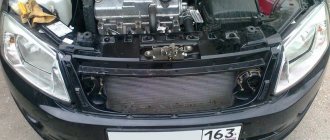
The relay must be placed where it will not be exposed to moisture or water. It is best to wrap the relay with insulating tape. Using a size 8 wrench, you need to unscrew the 2 bolts securing the radiator grille and unclip the 2 lower latches, remove the grille completely. We remove the standard sound signal and lay the wiring according to a new diagram. All connections must be carefully insulated, and the wire that connects the wires from the signal must be inserted into the corrugation. We install the relay in the desired position and install the radiator grill back.
Every car must have a working horn. Thanks to the horn, the driver can prevent an emergency situation on the road and avoid a possible collision. But it often happens that the horn refuses to work. For what reasons does the sound signal on the VAZ 2110 not work and how to fix this problem - read below.
Does the sound signal on the VAZ 2110 not work? — Finding and eliminating the “culprit”
Every car must have a working horn. Thanks to the horn, the driver can prevent an emergency situation on the road and avoid a possible collision. But it often happens that the horn refuses to work. For what reasons does the sound signal on the VAZ 2110 not work and how to fix this problem - read below.
Air connection
If you need to connect an electric horn instead of an electric one, the connection procedure will be almost the same as described above. The difference is that the wire from the relay does not go to the horn itself, but to the compressor (the motor that sends the signal to the horn). And the pneumatic signal tubes are already connected to the compressor through tubes.
When you press the horn, air from the compressor is forced into the pipes. Using a membrane installed in them, the sound signal is removed.
You can read about how to connect headlights yourself in our article How to connect headlights.
Source
Possible malfunctions: signs and causes
There are several signs of a malfunctioning sound signal on a VAZ 2110 or 2112:
- The sound signal has disappeared. The driver presses the steering wheel or the corresponding button located on it, but there is no beep.
- The beep appears and disappears. When the driver presses the steering wheel, the signal may start to work, but then immediately disappears.
There may be several reasons why the horn refuses to function:
- One of the most common reasons is the failure of a safety device. In this case, the integrity of the horn itself will not be compromised, which greatly simplifies the repair procedure.
- Failure of the horn itself. If after replacing the safety device the sound does not appear, you can try to check the functionality of the horn by dismantling it and directly connecting it to the battery. If the device is working, then when connected to the battery it will begin to emit a corresponding signal.
- The reason may also be a short circuit in the vehicle's on-board network.
- Another cause of the problem may be worn out clamping contacts located on the steering column. This problem often occurs in the cars of our compatriots. In any case, the clamping contacts wear out over time due to use; this cannot be prevented. As an option, you can try to increase the service life of the contacts; to do this, they need to be treated with graphite lubricant from time to time.
- Worn slip ring on the steering wheel. As stated above, there is no escape from wear and tear, so sooner or later every car owner will face such a problem. As in the previous case, you can try to increase the service life of the slip ring by applying graphite lubricant to it.
- Oxidation of contacts on the steering wheel. With prolonged use, deposits will begin to accumulate on the internal contacts, which makes it impossible to transmit the impulse to activate the horn.
Other common causes
Quite often you can find the following causes of problems:
- The sound signal may disappear due to worn-out clamping contacts located on the steering column. To prevent rapid wear of the wires, experts recommend periodically lubricating them with graphite lubricant, after removing the steering wheel of the car. Such treatment will help not only prevent wear of the element, but will also extend their performance;
- Worn contact steering ring can also cause the horn to fail. To eliminate it, you will need to carry out similar measures that were described in the previous paragraph;
- Quite often the signal on the VAZ-2110 stops functioning due to oxidation of the steering internal contacts. Since a lot of deposits accumulate on the elements, they become an obstacle to the sound signal, so the car horn stops working. To eliminate the breakdown, it will be enough to disassemble the car’s steering wheel, carefully clean the internal contacts and correctly assemble the steering wheel.
We hope that the information in this article will make it much easier to identify the cause of the sound signal malfunction and quickly fix the problem yourself. Remember that if the sound signal on a VAZ-2110 does not work, it is better not to ignore the problem, but to try to solve it. Numerous videos created by repair specialists will help with this.
Methods for troubleshooting
If the horn circuit is broken and the horn stops working, then there are several options for solving the problem:
- First you need to diagnose the safety device. If this part is burnt out, then you just need to replace it with a new one; the device is located in the mounting block. The replacement process will not take much time; any car enthusiast can cope with this task. If replacing the fuse gave results, but after some time the horn stopped working again, then most likely the reason lies in voltage surges in the on-board network. Overload contributes to accelerated burnout of the fuse element, so you will have to look for the source of the load and solve the problem. To do this, use a multimeter or seek help from an electrician.
- If the horn itself malfunctions, the device must be replaced. If diagnostics by direct connection to the battery do not produce results, then most likely the reason lies in the device itself, which needs to be changed.
- Short circuit. To diagnose, you will need a multimeter and a little experience. Using a tester, you can find a short circuit, but if you have never encountered such a problem before, it is better to seek help from specialists.
- If the clamping contacts or slip ring are worn out, then the failed elements must be replaced. It is not a fact that you will be able to buy new contacts or a ring, so most likely you will have to change the horn assembly.
- Another reason why the horn does not work is oxidation of the internal contacts. Over time, as mentioned above, dirt and deposits accumulate on them, which leads to the obstruction of sound. You can try to disassemble the steering wheel of the car, then clean the internal contacts and assemble the steering wheel (the author of the video is the channel Alexander Amochkin Kolomna AAK).
If you are faced with the problem of a non-working horn, then you will probably be wondering how to replace it:
- First of all, you need to remove the steering wheel. To do this, remove the trim and unscrew the bolts that secure the steering wheel.
- After the steering wheel is removed, you can clean the contact tracks, perhaps this will help solve the problem. Make sure that the wire contacts in the column are as clean as possible .
- Unscrew the two screws located under the plastic cover. After dismantling the cover, you will be able to see the contact plate; there is a possibility that the problem lies there. Clean the contacts and check the signal functionality. If the horn does not work, then using a 24mm wrench you will need to unscrew the nut, but you do not need to unscrew it all the way.
- Next, the steering wheel itself must be pulled towards you; this will require some effort. You can try to move the wheel by tapping it from different sides. When you feel that the steering wheel has given way, the nut is unscrewed completely.
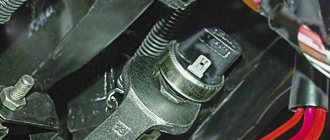
- After dismantling the steering wheel, we proceed to removing the horn. There is a module located under the grille of the radiator unit; it must be removed; to do this, unscrew the nut to 13 and disconnect the connector.
- Install a new one, replace the steering wheel and check the operation of the horn.
Photo gallery “Removing the steering wheel and replacing the horn”
Why did the horn stop working?
If the warning signal on the VAZ-2110 does not work, including the fan, you should not immediately contact a service station.
You can identify the cause of the malfunction and eliminate it yourself, taking into account the advice of professional technicians.
Most often, the signal may stop working due to the following reasons:
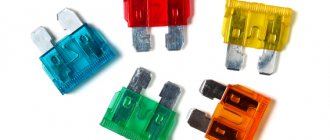
- A fuse that has become unusable. To fix the problem, you will need to replace the burnt element, which must match the color and value of the previous one. This procedure does not take much time; it can be completed in just a couple of minutes. But if after a short time the new fuse blows again, this problem needs to be solved at a service station.
- If after replacement the sound signal does not appear, this will indicate a short circuit in the electrical network. To eliminate the cause of the problem, the owner’s experience is rarely enough, so the right decision would be to seek help from experienced professionals.
- The sound signal stopped working due to a breakdown of the horn itself. If replacing the fuse did not produce any result, and the audible brake light still does not work, then most likely the horn itself is broken. It will be difficult even for an experienced car enthusiast to cope with the problem on his own, since in order to identify the cause of the breakdown, you need to connect the part to the battery. If you decide to check the signal yourself and the element does not start functioning after connecting to the battery, the easiest way is to buy a new horn and install it.
Is a Volga horn good?
Is it possible to use a signal from the Volga in the “ten”, how to install it and how to connect it yourself? In the VAZ 2110 it is allowed to install a Volga horn, and the latter can be either old or new model. There is no particular difference between these details, except that the tonality will be slightly different. And, of course, the cost. But keep in mind that installation by simply replacing the device will not work.
The bottom line is that two cables are connected to the standard device - one with a negative output, which comes from the button on the steering wheel, and the other with a positive one. The latter is permanently connected; it also powers the ventilation device of the radiator unit. But in Volga devices, only one cable is used - positive, since the mass in this case is supplied through the body, that is, from the attachment to the vehicle body. In addition, you must also take into account that both systems use different current consumers - the standard options require no more than 5 amperes, while the Volga ones require 8 amperes each. The result is 16 amperes (video author - Master Bruce).
Accordingly, to correctly connect a product from Volga to a VAZ 2110, you will need a four-pin relay; you have several options for installing it:
- in the vehicle interior, in the mounting block with fuses;
- in the engine compartment, but in this case, please note that the relay should be securely insulated to prevent moisture from entering.
Audio connection procedure
Having collected all the necessary elements, only now can you proceed to the most important action. Connection.
- First step. Connecting a signal via a relay: remove the “-” terminal from the battery.
- Next, you need to remove the sound signal and install a relay in its place.
- Publishing options
- The so-called “leech” is mounted on the “wire” to which the sound signal is connected. A wire about 15 cm long is connected to it with male terminals. "Mother";
- If it is not possible to install a "leech", you can remove the positive wire and then solder a piece of wire with a "mother" terminal to it. The adhesion site must be covered with electrical tape or pre-installed.
- Next, the “” wire must be connected to the relay. For this purpose, the wires with the newly created process are connected at the 86th and 30th pins.
- Let's go further and find out how to connect the signal to a VAZ or any other car. Now you need to connect the negative wire of the relay to the relay. To do this, use pin 85.
- The horn is connected to the rest of the 87th relay contact.
- Last step: put "-" on the battery.
The feasibility of self-repair
So does it make sense to repair the horn yourself? If we take into account the recommendations described above, then the repair is advisable only if the car owner is as careful as possible when performing it. After all, during the repair work, there is a high probability that an inexperienced car enthusiast will damage the wiring in the unit or connect the contacts incorrectly. Therefore, if you have never encountered a repair procedure before, it is better to entrust this matter to specialists or simply replace the horn assembly.
Setting signals without relays
There is another way to connect signals from the Volga . Since the factory signals are connected through a relay located in the fuse box, you only have to connect the new signals directly through the “old” wiring. This method is rarely used due to its disadvantages. The fact is that the positive wire used in standard wiring is very thin and physically cannot pass the necessary voltage, as a result of which the signals from the Volga will not work at full strength.
Installation of sound signals from Volga
Many owners of VAZ 2109, 2108 are not satisfied with the sound of the standard horn of their car. An excellent replacement for the standard nine signal can be the option discussed here for installing a sound signal from the Volga. Many, including the author, have already completed this not at all complicated installation, and do not regret the time and money spent, especially since this modernization is more than compensated by the awareness of the fact that his car has become a little closer to ideal, and is ready for it immediately show it to everyone!
Replacing the standard signal of a VAZ-2109 with a signal from a Volga
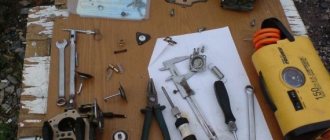
To begin directly installing new signals, you will need:
- sound devices from “Volga” with a “mass” installed on the body;
- relay 90.3747 with mounting;
- relay block;
- female type terminals;
- heat-shrink tubing;
- stranded wire, with a cross section of 2.5 mm. sq.;
- fuse block;
- 20 A fuse;
- metal corner.
Video review of installing a signal on a VAZ-2109:
We diagnose the sound signal
It all starts with the connector pins:
- Let's say the voltage “+12” is not caused on both contacts. Then look for a short circuit or break point, starting from terminal 6-Ш5 (diagram above).
- If positive voltage is received, check the second terminal. It will contact ground when you press the horn button. During this check, the battery must be disconnected.
- If the previous two steps are completed successfully, then voltage is supplied to the horn. It may need to be replaced or the contacts cleaned.
By the way, in “step 2” it is recommended to rotate the steering wheel - contact may be broken at certain angles of rotation.
Faulty signal circuit:
1) check the presence of input ground or voltage on the signal itself (in old systems, the “plus” is constant, and the signal is controlled by the “minus”). If a plus and a minus appear when you press the “beep”, replace the signals themselves (the signals are inseparable and must be replaced if they fail);
2) Check the supply voltage (fuse, relay, mounting block);
3) power button on the steering wheel (contacts, switch adjustment and three levers), presence of mass on the steering column;
1) incorrect adjustment of the switch on the steering column (too “tight” on the steering wheel);
2) Short circuit to ground on the steering column (signal control wire);
Methods for troubleshooting
If the horn circuit is broken and the horn stops working, then there are several options for solving the problem:
- First you need to diagnose the safety device. If this part is burnt out, then you just need to replace it with a new one; the device is located in the mounting block. The replacement process will not take much time; any car enthusiast can cope with this task. If replacing the fuse gave results, but after some time the horn stopped working again, then most likely the reason lies in voltage surges in the on-board network. Overload contributes to accelerated burnout of the fuse element, so you will have to look for the source of the load and solve the problem. To do this, use a multimeter or seek help from an electrician.
- If the horn itself malfunctions, the device must be replaced. If diagnostics by direct connection to the battery do not produce results, then most likely the reason lies in the device itself, which needs to be changed.
- Short circuit. To diagnose, you will need a multimeter and a little experience. Using a tester, you can find a short circuit, but if you have never encountered such a problem before, it is better to seek help from specialists.
- If the clamping contacts or slip ring are worn out, then the failed elements must be replaced. It is not a fact that you will be able to buy new contacts or a ring, so most likely you will have to change the horn assembly.
- Another reason why the horn does not work is oxidation of the internal contacts. Over time, as mentioned above, dirt and deposits accumulate on them, which leads to the obstruction of sound. You can try to disassemble the steering wheel of the car, then clean the internal contacts and assemble the steering wheel (the author of the video is the channel Alexander Amochkin Kolomna AAK).
If you are faced with the problem of a non-working horn, then you will probably be wondering how to replace it:
- First of all, you need to remove the steering wheel. To do this, remove the trim and unscrew the bolts that secure the steering wheel.
- After the steering wheel is removed, you can clean the contact tracks, perhaps this will help solve the problem. Make sure that the wire contacts in the column are as clean as possible .
- Unscrew the two screws located under the plastic cover. After dismantling the cover, you will be able to see the contact plate; there is a possibility that the problem lies there. Clean the contacts and check the signal functionality. If the horn does not work, then using a 24mm wrench you will need to unscrew the nut, but you do not need to unscrew it all the way.
- Next, the steering wheel itself must be pulled towards you; this will require some effort. You can try to move the wheel by tapping it from different sides. When you feel that the steering wheel has given way, the nut is unscrewed completely.
- After dismantling the steering wheel, we proceed to removing the horn. There is a module located under the grille of the radiator unit; it must be removed; to do this, unscrew the nut to 13 and disconnect the connector.
- Install a new one, replace the steering wheel and check the operation of the horn.
Photo gallery “Removing the steering wheel and replacing the horn”
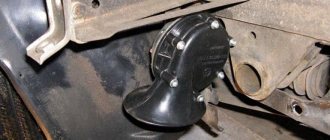
How to remove a faulty signal (horn)
There is a single module mounted under the radiator grille. To remove it, unscrew one nut (key “13”). First disconnect the connector.
Dismantling, adjustment before installation
It will be necessary to remove the grille. This action is difficult to perform on both the “Ten” and even on the VAZ-2112, and the signal may not work due to faulty wiring. First achieve what was discussed in “step 3”. And only then, if necessary, proceed with replacement.
One adjusting screw is fixed to the horn body. Set it to the middle position and check.
Signal installation procedure
Whenever working on a vehicle's electrical systems, you must first turn off the power. To do this, remove the terminal leading to the car body from the battery.
To easily access the location of the signal on the VAZ-2109, you need to remove the radiator grille. We unscrew the factory signal together with the grille mounting rail. We also remove the ground wire coming from the signal.
In advance of starting work, it is worth preparing mounts for new signals . You can buy the metal corner needed for these purposes at any hardware store. The location of the signal from the Volga will be the same as that of the “native” signal. Apply marks to the corner in the same way as you will install it. Next, saw off along the marked line and drill holes for attaching new signals. To extend the life of a metal corner, it should be coated with paint or any other protective coating. Then take the new signals and fix them on the prepared corner. The bolt included in the kit has two purposes: as a fixing element and as a “mass”. In order for it to perform the “ground” function, it is necessary to ensure its direct connection to the metal corner. A castle washer works well for these purposes.
Your next action will be to set the signal. Place the new part in its intended location and secure it by tightening the bolt using a castle washer. This way you will provide the contact necessary for the signal to work. As a rule, the bolts used to attach Volgov signals are longer and pry off the radiator. To avoid this, place the washers so that the corner with the attached signals moves further away.
Remember that the corner must be in contact with the car body.
Next, proceed to connecting and adjusting the wiring. Below is a diagram of connecting Volgov signals.
Crimp the ends of the wires with suitable terminals, and then insulate the joints with heat shrink tubing.
The relay for connecting the signal can be installed on the back of the radiator frame.
Fix the wire coming from pin 86 at the place where the relay is attached to the body using a castle washer. This type of connection guarantees contact. Before fastening, install a lug with a fastening eye on the wire.
Pull the wire from the fuse to the positive terminal on the battery. In fact, this step is the final step in connecting the Volga signal to the VAZ-2109 and 2108. All you have to do is install the radiator grille in its place and enjoy the new sound emanating from your car. By the way, the outgoing sound can be customized. You need to twist a special bolt on the signal housing and the sound will change its tone. Also, do not forget to lubricate the mounting points and connections with a special anti-corrosion coating.
What to do if the signal on the VAZ-2110 does not work
A working car horn is a necessity. If the horn does not function, then the person sitting behind the wheel will not be able to notify either pedestrians or other drivers of his approach. As a result, a seemingly frivolous breakdown leads to the creation of an emergency situation with completely unpredictable consequences. For this reason, if you identify any problems in the operation of the beep, you should quickly begin to eliminate them. Why the signal does not work specifically on the VAZ 2110 model, and how to fix it, we will explain further.
Replacement and repair of VAZ sound signal
The most common reason for a missing beep is the beeps themselves. The reason is mechanical, moisture and oxidation lead to blockage of the sound membrane and, as a result, the absence of vibration and sound effect. Sometimes you can restore functionality by spraying the WD signal. 40 or similar composition.
On cars that have two alarms installed, they usually have different keys, low and high. If one signal fails, the other will not be able to fully supply the required power and therefore needs to be replaced. Typically, many signals have pitch adjustment screws, and if you have rattles, rattles, or other unwanted sound effects, you can use the adjustment to achieve the appropriate sound. In addition, they can be used to displace the “impregnated” membrane, thereby restoring the signal.
READ Connecting Hydronic to Starline Alarm
Probable Causes
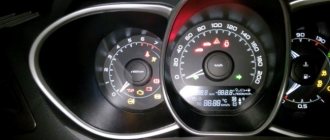
Based on the nature of the signal malfunction in the VAZ-2110, it can be divided into two groups.
In the first case, the horn does not operate at all, no matter how the driver presses the button located in the center of the steering wheel.
The second option is that the sound is intermittent, that is, the signal begins to work unstable.
Among the most obvious and easily remediable causes, the main one is a blown fuse. A break in the fuse link de-energizes the entire electrical circuit, and, accordingly, the horn does not function at all. To check, just turn on the heater fan. It is connected to the same protective device.
Also, the horn itself often breaks on the 2110 model. This version is accepted as the main one if installing a working fuse does not lead to a positive result. Here you will have to tinker longer:
- the signal is removed (it is located behind the radiator grille);
- connect directly to a battery or other 12-volt power source (the white wire is “plus” and the black wire is “minus”);
- If the device itself is faulty, then it will not produce a characteristic sound.
When everything is in order with the node, then you should suspect a break that occurred somewhere in the circuit.
The next possibility is abrasion of the clamping contacts installed directly in the steering column. This is more likely the older the “ten” is. By the way, it is not difficult to extend their service life - it is enough to regularly treat the contacts with graphite-based lubricant.
Also, sometimes the problem lies in the oxidized terminals of the pads. Inspect the one located in the steering column, and the second one in the engine compartment. At the same time, make sure that all wiring is securely fastened.
The slip ring is less often to blame for the sound signal not working. It is located directly in the steering wheel. This element of the 2110th model also wears out over time and ceases to perform its intended function.
Correct connection signal. Lada 2112, 1.6 l., 2005 On DRIVE2
In the spring I installed an air horn, but connected the compressor directly to standard wires. Signed fine, but something is missing. The compressor paused for a split second. Everything seemed normal, but with the onset of frost, when the button was pressed, only the compressor hummed, and after a long period of time the pipe began to beep. I travel to Orenburg from time to time, and inattentive drivers are encountered on the road, especially in winter, when you don’t know what to expect from them. And you won’t be able to stop right away or make a sharp maneuver on the ice. In general, there is no signal anywhere! I wanted to install a good old snail air horn, it was smooth and worked well in any cold weather. This happened on all machines) But I decided to correctly connect the pipe through the relay, as it should be done in the first place! Through the relay, the compressor will use maximum energy and, accordingly, louder sound. Here is a simple connection diagram.
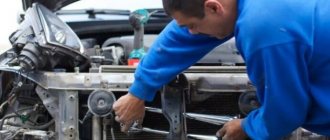
I used a 4 pin 30A relay and a relay plug. I connected the wires according to the diagram and installed the headlight unit on the lower mount on the relay. He then cleaned the compressor: he poured some oil into the compressor, plugged in the power supply, it made a whirring sound, then reversed the power poles so it ran in the opposite direction. As a result, the compressor began to work faster. By the way, I installed it behind the bumper to prevent contamination. The pipe is inclined, it is advisable to wear stockings to increase service life. After work, I was very pleased with the signal! I have not heard such a sound in my car. The compressor responds instantly to the press of a button. The sound became much louder! Now the frosts are not scary!
Source
Replacing the horn
The work is carried out in this way:
- remove the protective cover of the button;
- unscrew the three bolts securing the movable plate;
- inspect the contacts, clean them and test them;
- if it doesn’t help, then use a 24 mm wrench to slightly loosen the nut and pull the steering wheel towards you;
- when it gives in, finally unscrew the fasteners and remove the steering wheel;
- inspect the slip ring.
Next, look deep into it - there are two round bronze plaques. Close them - a sound is heard, which means the buzzer is ok and the problem is in the button. If nothing happens, then the signal is broken.
The horn itself, as previously noted, is hidden behind the radiator grille. A single 13mm nut holds it in place. It is more convenient to unscrew it with an open-end wrench. Next, disconnect the signal connector and remove the device.
It is advisable to check the functionality of the new horn. If everything is in order, then put the part back in place.
Afterwards, assemble the steering wheel and make sure that the unit works.
Installing a relay in the engine compartment
Unlike the first method, here all the work on installing signals and wiring will be under the hood. The same material will be used, you just need to buy:
- Hanging fuse (like from a mafon-16A) - 25r
- Terminals mother-8pcs-10rub
- Plastic corrugation 2 meters - 8 rubles
We place the horns from the Volga in any convenient place (as in the first option), and connect the wiring according to any of the diagrams: In the first scheme, we take “Plus” for the signal from the fuse block, through its fuse, and in the second scheme we take “Plus” immediately with battery, through a separate 20A fuse. It is best to use the second circuit to connect horns from the Volga to a VAZ 2110.
It is better to place the relay where there is the least chance of moisture getting in. Before doing this, it is good to insulate the relay or wrap it in a bag.
The installation procedure is approximately this:
- Using the “8” key, unscrew the 2 bolts securing the radiator grille and unsnap the 2 lower latches, remove the grille!
- Removing the standard sound signal
- Assembling the wiring according to the diagram
- We isolate all connections, and put the wire that connects the signals to each other into a corrugation (so as not to rub against the radiator)
- We attach the relay in a suitable place
- Putting back the radiator grill
Horn from Volga - is it really possible to install it on a VAZ?
For those who want to increase the volume of the VAZ-2110 signal, it makes sense to replace the standard one with a product intended for the Volga.
You can take either an old type element or a new one - there is no difference between them. However, it is worth considering one nuance - the device for Lada has two wires: minus and plus, while the GAZ horn is equipped with only one cable (positive). Simply put, in the Volga the circuit is closed to the total mass of the car, that is, its body.
There is one more circumstance. The “tens” horn consumes only 5 amperes, and the gas analog – 8. Since they are installed as a set (2 pieces), the output will be 16 A. That is, a stronger fuse will be needed in the electrical circuit.
Additionally, the native circuit of the VAZ-2110 will have to be complicated by installing a relay designed for four contact groups. It is permissible to install the relay where it is convenient. Choose:
- interior mounting block;
- engine compartment (here it is isolated from moisture).
The work is performed as follows:
- remove the radiator grille;
- disconnect the connector from the signal;
- cut off the block remaining on the car;
- a relay is connected to the wire (contacts 85 minus and 86 plus, a jumper is placed on the latter leading to 87);
- two beeps are attached in series to pin 30;
- then they are fixed with bolts on the frame in pre-drilled holes;
- the radiator grille is put in place.
It remains to check the functionality of the signal.
Stories from our readers
“Fucking basin. "
Hi all! My name is Mikhail, now I’ll tell you a story about how I managed to exchange my two-wheeler for a 2010 Camry. It all started with the fact that I began to be wildly irritated by the breakdowns of the two-wheeler, it seemed like nothing serious was broken, but damn it, there were so many little things that really started to irritate me. This is where the idea arose that it was time to change the car to a foreign car. The choice fell on the melting Camry of the tenth years.
Yes, I had matured morally, but financially I just couldn’t handle it. I’ll say right away that I am against loans and taking a car, especially not a new one, on credit is unreasonable. My salary is 24k a month, so collecting 600-700 thousand is almost impossible for me. I started looking for different ways to make money on the Internet. You can’t imagine how many scams there are, what I haven’t tried: sports betting, network marketing, and even the volcano casino, where I successfully lost about 10 thousand ((The only direction in which it seemed to me that I could make money was currency trading on the stock exchange, they call it Forex. But when I started delving into it, I realized that it was very difficult for me. I continued to dig further and came across binary options. The essence is the same as in Forex, but it’s much easier to understand. I started reading forums, studying trading strategies. I tried it on a demo account, then opened a real account. To be honest, I didn’t manage to start earning money right away, until I understood all the mechanics of options, I lost about 3,000 rubles, but as it turned out, it was a precious experience. Now I earn 5-7 thousand rubles a day. I managed to get the car buy after half a year, but in my opinion this is a good result, and it’s not about the car, my life has changed, I naturally quit my job, I have more free time for myself and my family. You’ll laugh, but I work directly on the phone)) If If you want to change your life like me, then here’s what I advise you to do right now: 1. Register on the site 2. Practice on a Demo account (it’s free). 3. As soon as you get something on the Demo account, top up your REAL ACCOUNT and go to REAL MONEY! I also advise you to download the application to your phone, it’s much more convenient to work from your phone. Download here.
Installing Volgov signals in a VAZ 2110 with a simple replacement will not work. The thing is that there are two wires going to the standard signal: “Minus”, which is supplied from the button on the steering wheel, and “Plus”, which is constantly coming up (which also powers the radiator fan). And for the Volgov signals to work, only one wire is needed - “Plus”, since “Ground” is supplied through the body (from attaching them to the car body).
In addition, we are talking about different current consumption :
- Standard signals according to the passport consume no more than 5A (in measurements no more than 3.5A)
- Volgov signals 8A each (Total 16A)
That is why, in order to connect signals from the Volga to the top ten, you need to use a 4-pin relay (for example, 904.3747-10)
The relay can be installed:
- Inside the cabin in the fuse box.
- Under the hood (in this case the relay must be insulated to prevent moisture from entering)
Let's look at both connection options using an example: