Many VAZ-2114 owners try their best to improve the appearance of their car. Moreover, special attention is paid primarily to the exterior. But in no case should we forget about the interior design. After all, this is where the driver mainly spends his time.
In this material we will talk about how door trim is done on a VAZ-2114 on our own. In reality, this is quite easy to do - you just need to be patient and careful. The procedure here is as follows:
- door disassembly;
- removal of old casing;
- installation of a new one.
In some cases, it is also necessary to remove the trim when repairing the door if:
- it rattles when driving;
- her power windows squeak;
- lock is faulty, etc.
How to fix the door trim on a VAZ 2114
Many VAZ-2114 owners try their best to improve the appearance of their car.
Moreover, special attention is paid primarily to the exterior. But in no case should we forget about the interior design. After all, this is where the driver mainly spends his time. In this material we will talk about how door trim is done on a VAZ-2114 on our own. In reality, this is quite easy to do - you just need to be patient and careful. The procedure here is as follows: In some cases, it is also necessary to remove the upholstery when repairing the door if:
Stage 2. Covering with Lycra
Now we take our door for covering. We need Lycra to give shape to our skins. To do this, you can use any thin and well-stretchable material; tights from your wife, sister, or mother are suitable (underline as appropriate).
Now we take a construction stapler and punch through all the indentations; you can also use Akfix glue for this.
At the back of the card, along the edges, we turn two blocks to give rigidity to the cards, otherwise they will turn out to be “banana-shaped”.
Be sure to pull the lycra very tightly; after pouring the resin, folds may appear that can be removed with putty, but do we need it?
At this stage, we immediately think about the fastenings for the door opening handles if we remove the factory ones.
Selecting the material
There is now quite a large selection of materials suitable for the purpose in question. Therefore, choosing the one that suits you best will be quite simple.
Most often used:
Leatherette has a low price, but does not last long. Often cracks.
Genuine leather has gained the reputation of a reliable and durable material. Its only drawback is the high price. It is very convenient to use, and the results are always excellent.
Alcantara has a pleasant appearance and high strength. It is not difficult to care for her. Externally it resembles suede. The color palette allows you to satisfy the most whimsical taste.
Velor, as they say, looks rich on car doors, but wears out very quickly on seats. It needs regular cleaning, as due to its structure, literally everything sticks to it.
Flock looks very similar to velor, but is more practical and easy to clean. He is not afraid of water, he is not afraid of the cold.
Carpet, in fact, is a type of carpet. The difference is that it is softer and more pleasant to the touch. Wear-resistant, ideal stretch. Inexpensive.
How to remove
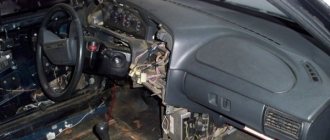
Initially, the podium is dismantled. There are three screws underneath, which can be easily removed with a standard Phillips screwdriver. You need to remove it carefully and with feeling. Otherwise, you may break the wires supplying the power windows. After dismantling the podium, you will need to disconnect the terminal from them.
Next, remove the inner handles. The pads must be carefully pryed off with a flat screwdriver or knife. The bolts are hidden behind them. After unscrewing them, the handles themselves are removed.
Then it will be necessary to dismantle the lining of the closing mechanism. It is pryed off with a flat screwdriver. Then comes the turn of the stoppers - these are plastic pins located on top. Unscrew with a Phillips screwdriver.
We should not forget about the speakers, usually located in the front doors. They are secured with screws. It is worth noting that if they were not installed at the factory, the latches may be non-standard. Having pulled out the speakers, you need to disconnect the wires leading to them. You shouldn't pull them sharply, as they are quite thin and tear easily.
After this, remove the lever that moves the side mirrors. Then you can remove the decorative moldings as well. Only after this will it be possible to remove the old cladding material. It is held in place by plastic caps. They are attached directly to the metal of the doors. The casing is pryed off with a knife or screwdriver, after which it is detached from the base. There is no need to worry about breaking the caps - they cost mere pennies and are sold everywhere.
There is no point in replacing Euro screws with self-tapping screws in the future if they reliably fix the upholstery. On average, one door takes about half an hour. If you have minimal experience, you will have to spend significantly more.
Sheathing process
After removing the old material, you can begin to install the new one.
The metal surface must be cleaned of traces of corrosion. Carefully remove any debris that has accumulated inside and repair any damage found. Since the upholstery has been removed, nothing prevents you from carrying out preventive maintenance along the way.
To improve sound insulation, foil foam rubber is installed inside with glue. This, among other things, will ensure better heat retention in winter.
Using a pattern, which is easy to download on the Internet, or, at worst, old sheathing, new elements are cut out from previously selected material. In the latter case, it is important not to forget to leave a few centimeters of margin around the perimeter in order to be able to tuck it inside.
A hole is cut in the workpiece for the handle. It should be slightly less than necessary. This way, when it's put in place, it will pull some of the material in and the edges will be hidden from view.
Glue is applied to the inside of the cut fabric. Which composition to use depends on the material you choose.
The most difficult thing is with the armrest cover. Here you need to apply the fabric carefully and very carefully. All irregularities must be stretched and folds straightened. It is also unacceptable to leave air bubbles. It is better to choose glue that dries for a long time. This will allow you to correct defects on the new upholstery if necessary.
It will be possible to fix the finished elements only after the fixing composition has completely dried. Assembly is carried out in reverse order.
To better imagine the whole process, you should watch this video:
Thanks to external tuning, you can significantly modify your own car. However, you should also not forget about the interior space, since the driver spends most of the time inside the car.
An excellent option for changing the appearance of the interior is to replace the door trim. To do this, you will need to disassemble the doors, remove the old trim and install a new one.
Material selection
The first thing you need to start with is the choice of sheathing material. The current range is quite wide, which allows each car owner to choose the ideal option in accordance with their wishes, requirements and financial capabilities.
The most attractive options are:
For more information about the nuances of these materials for creating door trim, see the table.
Material
Peculiarities
This is a strong, reliable and durable material, the only significant drawback of which is its high cost. It's not easy to work with, but the end result is a stunning finish. A true classic that will never go out of style
Noticeably cheaper compared to genuine leather, but the service life is not as long. In just a year, leatherette may become covered with miniature cracks in the form of cobwebs.
Many call this material ideal for the fourteenth model. It has an attractive appearance, similar to suede, but has increased durability and practicality. Easy to care for, easy to install and comes in a wide range of colors. Alcantara has no disadvantages as such
Well suited for door trim, as opposed to seats. The material is pleasant to the touch and beautiful in appearance, but with constant contact, abrasions form. The peculiarity of the structure will require you to frequently clean the fabric, because velor collects a large amount of dust
It feels like velor to the touch, but unlike it, it is much easier to clean, does not get wet and is not afraid of even sudden temperature changes.
Almost carpet, but softer and more pleasant. The material is easy to work with, costs little, does not wear out in a short period of time and stretches well. For the VAZ 2114 this is especially true, since when replacing the trim it is important to carefully repeat all the bends of the doors
The choice depends on your goals for refining the car interior. Thus, flock is suitable for a sporty style, leather is for class, and velor is for sophisticated ideas.
Dismantling
So, to change the door trim, the first step is to remove the door components and get rid of the old trim material. Basically, all you need to get started is a set of screwdrivers and a good mood.
Dismantling in progress
Each door will take you about 30 minutes, maybe more. It all depends on your skill and level of preparation. .
Sheathing
The doors have been stripped of everything unnecessary, so you can start covering them.
The work is completed. There is nothing particularly complicated about door trim. The only most problematic parts are the door disassembly stage. But if you have at least a little experience, you can easily cope with the task.
Everyone knows that Russian cars are a rattle, and a dozen are no exception. Some try to somehow deal with the creaking and rattling in the cabin, and some turn up the music louder and do not pay attention to all this. If you belong to the first category of people, then this article may be useful to you.
A constant source of irritation in the VAZ 2110 interior is the door cards. Cheap plastic together with unsuccessful fastenings in the form of pistons make our ride more varied and interesting