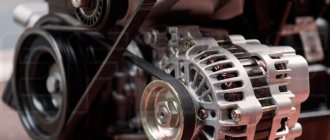
The generator has to be replaced not only when it malfunctions. Sometimes, after installing additional electrical equipment, the current strength of the standard generator may not be enough, so they are looking for a more powerful replacement. Let's find out which generator for Niva 4x4 is better to choose.
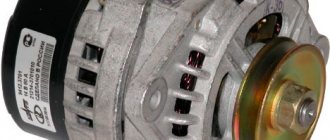
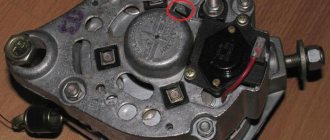
The generator model installed on an SUV depends on the year of manufacture of the vehicle and engine. On the very first Nivas with an engine capacity of 1.6 liters, a generator from the “classics” was installed with a remote voltage regulator. On later models, the voltage regulator is already built into the generator. Generator pulley for mono V-belt.
Generator Chevrolet Niva
A generator is an important part of any car, which is responsible for its power supply.
With the help of this unit, it is possible to provide a continuous supply of electricity to all components, various systems and sensors, making its operation possible. On the car, a unit with article number 9412.3701 is used as a standard generator. Such a generator can also be found on the injector of the VAZ-21214, VAZ-2131, VAZ-2123.
If the generator on a Chevrolet Niva fails, you can replace it with analogues, the most popular of which are presented in the table.
| Generator | vendor code | Cost, in rubles |
| VAZ-2123 (produced after 2003) | 5112.3771-30 T | 5370 |
| VAZ-2123 (produced after 2003) injector 14V 80A PRAMO | 5112.3771 | 4460 |
| VAZ-2123 (produced after 2003) | 9402.3701-04 | 4380 |
A generator for a Chevrolet Niva costs between 5,000 and 7,000 rubles. The price of the original unit depends on the region of purchase. Many owners prefer to use Start Volt at 120 amperes when the factory generator fails.
Generator type 9402.3701-01 alternating current (installed on Chevrolet Niva produced after the fall of 2003), three-phase, with a built-in rectifier unit and electronic voltage regulator, right-hand rotation (drive side).
NOTE Chevrolet Niva, produced before the fall of 2003, was equipped with a generator type 9412.3701, which was also installed on the injection VAZ 21214, VAZ 2131, VAZ 2123 until the fall of 2003.
NOTE: The generator installed on the vehicle used for photography is driven by a V-belt. Repair work is shown using the example of a generator with a multi-belt pulley. All elements of both generators, except for the pulleys, are absolutely identical.
The generator armature is driven into rotation from the crankshaft pulley by a V-belt or (depending on the version) by a poly-V-belt.
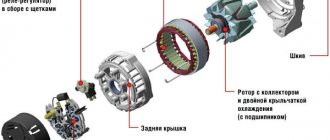
Rice. 9.3. Generator 9402.3701-01: 1 - rectifier unit; 2 — bearing sleeve; 3 — rear bearing of the rotor shaft; 4 — slip rings; 5 — protective sleeve; 6 — terminal “B” of the generator; 7 — gasket; 8 — casing; 9 — voltage regulator with brush holder; 10 - coupling screw; 11 — back cover; 12 - stator; 13 — front cover; 14 — spacer ring; 15 — front bearing; 16 - pulley; 17 — washer; 18 - rotor.
Stator 12 (Fig. 9.3) and covers 11 and 13 are tightened with four screws. The rotor shaft 18 rotates in bearings 3 and 15, which are installed in the covers. Power is supplied to the rotor winding (excitation winding) through brushes and slip rings 4.
The three-phase alternating current induced in the stator winding is converted into direct current by a rectifier unit 1 attached to the cover 11. The electronic voltage regulator 9 is combined into one unit with a brush holder and is also attached to the cover 11.
Rice. 9.4. Generator system connection diagram: 1 - battery; 2 - generator; 3 - battery charge indicator lamp located in the instrument cluster; 4 — mounting block; 5 - ignition switch.
The generator connection diagram is shown in Fig. 9.4. The voltage to excite the generator when the ignition is turned on is supplied to terminal “D” of the regulator (terminal “D” of the generator) through indicator lamp 3 located in the instrument cluster. After starting the engine, the excitation winding is powered by three additional diodes installed on the generator rectifier block.
The “W” output of the generator is not used on vehicles of the BA3-2123 family. The operation of the generator is controlled by a warning lamp in the instrument cluster. When the ignition is turned on, the lamp should be on, and after starting the engine, it should go out if the generator is working. A brightly lit lamp or glowing at full intensity indicates a malfunction.
Which generator is better to put on a VAZ 2110
VAZ 2110 factories install KATEK generators with a current of 80 A. The service life is 140,000 km, which is approximately 10 years of vehicle operation. Answering the question of which generator is better to install on the VAZ 2110, experts recommend products from Russian manufacturers.
What to consider when choosing
- Russian manufacturer or foreign? Of course, first of all, Russian manufacturers are preferable. If only because it is easier to find spare parts in the event of a minor breakdown. If you purchase a generator for a VAZ 2010 from a not so popular company, it may be difficult to find spare parts, and they will not cost you so much.
- Current strength. Factory models for VAZ 2010 - 3771 or 94.3701 - are designed for 80 A, this current is enough, even if there are additional devices that consume it. More powerful ones - 120 A - are installed in the presence of powerful acoustics, no harm is done to the battery, and you will provide all energy consumers with uninterrupted current.
- It is better to purchase a generator if there is a warranty on it. There may well be a defective product, and the warranty will provide the opportunity to replace it with a new one.
Generator Manufacturers
It is best for 2010 to purchase a standard generator from KATEK or KZATEtm Samara plant, and about 50% of owners do just that, according to statistics. They are reliable, cope perfectly with their functions, creating the necessary tension.
How to find out if the generator is faulty
When operating a Niva Chevrolet, certain difficulties and malfunctions sometimes arise. During a trip or long-term use of a car, various problems arise, and one of them is the failure of the generator.
Diagnosing a breakdown is quite simple. There are several manipulations that can be used to determine the need for repairs:
- The corresponding light on the dashboard lights up, indicating that the battery is constantly discharged.
- The battery drains quickly when the engine is running.
- The brightness of the light decreases as the engine speed increases. In this case, it is necessary to replace the generator brushes.
Also interesting: Engine tuning: Niva 4x4 - increasing power using common methods ||
Niva boost the engine All of the above signs indicate that the generator urgently needs to be replaced or repaired.
Generator replacement
When problems are detected in the operation of the generator, most Chevrolet Niva owners turn to specialized service stations, where professionals carry out high-quality diagnostics of the vehicle and quickly deal with the problem.
However, if necessary, you can change the generator yourself if you know the structure of the car and prepare the necessary tools. In addition, it is better to familiarize yourself with the replacement algorithm in advance.
To change the generator on a Chevrolet Niva, you will need to follow a few fairly simple steps.
- First of all, you should take care of the safety of the work being carried out. To do this, you need to put the car in a repair place, turn off the engine and remove the terminals from the battery.
- The next step is to remove the wire from the contact bolt, which is located on the rear panel of the generator. You will also need to remove the block from the assembly that secures the brushes.
- After this, you should begin dismantling the alternator belt. The belt is tensioned using a special plate called a tensioner. You can adjust the tension using the fastening bolts; they need to be loosened. The plate is located in the area of the tension roller and is attached to the structure with three bolts. To unscrew them, you need to take an open-end wrench for two bolts, and use a wrench to loosen the third.
- Next, all that remains is to remove the belt and unscrew the generator mounting bolts. There are only two bolts - top and bottom, but they are massive, and you will need a wrench for a large diameter. If the bolts will not turn, you will need to hold them from behind.
When the bolts are unscrewed, all that remains is to dismantle the generator and begin installing a new one.
The belt is part of the transmission system between the engine and the generator, so its condition directly affects the operation of the generator set. During operation, it may break, which will stop the production of current in the machine. This should not be allowed, so if it is damaged, it must be replaced with a new one. To replace, you will need the following tools:
- mount;
- screwdriver;
- a set of keys;
- jack to lift the car.
The replacement process is as follows:
- Disconnect the battery, then use a Phillips screwdriver to unscrew the crankshaft sensor fasteners.
- Loosen the belt fastening nut.
- Place the right side of the car under a jack, raise it, and engage 4th gear.
- We rotate the right wheel and first pull the belt off the pump pulley.
- We install the new one in the reverse order. The belt is placed on the crankshaft pulley and only at the end is secured to the generator.
- We rotate the wheel so that the belt is tensioned and takes the desired position.
- The fastening nut is tightened. The crankshaft sensor is installed.
- The belt is placed on the part in this order: crankshaft, then the upper tension roller, the lower right pulley, the lower tension roller, pump, generator.
Alternator bracket diagram for VAZ 21213 (carburetor)
The author of the drawing made a bracket from a piece of metal 80x80 mm, 4 mm thick. The upper adjustment bar for the generator is borrowed from the Volga. It was cut in place and a new 8.5 mm mounting hole was drilled.
VAZ 2110 crankshaft pulley, GAZ 3110 pump pulley, 6RK1290 belt. A standard cooling fan is installed on the pump pulley. The location of the generator is top left. The lower mounting point of the fuel pump, at the front we attach it to a standard stud and bolt, and at the top there is an M8 cylinder head bolt. The lower long generator mounting bolt with an engraver and an additional locknut.
Another bracket drawing provides for a belt measuring 1375 mm. You will need to modify the plane on the head in the area of the M8 bolt with an angle grinder, and also change the studs and bolts securing the front cover.
Features of installing the bracket in the video:
Installing a new generator
The algorithm for installing a new generator is practically no different from dismantling the old one, only all steps are performed in reverse order. So, the car owner will need:
- Screw the assembly to the engine by turning and fixing two bolts - upper and lower. At the same time, there is no need to tighten them too much, since then the belt still needs to be tensioned.
- Install a new V-ribbed repair on the pulleys. You need to put it on with a little effort and go around the pulleys in the following sequence: hydraulic pump pulley, roller, crankshaft pulley, power steering pulley, roller, generator pulley.
- Tension the belt by tightening the adjustment bolt and the special plate. It is important that the belt deflection in the upper free part does not exceed or be less than 15-16 mm.
Then all that remains is to tighten the three bolts of the bottom plate and check that the power source is secure.
Generator set belt for VAZ 2107
The VAZ 2107 car was produced from 1982 to 2012. Initially, the model was equipped with a smooth drive belt (old model). Over time, the “seven” was modified several times and at the end of the 1990s, the generator began to work with a new type of belt with teeth.
The most popular among car owners are rubber products from the German company. These belts fit perfectly into the operation of a domestic car and serve for the entire period specified by the manufacturer.
The design numbers and sizes of the belts are indicated in the vehicle’s service book:
- 2101–1308020 (smooth surface), dimensions - 10.0x8.0x944.0 mm;
- 2107–1308020 (toothed surface), dimensions - 10.7x8.0x944.0 mm.
How to tension a belt on a generator
The operation of the generator, as well as the water pump, primarily depends on the correct tension of the belt on the pulley. Therefore, existing rules cannot be neglected. The belt is installed and tensioned in the following order.
- Place the assembled generator in place, lightly tightening the fixing nuts.
- Take a pry bar and use it to fix the gap between the generator housing and the pump.
- Place the belt on the pulley.
- Without releasing pressure from the pry bar, pull the belt onto the pulley.
- Tighten the top nut securing the generator until it stops.
- Check the degree of belt tension - the rubber should not sag, but it should not be too tight.
- Tighten the lower nut securing the generator.
Generator connection
Replacing the generator is only half the battle. It is also important to connect it correctly to the circuit source. Before connecting, you need to complete the work on the front and rear panels of the unit, only after that you can connect the terminals to the battery.
Also interesting: 3 types of homemade winches and the features of making them yourself - Tuning and repair
The contacts must be clean during connection. If contamination is detected, it can be removed using special cleaners. Also, the terminals on the battery must be tightened, otherwise the oxidation process will begin on their surface.
If everything was done correctly, then when you start the engine, the light on the dashboard indicating a low battery charge should go out. However, experts recommend, just in case, checking the operation of the generator using a multimeter by measuring the voltage at the terminals.
Thus, in order to avoid any serious problems with the generator during the operation of the Chevrolet Niva, it is important to undergo a technical inspection on time and repair the components of this unit.
How does a Chevrolet Niva generator work?
The vehicle's on-board network has two power sources. The role of the first of them is performed by the battery, but its functions are very limited. It powers the network before the engine starts, and also powers some elements of the engine control system while it is running.
The Chevrolet Niva generator performs an additional function by charging the battery. If the elements of the electrical circuit operate properly, the car can remain energy-independent and autonomous throughout the entire period of engine operation.
The basic design of the generator on cars of the VAZ family is a combination of a moving and a fixed part. The rotor is a moving element that acts as an electromagnet. It consists of a magnetic circuit in the grooves of which the winding is laid. The stator, that is, the stationary part, is made in the form of a ring.
- A pulley that transmits torque from the crankshaft to the rotor.
- Housing consisting of front and rear covers;
- Sleeve;
- Rotor
- Stator;
- A rectifier block or diode bridge consisting of six semiconductor diodes;
- Voltage regulator combined with brush holder into one unit;
- Sleeve;
- Pad;
- Casing.
Each component part is a consumable item, so the generator must be disassembled and repaired. It must be emphasized that the Chevrolet Niva's current source differs from similar units of other cars only in the geometry of the housing and the method of its installation in the engine compartment.
Generator type 9402.3701-01 alternating current, three-phase, with built-in rectifier unit and electronic voltage regulator, right rotation (drive side). Generator Niva Chevrolet 9402.3701-01: 1 – rectifier unit; 2 – bearing sleeve; 3 – rear bearing of the rotor shaft; 4 – slip rings;
The Niva Chevrolet voltage that occurs in the car system maintains the functionality of all electronic devices of the vehicle. The electricity generation system within the machine has its own characteristics, which are worth learning about before various breakdowns occur. First, you should familiarize yourself with the node that creates electricity.
Chevy Niva generator with air conditioner
Welcome to ChipTuner Forum.
Theme Options
On simple Nivas, the generator also cannot cope, but there are two screws at full capacity and each 15A. On a Chevrolet Niva, the fans turn on separately - the right one at low speed, then both at full speed if the temperature rises.
The generator there can be equipped with a LV that evaluates the voltage level and controls the lamp on the panel. But before testing the generator under load, you need (for reliability) a charged battery. Has the generator been changed? Or fans?
brownie Kuzma
Sukhov
With overcurrents. It is necessary to measure the current supplied to the load. There are no options here; it should be less than what is declared by the manufacturer.
I think this is useful information. More powerful generators are designed for cars with air conditioning than for cars without it. In this case, the generator must have a current of at least 85 A, if memory serves.
brownie Kuzma
Sukhov
An oscilloscope can only help here. The lamp will light up only when the current from the additional current decreases. rectifier, and the diode bridge or stator winding is to blame.
In air conditioning mode, how many fans are turned on and in what modes?
brownie Kuzma
brownie Kuzma
This is exactly what happens at Topicstarter:
That is, it looks like a current overload. I would like to measure the current while doing this.
General characteristics of the generator
On Chevrolet Niva cars, the manufacturer installs an alternating current generator of type 37.3701 with a three-phase circuit.
The generator has the following technical characteristics:
- The maximum current when the engine operates at 5000 rpm is 55A;
- Output voltage – 14.1 V with an error of 0.5 V;
- The maximum permissible rotation speed is 13,000 rpm;
- The ratio of engine speed to generator speed is 2:2.04.
Principle of operation
The basis for obtaining electric current is the phenomenon of electromagnetic induction. It represents the occurrence of an induction current in a closed circuit under the condition of a change in the magnetic flux penetrating this circuit. There may be several ideas for implementing a generator set. It is enough to recall all the experiments on observing EMR.
But rational and technical components impose their limitations. It is irrational to use a permanent magnet as a source of magnetic field, since it will be impossible to regulate the magnetic flux. By changing the current strength in the electromagnet, you can ultimately influence the output parameters of the induction current.
The rotor includes not only the windings of the electromagnet, but also the shaft with slip rings. Thanks to the sliding contact of graphite brushes with slip rings, the movable winding is excited. Current is supplied to the voltage regulator through one of two circuits. Initially, when the engine is turned off, the winding is powered by the battery.
Also interesting: Polishing the Niva body
The operation of the generator is monitored by turning on the lamp on the instrument panel.
When the device is operating, the potential at the generator contact and at the output of the diode bridge is the same, therefore, current cannot flow through the lamp. If the light is on, this means low voltage at the diode connector, which indicates a faulty power source. The rectified current powers the on-board network and recharges the battery.
Tools:
There seemed to be a service in the area where we worked. I'll give the car back and go to the office while they fix it. The charge was just enough to get to the box.
The last meters were walked by hand. The electrician came out and said in a menacing, confident voice that everything was full today and he couldn’t do it. But the problem was solved immediately by itself.
My property was already in a box and I couldn’t leave on my own. But the comrade who was supposed to come has not yet appeared. In general, they quickly diagnosed me that the diode bridge had burned out.
The auto parts were a block away from the service station. An hour later I was back on the wheels. Hooray!
Parts and consumables:
The diode bridge burned out photo from the network. When overcoming puddles, it will be much more difficult to fill it than the lower ones. So I started thinking, maybe I’ll install a more powerful generator, because I plan to install a trunk and, of course, a chandelier; I think 4 lamps from hella will fit in quite well.
Plus I will also install a winch, and it also drains the battery pretty badly.
And if the gene is weak, then when fighting off-road, we can get a situation where we are skidding in the dark, the chandelier is turned on, the engine is boiling - both fans are threshing at full strength, we are pulling with a winch - will the gene be enough for 80 amperes? Such energy consumption, of course, will not happen often, but when it happens, it’s better to be safe, isn’t it?
So I’m looking at a gene for the Pramo ampere, it costs about rubles.
But first, let's check the generator that I got with the car by default. It seems to me that either the brushes there are worn out, or something else - well, it cannot charge the battery normally; in 4 months of summer operation I have already recharged the new battery 3 times. Apparently the gene charges only superficially. On the other hand, wouldn’t it be bad to drain the battery per ampere? After all, the battery is new and it would be wrong if it only lasts a year or two. If there is wear, the bearings or generator covers must be replaced. Check for a break in the stator winding.
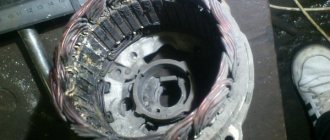
Connect a test lamp one by one between all winding terminals. In all three cases the lamp should be on. If the lamp does not light up, there is a break in the winding.
Replace the stator or winding Check if the stator windings are shorted to the housing. Connect the lamp to the terminal of the stator winding, and the wire from the current source to the stator housing. If the lamp lights up, it means there is a short circuit: Inspect the drive-side generator cover assembly with the bearing. If, when rotating the bearing, you feel play between the rings, rolling or jamming of the rolling elements, the protective rings are damaged or there are traces of lubricant leakage, and cracks are found in the cover, especially in the places where the generator is attached, it is necessary to replace the cover assembly with the bearing; the bearing in the cover is rolled.
Check the ease of rotation of the bearing on the slip ring side. If, when rotating the bearing, you feel play between the rings, rolling or jamming of the rolling elements, the protective rings are damaged, or there are signs of lubricant leakage, the bearing must be replaced.
To do this, use a puller to press the bearing off the rotor shaft and press on a new one using a suitable mandrel, applying force to the inner ring of the bearing. Inspect the generator cover from the slip ring side. If cracks are found, the cover must be replaced. Damage to the capacitor or loosening of its mounting on the generator; deterioration in contact with ground is detected by an increase in interference to radio reception when the engine is running.
Removing the voltage regulator
If we consider the simplest closed circuit, which is placed in a time-varying magnetic field, then the induced emf in it is proportional to the rotation frequency of the electromagnet. Considering that a car engine operates at different frequencies, a device is needed to stabilize the output voltage. The role of this device is played by a voltage regulator located in the brush assembly.
The current flowing through the rotor winding is able to regulate the magnetic flux, hence the output voltage. When it exceeds 14.2 V, the transistor closes the excitation circuit. When the voltage drops to 13.5 V, the circuit is unlocked again.
The voltage regulator can be removed from the Niva Chevrolet for replacement using a flat-head screwdriver and a size 8 wrench. The procedure is as follows:
- This is worth doing if the voltage in the system does not correspond to the norm - less than 13.5 V.
- Disconnect the wire from the negative battery.
- Disconnect the generator block with terminal D. Turn the rubber boot to the side and unscrew the nut.
- Disconnect the wires from the stud.
- Unscrew the nut securing the generator excitation circuit terminal, and then remove the terminal itself.
- Loosen the 3 screw fastenings of the plastic casing of the generator set and remove the casing.
- Next are 2 more fastening nuts that secure the voltage regulator.
- We disconnect the screw securing the terminal to the D bus from the rectifier, after which you can finally remove the voltage regulator itself.
The generator on Niva works for a very long time and will remain in operation for several years without any problems. Over time, its power drops noticeably, then it is worth replacing several of its parts or the entire assembly. If after replacement the problem with a drop in power cannot be eliminated, you should go to a service center for diagnostics.
Do-it-yourself device repair
Now let's talk about how a generator is repaired. The repair procedure can be performed at a service station or in a garage, of course, if you have an idea of what needs to be done.
Replacing the alternator belt
How to change the alternator belt correctly:
- First of all, the connector with the DPKV is dismantled, after which the screw that secures this regulator is unscrewed and removed.
- The nut that secures the device should be loosened slightly, but not completely unscrewed. The generator assembly can be moved towards the block, after which the strap on the displaced device can be removed without problems, since it will be loosened.
- Using a jack, which must be installed in advance on the side where the unit is located, you need to slightly raise the car by turning on first gear.
- Next, pull the strap itself so that it can move away from the pump shaft. Then spin the wheel until the tension point reaches the pulley.
- The next step in replacing the alternator belt will be to remove the belt from the other shafts.
- As for installing a new one, it should first be put on the shaft of the unit and the crankshaft, only after these steps can it be installed on the pump shaft.
- The wheel turns until the strap hits the pulley. Then the device is put in place, the strap is tightened, after which the assembly is fixed to the bracket using a nut. The final stage will be the installation of the DPKV in place (author - Ig K channel).
Replacing the tension roller
Repair of the Niva Chevrolet generator may involve replacing the tension roller. The main part of this element is the bearing, so if the strap is loose, then first of all it is necessary to check it. If the roller is in good condition, then the bearing will rotate quietly and there should be no jerking.
To replace an element, follow these steps:
- First, install a crowbar or other tool so that the clutch shaft is blocked. This will prevent the crankshaft from moving.
- Then the screw that secures the roller itself is loosened, and the tension on the strap is relieved.
- The axial screw is unscrewed, after which the roller can be removed.
- A working roller is installed and the strap tension is adjusted. After replacement, make sure the device is working properly.
Replacing the brush
Dismantling the generator
- Replacing the generator begins with removing the device from the engine compartment. All wiring going to it is disconnected, and we must also not forget about disconnecting the battery. The protective plastic casing is removed.
- The nut securing the wires and the screw securing the assembly are unscrewed. The fastening in the form of a bolt is detached; it is located at the bottom of the structure, after which the strap is removed.
- When all the bolts are unscrewed, the mechanism can be removed from the bracket; a mounting spade may be needed for this.
- To install a new unit, all steps should be repeated in the reverse order. After the new generator is installed, it is necessary to diagnose the condition of the drive belt and also adjust the tension.
Sorry, there are no surveys available at this time.
Basic generator malfunctions
Mechanical problems include an insufficiently tensioned alternator belt or its breakage, bearing failure, wear or damage to the pulley. Diagnosing them is not so difficult, because the condition of the belt and pulley can be assessed visually. A failed bearing produces extraneous noise when the rotor rotates.
- Worn brushes or worn commutator. The condition is determined visually after dismantling the voltage regulator.
- Broken rotor winding. It is necessary to measure the winding resistance with an ohmmeter. If the value is “infinity”, the rotor should be replaced.
- Short circuit of the rotor winding to its body.
- Failed bearings can cause the armature to cling to the stator winding. Such a stator with traces of runout should be replaced.
- Broken stator winding. It is necessary to measure the resistance of each winding.
Generator malfunctions may not be accompanied by the warning lamp lighting up. You can notice this situation by the battery losing charge or by a change in the brightness of the headlight when the engine frequency changes. By contacting a qualified auto electrician, you can significantly save on repairs, because replacing a part is much cheaper than buying a new generator.
Read news about the new Niva
- Generator Niva Chevrolet - voltage, repair and maintenance
- Replacing the alternator belt tensioner pulley
- The modernized Lada Niva Legend (4x4) 2021 was shown on the Internet
- Lada 4×4 Bronto - sales stopped, new details » Lada.Online - all the most interesting and useful about LADA cars
- Description of the instrument panel Lada 4×4 (VAZ 2121, 2131) » Lada.Online - all the most interesting and useful about LADA cars
- Purpose of fuses, relays and their replacement Niva VAZ 21213, 21214, 2131 lada 4×4
- Chevrolet Niva gasoline consumption per 100 km
- Buy LADA (VAZ) 2131 (4×4) 2022 in Rostov-on-Don, low price for Lada 2131 (4×4) 2022 on the Avto.ru website

