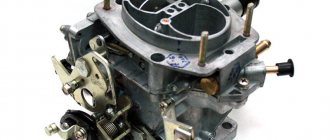
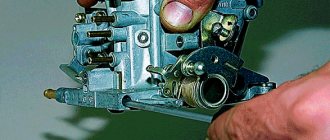
Classic VAZ cars with carburetor engines are gradually leaving our lives, since they are no longer produced by industry, but there are still many of them in use. In order for the car to serve the owner without problems and cause a minimum of hassle, it is necessary to maintain the technical condition of the car, including the need to periodically adjust the VAZ-2106 carburetor.
The carburetor unit in this car is a rather complex technical device; it consists of such main parts as a float chamber, an accelerator pump, a main dosing and idle system, a starter device, and so on. Basic operations for setting up the carburetor should be entrusted to specialists, but the car owner, with certain skills, can independently adjust the idle speed or the level of gasoline in the float.
Do-it-yourself Ozone carburetor adjustment
The name “Ozone” came into use with the start of production of the VAZ-2105 car; It was for this model that the Dmitrovgrad Automobile Plant (DAAZ) developed a new carburetor for an engine with a volume of 1300 cubic centimeters. For the “seven” Zhiguli, DAAZ-2107 carburetor units were produced, running on 1.5-liter engines, and they were also installed on the “six” VAZ.”
If the car consumes fuel within normal limits, accelerates normally and does not compress while driving, it is not recommended to re-adjust the car yourself, especially if the driver does not have sufficient experience in this matter. Adjustment is necessary in cases where:
- increased fuel consumption;
- the engine runs unstable (jerky) at idle;
- the engine gains speed at dips;
- The engine stalls at minimum speed.
Also, the internal combustion engine may fail if the fuel supply is insufficient, and starting in cold weather is difficult due to an unregulated starter.
It is generally accepted that a car owner or any person who is an automotive enthusiast is capable of independently performing the following types of work:
- adjust the position of the float in the tank;
- configure the launch system;
- adjust idle speed;
- Replace the strainer located in the carburetor cover.
The most common and popular procedure is idle adjustment; Both fuel consumption and engine response to the throttle largely depend on this.
Which carburetor model to choose
For any VAZ car, starting from 2101 to 2107, only certain carburetor models are suitable.
DAAZ carburetors
Carburetors DAAZ 2101, 2103, 2106. They were produced at the Dmitrov Automotive Unit Plant, which bought a license from the Italian company Weber, therefore these carburetors can be indicated under both names. The devices were not distinguished by the complexity of their design, but they could please their owners with the rapid acceleration of the car and good speed. One of the biggest problems in installing these models is their virtual absence on the market.
In addition to speed and simplicity, Weber carburetors also provided incredibly fast fuel consumption - these “monsters” consumed 10–14 liters per 100 km. fuel.
The powerful but resource-intensive Weber carburetor was produced by the Russian Dmitrov plant using Italian technology
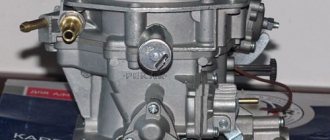
Carburetors "Ozone"
More technologically advanced models, which were already installed in VAZ 2105 and 2107 cars, were also produced at the Dmitrov Automobile Unit Plant. However, they were not only more advanced and improved, but also more environmentally friendly. This is why they received the name “Ozone”. This carburetor made it possible to reduce fuel consumption to 7–10 liters. 100 km, while maintaining the dynamic characteristics of its predecessors. The downside of the device was the complexity of its assembly and constant contamination in one of the chambers, which led to the fact that the acceleration of the car noticeably deteriorated, the speed decreased and the engine began to act up.
“Ozone” is an environmentally friendly model of DAAZ carburetors
Solex
A little later, DAAZ 21053 carburetors appeared. They were produced under license from the French company Solex, hence the name of the models. These carburetors were not much similar to previous DAAZ models. The updated design with a fuel return system made it possible to save 400–500 ml of fuel per 100 km. These carburetors were distinguished by good power and low gasoline consumption. The disadvantage of the device was the narrow fuel and air channels, which very often became clogged.
The Solex carburetor successfully combines the power and environmental friendliness of its predecessors
Solex carburetors came in many variations with different auxiliary systems. In the CIS, the most popular option has become an electric idle air valve.
Custom carburetor Solex 21073
Often, inquisitive car enthusiasts resorted to replacing the carburetor on their own. One of the suitable models turned out to be Solex 21073, famous for its fairly wide jets and channels. Such a carburetor increased the car’s power, but at the same time increased fuel consumption - 9–12 liters. per 100 km.
Solex 21083
The second non-standard carburetor, which with some modifications fits the VAZ 2106 and 2107 models, is Solex 21083. After expanding the diffusers and installing jets, this device allows you to significantly increase the dynamics of the car without much fuel consumption. However, the process of upgrading a carburetor is very complex and time-consuming.
Adjusting the idle speed on Ozone carburetors
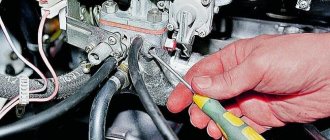
Before starting adjustment work, the internal combustion engine must be warmed up to operating temperature; it is also important that the carburetor is clean, without clogged channels. Next we proceed as follows:
- start the engine at idle speed (XX);
- screw the quantity, unscrewing it, increase the speed by 100 revolutions more than normal;
- we begin to tighten the high-quality screw until the motor begins to operate less smoothly, then we turn it back a little, achieving stable operation;
- we find the optimal operating mode of the XX motor with the highest quality of the tightened screw, while the norm is 850 rpm (from 800 to 1000 is allowed).
With proper adjustment, gasoline consumption in the city averages 8.5-9.5 l/100 km, but the engine must be in good condition and the ignition must be set correctly. Even on Ozone carburetors, the solenoid valve jet is often clogged and should be checked before adjusting the idle mixture and cleaned if necessary.
Fuel mixture quality adjustment screw Solex 21083
Why do you need a Solex 21083 carburetor quality screw?
The quality screw is necessary to change the composition of the fuel mixture entering the car engine at idle (idle). By turning the screw we lean the fuel mixture, by turning it away we enrich it. In this way, you can adjust the air/gasoline ratio to ensure it operates at a minimum stable idle speed.
Where is the quality screw installed on the Solex 21083 carburetor?
The fuel mixture quality adjustment screw is installed in the lower part of the carburetor body, at the outlet of the emulsion channel. The screw is screwed into a special channel at the bottom of the carburetor body. It changes the flow area of the outlet.
The outlet of the CXX Solex 21083 through which the fuel mixture is sprayed, the composition of which is regulated by a quality screw.
How does a Solex 21083 quality screw work?
The Solex 21083 carburetor quality screw is a metal screw of a certain shape with a thread. A rubber O-ring is installed on it to prevent excess air from entering the CXX channel. One end of the screw has the shape of a needle; the other has a cut for a 3 mm slotted screwdriver. See photo at the beginning of the article.
How does the fuel mixture quality adjustment screw work?
The easiest way to see how the quality screw works is in the Solex 21083 CXX diagram.
Under the number “14” is the quality screw.
A mixture of air and gasoline (fuel emulsion) is formed at the CXX fuel nozzle, where gasoline entering the carburetor CXX from the float chamber and air from the air duct are mixed. Under the influence of vacuum at the edge of the throttle valve of the first chamber, it is pulled through the emulsion channel and the CXX outlet into the engine intake manifold. The engine runs on this fuel mixture.
If we tighten the quality screw all the way, we will completely block the outlet of the emulsion channel of the idle system. Fuel stops flowing into the engine and it stalls.
If you turn the quality screw out a little, fuel will begin to flow into the engine and it will idle.
In order for the car engine to operate stably at idle, you should unscrew the quality screw at least half a turn from the stop and adjust the idle speed with setting the position of the fuel mixture quantity screw. It is necessary to achieve such a mutual position of these two screws that the idle speed is 650-700 rpm and the CO content in the exhaust gases is within normal limits.
Malfunction of the fuel mixture quality screw
There are only two malfunctions: clogging of the idle air system outlet and damage to the rubber O-ring on the screw.
Over time, the idle air system outlet becomes clogged with deposits and soot from the engine intake manifold. The quality screw needle ceases to play the role of a locking device, since the hole is already clogged. Depending on the degree of contamination, the engine begins to idle unsteadily or the idle speed disappears altogether. When turning the quality screw when adjusting the XX speed, the reaction will be weak or not at all.
You can quickly clean the outlet, quality screw and emulsion channel yourself without disassembling the carburetor using a cleaning aerosol. Details about the cleaning procedure: “Cleaning the idle system of the Solex carburetor 2108, 21081, 21083.”
The channel where the quality screw is installed leads directly to the CXX emulsion channel and its outlet. Therefore, this is one of the places where foreign air is likely to “suck” into the carburetor. Foreign air depletes the fuel mixture, as a result of which the engine does not have enough energy to rotate the crankshaft at idle, and it begins to “triple” and tries to stall. The reason for the air leak is a worn rubber o-ring on the quality screw. It may fail due to age or careless repairs.
Replacing the ring with a new one will help correct the problem of air “sucking” into the carburetor and restore normal idle speed of the car engine.
Notes and additions
If, with the quality screw fully tightened, the car engine does not stall, but continues to run, you should look for places where fuel is likely to enter the engine in addition to the carburetor idle system
Or pay attention to the position of the throttle valve of the first chamber. Perhaps it is very slightly open and in addition to the outlet hole of the CXX, underneath it there is an exit slot of the transition system of the first chamber and the fuel is drawn out of it by vacuum
The position of the throttle valve is regulated by the quantity screw, which with its tip rests on the lever on its axis.
Setting the gasoline level in the float chamber
To adjust the float in the DAAZ carburetor, it is not necessary to remove the entire assembly, but partial disassembly is required. To make adjustments, perform the following steps:
- turn off the engine, open the hood;
- remove the air filter cover (unscrew the three nuts);
- remove the filter housing itself (four more nuts);
- disconnect the suction cable;
- remove the telescopic trigger rod;
- unscrew the five screws securing the carburetor cover (they need to be carefully removed and reassembled, it is important not to drop the fasteners into the manifold);
- for ease of operation, disconnect the fuel supply hose;
- turn the lid over and determine the gap between the float and the cardboard spacer, it should be from 6 to 6.5 mm;
- if the gap differs from the required value, adjust it by folding the tongue;
- It will also be necessary to align the float itself in a plane; it may have a chamfer relative to the surface of the cover.
When adjusted correctly, immediately after removing the cap, the gasoline in the float chamber is approximately level with the center of the beveled surface of the carburetor body, and the float stroke is approximately 14 mm.
Lada 2103 “beginning of the journey” › Logbook › carburetor DAAZ 2107-1107010-20 (part 4 - setup)
I won’t repeat about the level in the float chamber (I think everyone knows this), but many have forgotten about adjusting the dampers and some don’t even know (and there are some among those who do it for others’ money)
Well, let's start with the main dampers
open the damper until the tendril on lever 3 (black arrow in the photo) touches lever 2 (red arrow)
in this position, measure the gap between the edge of the damper and the body
it should be 6mm, the gap can be adjusted by bending the tendril (black arrow in the photo) of the lever3
with a full opening, I do it much easier at the moment of the correct distances (b top photo) the flaps occupy a perpendicular position with the lower plane of the carb
and setting up the launcher
and check the gap using a drill with a diameter of 5.5 mm
Setting the Ozone carburetor trigger
A situation often arises when a VAZ-2106 car does not start well in cold weather; the main reasons for this problem are an unregulated starting system or a broken diaphragm. Here you need to know that when the air intake expands, the air damper closes completely, but when starting under the influence of vacuum, it opens slightly at a certain angle.
On DAAZ carburetors of models 2105, 2107, for cold starts, a pneumatic valve is installed that provides a starting gap for the air damper, and this valve has an adjusting screw closed with a special plug. If the throttle valve angle is set incorrectly with the screw, the fuel mixture of a cold engine will be disrupted and starting problems will arise.
There are several ways to adjust, this can be done with the carburetor removed by closing the shock absorber and simulating the force of a vacuum by pressing with your finger. In this case, the gap between the housing wall and the lower edge of the “air duct” should be within 5-5.5 mm; probes, drills or other objects of a certain diameter can be used for measurement. The initial gap between the throttle valve (bottom) and the carburetor body is also set; its recommended value is 0.7-0.9 mm, and the adjusting screw is located at the bottom.
ADJUSTING THE STARTER DEVICE
These works can be performed directly in the car. But you will have to first remove the filter cover.
- We turn out the plug. Underneath we find the adjustment screw.
- If you carry out the work without removing the carburetor from the car, pull out the choke. If you have the device in your hands, press the three-arm lever. After the damper is completely closed, push the rod down until it stops.
- Let's see what the gap is between the camera and the air damper. A 5.5 mm drill will help us with this.
- If necessary, make adjustments by turning the adjusting screw using a screwdriver.
- We return the plug back.
- Now you need to check the distance between the camera and the throttle valve. The required size is 1 millimeter. A drill with a similar diameter is suitable for this. The gap is adjusted using a rod, which is either rearranged into a different hole or bent.
Features of Solex carburetors for VAZ-2106 cars
Often, car owners, in order to save fuel and improve dynamic performance, install Solex VAZ-21083 or 21073 carburetors on their cars, but these units do not always live up to expectations. As an alternative, the Dmitrovgrad Automotive Aggregate Plant specially developed model 21053-1107010-20, which is designed to work with 1.5 and 1.6 liter engines; today this carburetor is considered one of the best for classic VAZs. The main advantages that should be noted when installing a 21053-20 carburetor instead of the standard Ozone:
- vehicle dynamics are improved;
- less time to warm up the internal combustion engine;
- the correct operation of the machine is guaranteed;
- when you drive at a slow pace, you save fuel.
"Solex" is also easy to install, "not fussy", although it has its drawbacks: you need to buy spare parts (a rod that fits the Niva, an air filter housing, a thick gasket), spend more time on assembly and major repairs.
Correct selection
Fans of tuning VAZ classics and simply wanting to improve its performance characteristics most often opt for Solex
.
Initially, models from front-wheel drive cars DAAZ 2108 and 21083
. It is impossible to install them on classics without minor modifications. Let's look at such work in more detail. When choosing a device for your car, you need to take into account the engine displacement. For engines with a volume of 1.3 liters, the DAAZ 2108 fits well, and for 1.6 - the DAAZ 21083. These devices differ in the diameters of the cross-sections of the diffusers, as well as the fuel and air nozzles. To install any of these models on a classic engine, you must additionally prepare the following components. A new set of gaskets for the carburetor, a piece of hose to ensure its heating, a tee to the fuel system, a valve and a set of rods for the gas pedal. To get the most out of this undertaking, it would be advisable to replace the ignition system with an electronic one. Now let's look at the procedure for installing the carburetor:
- On a cold engine, you need to remove the standard device along with the gaskets;
- The next step is to install new gaskets. The first is paronite, then plastic and then cardboard on top;
- A new Solex is placed on top of these gaskets, but the fasteners are not yet clamped;
- Under the nuts closest to the engine on the carburetor, place a bracket from a set of rods for the gas pedal;
- The double-arm pedal drive lever, which is removed from the valve cover, should be placed on the bracket;
- The rod on it, the one that is shorter, is replaced with a new one from the purchased kit, and if necessary, the length is adjusted;
- The pedal return spring should be placed closer to it;
- Now you need to ensure heating of the device; to do this, connect it to the outlet pipe on the intake manifold.
How to adjust idle speed on a Solex carburetor
As in the case of ozone, before adjusting the idle speed, the internal combustion engine of the car must be warmed up to operating condition, while the engine itself, as well as the spark plugs, fuel pump, high-voltage cables, etc. must be in good condition, air and fuel filters must not be contaminated. The air damper must be opened all the way (the air handle must be recessed all the way), then continue adjusting the XX by turning the quantity and quality screws:
- using a large screw (number), turning it, we increase the speed;
- we tighten the high-quality screw until the engine begins to slow down, work intermittently, then unscrew until the engine begins to operate stably;
- Using both screws we get the most optimal mode by setting the speed to at least 850-950 rpm.
After the tuning operation, it is necessary to check the dynamics and stability of the engine in motion: the engine should not stall with strong gas emissions, and there should be no dips, jolts or jolts when driving.
Now let's look at how the carburetor works, ensuring the distribution of the fuel-air mixture:
- Acceleration pump.
- Econostat system.
- Maintains constant fuel level.
- Idle support.
- Support for engine starting and warming up.
- Jets (air and fuel), diffuser, VTS atomizer, well and emulsion tube are located in the main metering chamber.
The carburetor is adjusted after cleaning and assembly. Before you start disassembling and cleaning, I suggest you remember the main saying of any auto mechanic - “Don’t make a fuss while it’s quiet,” meaning that you shouldn’t get into a place where everything is in order or disassemble something that has nothing to do with the breakdown.
Nuances and main malfunctions of Solex carburetors
Despite all the advantages and disadvantages, Solex carburetors have their own disadvantages and characteristic “diseases”; one of the main disadvantages is problems with idling due to blockage or ventilation of the channel. Air enters the XX system mainly due to the sticking of the cover to the body, since the metal is deformed over time and this defect can be corrected by replacing the gasket and smoothing the adjacent surfaces.
Another common problem with idle speed is a clogged passage, which can only be cleared by removing the quality control screw. But the whole difficulty lies in disassembling this screw, since it is located deep in the carburetor “body” and is held in place by a rubber gasket.
Even a completely unscrewed screw does not simply come out of the channel; it can be disassembled using a piece of hollow tube, for example, taken from an old radio. To use the tube as an extractor at the end, we make two cuts, then insert the device into the channel, and use the twisting method to extract the part we need.
Another typical drawback of the Solex is a failure to drive when accelerating the car, which occurs due to the accelerator pump. To correct this shortcoming, car owners often upgrade the accelerator pump nozzle (“nose” or “elephant” for ordinary people), moving the injection of both tubes to the primary chamber. Solex has virtually no other problems and serves for a long time and reliably.
The work concerns exclusively the idle VAZ 2106. The setting does not affect other engine operating modes. There are two screws for adjustment: a large one for the number of revolutions and a small one for the quality of the mixture.
Before starting work, make sure that the ignition system is working properly. Adjust or repair if necessary. The engine must also be repaired.
From the history of power supplies for VAZ
On the first Zhiguli models, which were Fiat models improved and adapted to the roads of the USSR, devices that were produced by the Dmitrov Automobile Unit Plant were installed in the fuel system of their engines. For their production, a license was purchased from the French company Weber
.
They were assigned the index DAAZ 2101, 2103 and 2106. They are still called DAAZ-mi or Webers. Many owners still continue to use them on their cars, as they give good dynamic performance, and their design is simple, without any special design frills . However, these DAAZs have one significant drawback: too much fuel consumption. These models have long been discontinued, since with the advent of the VAZ 2105 the era of “ Ozons
” came. This is already the own development of engineers from Dmitrov, which differs significantly from its predecessor in design and operational characteristics. The name “Ozone” was not given in vain; at that time they were the most environmentally friendly models available. Reviews of such products are very favorable, but they also have problems. This is how failures of the pneumatic drive of the secondary chamber damper sometimes occur.
The “leaky” diaphragm of the forced idle economizer system causes unnecessary problems for drivers. But, despite such “punctures”, their reputation is still only positive. This carburetor model is capable of providing good dynamics, with a fuel consumption of approximately 7 liters per hundred kilometers, you just need to monitor its condition and carry out maintenance on time. The next stage in the evolution of products from DAAZ was the production of front-wheel drive cars, which were called “ Sputnik”
" Their power unit began to be equipped with a fundamentally new design of carburetors. Their production was also based under a license from France, which was provided by Solex. This model was the most economical of all previously produced, and also capable of providing good dynamic and power performance of engines.
Inspecting the carburetor
Check the solenoid valve on the carburetor (if equipped). To do this, you need to turn on the ignition, turn it off and then turn on the contact on the valve. Clicking sounds indicate that the valve is working properly.
Start the engine, remove the vacuum hose from the dispenser and touch it with your tongue. You should not feel the thinness of the air. If so, unscrew the cap slightly.
Sink into the suction handle and open the air filter. In a carburetor, the primary chamber door must be vertical.
Lower the suction pipe completely and fill three cubic meters of gasoline above the shock absorber. It should not bleed noticeably for 5-10 seconds. Press down the choke handle, press the accelerator pedal and see if the choke and wedges open smoothly.
Unscrew the adjustment levers on the carburetor, coat the O-rings with oil and tighten until the screws touch the seat in the carburetor.
Let's start adjusting
- Adjusting the quality of the mixture, unscrew 2-3 vol.
- Unscrew the big one 1.5 turns.
- Start and warm up the engine. With extended “suction” it will work even if the idle speed is not equalized.
- Warm up the internal combustion engine, turn off the intake. If the motor shakes or stops, unscrew the quantity meter to obtain a stable speed. At high speeds, turn the screw until it decreases. We reach a stable rate of about 900 per minute.
- We adjust the quality by screwing until breaks appear, then unscrew until stable operation.
- The crankshaft speed will change. By twisting the amount of mixture, we obtain the stability of the turns.
- repeat the adjustment 2-3 times for both nozzles.
The more you can unscrew the screw that regulates the amount of mixture supplied, the leaner it will be and the lower the fuel consumption will be. The more he can screw in, which is responsible for the quality of the mixture - there will be less CO2 in the exhaust gases. But, I repeat once again: this is the minimum and nothing more.
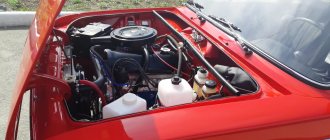
Under the hood of the six
Adjusting the idle speed of the VAZ 2106 is intended for:
- restoration of proper engine operation, in case of loss of idle speed - maintaining stable crankshaft speed;
- regulation of emissions of toxic substances and carbon dioxide into the atmosphere, minimizing these indicators.
The adjustment will eliminate excessive fuel consumption and normalize the amount of CO 2. If the content of harmful substances in the exhaust gases of the car is critical, its operation is prohibited.
If the VAZ 2106 loses speed at idle, this may indicate the following problems:
- idle jet (XX) is clogged);
- the solenoid valve is damaged if it is installed on the XX jet;
- carburetor is not adjusted.
Failure is accompanied by unstable engine operation at low speeds. It may lock up after heavy braking or while driving.
One of the elements of the carburetor on the VAZ 2106 is the idle fuel jet, which can be made with or without a solenoid valve. In the second case, a plug is installed instead of the EMC.
"Solex" on "Classic"
It is believed that the Solex carburetor on the VAZ-2106 provides a significant reduction in fuel consumption and greater power. Practice shows that there is truth in this, although experts do not recommend such tuning.
As for the settings, the procedure is similar to the “Ozone” setting. Here you also need to warm up the engine. Then check the float chambers and fuel level. According to reference books, as well as in practice, the best level is 25 millimeters between the edge of the chamber and gasoline. At this level, the spark plugs will not be flooded, and the car will not stall at idle. Adjust the level by bending the tongue of the floats.
Next, all actions come down to setting the idle speed. How to adjust the carburetor on a VAZ-2106? It's easy to do. Use the quantity screw to set stable speeds, then use the quality screw to achieve maximum speed. At the same time, if you rotate it further, the engine should stall. This means that the mixture has been over-rich. If the revolutions no longer increase after rotation, set the speed screw to 850–900 revolutions.
Here's how to set up a carburetor on a VAZ-2106. Next, you should check the car on the road. If gaps appear, they should be eliminated.
Troubleshooting carburetor problems
Regardless of whether EMC is installed or not, the procedure for cleaning the idle fuel jet is the same.
- Unscrew the cap of the holder or EMC.
- Unscrew and remove the fuel jet XX.
- Clean the center channel of the injector.
To remove the XX jet from the radiator body, a 13mm wrench is required, but depending on the model, you can also use a 14mm wrench. Turn the EMC to remove the jet. If the center hole is clogged, carefully clean it with a thin thread or blow it out with compressed air.
After cleaning the center passage of the fuel jet, reinstall it. Screw in all the way, carefully tighten with a wrench. Connect the "positive" wire to the EMC power terminal. Start the engine.
To make it easier to work with the carburetor, you need to disassemble the air filter. Turn on the ignition after disconnecting the power cable from the EMC terminal. Connect the power cable to the valve terminal. An audible click indicates that the EHR input is receiving power. In this case, the cause of the malfunction must be sought in the jet or in the carburetor itself. If there is no click, there is a problem with the solenoid valve or fuse. To check the valve, connect the “plus” of the car battery to the EMC terminal, and the “minus” to its body. If there is no click, the solenoid valve is faulty and needs to be replaced.
If the EMC input does not receive power, the cause may be a wiring fault or the need to replace the 8A fuse. If you have a standard fuse box, this part is installed in the ninth cell.
If the fuse, wiring and the valve itself are in good condition, then the cause of poor idling of the VAZ 2106 may be a clogged fuel injector XX. In this case, it must be cleaned.
Procedure for adjusting idle speed
To adjust the idle speed using tools, a narrow flat-head screwdriver, preferably with a short handle, is sufficient. Adjusting the idle speed should only be done with a warm engine. It is necessary to adjust the valve timing and ignition gaps. If the adjustment is made on a cold engine, it will not bring the desired effect and stable operation will not be possible.
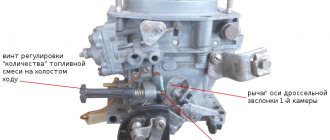
Idle speed is controlled by two adjusting screws: 1a - mixture quality and 2a - quantity (Fig. 2). By default, adjustment screw 2 comes from the factory with a restrictor sleeve that acts as a spacer. Therefore, the manufacturer indicates that the screw rotation is within the factory range. For complete adjustment and if idle speed adjustment is not possible, the restrictor sleeve is removed and basic adjustment is performed.
- Using screw 1, set the crankshaft speed to 900 min. -1. They can be checked on a bench or using the speedometer located on the dashboard.
- Using screw 2, it is necessary to achieve a CO 2 value that falls within the range of values from 0.5 to 1.2%. A special device will help with this - a gas meter.
Rotation of screw 2 helps to change the crankshaft speed. In this case, we adjust and re-set the rotation speed value with screw 1 for 900 minutes. -1 .
The correct idle speed setting is checked by pressing and sharply releasing the accelerator pedal. The crankshaft rotation speed should gradually increase without interruption, then also decrease. The engine must not stop. If this happens or if you experience shocks when you press the accelerator pedal, the setting must be repeated.
Quite often, after a certain time of using the car, VAZ 2106 owners are faced with the fact that the car begins to stall at idle. There may be many reasons for this, but the main one is a failure to check the idle speed. In this article, we will try to explain how to independently adjust the idle speed and thereby correct the problem that has arisen.
What does the VAZ 2106 carburetor idle system consist of?
Before you start adjusting the idle speed of the VAZ 2106 carburetor, you should understand what this system consists of. Below you can find a schematic representation of the inactive system and its explanation. Let us recall that in the previous article we looked at the placements, their diagram and description of each.
1. Part of the throttle body. 2. Throttle valve Chamber no. 1. 3. Holes for transitions between operating modes. 4. Adjustment holes that determine the amount of mixture supplied. 5. Channel for supplying air to the system. 6. The screw is responsible for adjusting the amount of mixture supplied. 7. The screw is responsible for regulating the quality of the supplied mixture. 8. Emulsion carburetor idle channel. 9. Screw for adjusting the level of additional air supply. 10. Drive compartment cover. 11. Air jet. 12. Part of the fuel mixture nozzle housing. 13. Channel responsible for supplying the fuel mixture to the system. 14. Emulsion is good.
How to adjust the idle speed of a VAZ 2106 with your own hands
Adjusting the idle speed of the carburetor of a VAZ 2106 car is a simple but very important procedure. To do it correctly and efficiently, you need to use the step-by-step instructions presented below:
1. Using the number screw, set the engine speed to 900 rpm based on the data displayed by the tachometer.
2. Rotating the mixture quality control screw will result in a carbon monoxide concentration of 0.5 to 1.2.
That's it, the idle adjustment is complete.
But finally, I would like to highlight a few important points:
The number screw can be rotated a maximum of 90 degrees; — a high-quality screw rotates a maximum of 50 degrees; — adjustment must be made with the mandatory use of a gas analyzer.
you need to know how to set the idle speed of a VAZ 2106 to adjust the carburetor. You can do this procedure quite quickly with your own hands, if, of course, you have an idea of what a carburetor consists of and the functions of its main components. But first, let's start with the saddest thing: if suddenly there is no more idle speed and the engine starts to stall.
You'll be lucky if it happens close to home. But if you’re on the road, it’s not good enough. On a personal note, I’ll add that several times I had to disassemble and disassemble the carburetor while stopping on a small road, avoiding passing trucks, and using a flashlight. A good practice is to carry a thermos and a flashlight outside.
Design and principle of operation
The legendary “six” - a model from the VAZ concern - was produced from 1976 to 2006. Over the entire period, more than 4 million cars of various modifications were produced. The car was equipped with engines ranging from 1.3 to 1.6 liters. Fuel type: gasoline. Both mechanical and electronic ignition were used. The fuel system had a carburetor.
How to adjust the carburetor on a VAZ 2106
They were installed from different manufacturers, but the most popular were:
- carburetors from the Dmitrov Automobile Unit Plant (DAAZ);
- Ozone carburetors. Better quality and more productive. They began to install them instead of the old ones from DAAZ. They had simpler settings and lower fuel consumption.
In addition to those presented, Solex carburetors were also installed. They were a modified version of the DAAZ, but with much better characteristics.
Any carburetor is a special device that is installed in a car to create the highest quality fuel-air mixture. This happens by mixing fuel and air in a certain proportion and supplying the finished mixture to the cylinders of an internal combustion engine. Maximum combustion efficiency of gasoline can be achieved if the mixture ratio is 14.7:1. In this case, the first number is equal to the amount of air, and the second, respectively, to the fuel. However, the presented ratio may be different, it all depends on the mode in which the power unit operates.
Carburetor "Ozone", VAZ-2106, design and adjustment
Any carburetor for a VAZ-2106 car consists of the following parts:
- float chamber;
- econostat;
- idle system;
- accelerator pump;
- launch system.
Important! Each part consists of many elements. In this regard, there are practically no fundamental differences between carburetors of different brands.
As for the adjustment, during the process it is necessary to adjust each element presented.
The engine does not idle: the main reason
The first thing you should pay attention to is the solenoid valve. However, it is not installed on all VAZ 2106 carburetors. It is this small device that most often falls into disrepair. In principle, it is analogous to a solenoid relay: there are windings, an armature, and a return spring, but the dimensions are slightly smaller.
The function of the solenoid valve is to open the path of gasoline (with the throttle valve closed) when the contact is turned on. And they close when turned off accordingly.
The most common breakdowns of the solenoid valve, as a result of which the minimum disappears:
- The winding is destroyed, the armature with the needle does not move, fuel is not supplied.
- A clogged fuel jet is located on the edge of the valve.
- The valve armature is blocked due to deformation.
You can check this device very quickly; you will need a small piece of wire, stripped from both edges. Connect one end to the battery positive, the other to the solenoid valve output. A fairly loud click should be heard, but otherwise the winding will most likely be destroyed.
If there is a click, remove the previously connected cable and turn on the ignition. Place the power connector onto the valve. If there is no click, the wiring is destroyed. There can be three ways out in case of failure; you can use any of them:
- If the solenoid valve is completely destroyed, it would be reasonable to unscrew it and remove the tip (fuel jet). And this way you can easily get to the nearest store. The price of a new VAZ 2106 solenoid valve is about 100 rubles, so repairs will not be expensive.
- Temporarily connect the solenoid valve wire to the positive terminal of the battery - if the wiring is damaged. But in this case you will have to get rid of the thread every time you stop.
- It will be much more efficient to connect a wire from the output of the solenoid valve to the “+ B” contact of the ignition coil. The fact is that voltage appears on it only after the ignition is turned on.
Signs of malfunction:
If the carburetor begins to produce a rich mixture, you will understand this by the following signs:
- Fuel consumption increases
- Loud exhaust is heard from the muffler and the smoke turns black
If the engine receives a lean mixture, you will understand this by the following sign:
Loud bangs are heard from under the hood.
In both cases, the engine heats up noticeably more, and its power is also lost.
If you encounter a similar problem, remember that it is a natural consequence of using the carburetor. Any element of the car requires care, regular inspection and maintenance. Therefore, the VAZ 2106 carburetor must be adjusted from time to time.
Before proceeding with the adjustment, you need to make sure that the cause of the breakdown is not the failure of any element inside the device. You need to disassemble it, wash it and clean it. And only after you are convinced that all components of the structure are in full working order, you can begin adjustment.
The easiest option is to send the car to a specialist. Carburetor technicians have a special tool - a gas analyzer. Using this device, you can achieve the most efficient system setup. However, the services of specialists in this profile are not cheap. You may want to do all the work yourself, using available materials. Next we will look at how to set up a carburetor step by step.
Source
If not the valve, then what?
Dirty, low-quality fuel, a malfunction of the ignition system - all of this individually and in a compartment can cause the idle speed to disappear or become unstable. If you have already decided to carry out a full diagnosis, start with filters - air and fuel.
If they are heavily clogged, gasoline or air (these are the main components of the air-fuel mixture) usually do not enter the carburetor. More precisely, they will strike, but only after overcoming great resistance. And don't forget about the thimble filter installed at the inlet of the carburetor.
The solution is to replace all filters and no more problems. But if that doesn't work, you'll have a lot more bad nodes. Now it's time to look at the spark plugs (remember how long ago you changed them). Unfortunately, it is a rare spark plug that will last more than 30 thousand km.
And this is about a year and a half of operating the car in average mode. Unscrew the spark plugs, look to see if there is carbon deposits and what color it is. With a long service life, the center electrode of the fork wears out and this increases the space. Replace the spark plugs and check idle speed stability.
Is it still idling and not turning over? Then all that remains is the ignition system. If you have a contact one, check the gap in the switch and set the optimal advance angle. If it is non-contact, diagnose the switch and Hall sensor.
These two items are more likely to fail than others. However, there is nothing left to break. Also check the condition of high-voltage cables and, if necessary, remove moisture and dirt from them. The distributor cap should be intact, and the resistance of the resistor in the slider should be approximately 5.5 kOhm.
Common causes of carburetor failure and their solutions
If one of the system elements in the carburetor fails, you may not notice it immediately. Failures appear gradually. Often, unstable idle speed is explained by a failed solenoid valve. Not all carburetors have such a device.
To test the solenoid valve, you will need to disconnect the wire connected to it. A positive contact is supplied to it from the battery. Correct wiring is indicated by a slight click.
You need to check the voltage on the wire that connects to the solenoid valve. If there is no voltage in the line, the wiring has failed. It will be necessary to completely replace the network from the ignition switch to the solenoid valve.
Unstable speed can also be observed when the spark plug electrodes are covered with a large layer of soot. The spark power is insufficient. It cannot ignite the fuel mixture. The poor condition of the spark plugs is due to incorrect carburetor settings. In this case, it supplies too much fuel to the combustion chamber.
The cause of this malfunction may be a burnt-out intake valve. It is responsible for the amount of fuel that is supplied to the combustion chamber of the engine. To ensure this, you need to adjust the carburetor. If this does not help, the inlet valve will need to be replaced.
Setting up the VAZ 2106 carburetor
On a VAZ 2106 car, idle adjustment should be made provided that all filters are clean (at least install a new one for air), the spark plugs are practically new, and the ignition system works perfectly. Please note that when adjusting the carburetor it is necessary to install an air filter. It is also necessary to take into account that the level in the float chamber, if necessary, must be adjusted in advance. Don't forget about the shock absorber blanks.
Adjusting a car's carburetor is a simple task. For those who know at least a little about the structure and purpose of both the carburetor itself and each adjusting screw. Gasoline car engines are equipped with different carburetors, but their operating principle is the same. Therefore, if you know the principle of operation, then adjusting and tuning the carburetor will not take much time.
Content:
Carburetor VAZ 2106
On the one hand, it is easy to explain the principle by which the VAZ 2106 carburetor is adjusted when you know its structure at least in general terms. We will not analyze the design in detail; we will only get acquainted with the main systems that ensure optimal operation of the carburetor engine.
The carburetor is used to mix and properly dose the air-fuel mixture, as well as to power the combustion chamber. To do this, it is equipped with a number of systems and mechanisms:
- the system is inactive;
- throttle control mechanism;
- control mechanism for mixture enrichment dampers;
- fuel filters;
- fuel accounting system;
- economist;
- accelerator pump.
These are only the simplest devices that support the operation of the carburetor. We do not seek to scrutinize his work. Our goal is minimal adjustments that affect engine performance. Every owner of a six can make such an adjustment with his own hands, without the risk of completely ruining something.
Signs of incorrect carburetor operation
The fuel system of the VAZ 2106 operates in a clear relationship with other mechanisms. If this connection is broken, it will be quite difficult to repair and detect the fault. In practice, this is expressed in the following characteristics:
- Unstable engine idling.
- Increased fuel consumption.
- Fuel leaks in the engine compartment.
- It decreases as the engine operates and the speed changes.
- Difficulty starting the engine.
- Filled candles.
Of course, not in all cases it is necessary to take a screwdriver and tighten the screws on the carburetor. It may have nothing to do with it. For example, a floating idle can occur when air escapes from the intake manifold gasket or the brake booster diaphragm ruptures. Or it could be poor fuel quality, or it could be because the contact assembly in the ignition distributor is worn out. The point is that it is impossible to give clear prescriptions for the treatment of a specific motor disease in a general and global sense. The issue must be solved comprehensively and the interconnection of all systems affecting engine operation must be taken into account.
Search for idle speed of VAZ 2106
The minimum is gone. What to do? Firstly, this could be due to a blockage in the idle passage in the primary chamber of the carburetor. With a full guarantee, this problem can be eliminated only after completely disassembling the carburetor, cleaning the channels, bleeding the jets, installation and readjustment. With a small amount of blood, this problem can be solved without removing the carburetor from the engine, by partially removing the air from the channels and jets.
In the trunk every six there should be a pump with a nozzle for purging the channels and nozzles. This is a cone-shaped device that hangs on the pump tube and interferes with the continuous pumping of the wheels. Now this will come in handy more than ever. To bleed the channels, you will have to unscrew all the adjusting screws; all jets are accessible from the outside, without disassembling the carburetor. So when editing, do not confuse them. To bleed, you will need to remove the carburetor cap. Isn't it worth explaining what needs to be done for this?
After you remove the cover, you put a soft cloth in the diffusers so as not to accidentally drop glasses or any bolts that could fall into the diffuser, get into the timing belt and jam the engine, and then you will remember this bleeding for a long time. In order not to explain which channels need to be blown into and which ones not, blow through all the channels that you see on the plane of the carburetor coupling and on the plane of the cover. Then blow out the holes where the adjustment screws were. This is all we can do without removing the carburetor. Now you can reassemble the structure in reverse order, purging the nozzles before installation and cleaning the tapered adjusting screws. Don't forget to remove the cloth from the speakers.
Separate elements of six carburetor repair
Qualified carburetor repairs are carried out in specialized repair shops and car service stations in the presence of professional stands.
However, some repair work can be done with your own hands if you have basic plumbing skills. Thus, a number of malfunctions in the functionality of the product consist of clogging of fuel lines and small channels of small caliber carburetor jets, incl. and the presence of resin deposits from the fuel composition in them. This can be eliminated by washing the calibrated components and internal surfaces of the product with acetone or its analogues and blowing with a compressor under a pressure of about 4 kgf.
The idle system is most often subject to adjustment work and is usually carried out after traveling 8-10 thousand km. This type of work is carried out by establishing the positions of 2 bolts, the position of one of which determines the composition of the fuel mixture, and the second - its volumetric value. Requirements for starting adjustment: engine temperature – 85-90°C, antifreeze – 90-95°C, cylinder head valve clearances are adjusted, the throttle valve is closed, the ignition timing is determined according to the standard.
- The frequency value of the rotation of the crankshaft with the amount of fuel mixture is set within the range of 0.8-1 thousand rpm.
- The percentage concentration of CO in the exhaust gases using the fuel mixture quality screw is set within the range of 0.5-1.2 cents.
- The rotation speed value that was knocked down when setting the carbon monoxide level is regenerated within the limits of 0.8-1 thousand rpm.
- It is also possible to restore the parameters of CO concentration.
- Next, you need to sharply press the accelerator pedal and then release it from the force. The following picture should be observed: an increase in frequency occurs without interruption, a decrease in frequency leads to the fact that the power plant operates at low crankshaft speeds. If the engine stalls, you will need to re-adjust the engine crankshaft speed with a value of 0.8-1 thousand rpm.
Another common defect is that the VAZ 2106 carburetor does not start for the following reasons:
- if the fuel lines are clogged, it is necessary to pump them with a compressor unit, and the gas tank should be washed and steamed;
- If the fuel pump or carburetor mesh filter components are clogged, they must be cleaned, and if they are defective, they must be replaced.
There is also such a defect in the fuel system of the “six”, when the VAZ 2106 carburetor shoots at If the carburetor and fuel pump are checked and are functioning correctly, then the VAZ 2106 is “to blame” for this malfunction, the glow element of which is dirty or oily. They need to be cleaned, degreased, and, if necessary, replaced.
Sometimes, as an element of modernization of the “six”, a turbine is used on the carburetor, which, with the correct installation of this device, increases the power of the power plant
It is very important to correctly install and connect this device to improve the dynamic performance of the car.
Any VAZ 2106 carburetor, the price of which will differ depending on the manufacturer’s brand, is mounted on a vehicle with basic knowledge of plumbing. Therefore, carburetor installation is easy for car enthusiasts; it is much more difficult to make the correct adjustments to this product.
As a last resort, if the old spare part does not meet environmental requirements, allows increased fuel consumption, does not maintain idle speed and cannot be repaired, the carburetor must be replaced with a new product and then adjusted.
