Even new cars may experience such a problem as power loss during operation. When the car starts, with good wiring, there should be between 14 and 14.8 volts. The error of the problem is minus 1-3 volts. This means that urgent debugging of the wiring is needed so that when the electrical equipment is turned on, the drawdown does not exceed 0.3 - 0.5 volts.
If you bought a used car, you will constantly face the problem of power supply to the headlights. To make the problem less likely to occur, you need to make sure that the wire from the generator housing approaches the battery negative by at least six squares. To prevent oxidation six months after purchasing the car, you need to clean everything on the plus side, and also treat the contacts with a special spray or lubricant.
What you need to know about headlights
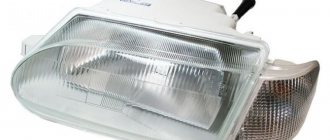
The headlights are connected to the battery by two wires with positive and negative contacts, leading directly to the head light. At the break in the positive wire there is a relay powered by the wires going to the lamps. The cost of a two- or four-pin relay is approximately sixty rubles.
When you press the light switch, the relay is energized. The relay closes and the voltage goes directly, bypassing all contacts, from the battery to the lamp. In this case, a regular lamp will shine as brightly as if you had a + 80% lamp.
You can install it yourself; no special knowledge is required. It is enough to know the basics of physics at the 9th grade level of high school. The main rule is to carefully and tightly insulate all contacts and the relay itself. This procedure, which will subsequently save you a lot of time and nerves, will take no more than half an hour.
You need to understand and find out the reasons why the headlights on the VAZ 2110 and 2114 shine poorly as quickly as possible. Light on the road is the key to your well-being after sunset, and especially in winter, when it gets dark early (and dawn comes late). If bad weather conditions in the form of rain or snow are added to the general theme, then the lack of lighting becomes literally dangerous.
Driving almost by touch means, first of all, risking the integrity of your iron horse: an undetected hole can seriously damage the chassis, or even cause a skid, which is fraught with injuries not only for your car, but also for oncoming/passing people.
Why the headlights on the VAZ 2110 and 2114 shine poorly, you need to look for the reasons until you are completely sure that it is this factor that interferes with proper functioning. Simply changing lamps to more powerful ones does not always solve the problem and may turn out to be an unnecessary waste of money.
Why bad light may occur on a VAZ 2114
To solve the problem, you need to understand all the nuances of the headlights.
Simply replacing headlights may not give the desired effect. In some cases, changing lamps will be a waste of money. Improving the headlights Causes of headlight malfunction:
- One of the most common reasons is dirty windows. Dirt, which may appear on the headlights after prolonged use, can reduce illumination by approximately 50%. It also happens that it is quite difficult to notice any dirt on the headlights. This is due to the fact that they may not be noticeable. How to remove dirt from headlights? This may not be so easy to do, because using a dry rag is prohibited. It leaves small and unnoticeable scratches on the glass that can ruin the glass.
Recommendation. In order to wash the headlights, you need to use a special cloth and detergents. Only in this case will the car owner be able to effectively clean the headlights of all kinds of contaminants. Another way to keep your headlights clean is to install a washer.
- Minor scratches are another common cause of dim headlights. Scratches can appear for a variety of reasons. The thing is that by wiping the headlights with a regular rag or even a glove or some item of clothing, you can actually clean the surface of the headlight, but small scratches will also appear on it. As long as the number of scratches is small, this will not have any serious effect on the performance of the headlights, but after a long time there may be so many scratches that the headlights will be exceptionally dim.
- In some situations, the glass may even burst. There are many reasons for this. In Russia and other CIS countries this can happen due to temperature. If a car enthusiast notices any crack, he needs to remove the headlamp as soon as possible and replace it with a new one. If this is not done, the headlight may stop working while driving. The consequences of unexpectedly turning off the lights can be unpredictable.
- Another reason for deterioration in illumination is the age of the headlight. Over time, the headlights become increasingly cloudy. This is due to the fact that while driving, various small debris, as well as sand and dust, fall onto the surface of the headlight. As a result, very small scratches begin to appear on them. Despite the fact that they are practically invisible, these scratches are capable of refracting light according to the principle of a prism. This is an extremely unpleasant effect. It is because of this that the glass has to be replaced. How to protect the headlight from such unpleasant consequences? In this case, it is recommended to cover them with a special protective film, which can be purchased at a car store.
Tuned headlights VAZ 2114
Glass polishing
Experts recommend periodically polishing polycarbonate lamps to maintain their impeccable appearance. But this procedure should be approached wisely so as not to add damage to the surface.
What is necessary
For high-quality polishing of lighting fixtures you will need the following consumables:
- a couple of buckets of purified water;
- paste intended for polishing lampshades. It comes in two types - abrasive and non-abrasive. Both types will be useful;
- a pair of microfiber cloths;
- several types of sandpaper, the grain size of which will be in the range of 800–2500 units;
- adhesive tape.
Also, when polishing, you cannot do without some tools:
- polishing machines. Many people don’t have a special unit, and the purchase will cost a pretty penny. Therefore, for polishing you can use a drill to which an attachment with a polishing wheel is attached;
- two polishing wheels of different hardness. One of them should be hard, white or orange, and the second should be soft, black;
- a spray bottle from which you will spray clean water onto the circles.
We paste over
First of all, wash the headlight. There should be no grains of sand left on it. After washing, the lamp should be allowed to dry. You can spend this time covering the perimeter of the ceiling with tape. This is necessary so that if the sandpaper slips, the painted body parts adjacent to the lamp will not be scratched.
How to improve the light on a VAZ 2114. Replacing the reflector
The procedure for replacing the reflector is extremely simple. Every car enthusiast can handle it. Action plan:
- First you need to remove the headlight unit. This can only be done with the battery turned off.
- Then you need to remove the glass from the headlight. It is secured with sealant. It is softened using a regular hair dryer. After this, the glass must be carefully pryed and removed.
- The next step is unscrewing the light bulb.
- After this, you need to dismantle the shabby reflector and install a new one. When this is done, the car enthusiast will only have to assemble the headlight in full compliance with the reverse sequence.
We must not forget that before installing the glass it needs to be cleaned, and it is best to degrease the body as soon as possible before applying another layer.
Product change process
Anyone can replace a failed component of the low or high beam system. You will need the following tools:
- awl (thin screwdriver);
- magnet equipped with a long handle (optional).
First of all, to replace you will need to remove the negative cable from the battery. If you do not do this, you may receive an electric shock.
After this, follow the instructions:
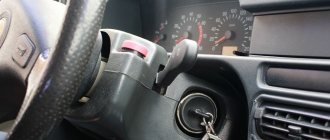
- Open the hood with the car's ignition off. Find the headlight units on both sides of the car.
- Unscrew the protective box of the light source on the headlamp from both sides. After removing the box cover, you will see under it a block with three contacts that are responsible for powering the lighting system, as well as a spring-type holder.
- Disconnect the block, and then, using a squeezing movement of the product fasteners, release the lighting element. You can remove it from the standard mounting location.
To replace and replace with another bright light product, follow the instructions in reverse order.
Dim headlights, causes and how to fix them
There are a number of specific situations in which the headlights may shine dimly:
1.If the headlights were adjusted poorly or incorrectly.
2. If the voltage is too weak.
3. If the headlights are clogged.
4. If the headlight glasses are cloudy.
5. If the contacts come off.
What is the difference between Bosch and Kirzhach headlight adjustment?
The Bosch and Kirzhach headlight models have differences in the engraving on their glasses and also have different reflectors. In general, adjusting the headlights on a VAZ 211 will not have any special differences; everything is done according to the same points listed above. The only thing you can notice are fundamental differences in the operation of these models.
With Bosch headlights, the light beams are dispersed more accurately, giving uniform light and good visibility. And Kirzhach elements provide light pointwise in front of the car and weakly scatter it to the sides.
One headlight burns brighter than the other, reasons and how to fix it
There are also cases when one of the headlights burns much brighter than the other. This happens for the following reasons:
1. One headlight may burn brighter than the other if its contacts have become loose. In this case, you will have to disassemble the headlight to carefully check all the necessary connections and thus eliminate the problem.
2. If one of the headlights is mechanically damaged. Such damage cannot be repaired and can only be eliminated by replacing the headlight.
3. One of the simplest and most common causes of poor headlight light is ordinary contamination of the surface of the headlight. Dirt can be easily removed by wiping the headlight with a wet cloth.
4. If the light bulb has become unusable. In this situation, you just need to replace the light bulb with a new one.
The headlights shine too poorly - we improve the low/high beam on the car
Dim headlights have become a big problem for many car owners. Poor lighting on the highway means you can see only part of the objects along the way and there is no chance of normal, confident movement. Poor quality low beams in the city, especially in wet weather, mean the risk of not seeing a pedestrian on the road or not noticing cars driving without illumination. So it’s always worth remembering what the light on the car should be. There are dozens of options for improving the brightness and quality of the light beam from headlights. Today we will look at some of them. Let us remind you right away that we will be talking about halogen headlights, which are permitted by law. Although xenon improves the quality of light, it reduces safety due to significant blinding of drivers of oncoming cars.
We recommend: How to change valve stem seals in a car?
All-weather lamps
Another test is to overcome adverse weather conditions. Such lamps have a special coating on the main surface that transmits light; it colors the light in a yellowish tint, which allows the light to remain contrasting in bad weather conditions.
All-weather lamps H4
PHILIPS h4 weather vision, NARVA h4 azuro, GENERAL ELECTRIC h4 oldey, IPF h4 superbeam are the manufacturers that were tested.
The first parameter (high beam), Philips and Gerenard Electric devices are almost equally good.
In the low beam test, Phillips beats its high beam category neighbor to become the sole winner.
The low beam is dim, reasons and how to fix it
Today, there are traffic rules according to which every car owner is required to drive with low beam headlights on during the day. Continuous use of lighting can significantly increase the risk of breakdown. There are several causes of malfunctions and they are all quite different:
1.If there are problems with contacts. Often, oxidation damages a headlight. In this case, you need to pay attention to the mass under the hood and the console. Check the headlight terminals carefully as they may become loose from the mounting components. The natural process of oxidation occurs due to moisture entering the contacts. To prevent this, it is necessary to treat the contacts with silicone grease.
2. In many cases, clouding of the headlight can occur due to its long-term use. Therefore, if regular cleaning of the headlight does not give any result, you need to replace it.
3. If the headlight bulb is out of order. In this case, replacing the light bulb is the only solution.
If the problem is with the light bulb
Sometimes the reason why the headlights don't shine is so obvious that you have to do very little. It’s worth remembering: if the light doesn’t work well at home, the first thing we do is check the light bulb installed in the lamp. The same logic should apply to a motorist who is faced with poor performance of lighting fixtures in a car.
Problems with the light bulb can only be eliminated by replacing it. This procedure occurs differently on different cars. However, most often it does not cause car owners a lot of trouble.
How to adjust headlights, work progress step by step
If the headlights are not adjusted correctly, this can cause headlight problems. Correctly adjusting headlights is a very delicate process, however, it is very important and extremely necessary. Very often, it seems that small differences in the angle of the light flow are not capable of creating discomfort for the driver, even when driving on unlit roads. However, as practice shows, not only the health, but also the life of the car owner can depend on the correct setting of the headlights.
If your headlights are not adjusted correctly, you will dazzle motorists passing you, often leading to head-on collisions. Most drivers do not notice that the headlights are scattered; this can occur even with completely invisible damage to the bumper, although it is difficult to notice visually.
To check the direction of the light, just drive up to the wall in the dark. Deviations from the norm can be determined by eye. If there are discrepancies, adjustments should be made. Of course, you can contact a workshop or specialized service center, however, you can adjust the headlights yourself.
What does that require? A flat area, for example, the area in front of the garage is suitable for this. One side of this platform should rest against a vertical wall without corners or various irregularities.
On the wall you need to draw a line with chalk dividing the vehicle into two identical halves. The easiest way to do this is to drive the car close to the wall and determine the middle. Then you need to turn it back. For subsequent marking of the wall, you will need to know the distance from the lamp to the ground and from the center of the vehicle to the lamp. Now we draw another line on the wall, but five centimeters lower than the first. We measure the distance from the center of the car to the lamp and from the center of the lamp to the ground. The center of the headlight is the intersection of both lines.
Now let's move on to the adjustment. To do this, we drive the vehicle seven meters back and turn on the headlights. It is necessary that the angle of the headlights coincides with the line we drew. In addition, the place where the light spot goes up must coincide with the lines that intersect.
Step-by-step adjustment of optical devices
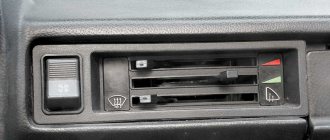
You can improve your headlights yourself using screws. For this, screws are used that are responsible for the horizontal and vertical planes. By making rotational movements using screws, you can quite easily change the position of the optical device. At service stations, technicians use optical instruments for this event, and a special screen will help car owners with self-adjustment. The process of improving headlights is recommended to be done in the following sequence:
We improve the headlights on a VAZ-2114 with our own hands
In order to actually improve the glow of the headlights, you can try installing new lamps from PHILIPS or OSRAM manufacturers. Some lamp models have the highest degree of luminescence, which will allow the road to be illuminated most clearly.
Thanks to this visualization, you can clearly see how the above-mentioned headlights shine.
Polishing headlight glass
The following two tabs change content below.
An expert on Lada cars with many years of experience. I own a Lada Granta car, I collect cramps based on the Priora. Sometimes I stay overnight in the garage. My wife is more jealous of cars than of women.
Also, budget-friendly ways to improve the glow of headlights include cleaning and polishing the glass. You can do this either on your own using special kits, or contact a specialized workshop. Inspect the reflector for integrity, because after five years of using the car, it could become rusty.
Due to such deposits, not a single headlight will shine normally.
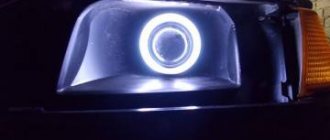
Installation of tuned headlights
For cars of the Samara and Samara-2 family, similar sports headlights are provided, in which the low and high beam are separated from each other, and an additional lens is mounted, which will provide a much clearer and more even light output. A budget option for such a headlight, making and modifying it yourself.
Such a headlight not only shines well, but also looks better.
Reviews
| № | Positive |
| 1. | Kirill , 33 years old: after buying the car from the dealership there were no problems with optics. Incorrect lighting began after a collision on the highway. I had to adjust it with hydraulic correctors. It’s not at all difficult to figure out the sizes and angles of lighting on your own. |
| 2. | Vitaly , 41 years old: recently replaced the standard lamps with halogen ones, the accuracy of the light beam has dissipated. The regulator in the cabin did not cope with the task, even in position “2”. I adjusted it using hydrocorrectors on each of the headlights. It turned out to be good light. |
| 3. | Vladlen , 33 years old: despite the fact that the body geometry was restored after the accident, the low beam lost its accuracy. Thanks to hydrocorretors, I restored the light beam. |
| 4. | Vasily , 38 years old: I work as a taxi driver, I often drive at night. In general, the lighting of the Lada Grant is good and accurate, but after the repair all the settings were lost. I had to restore it myself using standard hydraulic correctors. |
| 5. | Mikhail , 42 years old: I can say that the lighting quality of the Lada Grant is good, far from ideal, but better than that of the Priora and Vesta. Sufficient for daily needs, those who want to improve performance can install xenon. |
| 6. | Gennady , 44 years old: I work as an entrepreneur, I drive most of the time. The accuracy of the low beam light beam is enough for me; the road and the right side of the curb are illuminated. During all this time I only adjusted it with hydraulic correctors a couple of times. |
| 7. | Valentin , 42 years old: after a major overhaul of the car last year, I slightly adjusted the high beam. The violation may be related to the accident. In all other respects, no comments. |
| Negative | |
| 1. | Victor , 34 years old: I don’t like the standard head lighting, it’s weak and dim. The adjustment doesn't help much. After installing xenon there are no problems, the road and side of the road are always under control. |
| 2. | Alexander , 36 years old: bought the car second-hand, second owner, good condition. I replaced the head optics with xenon, I’m happy with the quality, the clearance is excellent. My advice to motorists. |
| 3. | Konstantin , 32 years old: Lada Granta has a problem with high beams, similar to Priora and Vesta. Nothing has been changed. I installed additional headlights myself. |
Conclusion As for the Lada Granta, a car in the mid-price segment, the lighting is good, it is quite enough for daily use. Anyone who wants to see the road a kilometer ahead should install additional lighting.
To complete the data, read the recommendations and operating instructions (https://www.lada.ru/cars/granta/sedan/manual.html). The adjustment mechanism is similar to the Vesta and Priora models.
How to solve the problem of dim car headlights
During the operation of the car, problems may arise in the operation of the head optics, the lighting intensity of which decreases, which makes it difficult to use the car at night. We will tell you in more detail how to improve the headlights, which will ensure safe driving at night.
We polish optics
Over time, numerous micro-scratches and other damage may appear on the headlight glass, which leads to cloudy headlights. As a result, the light intensity deteriorates, and it is not possible to solve this problem simply by cleaning the headlight glass.
With such clouding of the headlights, it is necessary to replace the glass or polish the optics, which will return the glass to its original transparency. Such polishing is not particularly difficult, so every motorist can do it. This work can be done manually using fine sandpaper, or with special grinders that use working wheels of varying abrasiveness.
When performing such polishing manually, the car owner will need to purchase several sandpapers with coarse and fine grains. They begin work with coarse abrasive sandpaper, after which they move on to using fine-grained sandpaper. Such work will make it possible to remove the surface layer of glass or plastic, returning the original transparency of the optics and completely solving problems with reduced light intensity.
Changing headlight bulbs
Over time, the performance of the bulbs used in headlights can deteriorate, resulting in reduced lighting efficiency. Solving this problem will not be difficult. You just need to purchase new light bulbs and replace them in the headlights yourself. On most cars, this work is not difficult. In this case, it is not necessary to remove the headlight itself; you just need to disconnect the power wire from the lamp and, by turning the socket 90 degrees, easily remove it from the socket and replace the dimmed light bulb.
Remember that it is recommended to carry out all work with clean gloves, and you should not touch the light bulb with dirty hands. Tiny droplets of grease may fall onto the glass, which will subsequently disintegrate during headlight operation, leading to mechanical damage to the light bulb.
Installing xenon and bi-xenon
Many car owners are not satisfied with the intensity of the standard light. Indeed, in order to save money, automakers install the simplest lights on their cars, which do not provide high-quality illumination of the road at night. This problem can be solved by using xenon and bi-xenon, which can be easily installed in the basic optics of a car.
Bi-xenon and xenon provide high-quality illumination of the road surface, while the light bulbs themselves and the control units necessary for their operation are affordable. Replacing lamps is not particularly difficult. In specialized auto stores you can purchase ready-made kits of lamps and control units, the installation of which can be carried out independently.
If you doubt your abilities and have no idea about the structure of the car’s electrical network, then you can easily contact specialized workshops where you will be offered inexpensive and high-quality services. The cost of such headlight polishing today is not too high, which allows all car owners, without exception, to take advantage of the offer of specialized service stations and restore the performance of the car's head optics, without increasing the cost of operating the car.
Replacing the diffuser and glass in stock optics
Replacing the lens and damaged or cloudy headlight glass will solve problems with dim headlights. Such work is not particularly difficult and, with proper skill, every car owner can complete it. You just need to remove the headlights from the car, use an industrial or household hair dryer to warm up the original sealant, disassemble the optics, replace the lens, lamps and glass, and then reassemble the headlight using the sealant in the reverse order. Such work allows you to radically improve the headlights, while the costs for the car owner will be minimal.
Solving the problem of condensation inside the headlights
The appearance of condensation inside the headlight can also lead to problems with the quality of lighting at night. Moisture that gets inside the headlight will invariably fall out in the form of condensation, which reduces the effectiveness of road lighting at night. Moisture gets inside the headlight due to a leak in the seal. It is necessary to carry out the appropriate inspection of the optics, identify existing damage and carry out the necessary repairs. As a rule, you have to either replace the damaged glass or use a sealant to restore the seal of the optics, which in turn will solve problems with condensation.
Remember that you should not delay repair work, as the presence of condensation inside the headlight can lead to deformation, and in the future it will be impossible to repair such damaged optics. The car owner will need to purchase a new set of headlights, which will lead to a significant increase in the cost of operating the car.
Installation of new high-quality optics
This is a radical and expensive way to solve problems with dim headlights. Today you can find various models of headlights on sale, including tuning options that use bi-xenon or ice light and allow you to provide the highest quality illumination of the roadway. Car owners will be able to easily select such new, modernized headlights for their car, and subsequent replacements will not present any particular difficulty.
Let us only note that headlights built on ice technologies have a high cost, which is explained by the complexity of the design and the need to install additional control units for the operation of head optics. Therefore, most car owners, if they replace standard optics with modernized ones, then choose xenon or bi-xenon, which both combine the quality of road lighting and have an affordable price.
How to check voltage with a multimeter
Low voltage may result from problems with the contacts or the generator. If the light of the lamps is poor due to the contacts, there is no need to change them to more powerful ones, as the contact area may overheat. You can check the voltage using a special device - a multimeter. Based on its results, it will become clear where the breakdown occurred and which part needs to be replaced.
In addition, it is worth saying that if the reflector coating has peeled off, dirt and dust will get into the headlight. As a result of dust entering, the light is scattered. In this case, replacing the lamp with a more powerful one will not give any result. This requires a complete replacement of the headlight, although such an operation is not cheap.
Adviсe
- Disconnect the negative battery cable.
- Do not replace while the engine is running.
- Maintain the time from the moment the lamp is turned off, as it has a high degree of incandescence.
- Remove the lamp without jerking or pressing, as it often bursts into small particles with a scatter that is dangerous not only for the eyes.
- Do not create congestion by stopping on the roadway or shoulder as a result of an unexpected loss of light. Continue to the nearest service point.
- Do not overuse the installation of xenon lamps. These blind drivers of oncoming cars, aggravating the occurrence of road accidents. By the way, in some CIS countries these are prohibited.
Bottom line
Many of the listed ways to improve headlights can be implemented independently. However, if in doubt, it is better to visit a specialist who will tell you what can be done. Or simply replace the module, although this will slightly cut the family budget.
Therefore, each car enthusiast decides for himself what to do. Just remember that incorrect lighting leads to various consequences, sometimes even tragic. Your life and the safety of others is priceless.
Sources
- https://remontvazov.com/kak-uluchshit-svet-far-na-vaz-2114
- https://AvtoKart.ru/diagnostika-i-remont/kak-uluchshit-osveshchenie-far.html
- https://carfrance.ru/vaz-2114-ploxo-svetyat-fary-chto-delat-nizko-i-ne-vidno-dorogu/
- https://GTshina.ru/pokupka-avto/vaz-2115-kak-sdelat-svet-yarche-kak-uluchshit-svet-far-avtomobilya/
- https://carfrance.ru/kak-uluchshit-svet-far-vaz-2114/