Print this article Font size 16
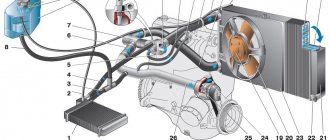
VAZ 2109 cars use a liquid cooling system, which includes a block jacket, a liquid pump (pump), pipes, an expansion tank, a thermostat, a temperature sensor and two radiators - the main one and the interior heating system.
Although this system performs a serious function - maintaining the optimal temperature regime of the power plant, all elements are structurally quite simple.
One of the most common problems with this system is bursting or jumping of pipes and radiator leaks. Less often, but it also happens that the thermostat gets stuck in one position, the temperature sensor malfunctions, and the pump fails.
Purpose and design of the pump
The water pump is the most important element of the engine cooling system. Its main function is forced circulation of coolant through two circuits - small and large. On an unheated engine, antifreeze circulates in a small circle - from the water jacket of the engine to the radiator of the cabin heater and the carburetor cooling unit (or the throttle valve on the VAZ 21099 injector). When operating temperature is reached, the thermostat opens a large circuit and coolant begins to circulate through the main radiator.
The water pump impeller, driven by the timing belt, forces antifreeze to circulate through the cooling system.
If the pump fails, the movement of coolant through the channels will stop, and the engine will inevitably overheat. Aluminum pistons expanding in volume will damage the cylinder walls and compression will be lost. In this case, a major overhaul of the engine will be required, which is several times more expensive than the cost of a new pump.
The water pump has a fairly simple device
The VAZ 2108 water pump consists of a housing with a flange attached to the cylinder block with three bolts. Inside the pump, a shaft with an impeller and a drive gear in the form of a toothed pulley is installed on bearings. To prevent antifreeze from flowing out through the pump shaft, the device is equipped with an oil seal.
The service life of the pump depends on the performance of two parts - bearings and oil seal. As soon as one of these elements fails, it must be replaced or repaired.
Roller bearing life determines pump longevity
When do you need to change timing rollers?
Most motorists cannot determine in time that the timing belt rollers need to be replaced. It's not the motorists' fault. After all, most of them are accustomed to the fact that the on-board computer informs the driver about the need to replace consumables. It processes data received from various sensors. If necessary, displays a corresponding notification on the dashboard.
In most foreign cars, it is the on-board computer systems that monitor the general condition of the engine. But in this case, the car owner will have to monitor the technical condition of the consumables. The VAZ 2109 does not provide any kind of on-board computer. Everything is the old fashioned way here!
Therefore, you should listen to experienced owners of a car of this model! They recommend replacing rollers when the following symptoms appear:
- When the engine starts, a whistle is heard, after which the smell of melted rubber may come from under the engine compartment shield.
- At high engine speeds, a sharp drop in speed may occur. In ordinary cars, this may indicate some kind of malfunction in the gearbox. However, in the VAZ 2109, this indicates an idle rotation of the rollers, during which the shaft rotation speed drops.
- While driving, a metal grinding sound is heard from under the hood. This happens because the rollers are jammed. As a rule, this happens when they are over-tensioned, or the spacer rings and washers are worn out. In this case, you will also have to replace the rollers, since if such parts are damaged, the roller itself is damaged. Therefore, you will have to replace them with a set. There is an important thing to consider here: additional timing roller parts are not sold separately. They can only be purchased complete with a set of rollers.
- Also something to consider! In the case of an installed modification shield, the motorist will have to spend a much more impressive amount than 3,500 - 8,000 rubles.
- If noise is heard when the engine is running, and when removing the protective casing, the owner sees that when the engine is running, the belt moves not only in a circle, but to the sides along with the roller, then an urgent replacement is necessary.
- If you hear a squeaking sound when starting the engine, then most likely the cause will be either excessive tension on the rollers or damage to their bearings. In this case, it is necessary to urgently remove and check. If during inspection it is discovered that the bearing moves with play, or lubricant is leaking from it, then it must be replaced. Fortunately, the cost of bearings varies from 145 rubles to 356 rubles.
- If, when inspecting the engine, oil smudges are found on the belt, it means either the bearing is leaking or the attachment rings have ruptured. As a result, lubricant from the roller bushings got onto the belt.
We recommend: Lada Vesta head unit - price, replacement, connection and pinout
Don't be lazy, in this case it is best to carry out a detailed inspection of the rollers, belt, shaft gear, generator gear. It will take about 30 minutes and can save you up to 50,000 rubles. Since ignoring problems with the timing system can completely damage the engine.
The cost of restoration work on the model 2109 engine varies from 45,000 rubles to 78,000 rubles.
modified timing shield
regular timing belt
option of a modified timing system panel
There are also cases of installing a special double chain instead of a rubberized belt. As a rule, for the operation of this type of system, the installation of a turbine is necessary. Otherwise, it will not have enough power to rotate the chain. Since the chain requires 0.56 times more power to operate than a standard engine produces.
As you can see, the modified timing shield is slightly wider than the usual one. This change in design is due to the presence of an additional number of timing belt tension rollers. As a result, the size of the shield increases.
The modified shield is installed in the form of an overhead panel on the engine. In this case, all gears are removed. Their bushings are inserted into special grooves on the panel. Then the gears return to their place. The panel itself is fixed with 5-8 bolts, depending on the model.
To avoid serious problems and any malfunctions in the engine, you should replace the rollers on the VAZ 2109 in a timely manner. The manufacturer recommends updating these consumables at intervals of 40,000 - 50,000 kilometers.
The actual condition of the rollers must be checked every 19,500 kilometers.
Compliance with intervals:
- checks;
- replacements.
Allows you to extend:
- timing belt service life;
- the operation of the entire engine as a whole.
It is worth considering the following things that affect the wear of timing rollers:
- use of low-quality bearings;
- the car owner uses rollers from one manufacturer and bearings from another;
- use of low-quality lubricant for roller bushings;
- excessive tension on the rollers, as a result of which excessive pressure is exerted on them - this can lead to their breakage;
- use of parts made from low-quality materials.
Pump location
The water pump is installed on the right (in the direction of travel) side of the engine under a plastic cover. There is also a gas distribution mechanism that drives the pump toothed pulley through a belt. This arrangement creates a number of problems.
- To inspect the pump you have to remove the plastic casing.
- Due to a leaky seal and a small leak, antifreeze gets onto the belt, which quickly fails.
- If the bearing is severely worn, the shaft may jam, and the timing belt may jump off or break. In 90% of cases this leads to pistons hitting the valves, and subsequently to expensive repairs.
The coolant pump is installed on the right side of the engine
For these reasons, it is necessary to periodically (every 10–15 thousand kilometers) inspect the gas distribution mechanism for belt tension and pump performance.
Reasons for failure
A centrifugal pump does not always survive until scheduled replacement, since there are many other reasons for its failure. First of all, the malfunction is a decrease in the level of antifreeze in the system, which often happens when the oil seal is damaged. The reasons for this may be the following:
- sudden changes in temperature;
- contamination, for example, liquid dirt that accidentally gets under the hood;
- rare changes of antifreeze (it may contain a lot of oil and combustion products);
It is possible to detect oil seal leaks by characteristic leaks that are visible during external inspection. If you notice a knocking sound from this unit, this may indicate bearing failure. With this symptom, it is necessary to immediately replace the VAZ-2109 pump, since driving such a car can lead to jamming of the pump or displacement of its shaft.
The following signs may indicate that the pump is faulty:
- traces of antifreeze on the ground after parking the car;
- Howling sounds are heard while the engine is running;
- engine overheating (usually this happens due to rotor failure).
If you are not sure whether to replace the pump, it is advisable to feel the upper hose going to the radiator. If it is warm, then it is necessary to urgently replace the failed part.
When you change the timing hose, remove the casing from the unit and inspect it for integrity. In some cases, the water pump fails due to defects or cracks in the housing.
Troubleshooting
Malfunctions of the water pump on front-wheel drive VAZ models manifest themselves as follows.
- Extraneous noise appears on the right side of the engine, increasing with increasing speed.
- Traces of coolant (not to be confused with engine oil) form near and under the timing belt assembly.
- A puddle appears under the car, and the level of antifreeze in the expansion tank drops noticeably.
- The electric cooling radiator fan turns on more often than usual in any weather.
The protective cover is attached to the engine with three bolts
Practice shows that most car enthusiasts discover the problem at the penultimate and final stage of wear, when the antifreeze has already leaked to the ground or the pump shaft has jammed.
It is quite difficult to clearly identify the sound of worn water pump bearings against the background of a running engine. The problem is compounded by noise from other faulty components, such as knocking valves. Therefore, at the first suspicion, you should remove the plastic timing case by unscrewing three bolts with a 10mm wrench and diagnose the pump as follows.
- Carefully inspect the area around the water pump gear and timing belt for traces of coolant.
Traces of coolant under the pump indicate an antifreeze leak
- Look at the position of the toothed pulley relative to the other gears and the plane of the steel casing. It shouldn't be skewed.
After complete wear of the bearing, the pump shaft may become distorted.
- Try rocking the gear along the shaft axis with the belt tense. If this succeeds, the pump must be dismantled.
- Loosen the tension roller and timing belt and rock the shaft. If play is detected, move the belt and turn the pulley by hand. It should rotate easily and silently.
These symptoms can appear individually or simultaneously. You can detect oil seal wear when the bearings are working (there are traces of antifreeze, but there is no shaft play), and vice versa. In any case, the pump should be removed and, if necessary, disassembled or replaced.
The method for identifying a faulty water pump is the same for versions of a car with a carburetor and an injector; there is no difference.
Video: operation of a faulty pump
Necessary equipment
To carry out the work of replacing the liquid pump on a VAZ-2109, not much equipment will be required. All you need to have is:
- Open-end and ring wrenches for “10” and “17”;
- Heads with collars of the same sizes;
- Powerful flat screwdriver;
- Knife;
- Container for draining working fluid;
- Rags;
- Sealant;
- Jack;
- New liquid pump and gasket;
It is also better to carry out all work in the garage. Having collected the necessary tools and purchased a new pump, you can begin the replacement.
Installing an additional pump
The disadvantage of the first front-wheel drive VAZ cars was the poor performance of the interior heater. Until the engine warms up to operating temperature, the cabin is cold. This is due to the design of the small circulation circuit, into which coolant enters in small quantities. The problem is solved by installing an additional electric pump from GAZelle.
An additional electric pump is installed in the stove pipeline
To install an electric pump, you must purchase:
- four-pin relay;
- multi-core wires and a two-pin connector;
- fuse socket;
- hoses and clamps for connection to the cooling system;
- electric pump from a GAZelle car.
The pump is placed on a homemade bracket, screwed to one of the bolts on the mounting flange of the gearbox. The antifreeze is first drained and the thermostat is removed, which will interfere with the installation of an additional pump. This is especially true for the injection model VAZ 21099.
To turn on the pump, a small circuit with a relay is assembled
The insertion is made into the return pipe coming from the cabin heater. In this case, the electric pump will create a vacuum in the heater radiator. To turn on the pump together with the ignition and from a separate button, a simple electrical circuit is assembled. A relay with a fuse is placed in the cabin under the dashboard, and any free button is selected as a switch.
Help in choosing a timing belt and rollers
The reliability, efficiency and operating life of the motor depend on the quality of the rollers and belts chosen for replacement.
Research shows that the cost of a belt is from 450 rubles, and rollers will cost you at least 600 rubles.
When buying spare parts, be guided by the opinions of VAZ 2110 car owners. There are many forums. Also consult with specialists at the service station. They will be able to give professional advice, or even order quality components for you.
Surveys among owners of AvtoVAZ’s creation, namely the VAZ 2110, showed that the most popular belts are products manufactured by the following companies:
- Gates;
- Bosch;
- Kraft;
- Power Grip;
- Dayco;
- Contitech.
As for videos, it’s better to pay attention to the following brands:
- Gates;
- Power Grip;
- VPZ;
- BRT;
- Dayco;
- Marel.
Of course, the choice is purely individual and depends on the financial capabilities and available assortment of a particular store. But if the necessary elements are not available in your city, you can always order them online. Nowadays this is not a problem.
Timing belt price
Separately, a timing belt on a VAZ 2112 costs about 1,000 rubles. However, all drive elements should be replaced at the same time. This will make it more clear what the shared resource is. The cost of a set, including a belt and 2 rollers (tensioner and support) is about 2500-3000 rubles.
At service stations they can charge you from 800 to 1200 rubles for replacing a kit.
To save money, you can replace the timing drive kit on a VAZ 2112 yourself, but first you need to choose the right spare parts. The table below shows several types of kits from trusted manufacturers, indicating catalog numbers
Manufacturer's recommendations
- Your primary task as a car owner is to periodically visually inspect the unit.
- In addition to replacing the element, it is necessary to simultaneously replace the tension rollers.
- VAZ 2110 comes with 8 and 16 valves. The replacement process also depends on this. So, in an 8-valve valve, one tension roller is installed, and in a 16-valve valve, a support and a tension roller are installed.
Replacing the timing belt of a dozen is not difficult. It is not necessary to contact specialists. It is quite possible to do it on your own.
Set of tools
To complete the job of replacing the timing belt you will need:
- A set of spanners and open-end wrenches;
- Mount;
- Screwdriver Set;
- A special key with which to tighten the roller or simple pliers with curved rings;
- Car jack;
- Rags, protective gloves.
Many people ignore the advice on using gloves. Especially in the summer when it's hot. But they are needed to protect you from injury.
There is no need for an inspection hole. You will need to remove the right wheel to remove the timing belt if your Ten is equipped with power steering. So you can't do without a jack.
Visual belt check
Before replacing the timing belt on a VAZ 2110 8 valve, it is necessary to inspect it. It is carried out after a run of 15 thousand km.
Tools are prepared for this:
- keys: overhead and open-end.
- different types of screwdrivers;
- a mount is required;
- pliers with special jaws for proper installation of the roller;
- jack.
The check consists of the following points
- There is a special plug on the front protective timing cover that can be removed.
- The belt is removed from the generator pulley. This is important for ease of use.
- The timing cover is held in place by 6 bolts that need to be unscrewed.
- The belt opens. He is visually inspected.
We recommend: You can find money at a pawnshop
Do-it-yourself replacement of the VAZ 2110 8-valve injector timing belt is carried out in the case when all defects are clearly visible.
service-193 › Blog › Almost retro. Replacing the pump on a VAZ-2109
Replacing the pump on a VAZ 2107
Sometimes we get our hands on cars of a rather archaic design. This time the car turned out to be a VAZ-2109 with a carburetor engine and a complaint about leaking antifreeze. An inspection showed that the water pump (aka water pump) was loose and leaking, and therefore needed to be replaced. Although the Internet is full of manuals on this topic, mine will obviously be the best. Let's go.
We jack up the car, take off the right front wheel, and open the hood. The timing belt cover has already been removed during the diagnostic process, so we are not considering its removal. By the way, it can be seen that the belt is positioned on the gear a little crookedly. Apparently, some misalignment is already present:
We need to remove the timing belt, since the pump is driven by it. Before removing the belt, you need to align the camshaft and crankshaft to the marks. Here is the camshaft mark:
The crankshaft mark is more difficult. In principle, you can look at the mark on the flywheel through the window on the gearbox. But in our case, the mark there was clearly out of step with the mark on the camshaft, and it was decided to follow the mark on the crankshaft gear. To access it, you need to remove the alternator belt (unfortunately, it’s not included in the photo, but how to do this is also described in many places). After this, you need to unscrew the bolt and remove the pulley from the crankshaft. We had a cheat code in the form of an air impact wrench, but if there is none, then the simplest thing is to engage fifth gear and hold the brake while the second participant in the process unscrews the bolt. Another option is to lock the flywheel through the same window that has already been mentioned.
After removing the pulley, you need to make sure that the mark on the crankshaft gear matches the mark on the housing (the point on the gear in the upper part opposite the cutout):
If the mark does not match, you can screw the bolt into place (without installing the pulley) and rotate the crankshaft using it.
After this, you can loosen the tensioner. To do this, you need to unscrew the nut circled in red a little (literally a turn or two):
That's it, the belt can be retracted:
It would seem that here it is, the pump under the tensioner pulley, remove it and go. Alas, everything is more complicated. The pump body is covered with a metal plate of complex shape. This plate prevents the pump from being removed. And to remove the plate you need to remove the camshaft gear. Why this was done is not known for certain, but I cannot call this decision correct. So, we fix the gear with something (you need to insert some kind of screwdriver into the slots on the gear, and ideally a special pulley clamp), and unscrew the bolt. In our case, the gear came off the shaft quite easily. If it comes off with difficulty, you can try passing a rope/wire through the same holes and try to pull it towards yourself - as a rule, it helps to make dismantling easier. The main thing is not to lose the key. This is what the shaft looks like with the gear removed (it is clear that the camshaft oil seal is leaking, it is recommended to change the belt the next time you replace it):
The gear itself (the groove for the key is visible):
Now you need to unscrew the plate. It is mounted on a stud (you need to unscrew one nut next to the camshaft), on one bolt nearby, and three more bolts securing the pump. You need to unscrew all of them, and then try to pull out the plate:
Alas, we were unable to remove it without any complications. I had to unscrew one engine mount:
After that, jack up the motor and play the puzzle by turning the plate out in the appropriate way. After this, you need to remove the pump in the same way. It is held on by the same three bolts, as well as on a gasket that has become stuck over the years, so to move it out of place, you will need the intervention of a screwdriver. In this case, about three liters of antifreeze will spill out; it is recommended to substitute a basin. It’s no easier to pull it out than a plate, but here’s the result:
Camshaft oil seal from a different angle:
Old pump (completely uninformative photo):
After that, all that remains is: 1) Clean the pump seat. 2) Show miracles of resourcefulness by putting it and the plate in place. 3) Reassemble everything in the reverse order. 4) Tension the belt with the correct force (we overtightened it out of habit, of course). The criterion for correct tension is that the belt is pressed quite freely with your finger on a long branch (straight between the camshaft and the crankshaft). 5) Completely assemble everything, fill in antifreeze, start the engine with the expansion tank cap open, make sure there are no air pockets in the system (the thermostat opens, the radiator warms up , the fan turns on).6) Joyfully go about your business.
This is an excursion into history. But just fifteen to twenty years ago, the average car owner could do this procedure without any instructions! Such is the change of era. In fifteen years, we will be drawing up instructions on what a car without an autopilot is and how to drive it manually.
How to remove a fluid pump
To dismantle you will have to perform the following steps:
- Remove the bolts that secure the timing case. Remove this cover.
- On the camshaft gear, you need to align the mark with the protrusion, which is located on the left side of the engine housing. To do this, you need to use a jack to raise the right side of the car, then, with fifth speed engaged, rotate the wheel to align the marks.
- Be sure to align the marks before removing the drive belt. This will make further assembly easier.
- Using a key set to “17” you need to unscrew the nut that secures the tension roller. After this, you need to remove the belt and put it aside. The roller also needs to be dismantled. If you do not plan to replace the timing belt, there is no need to remove the crankshaft pulley.
- After this, you need to disconnect the negative terminal of the battery.
- Now remove the ignition module; there is no need to disconnect the wires.
- Unscrew the bolt that is located in the engine cooling jacket. Drain the liquid. Be sure to unscrew the cap of the expansion tank; without this, the liquid will not pour out.
- Next, you need to completely remove the metal casing. To do this, unscrew the 5 bolts securing it.
- The pump is secured to the engine block with three bolts. They must be unscrewed using a key to “10”. It is first necessary to tap the housing to facilitate dismantling the unit.
The pump seat on the engine must be thoroughly cleaned so that there are no traces of sealant or old gasket left there. It is advisable to replace the timing belt and pump on the VAZ-2115 at the same time. This will make repairs easier.
Final work
Having finished tensioning the belt, we assemble all the components in the reverse order:
- The drive pulley is installed.
- Securing the alternator belt with tension afterwards.
- Installation of timing belt protection.
After this work is completed, fill the system with coolant, install the wheel and lower the car.
Sources
- https://prometey96.ru/ustrojstvo/pompa-vaz-2109.html
- https://ladaautos.ru/vaz-2109/pompa-na-vaz-2109-kak-ee-zamenit.html
- https://scart-avto.ru/remont/zamena-remnya-grm-na-vaz-2109-kak-pravilno-pomenyat-detal/
- https://motorchina-online.ru/marki/kak-pomenyat-remen-na-vaz.html
- https://portal-mashin.ru/lada/zamena-pompy-lada-2109i-vaz-2109i.html
- https://carnovato.ru/zamena-pompyi-vaz-2109/
- https://luxvaz.ru/vaz-2109/180-zamena-pompy.html
- https://paradiz-nt.ru/karbyurator/zamena-remnya-grm-vaz-2109-karbyurator.html
Quick replacement of the pump on a VAZ 2109
If your pump (water pump) is broken and you have no idea how to change it, then we will teach you. Replacing the pump on a VAZ 2109 is not difficult, but first you need to find out whether it really is out of order. It's done like this:
- start the engine and warm it up to operating temperature;
- compress the upper radiator hose.
If you feel that the water is circulating, it means the pump is intact. If not, then it’s broken.
It often happens that there is no need to change the entire pump; you can get by with changing the seal. And to find out if the oil seal is okay, you need to do the following:
- find the control and ventilation hole of the pump;
- look at it.
If liquid leaks from there, then the seal is worn out. You can verify this by removing the GPM cover and performing a more thorough inspection. If brown deposits have formed around the hole, then our assumption turned out to be correct.
Well, if while driving you hear howling sounds or the pump rattles and jams, and a visual inspection does not reveal any defects in the pump, then you will still have to remove it. It is possible that defects have appeared on the side of the rotor that is not visible.
Replacing antifreeze
Now it’s worth saying a few words about antifreeze. Its additives disappear or become unusable within about two years of vehicle operation in average mode. And on average a car travels 35-40 thousand per year. Subject to daily use of transport. This means that at 80 thousand you need to carry out How often do you follow this scheme? Therefore, with each pump replacement it is recommended to fill with fresh antifreeze. And in the best case - flushing the entire system and blowing it with compressed air. For washing you need to use clean water and a special liquid. It can be purchased at any auto parts store.
Assembly nuances
When returning drive belt 2109 to its place, make sure that all marks on the crankshaft are in the correct position. If they move, you will have to spend additional time adjusting both the ignition and the gas distribution system.
When the tension roller is put in place, do not forget to also make sure that the belt does not dangle on it.
Sometimes, after the reassembly is completed, the car does not want to start or starts poorly. This symptom indicates that the belt is installed incorrectly. To fix the situation:
- remove it from the gear;
- turn it literally a couple of millimeters;
- put the belt back in place.
