Nowadays, the question of which running lights is best for Kalina is quite relevant. Since November 2010, all vehicles are required to drive with low beams or fog lights on during the daytime. In accordance with the changes made to the traffic regulations, daytime running lights (DRLs) can be used. After the adoption of this resolution, car owners encountered certain difficulties. In the first place was the problem of forgetfulness: people did not turn on the lights due to lack of habit. Sometimes they forgot to turn them off.
And if in the first case, traffic police officers initially tactfully reminded about the rules, then in the second, discharged batteries caused extremely negative emotions among vehicle owners. When changes were made to the rules and daytime running lights were allowed for use, some car owners of Lada Kalina and other brands attempted to resolve the issue using homemade devices, various lamps and components from commercially available LEDs.
A variety of homemade devices of various types and qualities have appeared. But the changes made to GOST strictly regulated the requirements for DRLs. Manufacturers of lighting devices for motor vehicles did not miss their chance, and a variety of daytime running lights from various companies appeared on sale.
How to replace the lamps yourself
Changing a light bulb in Kalina yourself is not difficult. The time spent on the work depends on the skill of the driver and the size of the hands. Some owners change light fixtures in 15-20 minutes without removing the headlight, while others suffer for more than an hour and ultimately dismantle the optics.
When replacing, cloth gloves are used. This helps protect the skin on your hands and also prevents contact with the bulb. When touched, fingerprints remain, which heat up when the light is turned on and after a while burn through the thin glass.
Far module
Replacing the high beam lamp is easier than in the low beam module, since the cover is located closer to the radiator grille.
To perform the operation you will need:
- Turn off the Kalina engine.
- Open the hood lid.
- Remove the protective boot on the back of the flashlight.
- Carefully disconnect the plastic chip.
- Open the latch.
- Pull out the lamp.
Assembly is carried out in reverse order. When installing the terminal, you need to check the contacts and, if necessary, clean them using a flat-head screwdriver, sandpaper or a special chemical spray.
Low beam
Replacing a low beam lamp on a Lada Kalina depends on the experience of the owner and is divided into two types:
- Without removing the headlight.
- With module dismantling.
To change lamps on installed optics:
- Unscrew the filter housing near the left headlight and move it towards the engine.
- Disconnect the washer motor terminal, remove the screws and move the reservoir to the side.
- Open the light module seals.
- Remove the block with wires.
- Remove the spring clip.
- Remove the part.
Assembling the headlight with a new spare part is carried out in the reverse order.
To dismantle the headlights, you need to unscrew the grille, fasten the modules and disconnect the contact chip. Place the removed optics on a convenient surface and replace the light elements.
Dimensions and DRLs
In the first generation Kalina, the dimensions are installed under the cover of the near reflector.
Replacement is no different from work in the near headlight compartment, however, to disconnect the lamp, it is turned counterclockwise. Drivers often install a diode instead of the original light source, which has a bright glow and can work for more hours.
Replacing DRL lamps on second generation Kalina:
- Open the hood.
- Find the plastic retainer at the bottom of the lamp near the radiator grille.
- Turn left 90°.
- Pull towards yourself.
Daytime running lamps do not contain halogen in the bulb, so they can be handled by hand when installing. Parts without gas include reverse elements, which are changed by bending the trim in the luggage compartment. To replace the Kalina station wagon's brake light bulb, you will have to unscrew the plastic plug on the fifth door, disconnect the chip and pull out the old spare part.
Turn signal
If the marker light on Kalina is freely accessible, then it is more difficult to get to the turn signal module.
To install a new lamp, you need:
- Unscrew the screws holding the air intake barrel and washer fluid reservoir.
- Move the parts towards the engine.
- Feel for the plastic cartridge and turn it to the left.
- The lamp is removed from its seat by slightly pressing and turning it 90° to the left.
To install a new part, you need:
- Install it into the cartridge.
- Press and turn to the right until it stops.
Fog lights
When replacing the fog lights, partial dismantling of the locker will be required. To do this you need:
- Turn the wheel towards the engine compartment.
- Unscrew the screws and unclip the clips where they are attached to the bumper.
- Bend the fender liner.
- Turn the light bulb to the left until it stops.
- Pull towards yourself.
- Disconnect the plug.
How to choose daytime running lights
Until recently, drivers turned on low beam headlights to attract attention to the car. The use of daytime running lights eliminates some of the disadvantages that appear when using standard optics in the daytime.
- DRLs increase the service life of headlight bulbs. Frequently turning the low beam on and off negatively affects the life of the bulbs. This is especially true for lighting devices with improved luminous efficiency, such as +30%, +50%, etc.
- When using DRLs, the inclusion of side lights and license plate illumination is excluded. This allows you to reduce energy consumption and not impair the readability of brake lights.
- The presence of automatic activation of DRLs allows you to combat the car owner’s forgetfulness. Without turning on the standard optics during the day, a motorist risks getting a fine. And if you leave the headlights on low beam with the engine off, the battery will quickly drain.
Before you start connecting daytime running lights, you should consider a number of factors that influence the choice of DRL model.
Firstly, a lot depends on the installation location and car design:
- Additional optics can be rectangular or round. Here the design of the bumper and the appearance of the “front” of the car will play a decisive role.
- The size of the lights is determined by the niche that is in the bumper or air intake of the car.
- The brightness of each block depends on the number of LEDs. It should be between 150-330 lumens.
The second important factor when choosing daytime running lights will be compliance with regulatory requirements. During installation, several basic characteristics must be met:
- The height from the ground level to the lanterns should be in the range from 250 to 1500 mm.
- The distance from the extreme side point of the car to the headlight should not exceed 400 mm.
- The minimum distance between two DRL lamps is 600 mm. For vehicles up to 1300 mm wide, this parameter is reduced to a distance of 400 mm.
- It is also necessary to observe certain geometric parameters when installing DRL lights. The horizontal deviation should be 20 degrees in and out, and the vertical angle should be 10 degrees down and up.
Switching on through dimensions or low beam
The second version of the DRL connection diagram involves using the power circuit of the side light bulb. To do this, the positive wire from the running lights is directly connected to the “+” from the battery. In turn, the negative wire is connected to the “+” of the side light, which is currently electrically neutral. As a result, the following current flow path is formed: from the “+” of the battery through the LEDs to the size, and then through the light bulb to the body, which serves as the minus of the entire circuit. Due to the low current consumption (tens of mA), the LEDs begin to glow, and the lamp spiral remains extinguished. If the driver turns on the side lights, then +12 V appears on the positive side of the side lights, the potentials on the DRL wires are equalized and the LEDs go out. The circuit goes into normal mode, that is, current flows through the side light bulbs.
Instructions for replacing lamps on Kalina 2
Low beam
Carefully remove the rubber boot from the low beam (it is larger in size)
Disconnect the block from the lamp
Next, press the spring clamp and remove it from the clamps to the side and move it away
We remove the burnt out one and install a new lamp. The H7 Osram lamp is installed from the factory; if you want to install brighter lamps, you can choose the Philips H7 +30.
We reassemble in reverse order.
High beam
Remove the rubber boot from the high beam
Disconnect the block from the lamp (Only the + wire is attached to the lamp)
Press the spring clamp of the lamp and move it to the side
We take out the old lamp and install a new one. Be careful when installing, it can only be installed in one position.
We also perform assembly in reverse order.
Replacing DRL lamps
Take the cartridge and turn it counterclockwise.
Next, remove the socket from the socket, take out the old lamp and install a new one. Toshiba lamps are installed from the factory; it is impossible to buy them in retail stores, so we choose an analogue.
Turn signal lamp
By pressing lightly, turn the cartridge counterclockwise and remove it from the socket
Press the lamp and turn it counterclockwise, pull it out of the socket
We take a new PY21W lamp and install it in the socket
This completes the lamp replacement.
When replacing the low and high beam lamps, it is prohibited to touch the lamps themselves by the bulbs! This will lead to rapid failure of the lamp. The rest of the lamps are incandescent, and this does not threaten them.
Lada K alina 2 . REPLACING LAMPS - PART 2
To replace the turn signal lamp
do the following.
1. Open the hood and place it on the stop.
5. Install a new turn signal lamp into the headlight unit.
To replace the side light bulb and daytime running light bulb
do the following.
4. Install a new side light and daytime running light bulb into the headlight unit. To replace the fog lamp bulb, perform the following steps.
Replacement of left headlight bulb shown
. The lamp in the right headlight is replaced in the same way.
1. Remove the front fender liner (Removing and installing mud flaps and wheel liners”, p. 246).
USEFUL ADVICE The fender liner does not need to be completely removed; just unscrew the screws of its front fastening and bend the edge of the fender liner enough to gain access to the lamp.
6. Install the new lamp in the reverse order of removal.
To replace a rear light bulb
perform the following operations. The work is shown using the example of a turn signal lamp; other lamps are replaced in the same way.
4. Install the new lamp into the taillight and all removed parts in the reverse order of removal.
Features of installation of lighting devices
Daytime running lights "Lada Kalina" are installed in accordance with GOST according to the following rules:
- at a distance between the internal parts of the devices of at least 0.6 m. For machine sizes less than 1.3 m in width, a distance of 0.4 cm is permissible;
- at a distance of up to 40 cm from the outer part of the lighting fixtures from the overall edges;
- at a height of up to 1.5 m. In this case, the minimum distance from the road surface should be 25 cm;
- in the front of the engine compartment.
The installation of Philips Led Daylight 9 DRLs or other suitable optics is considered correct when the light reflected in the mirrors of the car driving ahead does not interfere with the driver’s visibility.
Horizontal deviation is allowed - 20 degrees and vertical - up to 10 degrees.
In addition to the rules for installing the control unit for daytime running lights, state requirements regulate their brightness and the area of illumination of the road surface. It is precisely for these parameters that, as a rule, home-made devices or optics are not suitable for other car models.
Connection to Kalina's on-board network
There are no restrictions or rules regarding the connection diagram in GOST. But turning on and off daytime running lights must obey certain rules. The running lights should turn on automatically when the engine starts and turn off when the engine stops. When you turn on the high or low beams, the DRLs should turn off. Sometimes Kalina car owners want to additionally turn off the daytime lights when the engine warms up.
This option is possible with certain knowledge and skills in working with automotive wiring. When installing daytime running lights on Kalina in the factory version with a diagram and instructions for connecting to the control device, usually no problems arise. The mentioned device is a relay with five terminals numbered 85-87, 87a and 30. To connect it to Kalina, you need to find any power wire from the low beam headlights and the positive wire from the ignition switch.
All these wires need to be installed with a female terminal with a small piece of wire, carefully insulating the connection points. Wires of the required length are also connected to the relay terminals, but with male terminals. Next, the wire from terminal 86 of the relay must be connected to the car body under any mounting bolt. It is advisable to immediately connect the wire marked “minus” from the DRL here.
After installation is completed, you can check the operation of the lamps on the Lada Kalina car. To do this, you need to turn on the ignition. When the engine is running, the daytime running lights should light up. Next, you should turn on the low-beam headlights, the DRLs should go out, and the low-beam headlights should light up.
Read also: Expiration date of car tires
When switching to high beam, the situation should remain the same. Next, you need to turn off the high and low beams, and the running lights will light up. Then turn off the engine and the daytime running lights should go out.
I’ve long wanted to install daytime running gear on my Viburnum, but the ones I found on sale were either long, bulging, or completely out of place... and after much agony of waiting and choosing, I took it for myself:
Begin. I decided to run the power wire into the cabin through the hole under the wiper drive. To do this, first remove the battery, the levers along with the brushes from the shaft, then the plastic lining, and lastly the gear motor:
At the same time I cleaned the hole for draining the water, everything was clogged with earth for some reason...:
Remove the rubber plug:
We pass the DRL power wire through it:
We bring the wire into the interior, fasten it:
We prepare the necessary tools for fastening the DRLs themselves:
We unscrew the two screws that hold the lower plastic grille and take it out:
We outline and drill small holes for further screwing of self-tapping screws into them:
We put the lower plastic grille and two “lamps” in their places:
As a result, everything was installed according to GOST standards :) (I hope):
The first stage is now complete. Let's move on to the second one. These DRLs have a third wire (yellow), which is thrown to the dimensions, and in theory, when the dimensions are turned on, the daytime lights should work in the floor of the channel. But I need it so that when I turn on the headlights/low beams, they are completely turned off, and in the end I cut off this yellow wire at the root so that it doesn’t get in the way. In order for the DRLs to turn off the way I want, I need to use a 5-pin relay (avtogsm.ru/rele-5-kontakt-p211.html), I didn’t look for long, but took the whole set with wires and a fuse (I remember the rules DRLs should be able to be manually switched off without problems) from an unused PTF connection kit for the VAZ 2108... altered the pinout to suit your needs (30 - power supply for running lights, 85 - ground, 86 - dimensions, 88 - wiring, where 12V appears after switching on ignition), cut off the excess:
Pinout of the standard MUS, this is where we will hang the relay:
We pull out the larger wires needed from the bundle with the wire under the panel, and install a relay on them:
We tighten and paste over everything that can make a sound with a model:
continued in the next post, my limit of uploaded photos to the page is over))
Daytime running lights on Kalina do not lose popularity due to the requirements for cars, which stipulate that even during the day, cars on Russian roads must be driven with fog lights, daylight running lights or DRLs on. The manufacturers of this optics did not miss this innovation. Today, a wide variety of lighting devices have appeared on the market, which comply with state standards and at the same time give the vehicle a presentable appearance.
Read also: VAZ 2106 generator anchor
running lights for Lada Kalina
Basic criteria for choosing headlights
The popularity and demand for running lights is increasing over time. The various types of such lamps offered by manufacturers can not only ensure traffic safety, but also diversify the appearance of the vehicle. When choosing, you should carefully read the markings on the lamps.
Automotive lighting devices must be marked to permit their use on the territory of the Russian Federation. You should not choose devices based on the lowest cost. In addition to their low operational reliability, such lighting devices may be rejected during the next technical inspection. Then the car will be unusable until the causes are eliminated.
Markings must be clear, not exposed to external influences and located in a visible place. They must contain the country of origin code in accordance with EU requirements. The presence of a reflective element is also necessary. The selling organization is required to have a certificate for the product offered.
Parts manufactured by Hella, Philips, and Osram meet these requirements. Many of them can be installed on Lada Kalina. The cost of the kit ranges from 2,000 to 15,000 rubles. and depends on the manufacturer, design, performance characteristics and completeness.
To study the variety of shapes and lighting options when selecting daytime running lights for Kalina and preliminary evaluate design solutions, you can view photos presented in sufficient quantities in specialized magazines and on the Internet. Kits designed for self-installation are available for sale. These sets include:
- mounting brackets;
- connecting cable;
- connector;
- set of fasteners, bolts, nuts, latches;
- set of lighting fixtures.
The kit may contain a special device that, according to the rules, turns on and off the running lights when starting and stopping the engine. When purchasing such a kit, a connection diagram must be available. When installed on Kalina, running lights designed for foreign cars must be adapted to specific operating conditions.
When and why to change
The factory light is adjusted during the production process, at the time of passing technical inspection. In the new car, the modules shine with maximum power and at the peak of their capabilities. The need for replacement is determined by the following main criteria:
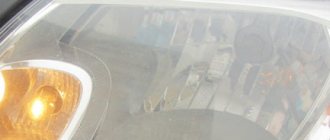
- Reducing light intensity.
- The appearance of yellowness and cloudy areas on the cut-off strip.
- Complete shutdown of one of the light modules.
- Increased brightness after the suspension hits a pothole or has mechanical contact with the headlight.
Kalina lamps installed on the conveyor last no more than 4 years. Cloudiness, deterioration of visibility and the appearance of unlit areas appear after the filament burns and the bulb smokes. In this case, the light does not pass through the dirt well and does not reach the desired areas of the reflector. There are yellow spots of light and darkened areas on the road.
The thickness of the light module filament is calculated by production engineers. When struck, the lamp shakes and the spiral becomes thinner. An external examination reveals a large increase in beam power. This indicates that the halogen lamp will soon fail, since the thin filament heats up above the set temperature and begins to melt. The service life of a damaged part ranges from one minute to several hours.
Which lamps are best to use in Kalina
To find out which lamps are installed in Kalina during assembly, you need to remove the cover and pull out the part. The name, model and type of spare part are printed on the case. AvtoVAZ uses products from Philips as the main light. However, some models contain parts from Osram.
When searching for light bulbs in Kalina, you should be guided by proven options:
- number on the Kalina body or in the vehicle passport;
- a burnt-out sample previously removed from the lantern.
The body number is entered into a special window that pops up when you visit online resources with catalogues. Such systems independently determine the year of production, configuration and type of lighting equipment and offer a list of original spare parts and replacements for Kalina.
The number is provided to the seller in the store to accurately determine the part code. A simple and reliable way is to remove the lamp from the base and buy a new one based on the sample. In this case, you avoid purchasing the wrong part and having to go back to the store for an exchange.
The Kalina hatchback and sedan use the same lighting devices. The type of spare parts is no different for the station wagon.
When choosing a light bulb, it is important to adhere to the recommended parameters from the Kalina manufacturer. Installing a light with a higher power will lead to melting of the internal parts of the optics and damage to the contact group. After installing cheap substitutes, damage may occur due to poor quality assembly of the part and even explosion of the bulb
After installing cheap substitutes, damage is possible due to poor quality assembly of the part and even explosion of the bulb.
Video: connecting DRLs via oil pressure sensor
Nowadays, the question of which running lights is best for Kalina is quite relevant. Since November 2010, all vehicles are required to drive with low beams or fog lights on during the daytime. In accordance with the changes made to the traffic regulations, daytime running lights (DRLs) can be used. After the adoption of this resolution, car owners encountered certain difficulties. In the first place was the problem of forgetfulness: people did not turn on the lights due to lack of habit. Sometimes they forgot to turn them off.
And if in the first case, traffic police officers initially tactfully reminded about the rules, then in the second, discharged batteries caused extremely negative emotions among vehicle owners. When changes were made to the rules and daytime running lights were allowed for use, some car owners of Lada Kalina and other brands attempted to resolve the issue using homemade devices, various lamps and components from commercially available LEDs.
A variety of homemade devices of various types and qualities have appeared. But the changes made to GOST strictly regulated the requirements for DRLs. Manufacturers of lighting devices for motor vehicles did not miss their chance, and a variety of daytime running lights from various companies appeared on sale.
Method of installation of lighting devices
The installation of DRLs on Lada Kalina cars, like on all other cars, can be done at a car service center or independently. There are no restrictions in this regard either in the rules or in GOSTs. The main requirements for the location of daytime running lamps are:
- The distance between the closest inner sides of the lamps must be at least 60 cm. If the overall width of the car is less than 130 cm, a distance of up to 40 cm is allowed.
DRL installation diagram for Lada Kalina
In the selected places, it is necessary to make markings according to the shape and size of the lamps, and carefully check for compliance with GOST requirements. Then use a regular knife or any other suitable tool to cut or widen the holes for the devices
It is advisable to be careful when working and do not use much force to avoid damaging plastic parts.
After adjusting the holes for the devices, you need to secure them with standard fasteners from the purchased kit, lay and secure the wires along the grille. After this, the parts can be installed in place. It is not advisable to secure the lower grille or other part with fixed lamps thoroughly until the devices are fully checked after connection.
Main characteristics
| Make: BMW | Gearbox: automatic / manual |
| Model: X1 | Body: sedan, coupe, station wagon |
| Year of issue: 2009 | Power: petrol/diesel |
| Engine capacity: 1985 cm³ | Drive: rear |
—>
In this article we will look at such a modification as running lights on a VAZ. We will do this using the Lada Kalina car as an example.
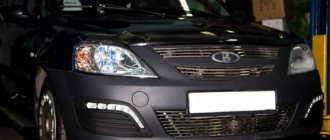
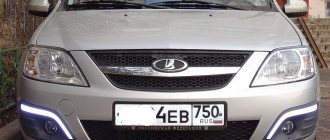
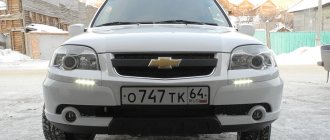
To install running lights on Kalina, Fig. 1, you need to find the right place.
According to the rules, additional lighting devices, if regular places are not provided for them, must be installed no closer than 30 cm from the edge of the bumper. The ideal place to install running lights (Fig. 2) on Kalina is at the edges of the lower grille (Fig. 5).
So, in order to prepare the place for installation, you need to remove the upper grill (Fig. 3) and the lower grill (Fig. 4).
The illustrations show the fastening bolts with arrows. After removing the lower grille, we proceed to install the running lights (Fig. 5) and lay the wiring along the grille (Fig. 7).
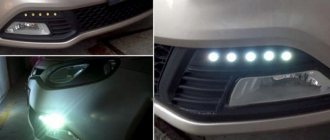
The wiring consists of two two-core cables that connect to the dimensions in Fig. 6, the LEDs consume very little power and do not require the use of additional relays.
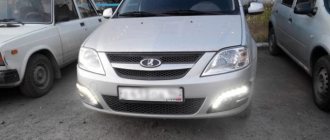
After installing the running lights on the viburnum and conducting the wiring, install the lower grille in its place (Fig. 8) and connect the red wire to the plus dimensions, and the black wire to body ground.
It is advisable to install the lower grille in its place, but do not fix it with bolts and check the correct connection (Fig. 9).
If you accidentally reverse the polarity, then nothing will happen to the running lights, they simply won’t work. After checking, we put everything in place and fasten it. Upon completion of assembly, we check again and use it as in the first picture.
So, daytime running lights are installed on the VAZ. Good luck!
More recently, Russia introduced requirements for the use of fog lights, either low beam or daytime running lights, during daylight hours. Many service stations offer assistance in installing additional optics on your car. However, connecting daytime running lights with your own hands is not very difficult, and below we will tell you how to do it.
We will talk about how to choose daytime running lights, describe how to install them and provide a diagram for connecting the DRLs.
At the end of the article, watch the video instructions for connecting DRLs via an oil pressure sensor.
Daytime running lights (DRL or DRL) are additional lighting devices that are installed in the front of the car. They can be combined with standard optics or used separately. When turning on the low or high beams, as well as the side lights, it is advisable to turn off the DRLs.
Question and answer: what should not be allowed under any circumstances
Q: What happens if you buy lamps with a base other than “H7”?
A: It will not be possible to install lamps in a standard headlight.
Q: If I use more than 55 watts of power, will this cause overheating?
A: Excessive power leads to the fact that the fuse in the low beam lamp circuit burns out. A separate fuse is used for each of the lamps, so it will not be possible to “deceive” the automation.
Q: Are halogens afraid of power surges?
A: For incandescent lamps, excess voltage is a harmful factor. In the case of using halogen lamps, there will be two harmful factors: overheating, underheating. Actually, this is why MTBF can be considered a relative rather than an absolute value. This value depends, and depends strongly, on the stability of the voltage.
Requirements for DRL according to GOST
Functional electrical diagram:
- DRLs should turn on automatically when the engine start/stop control is turned to the “on” position.
- It must be possible to activate and deactivate the automatic DRL operation without the aid of a tool.
- DRLs must turn off automatically when the headlights are turned on, except when the headlights are turned on for a short period of time to signal road users.
DRL emitters must occupy an area of at least 40 cm and emit light with an intensity of 400 to 800 cd. Moreover, the light should be white, the number of emitters should be 2 pcs.
Self-installation of DRLs is considered as making a change to the design of the car. If the vehicle is not equipped with DRLs, either low beam headlights or fog lights should be used instead during the daytime.
DRL for Kalina 1 in standard bumper
In connection with the adoption of the law that, starting November 20, 2010, all moving vehicles must have either daytime running lights, low beam headlights, or fog lights on, regardless of the time of day and visibility conditions. And also after 3 warnings from the traffic police (by the way, the fine for not turning on the lights is 500 rubles), it was decided to install daytime running lights.
Briefly about DRL and a brief report on the work done. Daytime running lights, or DRLs for short, appeared relatively recently with the advent of new models of foreign cars. DRL has nothing to do with side lights; installation of DRL is optional (i.e. optional, if desired), but daytime running lights are installed subject to certain parameters.
“State standard of the Russian Federation GOST R 41.48-2004”: 6.19.1 Installation Optional on cars. Prohibited on trailers. 6.19.2 Number Two. 6.19.3 Installation diagram There are no special requirements. 6.19.4 Placement 6.19.4.1 Width - the point of the surface visible in the direction of the reference axis that is furthest from the median longitudinal plane of the vehicle must be no more than 400 mm from the edge of the overall width of the vehicle. The distance between the inner edges of two visible surfaces must be at least 600 mm. This distance may be reduced to 400 mm if the overall width of the vehicle is less than 1300 mm. 6.19.4.2 In height - at a distance from 250 to 1500 mm above ground level. 6.19.4.3 Lengthwise - on the front of the vehicle. This requirement is considered to be satisfied if the emitted light does not interfere with the driver directly or indirectly as a result of reflection from rear-view mirrors and other reflective surfaces of the vehicle. 6.19.5 Geometric visibility Horizontal angle beta = 20 outward and inward. Vertical angle alpha = 10 up and down from horizontal. 6.19.6 Direction Forward. 6.19.7 Functional electrical diagram If installed, daytime running lights must turn on automatically when the engine start/stop control is turned to the “on” position. It must be possible to activate and deactivate the automatic activation of daytime running lamps without the aid of a tool. Daytime running lights must turn off automatically when the headlights are turned on, except when the headlights are turned on for a short period of time to signal road users. 6.19.8 Pilot signal Optionally in closed loop form. 6.19.9 Other requirements None.
After talking with Google and Uncle Yasha, a lot of unnecessary information appeared, all kinds of connection diagrams, etc. I decided to look at the connection diagram that came with the running lights and, having picked up the diagram of my car, everything became clear and simple. How to install DRLs directly on a car is an individual matter, since there are many models of running lights and their mounts are different. But with the connection, you had to do this: 1. When you turn on the ignition, the DRLs should turn on, and when you turn off they should turn off. 2. Must light up together with the side lights turned on. 3. When you turn on the low or high beam headlights, they should turn off (for DRLs with three wires). Yes, DRLs come with 2 and 3 wires. With 2 it is clear + (red) and – (black), but the third wire (usually white) serves to turn off the running lights when voltage is applied to it.
Connecting DRL to a Lada Kalina car. After I removed the battery and air vent, it became clear that you couldn’t just push the wiring into the cabin and you would have to remove the left fender liner.
After that, a two-core wire for daytime running lights was installed next to the harness.
And so the wire is in the cabin.
Now you need to connect the wires to the exterior light control unit block. To do this, connect the + (red) to the (thick blue with black stripe) wire. This wire will supply voltage when the ignition is turned on. And white (if available) to gray, it will be responsible for turning off the DRLs when the low or high beam headlights are turned on. The connection points must be soldered and carefully insulated.
DRL control unit
The most reliable and simplest option is to connect DRLs without a relay, but using a special running lights control unit. It ensures that the DRL turns on after starting the engine, guarantees safe operation, protects against overloads and can be installed on cars with any type of lamps, including LEDs.
Unfortunately, among the variety of industrially manufactured DRL units, the vast majority do not comply with GOST and have mediocre build quality.
This applies, first of all, to products from AliExpress, which do not meet the requirements in almost all respects.
Among all the diversity, only 2 options can be noted: the Russian DayLight+ DRL control unit and German products from Philips and Osram. The DayLight+ control unit was developed by Russian radio engineer Fedor Isachenkov, taking into account all the features of the vehicle’s on-board network and has a number of positive aspects:
- there is built-in voltage stabilization;
- full compliance with GOST;
- the maximum long-term load power is 36 Watts (significantly less is required for DRLs);
- simplest connection diagram.
DRL in the far to the floor glow on the controller
On the Internet there are many circuits and devices for high beam DRLs at full heat for 12 volts, but few for 24 volts, and most of them are complex. Below we will look at the long-range DRL controller in full heat; circuits for 12 and 24 volts will be provided. And it will be controlled by an inexpensive and accessible Attiny13A controller.
Pluses of DRL:
- You don’t have to constantly think about what you didn’t forget and turn on the lights when the car is moving. It turns on automatically.
- After the trip, you don’t need to think about turning off the lights, the DRL unit will do it for you.
- The lamps turn on smoothly, and not at full power, and this saves electricity, reduces the load on the generator by five times, and means saving fuel.
- The lamps will last much longer.
- When the ignition is turned off, the DRL unit does not consume energy; the unit is turned off.
Principle of operation:
- When the ignition is turned on, power is supplied to the DRL circuit.
- The controller gives a delay of 10 seconds.
- The controller waits until the status on port PB3 is zero. Simply put, the controller will check whether the dimensions are turned off. If they are turned off, then it moves on. If not, waits for shutdown.
- The input status of the PB4 port controller is checked. That is, it waits until one appears. Simply put, this port is connected to the handbrake and it controls the state of the handbrake. The handbrake was lowered, a 1 appeared on port PB4
- The lights are turned off and the car is released with the handbrake, only then the high beam headlights begin to light up smoothly.
- The DRLs turn off smoothly when the parking lights are turned on or the parking brake is applied.
Adjustment.
By default the block is set to 30%.
The brightness of the DRL is adjusted using a button located on the board and recorded in non-volatile memory.
To enter the setting mode, you need to press the adjustment button and hold until the headlights blink twice. We have entered adjustment mode. Each time you press the button, the brightness of the high beam headlights will change stepwise until it reaches maximum.
The next press - the headlights will go out, and pressing further the headlights will burn brighter each time. If you have reached the desired brightness, you need to write the new settings into memory, otherwise after rebooting the controller will install the old settings.
To do this, press the button and hold until the headlights blink twice. This will serve as a signal that the new settings have been saved.
Here we will also consider DRLs for cars with an on-board network of 12 and 24 volts.
The difference between 12 and 24 volts, DRL will only be in the circuit itself. A zener diode will be added to limit the voltage at the transistor's gate, and the rating of some components will be changed to 24 volts. The firmware and operating algorithm of both schemes, as well as the connection to the vehicle network, are identical.
DRL 12 volts on Attiny13A controller.
Arrangement of elements on the board, top layer. Only the power transistor is installed on the bottom layer, so we did not lay out the location of the parts of the bottom layer.
List of radio components for 12 volt DRLs
| No. P/P | Denomination | Silkscreen printing | Frame | Qty | Links to details |
| 1 | ATTINY13A-SSU | U1 | SOIC-8 | 1 | ATTINY13A-SSU |
| 2 | BC817 | Q1 | SOT23-3 | 1 | BC817 |
| 3 | 5V1 | D2 | LL-34 | 1 | Zener diode 5V1 |
| 4 | 47k | R1 | 0805 | 1 | 47k |
| 5 | 22k | R2 | 0805 | 1 | 22k |
| 6 | 1k | R3 | 0805 | 1 | 1k |
| 7 | 100n | C1 | 0603 | 1 | C 0603 |
| 8 | KEY-7.0*3.5*3.5 | KEY1 | KEY-7.0*3.5*3.5 | 1 | |
| 9 | 4k7 | R4 | 0805 | 1 | 4k7 |
| 10 | 100 | R5 | 0805 | 1 | 100R |
| 11 | IRF4905STRLPBF | Q2 | TO-263-2 | 1 | IRF4905STRLPBF |
| 12 | LL4148 | D1 | LL-34 | 1 | LL4148 |
DRL 24 volts on Attiny13A controller.
Arrangement of elements on the board, top layer. Only the power transistor is installed on the bottom layer, so we did not lay out the location of the parts of the bottom layer.
List of radio components for 24 volt DRLs
| No. P/P | Denomination | Silkscreen printing | Frame | Qty | Links to details |
| 1 | BC817 | Q1 | SOT23-3 | 1 | BC817 |
| 2 | 5V1 | D2 | LL-34 | 1 | Zener diode 5V1 |
| 3 | 110k | R1 | 0805 | 1 | R0805 |
| 4 | 22k | R2 | 0805 | 1 | R0805 |
| 5 | 2k2 | R3 | 0805 | 1 | R0805 |
| 6 | LL4148 | D1 | LL-34 | 1 | LL4148 |
| 7 | 100n | C1 | 0603 | 1 | C 0603 |
| 8 | KEY-7.0*3.5*3.5 | KEY1 | KEY-7.0*3.5*3.5 | 1 | KEY-7.0*3.5*3.5 |
| 9 | 4k7 | R4 | 0805 | 1 | R0805 |
| 10 | 51 | R5 | 0805 | 1 | R0805 |
| 11 | 10V | D3 | LL-34 | 1 | Zener diode 10V |
| 12 | IRF4905STRLPBF | Q2 | TO-263-2 | 1 | IRF4905STRLPBF |
| 13 | ATTINY13A-SSU | U1 | SOIC-8 | 1 | ATTINY13A-SSU |
Both boards were tested on the bench and will be tested on cars in the near future
Connection via 5-pin relay
Now it's time to learn how to connect running lights via a five-pin relay. The scheme is the most universal, and was assembled to eliminate the disadvantages of previous options.
First, about connecting the relay for DRLs:
- 30 – to the positive terminals of LED modules;
- 85 – to the positive wire of the side lamp;
- 86 – on the car body;
- 87a – to “+” from the ignition switch;
- 87 – do not connect (isolate).
The circuit with a five-contact relay works as follows. When you turn the key, +12 V is supplied to the DRLs, thereby turning them on. If you turn on the side lights or headlights, the relay will open contact 87a and close inactive contact 87. As a result, the DRLs will go out and the side lights will turn on. The circuit fully complies with the requirements of GOST and traffic regulations and can work with side lights even based on LEDs.