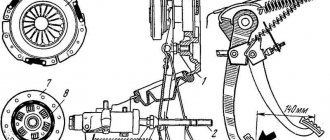
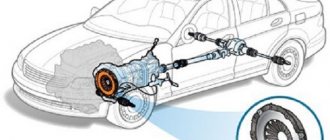
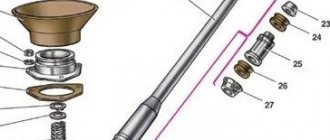
Clutch disc assembly
The clutch is one of the components of a car's transmission. When this system breaks down, further movement becomes difficult, sometimes the car stalls, and sometimes it simply does not move when you press the accelerator pedal. Let's look at how to diagnose and replace clutch elements of a VAZ 21099 car with your own hands.
Clutch system failures are felt instantly, here is a list of the main symptoms.
- When driving uphill, when you press the gas pedal, the car does not move, despite the ever-increasing engine speed.
- When driving in a straight line, acceleration time increases significantly, the engine often overheats, and fuel consumption increases.
- When stopping, pressing the brake and clutch pedals simultaneously will stall the engine.
- It is difficult and crunching to switch gears on and off when the car is moving. When the engine is off, they switch without difficulty.
- In the morning, when you try to start the car, the starter has difficulty turning the flywheel, despite the clutch pedal being depressed, and after starting, the engine runs hard and stalls after a while.
- There is a noise when you press the pedal.
- When changing gears, the car makes a jerk, and sometimes the engine stalls after it.
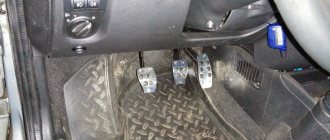
- The clutch release pedal is difficult to press.
- Full pedal travel exceeds 16 cm.
Signs and causes of clutch failure
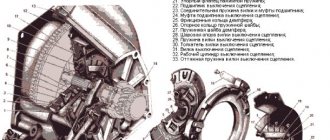
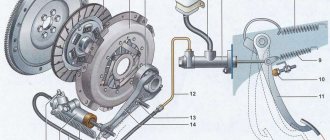
The VAZ 2108, 2109, 21099 clutch consists of a basket, a pressure bearing, a drive and driven disk. The main signs of a clutch malfunction are clutch slipping and incomplete disengagement:
- When switching off is incomplete (the pedal is pressed), there is difficulty shifting gears with the engine running, noise and crackling noises when changing gears, and large free play of the clutch pedal.
- When the clutch “slips” (the pedal is released), a burning smell may be felt in the cabin from the burning of the clutch disc linings, the car’s dynamics will deteriorate, the engine may overheat, and fuel consumption will increase.
In addition to the clutch disc itself, the release bearing can also fail - it serves to smoothly engage and disengage the clutch. When the release bearing wears out to the limit, you can hear a characteristic squealing sound - this is a sure sign that the bearing needs to be replaced. The cause of clutch failure may also be a breakdown in its drive mechanism, for example, a break or jamming of the clutch drive cable, a breakdown of the lever system, a fluid leak from the hydraulic drive if the clutch is hydraulic, or other similar breakdowns in the drive.
By the way, when replacing the release bearing at a service station, they may advise you to also replace the clutch disc. Usually, if problems begin with the clutch, it is better to replace all these parts, because replacing the clutch is very difficult: you need to remove the gearbox. But if someone wants to save on this, then all clutch parts can be purchased separately.
To work you will need the following:
- wrenches 8, 10, 13, 17 mm;
- torque wrench, 8 mm socket;
- jack;
- container for draining oil;
- inspection hole or lift.
- flat screwdriver, hammer.
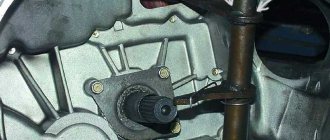
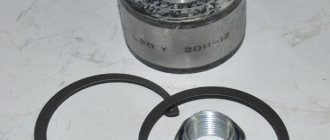
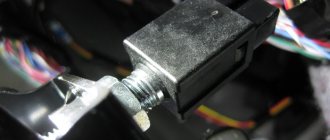
General information about the bearing
The release bearing of the VAZ 2109 car (hereinafter referred to as VP) is an important part in the operation of the vehicle. If it breaks down, movement by car is impossible, so the driver will immediately know about the failure of this element.
If this component breaks down, then the optimal functioning of the car's clutch is already impaired. In particular, if the release bearing breaks down, the clutch stops disengaging, which means the vehicle cannot move. If this element fails, then there is no way to do without replacing it.
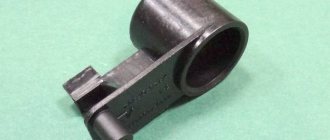
New and worn out VP for VAZ 2109
Replacing the clutch on a VAZ 2109/21099 without removing the gearbox
Replacing the VAZ 2109/21099 clutch without removing the gearbox is quite difficult. You will not find instructions or recommendations on this topic in the car's owner's manual. These recommendations are based on the experience of car enthusiasts who share their experience of replacing the clutch.
The main problem when replacing a clutch is that not every motorist has an overpass, a pit, and especially a lift, and it is necessary to make sure that the massive gearbox does not fall to the ground. But lifting it is problematic, since it is impossible to crawl under the car with it. All steps for removing the gearbox are almost the same as the instructions above, with the exception of some nuances:
- Purchase two bolts from the upper arm of the classic front suspension from the store. Their threads are exactly the same as those on the bolts that secure the box and the engine block together.
- Screw them in from above, only after that, with a small crowbar or screwdriver, we begin to disconnect the nodes. After moving away, the rear part of the box will rest on the transverse rod, and a gap of about 15 centimeters will form between the clutch housing and the flywheel.
- The release bearing is removed through the resulting gap and the bolts on the basket are unscrewed.
But the installation is slightly different from the process shown in the instructions:
- Place the new release valve in its place. Then a disk is installed on the flywheel and a basket on top of it.
- Just tighten the bolts a couple of turns, but do not overtighten!
- Carefully begin to slide the input shaft onto the splines in the disc.
- Then we move the box back and tighten the bolts on the basket. The basket fastening bolts are tightened only after the box is installed in its place.
- After this, you can install the gearbox and tighten the bolts on it.
Complex procedures
Replacing the clutch on a VAZ 2108-21099 is a labor-intensive and time-consuming process. To do this, you first need to remove the gearbox. After the gearbox is removed, you can proceed to the following operations.
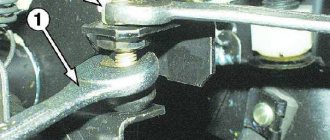
Replacing the fork and release bearing.
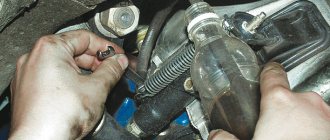
- Using a screwdriver, remove the protective cover of the plug.
- Unscrew the bolts securing the clutch basket and remove it.
- Use a screwdriver to press the spring off the release bearing clutch legs.
- We remove the bearing.
- We remove the spring.
- Unscrew the 3 bolts and remove the bearing guide sleeve.
- Use a screwdriver to grab the special protrusion and remove the plastic bushing of the fork.
- We remove the fork axle from the support sleeve and remove it from the basket.
Disassembly is complete, now we install new parts in the reverse order. When installing, it is necessary to lubricate the fork bushings with CV joint-4 grease.
- First, remove the basket and lock the flywheel.
- Unscrew the 6 bolts securing the casing to the flywheel.
- Carefully remove the clutch cover along with the driven disc, holding it with your hand.
- We inspect all parts for cracks and wear. We replace defective parts.
- We put everything back together in reverse order.
Some useful tips.
- The driven disk must be installed with the less convex side facing the flywheel.
- When removing and installing clutch discs, it is necessary to use a special mandrel, inserting it into place of the gearbox input shaft. If you do not have such a mandrel, you can replace it with an old input shaft, which can be purchased at any recycling center for old cars.
Source
Changing the clutch
Almost everything is ready to tear the box out of the engine, but there is no need to rush. In order to continue the process, you need two bolts from the upper arm of the classic. They have the same threads as those that connect the engine block and gearbox. We screw them in from above, and after that you can begin to separate the nodes using a small crowbar.
The presented replacement of the VAZ- 2109 is a rather painstaking process, but in order to do everything quickly and reliably, you can go to great lengths. Through the gap that formed after the previous procedure, you need to get rid of the release bearing, unscrew the bolts on the basket. But the installation is somewhat different from the instructions that can be found in the guides. We put the new release valve in its place. After this, we install the disk on the flywheel and the basket on top of it. We tighten the bolts literally two turns, they cannot be tightened. Next, very carefully we begin to fit the input shaft onto the disc splines.
It is worth considering that the petals of the basket of this car have a small amount of wear. This is quite normal, since the bearing works in constant contact with them. So, if you notice such a detail, do not despair. It will not bring you any unpleasant surprises if you replace the basket on time.
There is a special offer on our website. You can get a free consultation with our corporate lawyer by simply submitting your question in the form below.
Complex procedures
Replacing the clutch on a VAZ 2108-21099 is a labor-intensive and time-consuming process. To do this, you first need to remove the gearbox. After the gearbox is removed, you can proceed to the following operations.
Replacing the fork and release bearing.
- Using a screwdriver, remove the protective cover of the plug.
- Unscrew the bolts securing the clutch basket and remove it.
- Use a screwdriver to press the spring off the release bearing clutch legs.
- We remove the bearing.
- We remove the spring.
- Unscrew the 3 bolts and remove the bearing guide sleeve.
- Use a screwdriver to grab the special protrusion and remove the plastic bushing of the fork.
- We remove the fork axle from the support sleeve and remove it from the basket.
Disassembly is complete, now we install new parts in the reverse order. When installing, it is necessary to lubricate the fork bushings with CV joint-4 grease.
- First, remove the basket and lock the flywheel.
- Unscrew the 6 bolts securing the casing to the flywheel.
- Carefully remove the clutch cover along with the driven disc, holding it with your hand.
- We inspect all parts for cracks and wear. We replace defective parts.
- We put everything back together in reverse order.
Some useful tips.
- The driven disk must be installed with the less convex side facing the flywheel.
- When removing and installing clutch discs, it is necessary to use a special mandrel, inserting it into place of the gearbox input shaft. If you do not have such a mandrel, you can replace it with an old input shaft, which can be purchased at any recycling center for old cars.
Order of Operations
To carry out repair work, you need to place the car on an inspection hole, put it on the handbrake, disconnect the negative terminal to de-energize the on-board network, and remove the engine mudguard. Now you can start disassembling:
- Install a jack that will temporarily replace the front pair of wheels. You need to unscrew the nuts on them, remove the chassis and put them aside.
- To remove the contact part of the ball joint from the hub, you need to unscrew the bolts.
- Instead of the 2 upper conventional bolts, you need to install cylinder head fasteners.
Now you can remove the starter; it is attached to three nuts that need to be unscrewed.
At this stage it is necessary to install a jack under the engine. After this, the side motor support is detached.
After this, you can disconnect the rear engine mount and unscrew the gearshift linkage.
The protective cover must be removed from the clutch.
- The box is secured with several bolts; first you need to unscrew the front one.
- Now the transmission is accessible, the rear nut is unscrewed first. The gearbox bolts are located on the left wing side; they need to be unscrewed until they stop and the gearbox should be removed. It is important to ensure that the end of the assembly rests on the lever extension. This will create a gap that will allow you to remove the clutch.
Disassembly is complete. At this point, the guide for the clutch remains. It needs to be thoroughly lubricated. After this, you can put the release bearing on the guide.
- Subsequent operations are performed in the reverse order of the above steps. Important! There is no need to rush while completing the work. All operations are performed consistently and calmly. Make sure that after assembly there are no “extra” spare parts left.
Expert advice
Along the way, some mistakes emerged. This is a grenade with a boot without a clamp. There is also a jamb in the drive, the CV joint boot is torn. The thread on the grenade is bad. The ball joints are still working well, but there is already some wear and tear.
So, don’t be afraid to change the clutch disc, release plate, or basket. If you are making a car for yourself and not for sale, then it is recommended to change everything as a whole. These are the clutch disc, basket, release bearing, drive seal. If you have never changed a box, do not be afraid to take on this task, it is not difficult. The only condition is that when you install the clutch disc, center it.
There is a hole, when you install the clutch disc and press it with a basket, it may move. You will never hit the splines with the input shaft, since the shaft fits into the splines, and the guide is then removed. This is a cylindrical rod, it fits the classic, front-wheel drive. Its diameter is 20 mm, inserted into the flywheel, 15 mm, length 100 mm.
Let's summarize
If the check shows that the free play is normal, but you doubt your competence in adjusting the unit, contact a service station. Incorrect settings can cause rapid clutch failure. If you want to complete the work yourself, you can find the necessary information on the vehicle manufacturer’s website or in its service book. It is important to complete the work in a timely manner so as not to get into an unpleasant situation on the road. Monitor the service life of clutch parts; for example, the service life of the driven disc is 100 thousand kilometers. But, if a motorist has an aggressive driving style, it can decrease by 2-3 times.
Increased noise when turned on
- If jerking is observed when shifting the clutch, then the friction linings may have become oiled. Remedy: Thoroughly rinse the surfaces of the linings with a special liquid and be sure to replace worn gearbox and engine seals.
- Jerking can be caused by jamming in the clutch release drive. To eliminate this problem, you first need to find the reasons that contribute to the jamming. Then replace these same parts.