The starter is not the most complex and expensive unit to maintain.
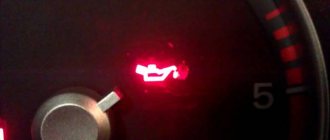
But it is one of the key components of the car. You turn the ignition key, the lights on the dashboard are on, but the starter does not turn, the engine does not start? There are two reasons:
- faulty contact supplying current to the starter relay;
- The starter itself or the relay is faulty.
In the second case, the starter must be removed, checked, repaired and reinstalled. The repair process is quite complex and deserves a large separate article. Here we will tell you how to replace the VAZ 2107 starter (carburetor, injector) and check its performance.
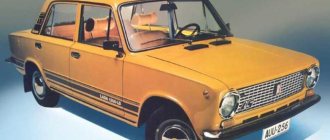
Starter VAZ 7 models (from 01 to 07)
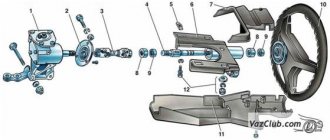
The commutator-type electric motor used to start the engine is located on the side of the crankcase of the power unit. The parts are connected to each other by bolts with a hexagonal head. Power is supplied from the battery.
The power of the device is sufficient to rotate the crankshaft at air temperatures down to -35 ° C (without preheating the oil). The appearance and design of the device are shown in the photo in the spare parts catalogues.
Removing the starter and protective screen
To repair the starter, it must be removed from the car. If the car is relatively new and the starter has not yet been removed, then the heat-reflecting protective screen is in its rightful place. It will prevent you from removing the starter, so you need to remove it first.
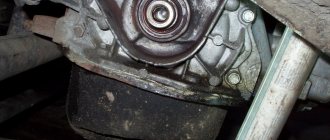
The protective screen is attached on top to two studs with 13 nuts and on the bottom with a 10 head bolt. And if the nuts can be unscrewed with a simple wrench, then to unscrew it you will need a long thin socket wrench. Many, having removed the protection, do not put it back in place, but it is better to do it anyway. Without it, the starter gets very hot from the exhaust manifold, especially in summer in traffic jams.
Starter guard and bottom bolt location
Video of starter removal
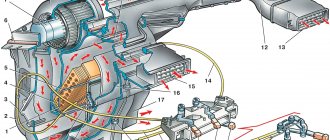
Purpose
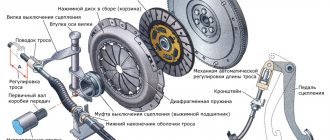
The device is designed to force the engine crankshaft at startup. The product is equipped with a special Bendix clutch, which engages with a ring gear mounted on the flywheel of the power plant. The electric motor is controlled remotely using a contact group in the ignition switch through an additional relay.
Starter electrical connection diagram
Kinds
There are 2 types of electric motors for starting the power plant:
- On cars with a carburetor, a standard starter is used; torque is transmitted directly from the rotor to the ring gear.
- On some carburetor cars and VAZ 07 with an injector, a gear type drive was installed. By using a planetary gear, the current in the power circuit is reduced and the torque is increased.
Read, it might come in handy: All about the VAZ-2107 thermostat
Work order
- We place the car on a viewing hole or overpass and secure it with the parking brake.
- Open the hood and disconnect the ground wire from the battery.
- Using a 10mm socket, unscrew the bolt of the lower fastening of the starter heat shield.
- We dismantle the air filter housing and the warm air supply hose (for injection units, remove the fastenings of the intake pipeline).
- Using a socket wrench with a 13 mm extension, unscrew the 3 bolts securing the starter housing. It is better to unscrew the bottom bolt from the inspection hole.
- Using a 13mm wrench, unscrew the nut (on the injection engine there are two nuts) securing the starter shield. Let's take it out.
- Using a socket wrench with a 13 mm extension, unscrew the 3 bolts securing the starter housing. It is better to unscrew the bottom bolt from the inspection hole.
- Using the same tool, unscrew the nut securing the tip of the wire going to the “+” battery.
- Disconnect the start relay wire.
- We remove the starter from the rear wall of the engine compartment.
- We install a new starter in its place.
- We carry out installation work in reverse order.
What to do first?
Disassembling the mechanism is not a priority task, since the starter’s power supply is connected to the battery, so you need to start with it. If the car is not too old, it is unlikely that the problems will lie in the design of the starter itself. It is enough to clean the contacts of the battery or the device itself for everything to work again in the desired mode.
Difficulties begin when the machine has worked for a long time and its operation has not been delicate. If, after a complete check of the electrical equipment of your VAZ 2107, the starter still does not start or continues to work intermittently, then the reason is inside the device and it is necessary to remove and disassemble the starter. On this model, both in carburetor and injection versions, it is installed rather inconveniently. To get to it normally, you will have to drive the car onto an overpass or inspection hole.
Disassembling the VAZ 2107 starter
After the ignition is turned off, you can begin the “operation”. It must be done in the following order:
- remove the ground terminal from the battery;
- if there is a protective mud casing at the bottom, then it must be dismantled;
- remove the electrical wires from the solenoid relay;
- unscrew the three mounting bolts (two upper, one lower);
- remove the starter.
As you can see, nothing complicated. The only thing is that in the case of an injection model, mechanics advise removing the inlet pipe extensions as well. Now we have to disassemble the device itself.
Diagnostics of faults in the VAZ 07 model starter
Starter faults:
- no rotor rotation;
- clicks when trying to start;
- extraneous sounds when the device is operating.
Starter won't start
The electric motor does not work due to battery discharge or winding failure. When the battery is discharged, the lighting devices do not turn on or the lamps glow dimly, and when you try to start the engine, a click is heard, after which the indicators go out.
Crackling sound when starting the starter
A cracking sound indicates a breakdown of the solenoid relay, which cannot engage the rotor gear with the flywheel ring. The repair consists of checking the wiring and measuring the resistance of the windings. A damaged relay must be replaced.
The starter clicks but does not turn over
The defect indicates insufficient voltage in the power supply due to battery discharge or oxidation of the contact pads. When the battery is low, the clicking sound is accompanied by a decrease in the brightness of the lamps. The defect is observed when there is poor contact between the battery contacts and the wiring terminals.
The starter hums but the engine does not start
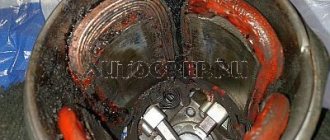
The reason for the hum is that the bendix is jammed; the relay cannot move the gear to the flywheel. To check it is necessary to remove the electric motor. After cleaning the starter from dirt, performance is restored.
The starter turns the crankshaft with difficulty, as if the battery is dead
With this malfunction, the starter may work “every other time”; in warm weather, the car starts normally. But even in the mildest frost, problems begin: it is with great difficulty that the engine cranks, and the load on the battery is enormous (can be seen on the voltmeter). There may be two reasons - wear of the bushings and the armature touching the stator. The second is interturn short circuits and other damage to the armature winding. In both cases, the starter begins to “slow down” itself. Most often, such a starter is replaced entirely, since repairs can be more expensive.
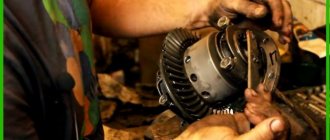
Preparation for repair and dismantling of the device
It is more convenient to carry out work in a specially equipped room - a garage box. The VAZ 2107 is installed above the inspection hole; for repair and restoration operations, a set of wrenches, a set of heads with a wrench and a device for pressing out the bearing are required. In the event of a malfunction of several other components in addition to the bendix, it makes sense to replace the starter assembly. On a car where there is an injector in the power supply system, repair work is best carried out from below.
The procedure for dismantling the starter on a VAZ 2107 car is as follows:
- Disconnect the battery and remove it from the engine compartment.
- We unscrew the terminal and disconnect the terminal and the wire that supplies power to the starter.
- We unscrew the bolts securing the device that ensures engine starting.
- We remove the unit complete with the bendix feed mechanism from the hole in the housing.
On a VAZ 2107 car, an engine with an injector installed will require a number of additional operations. In this case, replacing the faulty unit is only possible from below. To gain access to the assembly, you need to remove the steel protection and boots covering the engine compartment from below. The remaining operations carried out on the starter are carried out similarly to those described.
How to repair a VAZ-2107 starter with your own hands
To repair the starting unit yourself, you must:
- remove and disassemble the device;
- check the condition of the windings, bushings and brushes;
- replace damaged elements;
- perform reassembly and check the correctness of the electrical wiring connections.
Dismantling and disassembly
To remove and disassemble the unit you must:
- Disconnect the terminals from the battery, and then remove the battery from the engine compartment.
- Remove the protective shield under the power unit, which limits access to the electric motor.
- Unscrew the nuts holding the wires to the starter housing.
- Using a wrench, unscrew the bolts connecting the electric motor housing to the power unit crankcase.
- Pull the assembly out of the seat.
- Unscrew the solenoid relay nut and remove the assembly from the electric motor housing.
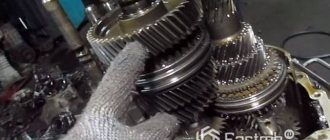
- Unscrew the tightening bolts and carefully remove the covers, and then remove the rotor from the stator.
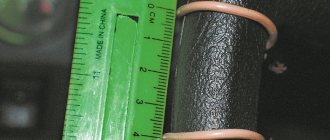
Replacing bushings
Replacement of starter bushings is carried out when the gap between the shaft and the support is increased. Due to a violation of the relative position of the parts, the rotor touches the stator plates. To eliminate the defect, it is necessary to remove worn parts.
Read this, it might come in handy: Compressor or turbine?
The damaged front support is knocked out of the mounting hole with a handy tool, the rear blind bushing is removed with a puller or drilled out on a machine.
To install new elements (made of bronze or composite material), mandrels made of soft material (for example, wood) are used. During installation, do not warp parts or use excessive force.
Before installation, the composite bushings are kept for 5-10 minutes in a container with motor oil, which saturates the porous surface. Bronze bearings are lubricated when installing the rotor shaft.
Replacing electric brushes
To supply voltage to the rotor windings, a flat commutator and brushes (made of a mixture of graphite and copper powder), pressed by springs, are used. The number of brushes corresponds to the number of poles; the design of the elements includes an elastic stranded wire. During operation, the graphite elements wear out and burn, and at the same time, wear appears on the collector.
Replacement of graphite brushes is carried out according to the following algorithm:
- Remove the back cover of the case.
- Unscrew the screws securing the brushes (there are 4 elements in total).
- Remove worn elements and install new brushes.
- Clean the stator cavity from residual wear products of graphite elements.
- Install the removed parts in their original places.
Repair of starter retractor relay
The electromagnetic retractor relay ensures the movement of the gear on the rotor, which engages with the flywheel ring gear when the electric starter is connected to the vehicle's on-board network. The device is located on the body of the starting unit; the design of the circuit includes an additional power relay (located under the hood).
If the unit breaks down, it is necessary to check the functionality of the control relay. It is recommended to tighten the fastening screw and make sure that there are no oxides on the contact plates and wiring.
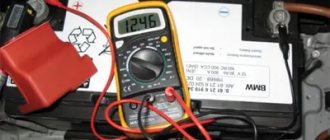
To test the relay, you must close the starter directly. If the rotor rotates, the electromagnetic unit must be replaced. Additional diagnostics involves measuring the voltage of the windings with a test device.
Serviceable coils have a resistance of 75 and 55 Ohms (for the holding and retracting windings, respectively). If the value differs from the factory parameters, then the unit must be replaced; it is impossible to repair the relay with your own hands or in a workshop.
The owner can remove the relay on the installed starter. After disconnecting the battery, the surface of the electromagnet is cleaned of dirt, and then you need to disconnect the wires (secured with nuts).
Then the bolts securing the relay to the motor housing are unscrewed. The assembly is disengaged from the rear cover. The new electromagnet is installed and connected in the reverse order.
Detailed installation process
In order to correctly install the starter, you must adhere to the following points:
1. Conduct a visual inspection of the device. 2. Installation of the device in its original place. First fasten with a long bolt, and then with two short ones. 3. Install the wire terminals and tighten the nuts. 4. Replace the battery. 5. Connect the terminals on the battery. 6. Install the braces coming from the intake pipe or air duct and air filter. 7. Replace the mudguard (if equipped).
After everything is done, you should start the engine. If everything works as expected, then the starter connection is made correctly. If the engine does not start, you should look for where the error was made.
Mechanism repair and installation
After removing the starter from the car, we disassemble it and inspect the components. Particular attention is paid to the condition of the bendix and sliding bearing bushings; the housing must be disassembled for inspection. Carefully remove the brushes from their sockets and clean the commutator of dirt. We assemble the device and check its functionality using the battery.
Installation of the VAZ 2107 engine starting mechanism is carried out in the reverse order of removal. If during testing it is revealed that the starter cannot be restored, it is replaced with a new one. If an injector is installed on the car, after connecting the battery, it will take some time to create the necessary pressure in the gas line. The engine should be started only after the pump has stopped running.
Brush block
Let's delve deeper into the depths of the starter. Its electric motor only works when voltage from the battery is supplied to the primary winding through the brushes. The lifespan of brushes is very limited, since they are made of graphite composition and tend to wear out quickly.
This can be estimated by eye based on the total mileage of the car. Some models have a more complex electrical circuit, which is connected in such a way that when the brushes wear out, current is not supplied to the solenoid relay, and when the ignition is turned on, the starter may not click at all. This circuit is provided on new fuel-injected cars and on the VAZ 2110.
In this case, in order to eliminate the malfunction, you need to disassemble the starter, get to the brush block and visually assess the condition of the brushes. It is quite possible that they have served their purpose and require replacement.
Conclusion
Every driver is interested in how much a regular and gear starter costs. In fact, the price is almost identical. The price of a regular one fluctuates around 3,500 rubles, and a geared one – 4,000 rubles. Considering this fact, it is of course more profitable to purchase a device that can breathe new life into the car. Considering that the installation and dismantling process will be carried out with your own hands, you will be able to save a lot.
Essentially, it is a direct current electric motor driven by closing an electrical circuit by turning the ignition key. The autostarter consists of a stator, an armature (rotor), a brush holder with brushes, as well as a traction relay and a drive.
In all VAZ classic models, incl. and in the “seven”, it is located at the bottom of the engine, and is attached to the clutch housing.