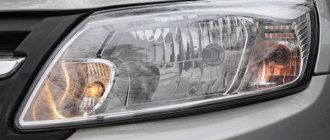
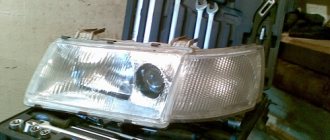
Practice shows that, on average, the original condition of optics on Niva is maintained for 1.5-3 years. This is followed by damage to the lens, clouding of the glass, and when diving into cold bodies of water with the headlights on, their destruction.
At the same time, the characteristics of the standard headlight cannot be called outstanding. Often, especially in the rain, the car becomes literally blind, and in the snow it becomes invisible.
It is recommended to replace lighting fixtures with similar ones from different manufacturers. Alternative tuning options are used solely at your own peril and risk, since traffic regulations directly prohibit the operation of a car with changes made to the design without registration with the traffic police.
This is especially true for lensed xenon and diode LED optics.
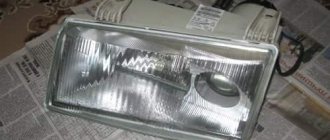
Headlights
Front optics are represented by 4 main samples that can replace old headlights in the field. The use of domestic products Osvar and Avtosvet will improve the lighting situation only temporarily.
- Hella - unlike standard samples, they have improved transparency of the glass element, as well as a rubber seal that is effective against dirt. Base - H4 for halogen lamps. Article - 1A6 002 395-031.
- Bosch - has similar parameters to Hella, but is somewhat inferior in terms of the quality of the light spot. They rarely fog up and are installed in place of the standard ones without modifications. For use with halogen lamps. A relative disadvantage is the significant price of about 1500-2000 rubles. a piece. Article - 0 301 600 107.
- Wessem is a waterproof optic that creates a clear light/dark area even with standard wattage lamps.
- DEPO - in addition to their attractive appearance, crystal headlights have a uniform illumination area due to the reflective cap, are moderately resistant to water, and do not fog up. Article: 100-1124N-LD.
Ideas for tuning Niva optical elements
Basically, tuning the optics of the Niva 2121 comes down to replacing the glass on the headlight itself or the reflector. If you notice that the contacts on the flashlight or sidelight have burned out or the flashlight itself has become too cloudy, this indicates that the device needs to be completely changed and not tuned. If you want to make your vehicle stand out from others, then instead of the usual optics, you can install tank optics; this tuning option is considered one of the most popular and simplest today.
So, how can you tune the optical components of the Niva:
- Install new optics instead of standard ones. As we already said, these could be tank headlights.
- Tinted lights. In this case, there are several options for tinting. One of them is to open the headlight glass with a special tinting varnish, the second is to use a tinting film for optics. In both the first and second cases, you will have to dismantle the headlights and disassemble them. When covering the headlights with film, make sure that there are no bubbles on the surface of the glass, otherwise the aesthetics of the headlights will be compromised. Also, before pasting, you need to make sure that you use a special film for headlights with good transmission, otherwise the optics will be too dark and will not be able to properly illuminate the road. As for the varnish, it is applied in several layers. When applying tinting, it will be advisable to install more powerful light sources in the optics.
- Installation of other bulbs in the headlights - xenon or LED. As mentioned above, this option is considered one of the simplest to implement and one of the most expensive in cost. The installation of lamps can be done on your own, especially if you tint the optics, you will most likely still have to install new lamps. When installing gas-discharge lighting sources, it will be necessary to additionally install an ignition unit, otherwise xenon operation will be impossible.
- Put eyelashes on the headlights. This tuning option is the easiest to implement and the cheapest in cost. Eyelashes can be purchased at any store or car market; you can install them yourself. Before installing and fixing the eyelashes to the glue, the surface of the headlight should be cleaned as much as possible and treated with alcohol or solvent to degrease. Eyelashes can be made of plastic, fiberglass or LEDs (the author of the video is the All about Niva channel).
Installing headlights
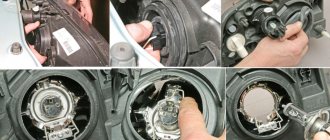
Work on installing new optics begins with removing old headlights, incl. on Niva Urban. To do this, unscrew the 6 screws from the radiator grille.
Unscrew the 3 screws securing the headlight unit
Remove the unit together with the fastening ring and disconnect the power.
If the new kit has non-standard dimensions, remove the headlight housing, remove the 4 screws and disconnect the wiring harness in the engine compartment.
At the end of the process, adjust the light beam of the new set using the diagram.
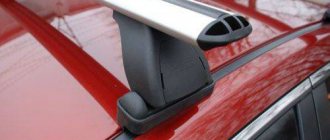
Attachments
Chandelier
An arc with additional headlights, called a “chandelier” among car enthusiasts, is sold in car dealerships. True, its price is not always adequate to the parts used, which forces car owners to use ingenuity and their own hands.
It is quite possible to make a similar mount for headlights yourself.
If you are one of these handy drivers, then the following information will allow you to make and correctly install this attachment yourself .
Note! To ensure that the electrical wiring on the Niva is not damaged, you should take a reasonable approach to the power of the purchased headlights or fog lights.
The arc itself can be made from:
- Old trunk. You can buy it at a car flea market;
- Or use existing fasteners;
- Use furniture fittings.
We will not dwell on this in detail, but will focus on the correct connection of additional lighting devices.
A homemade arc, if done carefully, is no different from purchased products
Connection features
The first thing you should arm yourself with is a high-quality wiring diagram for the Niva 21213. It is shown in the photo below. Firstly, such a diagram is useful for maintenance, and secondly, with its help it is easy to determine the location for connecting the wiring harness.
Factory color scheme of electrical equipment VAZ 21213
The second important point is the frequency of use of the chandelier:
- Constantly, including traffic in urban environments;
- Only when driving outside urban and suburban highways (off-road). And here a proven diagram is absolutely necessary for an off-road vehicle.
The chandelier control output can be connected to a standard switch.
The most preferable is a removable option, which provides for quick installation and dismantling of the chandelier, as well as its safe connection to the standard electrical wiring. The video in the article clearly demonstrates this process. Connection instructions are presented above.
But what you should pay attention to is the adjustment of the light flux. The fact is that when driving off-road, the hood of a car is often covered with dirt, which in the dark glares in the headlights, blinding the driver.
Sidelights
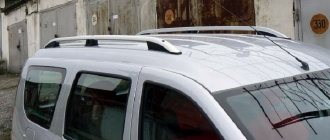
When purchasing sidelights (headlights), it makes sense to pay attention to new-style products. Changes compared to the classic model include an increased size, improved waterproofing and the ability to choose yellow-white and all-white options.
- DAAZ 21214-3712010 with DRL for 21214 M and Urban.
- OSVAR (old model) TN125 L.
dvg_ufa
Cockroaches and awl
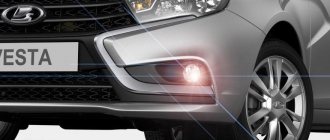
Niva. We connect the front PTFs.
Many Nivavods equip their funny cars with fog lights, but not everyone knows how to do it correctly. First, a little theory - GOST 8769-75, as amended in 1990, states 2.3. Fog lights 2.3.1. Each motor vehicle is permitted to have two fog lamps installed at the front. For tourist and mountain buses, the installation of fog lights is mandatory. 2.3.2. The location of the fog lights on the vehicle must correspond to that shown in Figure 2.
No point of the fog lamp light aperture should be higher than the top of the low beam headlamp light aperture. 2.3.3. Fog lights must be visible in the vertical and horizontal planes within the minimum permissible visibility angles (hereinafter referred to as visibility angles) indicated in Figure 3.
2.3.4. Fog lamps must emit white or selective yellow light, but the same for both headlights installed on the vehicle.
In short, the fog lights on the Niva need to be mounted on the front bumper so that the edge of the PTF is no further than 400 mm from the external dimensions of the car. The rest is generally nonsense.