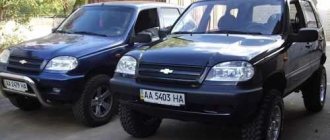
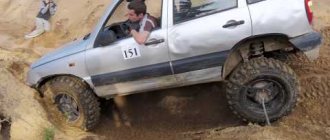
When a person buys a Chevrolet Niva, he rarely thinks about an extreme trip. Most often, a car is bought for a picnic with the whole family. That is, the car moves from one point to another. Although the Chevrolet Niva is an SUV, it is noticeably inferior to its European and Asian competitors in cross-country ability in hard-to-reach places. It is because of this problem that fans of hunting, fishing and simply extreme driving choose to lift their car instead of watching videos while sitting at home. Lifting is a type of tuning that increases the vehicle's ground clearance. They often do it with their own hands, in garages.
Chevrolet Niva
Proper modification will turn the Niva into a fairly solid car that will show excellent results off-road and in difficult terrain. We mentioned the word “lifting”, but did not say what it is. Lifting is a set of changes made to the design of the car. They allow you to install larger diameter wheels on your car. Most often, cars with all-wheel drive are chosen to create such projects. An all-wheel drive jeep is much more suitable for this task than a simple passenger car.
Advantages and disadvantages
Installing a lift kit has an ambiguous effect on the driving performance of the car. The advantages of this type of tuning include:
However, the suspension lift has not only a positive effect on the characteristics of the Chevrolet Niva.
A change in the factory design manifests itself in the form of the following disadvantages:
Tip: a suspension lift improves off-road traction and worsens the car's performance at speed. Therefore, increasing the ground clearance only makes sense if the Niva is regularly used on a primer, in mud or sand.
Types of spacers
Various types are available:
- There are those that are installed between the body cup and the support spring, and they are used, for example, where there is a MacPherson strut suspension, when during a turn, in addition to the strut, the shock absorber turns.
- The simplest in their design and installation method are interturn ones, and are installed both backwards and forwards. They make the product quite elastic, but the car’s ground clearance remains the same.
- The most common option is a spacer that is installed between the body shell and the spring, which increases ground clearance and makes the suspension more rigid.
They are also:
- Reinforced, they have a high design, due to which there is a significant increase in ground clearance on the Chevrolet Niva, and they are very often installed on the rear of an SUV
- Standard, slightly increase ground clearance
Lifting methods
There are several ways to increase ground clearance:
Installation of wheels with a large outer radius. In this case, the craftsmen are faced with a limitation - tires that are too large do not fit into the wheel arches. You have to widen them or move the wheel outside the car, installing extended hubs.
Installation of spacers. This method allows you to slightly raise the body and does not require much labor.
Installation of larger springs. This method is more expensive, but allows you to achieve a greater lifting height of the body.
Installation of wheel reducers on the rear axle. These parts allow the hubs to be lowered and increase the distance from the axle to the ground.
Downward displacement of the front beam. To do this, you will have to weld special fasteners onto the side members and install extended arms.
Installation of extended springs and spacers under ball joints. A simple and inexpensive way to greatly increase ground clearance.
Purpose
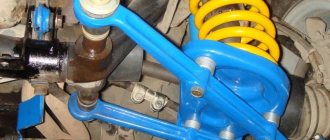
Chevrolet Niva comes from the factory with springs, both front and rear. The main purpose of these devices is to absorb all the shocks of the suspension that occur when the wheels hit potholes and bumps. They are located in the gap between the wheel and the frame of the car, due to which shocks from the road are smoothed out.
For their manufacture, special high-strength steel is used. The number of turns of the device affects not only the quality of shock absorption, but also the distance of the body from the suspension.
Many Chevrolet Niva owners upgrade the rear springs by installing spacers or reinforced parts.
How to increase the ground clearance of a Chevrolet Niva with your own hands?
Let's consider one of the lifting methods.
Before starting work, you need to prepare a set of tools:
To install the rear shock absorber bracket you will need a welding machine, and to rearrange the rear suspension cups you will need a grinder.
Upgrading the machine requires a ready-made lifting kit or independent selection of parts:
The procedure for lifting the rear and front suspension is different. Therefore, we will consider the operations separately.
Front suspension lift
To increase ground clearance, you need to do the following:
Tip: tighten the part with twists of steel wire. However, this method is dangerous. The tie may unwind or burst, causing the spring to suddenly straighten out and cause injury or damage to the wing.
This completes the first part of the procedure.
Rear suspension lift
To increase ground clearance at the rear of the Niva, you will have to use welding. First you need to jack up the car, remove the wheels, shock absorbers and springs. After this you will have to perform the following operations:
All that remains is to put the wheels on and lower the car to the ground. If there is a strong lift, you need to install an extended rear brake hose and bleed the brakes.
Suspension lift Niva Chevrolet
Despite the fact that the Niva car has cross-country ability, many continue to improve its cross-country properties. The main modification consists in re-equipping the car, as a result of which larger wheels can be installed on it, which will increase cross-country ability. The Niva’s ground clearance also increases—increasing ground clearance. This improvement is called a Niva Chevrolet suspension lift. These works can be carried out either in a special car service or independently. There are a variety of lift kits for the field. It depends on the driving conditions of the field, the size of tires, wheels, and rims.
Spring options for shevik
What springs should I put on a Chevrolet Niva? SUV drivers often complain that standard products sag very quickly, and there is a need to correct the situation. In this case, answering the question of which suspension elements are best installed on a Chevrolet Niva, it is worth noting that the best option are those that are suitable for the price.
- Izh-Techno are an excellent solution for replacing standard models. The cost of the kit is 2800-3200 rubles, but the service life of these models is much longer. For the Chevrolet Niva, the Izh-Techno spring 1 is recommended. The domestic auto industry has something to boast about, so if you do not want to overpay, then it is better to install the Izh-Techno kit.
- Kilen. These products are produced in Sweden, which already indicates their high cost. So, one element costs about 1000-1200 rubles. The thickness of the coils of this product is 14 mm for the front and 14.9 mm for the rear. For comparison: for standard products the size of the coils is smaller and is 13 mm.
- Lesjofors. A practical analogue of Kilen, which even have the same numbers.
- Raid. Currently they occupy a leading position, so we will tell you more about them.
Also interesting: VAZ Niva 2121 tuning recommendations
How to lift a Niva yourself
If you want to do the Niva lift yourself, then take this procedure very seriously, since despite the simplicity of the work, the slightest mistake will result in irreversible consequences in the future. Therefore, no matter what the car becomes unusable for use, you must strictly follow all the rules, and if there are any doubts, then it is better to turn to a professional.
In order to carry out all the work, it is enough to buy a ready-made lift kit, but there are car owners who upgrade the parts themselves, if you are one of them, then you need to stock up on the following parts:
You also need to additionally make special spacers for the rear shock absorbers. They can be made from corners, and bushings whose thickness should be approximately 32 millimeters are welded to them.
Improved rear suspension
In this case, you will need a welding machine. When everything is ready, perform the following steps:
The work can be considered completed.
After all the lifting work, you will need to install the main pairs, which will have completely different gear ratios, and if you had alloy wheels, they will need to be replaced with regular stampings. It is also advisable to purchase and install a self-locking differential on rear-wheel drive.
Installation of lift kit on Niva 2121
We are buying a lift kit for a Chevy Niva 4×4. It is ideal for a lift.
What is included in the elevator kit
Also included is an extended brake force adjuster rod,
it is lengthened by welding the lengthening plate. This lift kit for Chevrolet Niva allows you to raise the car by 50 mm in ground clearance for installing large wheels. A caprolon spacer is needed so that the cooking wheel does not take over. A bracket is installed on the rear axle under the standard shock absorbers.
There is a standard mount and allows you to move the shock absorber higher to a height of about 40 mm.
It makes sense to do this when you are going to install a lift kit on Niva 2121.
The bridge was raised and the brake hose was stretched, do not forget that the suspension also goes down.
Or we replace this hose with a longer one. Or we cut off the bracket and lengthen it by the same amount as this rod is lengthened. This lift kit includes a plate for transferring the hose, but if you untwist it you will have to pump the brakes. This time. We simply cut off the rod in place, digest it by first wrapping the joint with a rag and watering it with cold water, then paint over it. The lift kit for Niva 21214 is installed in the same order.
Front and rear suspension of the Niva 2112 lift
In the Niva lift front suspension, the kit consists of a spacer for the Niva, which is placed on the ball, the spacer is 30 mm.
You can't bet anymore. If we set more during the suspension stroke, the ball pin begins to break, resting against the body and tries to fly out of the cavity with nylon bushings where it is located. Comes with a standard shock absorber. Spacers on the field, which are placed under the spring cup, allow you to compensate for the height of the ball.
Thanks to this, the spring is not skewed; it stands just like on the standard suspension.
And the point of this lift kit is not just to clamp the suspension, but to lift it. If we hadn’t installed a ball spacer, but instead put a spacer under the cup, or put a longer spring, or a polyurethane buffer on top of the spring. We would have tightened the suspension, then the correct sales blocks would quickly die.
They are small compared to the big ones. The car would rise. But there was an additional load on the ball and on the salen blocks. Spacers for the rear springs of the Niva are also relevant for lifting. We need to preserve a certain geometry. The car rises by 50 mm and the Niva’s front suspension remains soft. Also, the upper bumper is cut off in half, or a Cheviniv one is installed, which is smaller in size.
Necessary tools for work:
- Regular jack
- Hijack jack
- Spring puller
- Balloon wrench
- Ratchet socket set
- Set of open-end wrenches
- Mount
- Wooden deck (stump)
It is advisable to perform such work with a partner. First of all, it's safer. Secondly, some lifting work is performed with four hands. Let's take the front suspension as an example.
Raise the front end. You can safely cling to the standard bumper, only the jack is installed under the pipe securing it.
By removing the wheel, we get full access to the lever and spring. The front suspension 21214 is made using a double wishbone design, which simplifies the task.
Important! For safety reasons, it is advisable to install some kind of support under the bottom power spar: for example, a wooden block. Lever travel is limited by the shock absorber
Unscrew its fastening and move it to the side
The lever travel is limited by the shock absorber. Unscrew its fastening and move it to the side.
Next you need to free the suspension from the anti-roll bar. The mounting bolts may become stuck due to corrosion, so we will use a penetrating liquid (such as WD-40). The stabilizer silent block clamp can be pryed off with a pry bar.
Then disconnect the hub from the lower arm. To do this, you need to jack up the suspension and fix the steering knuckle of the wheel. You can tie it with wire. Then unscrew the 3 mounting bolts and release the ball joint.
We fix the spring with ties and lower the jack. We remove the old elastic element. In some cases, it is enough to simply lower the lever with your foot, and the spring will come out without the use of ties.
Remove the upper support rings from the old springs. With their help, the elastic element is centered in the cups. They come together easily with a hammer and screwdriver. We install the rings on new, longer springs.
We put the elastic elements in their regular places and jack up the lower arm until it is completely aligned with the lower cup. At the same time, an assistant centers the shock absorber eye and moves the steering knuckle to the mounting location of the lower ball joint.
We tighten the ball “triangle” and attach the shock absorber mounting axis.
By manipulating the jack, we “catch” the mounting holes for the stabilizer bar clamp. With its bolts it should get into the normal place without distortion.
After such modernization, the clearance increases by 30-50 mm. This is enough to install wheels of larger diameter, and the bottom will still rise above the ground.
The rear axle of the Niva can be lifted by installing spacer supports of increased height. When using a size of up to 50 mm (according to changes in front end height), no modifications to the rear axle are required.
By lifting the rear axle, maintenance can be carried out on the axle and brake system.
The handbrake cable may need to be replaced. It is lengthened by a couple of centimeters. Otherwise, the Niva lift will lead to increased wear of the brake pads in the rear drums. Disconnect the lower shock absorber mounts and lower them until the springs stretch.
We take out the elastic elements and knock off the support rings from them. We clean the upper cup and carry out anticorrosive treatment. We install new supports of increased size and seat the springs using a jack.
We fasten the shock absorbers, assemble the axle, and mount the wheels.
Such a lift will not arouse suspicion among traffic police inspectors, and the cross-country ability of your NIVA 2121 will improve. No drawings, much less homemade parts, are required. You buy new springs and about the rates, the rest is a matter of technology. Labor costs for an elevator of one NIVA are two people/one day off.
What to pay attention to when lifting
We install a 30 mm spacer; if we do not install the spacers under the cup that come with the lift kit, you can install a longer spring or a polyurethane buffer. Then a problem appears: the spring is crooked, it can touch the body of the bump stop, constant grinding, knocking, squeaking. The Niva elevator kit is best suited. We don’t need to change the spring, we don’t change the shock absorber and the suspension works softly and at the same time the car rises by 50 mm.
Why don't we change the shock absorber? Spacers are installed under the spring cup. which maintain the same height position of the cup as on the drain. The shock absorber remains standard. If we install a long shock absorber, the upper shock absorber house will begin to break out. It sometimes cracks. Or the ears will fold on the cup.
We also need to modify the cup for the steering rod.
When turning the wheel, if the cup had not been modified, the rod would have stuck. And there was a restriction on turning, and there would be knocking when the suspension moved.
Chevrolet
Cruze
Lacetti
Are the springs sagging? Breaks through shock absorbers? Roll in corners or just want to lower your car. Technoressor springs! They help to cope with some problems that arise when operating a car. Springs lowered by 30/50/70 mm will make the car lower, more responsive when steering, and improve its appearance. Springs of standard height or 20mm to the factory ground clearance will make the car less susceptible to loads and more passable.
Clearance value
Ground clearance, or otherwise Niva 4X4 ground clearance, is relevant not only off-road, but also in the city. The higher the Niva 2121’s ground clearance, the higher the seating position and the better the visibility. The driver of an SUV receives earlier and more information about the road situation. This means it can react to it in a timely manner. If the ground clearance is higher on a Niva 4X4, then there is a greater chance of avoiding an emergency. The large glass area and good visibility of the Chevrolet Niva helps to spot holes in the asphalt. Speed bumps and other obstacles. Most obstacles can be overcome by walking without slowing down. Long-travel suspension is famous for its energy intensity. After all, it is designed for off-road driving. There are potholes in the streets, muddy holes in the courtyards and narrow passages. You have to park close to the high curb. For passenger cars, such parking is fraught with damage to the body, but with ground clearance and high bumpers in the city, lifted Nivas feel confident.
Source
Wheel bearing clearance
When the vehicle is actively moving, noticeable vibration may occur. The reason is play in the ball bearings of the front wheel hub. The wear of car tires will be uneven, and the life of the ball bearings will be significantly reduced. But if there is no gap at all, then the torsion of the hub will be very difficult (tight). In this case, the life of the ball bearing is reduced. You can adjust the bearings using a wheelbrace, a hammer and a “No27” wrench.
Perform rotational movements of the wheel in a raised state. Do you feel the distance? The gap must be adjusted. Have a helper hold the brake pedal. In the meantime, try to rotate again. Do you feel any play in the wheel? There is definitely a gap and it needs to be adjusted.
Remove the decorative cap and unscrew the hub fastening nut. A knob will help prevent scrolling. When repairing the Chevrolet Niva chassis, insert new hub nuts while adjusting the hub system itself. The old mounting screws will take the previous position and adjustment will be impossible. If there are no new fasteners, use used ones, but from another car.
Bend the collar of the nut on the trunnion of the external drive hinge, the hub screw will lock. Reinstall the previously removed elements.
After adjusting the ball bearing clearance, check the rotation of the wheel. It should turn freely and easily. It is possible to give a full assessment of a correctly performed adjustment only based on the results of the Chevrolet Niva mileage (assessment of heating of the hubs).
Now you can go to the forest! Do-it-yourself Chevrolet Niva lifting
When a person buys a Chevrolet Niva, he rarely thinks about an extreme trip. Most often, a car is bought for a picnic with the whole family. That is, the car moves from one point to another. Although the Chevrolet Niva is an SUV, it is noticeably inferior to its European and Asian competitors in cross-country ability in hard-to-reach places. It is because of this problem that fans of hunting, fishing and simply extreme driving choose to lift their car instead of watching videos while sitting at home. Lifting is a type of tuning that increases the vehicle's ground clearance. They often do it with their own hands, in garages.
Proper modification will turn the Niva into a fairly solid car that will show excellent results off-road and in difficult terrain. We mentioned the word “lifting”, but did not say what it is. Lifting is a set of changes made to the design of the car. They allow you to install larger diameter wheels on your car. Most often, cars with all-wheel drive are chosen to create such projects. An all-wheel drive jeep is much more suitable for this task than a simple passenger car.
What does lifting give?
There is a rumor among inexperienced drivers that lifting increases ground clearance. Remember, this is not true. It should be understood that the ground clearance will be increased by large diameter wheels, and lifting will mainly allow them to be installed on the car. In other words, this is a modernization of ground clearance and a significant increase in cross-country ability. This kind of car tuning can be done with your own hands without much difficulty. To do this, you need to find time, a garage stocked with everything you need, and allocate a budget for the purchase of spare parts.
With such an upgrade, the car can be operated without loss of comfort qualities, both on rough off-road conditions and on paved roads. The Chevrolet Niva will be in no way inferior to powerful jeeps. Auto-tuning is also done in a similar way, but has some design distinctive features.
Ultimately, the ground clearance increases, and the car can easily overcome bumps and all kinds of holes. The first step is to install and upgrade the suspension lift and install larger wheels. Let's consider the advantages of Niva with lifting:
Positive aspects of a lifted car
If you carry out a suspension lift on a Chevrolet Niva, the advantages of such work will be tangible from the first trip. And they will consist of the following:
- the value of ground clearance will increase;
- it will be possible to install special rubber with a huge radius;
- anger will appear in the outward form of punishment;
- the model's passability threshold will increase;
- components and mechanisms will receive additional protection from various mechanical actions.
All the advantages, of course, are better felt during off-road travel, where the car will demonstrate its superior driving properties at its best.
Subtleties of lifting
In this type of car suspension tuning, such as lifting, you always need to maintain common sense and be able to stop in time. It is important to know that during modification, the bend angle of the drives changes, which automatically leads to a reduction in their service life. In most cases, such car tuning is done to order, since everything depends on the wishes of each car owner; an individual suspension modernization project is drawn up for each car. The center of gravity also shifts and, as a result, the overall behavior of the car on the road changes. It is believed that the maximum wheel size should not exceed 235/75 r15. It is necessary to increase the ground clearance only with minimal load on the chassis, otherwise serious problems may arise.
Step-by-step instruction
Step 1
Body lifting is performed using spacers between the frame and body. It is best to choose aluminum spacers: they are inexpensive and well made. Their main advantage is the strength and rigidity of the attachment of the body to the frame. Foreign companies produce a wide range of aluminum spacers for all models of SUVs. All of them are made at the highest level and are perfect for the Chevrolet Niva. The suspension of each car is calculated individually, since there are no average lifting indicators.
Set of spacers
Step 2
When installing spacers between the body and frame, the task arises of trimming the wheel arches and fenders. You also need to install side mudguards that will protect the glass from flying dirt from under the wheels. Problems. Problems that arise with lines, cables, and steering mechanisms can be resolved without much difficulty. Depending on the type of spacers, the distance from the frame to the body part will be increased by 40-80 millimeters. And in combination with large wheels, ground clearance will increase by 50-150 millimeters. How these operations are performed can be seen in the video, where domestic auto mechanics perform car suspension tuning with their own hands. You can glean a lot of useful information from these materials, since in most cases they are accompanied by sensible comments and explanations about the performance of certain types of work.
Step 3
Lifting the suspension significantly increases the vehicle's maneuverability, but safety suffers: an increase in the center of gravity makes the SUV more difficult to drive. So don't overdo it. Choose a suspension lift height that is optimal for both cross-country ability and safety. You also need to take into account the maximum angle of inclination of the cardan shafts, until reaching which they operate in normal mode. Remember - the greater the angle of inclination of the shaft, the faster it will wear out.
Suspension lifting
Step 4
To combat the increased risk of rollover, widen the track with wheel spacers, negative offset rims, wide tires, or replacing axles (Spicer or Bars). Install disc brakes. This will widen the track by about 40-50 millimeters. You can get rid of the problem of the maximum angle of inclination of the cardan shafts by installing extended shafts and a spacer between the flanges of the cardan shafts and axles. SUVs with differential locks are best suited for lifting. Such cars have increased cross-country ability, and increased ground clearance helps improve this indicator.
Step 5
Now you need to choose a method for lifting the suspension based on what height you want to get in the end. For a small increase, simply add leaves, or install extended spring earrings. You can also replace the springs with others with more springs. Most often, the brake system of a car, for example a UAZ, also needs design changes during the lifting process. There is an alternative way - installing a spacer in the spring mounting brackets. These two options are almost always used on so-called “loaves” due to the preservation of original parts and the ability to raise the car to different heights.
Before and after lifting
Step 6
You should know that for successful off-road driving, cars with high suspension must be as energy-intensive as possible in order to ensure the best possible contact of the wheel with the ground. And the specific power of the car must also correspond to the new design of the suspension and chassis of the car. The wrong lifting method or technology can make the suspension very stiff. To lift the Niva's front spring suspension, place spacers between the chassis support cups and the springs. Another way is to install longer springs. During this operation, it is necessary to take into account the change in the angles of the levers. The more the angle changes, the more difficult the SUV will be to control. To avoid this, lower the arm brackets.
You can learn more about the Volkswagen Jetta in our article.
