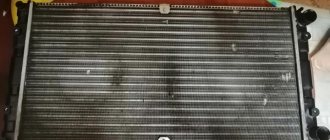
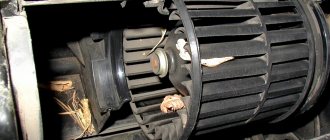
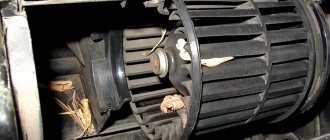
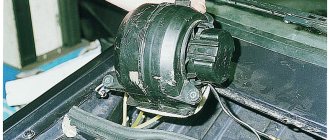
In order to provide a comfortable atmosphere in the cabin of any car, including the Niva Chevrolet, an air heating and cooling system is provided. The manufacturer took care of this and equipped the car with a stove motor, specifically an electric motor, an impeller and a shaft mounted on it.
Video about replacing the heater motor on a Niva Chevrolet:
But sometimes it happens that this miniature structure breaks down, ceases to fulfill its intended purpose and needs to be replaced. In this article we will look in detail at how to replace the heater motor on a Niva Chevrolet, as well as how to service it if necessary.
Problem
The question, as always, turned out to be extremely simple - the quality of the original delivery. It turned out that the Chevrolet Niva heater motor was supplied to the conveyor assembly assembled from the Kaluga plant. The official name of PJSC Kaluga Automotive Electrical Equipment Plant is KZAE. This plant, as you know, is almost entirely configured to work with the Volkswagen plant, which is located there, and supplies products to AvtoVAZ only for the assembly line. And even these supplies are not enough and we have to install stove motors from other manufacturers. There is a very big difference, both in the resource of spare parts and in the ease of installation. Of course, the main supplier of the Russian spare parts market is China or Luzar (which is not very important). The motors initially hum very loudly, but most importantly the impeller is pressed onto the motor shaft. While on the Kaluga product it is located on a lock washer, which greatly facilitates the installation and dismantling of the spare part. There is another Tolyatti product, if I’m not mistaken, of a similar design. But with a minimal difference in price, it is better to supply a conveyor original, especially since, as I said earlier, the plant serves Volkswagen.
Important nuances
There are several important points that must be taken into account when changing the heater fan on a Chevrolet Niva. Here they are:
The cabin filter cover should be removed very carefully, since the latches that hold it in place are easily broken. This point is especially relevant if you have to change the fan in the cold;
when lowering an unscrewed electric motor, you should remember that there is a small guide bushing on its shaft, which is very easy to lose: it falls, rolls down the glove compartment directly into the engine compartment and it will be very difficult to find it there;
It is not always possible to find a “native” fan for a Chevrolet Niva on sale (its catalog number is 21238118020)
For this reason, many car owners install LUZAR brand fans (and its number is lFh01211). These devices cannot be called a good alternative, and here's why. “Native” fans for the Chevrolet Niva can rotate at a speed of 3000 rpm, while the analogue from LUZAR reaches a maximum speed of 2800 rpm. The “native” fan consumes a current of only 18 A, and the LUZAR consumes 25 A. At the same time, fuse F18, mentioned above, is designed for 25 A, that is, the risk of its burnout when using the LUZAR fan increases many times over. In such a situation, the best option would be to install a “native” fan on the Chevrolet Niva.
Replacing a broken fan on a Chevrolet Niva is not that difficult. Even a novice car enthusiast who has held a Phillips-head screwdriver at least once in his hands can cope with this task. The main thing is not to damage the latches on the cabin filter cover and not to lose the fan guide bushing.
Heater motor Niva Chevrolet, Kaluga
I was not too lazy, and on occasion I ran through several markets and shops to see what was on offer to the people. The Kaluga original was nowhere to be found, except for one specialized store, where it cost outrageous money. The situation is similar for wholesalers, so only direct delivery from the factory. I won’t dwell for long on the differences between the original motor and the non-original one, I’ll immediately move on to how to see that this is a Kaluga spare part.
Heater motor assembly, lock washer
I took two photos of the original part. Main features of the original.
- The first and most important difference. In the conveyor configuration, the motor is supplied assembled with an impeller.
- As mentioned above, the impeller is not pressed onto the shaft, but is secured with a lock washer.
- On the stove motor there is a branded factory mark embossed on the metal.
Replacing the heating fan fuse
As mentioned above, almost any malfunction of the stove motor disables fuse F18. It is installed in the safety block, which is located to the left of the steering column, directly above the driver's left knee. The block is covered with a plastic console, so you will need a Phillips screwdriver to work.
Sequencing
- The plastic console of the fuse box is held in place by two self-tapping screws. They are unscrewed with a Phillips screwdriver.
- Now the console is carefully bent down until its lower edge is disengaged (the edge of the console is held in place by a plastic latch and a characteristic click will be heard when it opens).
- After removing the console, fuse F18 is removed from its socket. Its location is shown in the photo below.
- The fuse is inspected. If it fails, the insert in its body will be torn and melted. The fuse housing itself will most likely also be melted and traces of soot will be visible on it.
- The blown fuse is replaced with a new one, and the console is returned to its place.
Replacement and installation
Just a couple of words. If you have a motor with a pressed impeller, the main task is to pull it off. Well, if you bought the “right” spare part, you don’t have to regret the old one too much. A couple of powerful screwdrivers solve this issue. Installing a new spare part takes no more than half an hour. Moreover, if with a pressed impeller, as a rule, they play with four hands, then with the original spare part this is done with two hands. Well, one more thing: the Chevrolet Niva heater motor has not changed structurally since the start of production of the car through the restyled versions.
The stove is the central element of the interior heating system of any car. Any malfunction, especially in the cold season, leads to very unpleasant sensations. A well-functioning stove is the key to a comfortable climate inside the car.
The device of the stove of the Niva Chevrolet car
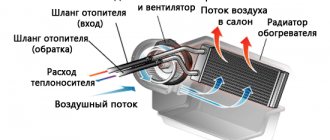
The Chevrolet Niva is equipped with a liquid-type heater. It supplies warm air to the cabin and cools the engine, overheating of which can lead to disastrous consequences and costly repairs.
Without air conditioning
The Chevrolet Niva heating system consists of the following elements:
- ventilation duct;
- windshield heating duct;
- intermediate body;
- air intake filter;
- fan;
- interior heating duct;
- foot heating duct;
- heater radiator.
The intensity of the hot air supply is regulated using dampers. The air duct system distributes the heat flow to various areas of the cabin: windshield, side windows, legs, doors, etc. In addition, there is a four-speed air supply switch.
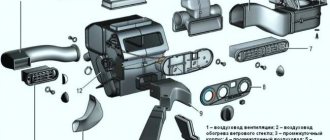
Heating system for the interior of a Chevrolet Niva car, where 1 is the side deflector air duct; 2 — windshield air duct; 3 - intermediate body; 4 - intermediate air duct; 5 — outside air filter housing; 6 — fan housing of the heating and ventilation system; 7 — central deflector; 8 — air duct for blowing the front passenger’s feet; 9 — facing of control units; 10 — front air duct for blowing the legs of rear seat passengers; 11 — rear air duct for blowing the legs of rear seat passengers; 12 — heater assembly; 13 — air duct for blowing the driver’s feet; 14 - side deflector
With air conditioning
The air conditioning system allows you to regulate the temperature and humidity in the cabin. Before turning on the air conditioner, the heater fan is turned on, and the temperature control knob is set to minimum. Almost the entire air conditioning system is located in the engine compartment. Only the evaporator is brought into the cabin between the heater and the electric motor, providing heat exchange between the incoming air and the refrigerant.
Heater and air conditioner diagram, where 1 - heater housing; 2 — inlet pipe of the heater radiator; 3 — heater radiator outlet pipe; 4 — air conditioner evaporator housing; 5 — evaporator outlet pipe; 6 — evaporator inlet pipe; 7 — fan housing; 8 — control cable for the external air supply damper
As the refrigerant moves through the evaporator tubes, it absorbs heat and turns into a gaseous state. The evaporator fins are cooled, and the fan directs cold air into the cabin and reduces the temperature. Gaseous refrigerant from the compressor under pressure enters the condenser, cools and turns into a liquid state. After this, the liquid is supplied to the receiver, and from it to the evaporator reducer, where it again turns into a gaseous state. A new cycle begins.
Main stove malfunctions
Stove malfunctions can be very different. The most common reason for its failure is:
- heater valve malfunction;
- damage to radiator pipes;
- failure of the additional resistor;
- radiator damage;
- control unit problems.
As a result of any of the above situations, the stove stops working normally.
Warm air does not enter the lower part of the cabin
Before repairing the stove, you should check the temperature of the coolant (coolant). Perhaps the problem is not in the interior heater, but in the cooling system. If the engine warms up to operating temperature (90˚C), then the cause of the malfunction should be sought in the stove.
With the help of damper position regulators, warm air is directed to different parts of the cabin
The dampers should be adjusted first. To supply hot air to your feet, follow these steps:
- The engine warms up until the warm air can be felt with your hand.
- The heater fan speed switch is set to position 4.
- The airflow direction knob turns to the 12 o'clock position and immediately returns to 10 o'clock. Air should begin to flow into the lower part of the cabin.
- If the result is not achieved, the procedure is repeated.
This sequence of actions is due to assembly errors. Due to gaps and backlashes, interference is created with air distribution and installation of the damper in the desired position the first time. If after these steps the heat still does not reach your feet, the heating system needs to be modified.
Antifreeze leak from the stove
In used cars, coolant often begins to leak from the stove. The reason for this is usually wear and tear on the pipes or a malfunction of the heater tap. Since antifreeze circulates under pressure, all connections must be tight. However, during prolonged use, hoses and gaskets lose their elasticity and burst. After inspecting the heating system and identifying the leak, the worn part is replaced with a new one. When making repairs, you should not use clamps made in China due to their poor quality.
DIY troubleshooting
If the Chevy Niva cooling fan does not turn on, then if you have at least a little experience, you can try to fix the problem yourself. The main advantage of repairs without the involvement of third-party specialists is saving money and time. Also, during the work, other elements and devices that are located at the location of the stove can be checked.
The disadvantages of self-repair may include making serious mistakes, which will lead to failure of not only the products being repaired, but also related parts. In some cases, replacing parts may result in a short circuit and fire in the vehicle.
If, despite all the possible disadvantages, you decide to repair the Chevrolet Niva yourself, then the recommendations below will help minimize the risks and possible damage from unprofessional intervention in the electrical system of the car.
Step-by-step instruction
If the stove fan does not turn on, then first you should check the fuse that is responsible for the safety of the wiring circuit of this electricity consumer. The Chevrolet Niva relay and fuse mounting block is located under the steering column. To get to it, you will need to unscrew the screws and remove the cover by pulling it towards you.
The location of the fuses inside the block may vary significantly depending on the car model, but in both old and restyled models, the protective device located in cell F18 is responsible for the heater heater. Such a product must operate at a current strength of more than 25 Amperes. You can check the functionality of the fuse with a tester or multimeter.
If the fuse is in good condition, the heater fan malfunction may be caused by a failed electric motor. To make sure that this part has actually burned out, you will need to dismantle it.
This work is performed in the following sequence:
- Remove the glove compartment. To perform this operation, you will need to unscrew several screws, remove the cover stops and the side casing.
- Unscrew the screws securing the electric motor.
- Disconnect the wires.
- Open the hood and remove the windshield wipers and the panel underneath them.
- Remove the cabin filter.
- Unscrew the four nuts holding the air duct box in place.
- Remove the engine from the engine compartment side.
You can check the electric motor using a multimeter, or by directly connecting it to a 12 V power source. If the motor is faulty, it must be replaced with a new original product or its complete analogue. Otherwise, it is recommended to lubricate the bearing and reassemble the interior heating system in the reverse order of removal.
If the heater fan motor constantly runs at maximum speed, then the additional resistor is most likely faulty. As a rule, this part cannot be repaired and you will need to use a new product in order to select the operating mode of the stove. To replace this part, you will also need to dismantle the glove compartment as described above.
Once this part is removed, the work of replacing the resistor is performed in the following sequence:
- Remove the wire terminal block.
- Unscrew the screw securing the resistor.
- Remove additional resistance.
- Install and connect a new product.
- Connect the wires.
- Install the glove compartment.
Sometimes the cause of a fan malfunction is a broken motor operating mode switch. The work to resolve this issue is similar to the steps above. If no broken wires are detected, this part is removed and then checked with a multimeter. Even if there is no closed circuit in one of the modes, it is recommended to replace the part.
The duration of operation of the electric motor or other components will depend on the quality of the spare parts used, so it is advisable to use only trusted retail outlets or order parts directly from the manufacturer.
Interior heater repair
The stove in the Chevrolet Niva is considered one of the most reliable components of the car. However, it can sometimes fail.
Replacing the heater cable
Sometimes it is not possible to change the position of the heater damper. The reason for this is a broken cable. To replace it, you will need a standard set of tools and a headlamp. Replacing the cable is carried out as follows.
- The driver's seat moves back.
- The handles are removed from the damper control panel and the screws are unscrewed.
- The panel is dismantled on the left side at the location of the driver's feet.
To access the cable you will need to remove the heater control mechanism
Using a cable, the position of the air supply flap is changed
Replacing the interior heating control unit
A faulty control unit can also cause the interior heating system to not operate correctly. Its dismantling, necessary for repair or replacement, requires the following procedure.
- The negative terminal is disconnected from the battery.
- All handles are removed from the heater control mechanism. To do this, you need to carefully pull them towards you.
All handles are removed from the heater control mechanism
Use a flat screwdriver to remove the air circulation lever
Use a screwdriver to pry up and then remove the block lining
Two self-tapping screws are unscrewed under the cladding
The connector with wires is removed from the control unit
After dismantling, the control unit is repaired or replaced with a new one.
Replacing stove pipes
If a coolant leak is detected, the pipes along with the clamps should be replaced. The work is performed in the following sequence:
- The coolant is drained from the system.
- The screws securing the glove compartment are unscrewed and it is removed.
- Use a Phillips screwdriver to unscrew the clamp of the lower pipe. The hose is removed carefully - the antifreeze should not get on exposed skin. If difficulties arise, the pipe should be rotated around its axis.
- The second pipe is removed in the same way.
- New hoses are installed and tightened with clamps.
If antifreeze leaks, the stove pipes are replaced with new ones.
Video: dismantling the stove pipes on a Chevrolet Niva
Replacing the stove fan
If the fan does not turn on or if strange noises appear when it is turned on, then the electric motor is most likely faulty.
Before removing the heater motor, you need to make sure it is faulty.
The most common reasons for its failure are:
- Lack of voltage on the electric motor due to poor contact.
- Visible damage to the motor wires due to chafing.
- The 25 A fan fuse located in the fuse box number F18 has failed.
- Failure of one of the resistors, manifested in the absence of one of the speed modes.
- No ignition.
- Deterioration of the armature and brushes of an electric motor as a result of long-term continuous operation.
If only fourth speed works
In cases where the motor refuses to work at the first, second and third speeds, but turns perfectly at the fourth, the same resistor with three isolated windings is to blame. If you can’t buy it, you can try to restore it yourself. True, only in the case when the thermal fuse has blown, naturally, no one will rewind the windings, the game is not worth the candle.
Fan resistor
You can remove and check the resistor without dismantling the engine. This is done like this:
- Use a Phillips screwdriver with a short blade to unscrew the rightmost screws securing the glove compartment.
- We gain partial access to the motor, but this is enough to get to the resistor.
- Remove the terminal block and move the wiring harness to the side.
- Using a Phillips screwdriver, unscrew the screw securing the additional resistor.
- We remove the resistor from the housing.
- We check the integrity of the thermal fuse with a multimeter. If it is faulty, you can try to replace it.
- Installation of a new or restored resistor is carried out in the reverse order.
Built-in fuse
To replace the built-in thermal fuse, any type KSD-160 or RY01-165 is suitable. They work up to a temperature of 150-165 degrees. To solder a new resistor, be sure to use low-melting solder so as not to overheat the part, and during soldering, hold it with thick pliers for better heat dissipation. Good luck to everyone and a comfortable temperature in the cabin!
Dismantling the stove
The stove is dismantled as follows.
- The negative terminal is removed from the battery.
- Remove the dashboard, performing the same steps as when replacing the control unit.
- The screws securing the heater to the cross member of the instrument panel are unscrewed.
- The stove is pulled out from its installation location.
Removing the stove from a Niva Chevrolet car is quite simple
How to determine if the heater motor is faulty
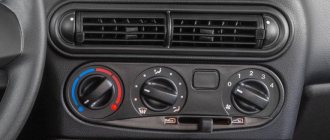
In a Chevrolet Niva, the heater is turned on inside the car. This is done using a regulator located on the dashboard (dashboard). The regulator has four positions, three of them are responsible for the operation of the stove and fan in different power modes, and the fourth is switching off. When switching the regulator to position 1, if the motor malfunctions, the sound of the fan will not be heard. This indicates that the motor is not working. It is necessary to click through all three positions with the regulator, and if the motor does not turn on in any of them, then this means that it has failed.
The main reasons for the heater not working in a Chevrolet Niva include the following problems:
- No battery power. The battery is faulty or there is no ground on the vehicle.
- The heater motor power wires are damaged.
- The fuse has blown due to the passage of a large current.
- The pre-resistance is faulty. In this case, the motor will not work in all modes.
- The car's ignition is not turned on. The stove in the Chevrolet Niva only works when the ignition is on.
- The heater motor has worn out and needs to be replaced with a new one.
The procedure for removing the old motor and replacing it with another
Having determined the cause of damage to the heater, it is necessary to remove the worn motor. First you need to disconnect the negative terminal from the battery. When disconnecting the ground from the battery, you must make sure that the car's ignition is turned off. Otherwise, you risk the possibility of failure of the injection control unit, which will lead to serious repair work.
Armed with the necessary set of tools, you can begin to remove the motor. To make it easier to dismantle the motor, it is necessary to remove the dashboard from the car interior. After this, it is necessary to remove all the inlet pipes suitable for the fan and check the ease of movement of the fan impeller itself. Not wanting to remove the dashboard, you can crawl underneath and try these operations. It is necessary to remove the glove compartment, since it will not be possible to remove the motor otherwise. After this, you need to disconnect the right air duct and the plug on the motor housing. If the motor does not work in only one position, but works in the others, then only the board needs to be replaced. The motor is removed as follows: the locking lugs are pressed down using a screwdriver, and the heater housing is turned clockwise, after which the motor is brought to the middle of the instrument panel and removed.
After removing the motor, it is necessary to inspect the air duct. Foreign objects or particles may have gotten into it and need to be removed and the air duct cleaned of dust. You can check the functionality of the removed motor by connecting it directly to the battery terminals. If the cause of the heater malfunction is in it, then you are on the right track to repairing the stove.
Installing a new motor
To do this, you need to take a new motor and screw on the connecting board. After this, insert the motor into place and turn it to the left.
Connect all inlet pipes and install everything in its place. When finished, check the motor for functionality by connecting the terminal to the battery. If the motor hums, then its replacement was completed correctly.
Refinement of the heating system of the Chevrolet Niva
When the intensity of supply of air heated by the heater into the cabin decreases, it becomes necessary to modify the heating system. This is due to errors in the assembly of the system. The main problem is the lack of tightness in the air ducts and dampers. This leads to incorrect distribution of warm air throughout the cabin. The modification is carried out as follows.
- The steering column casing and driver's side console are removed.
- On the heater side, a plate is removed that sets the direction of air supply.
The die located on the heater side needs improvement
To give the desired trajectory of movement of the damper, you can glue a plastic card to the die
The last stage of modification of the stove is the rigid fixation of the lower damper
As a result, warm air will be distributed throughout the cabin strictly in accordance with the position of the flow direction regulator.
Thus, even an inexperienced car enthusiast can ensure a comfortable microclimate in the interior of a Chevrolet Niva car. To do this, you just need to strictly follow the instructions and recommendations of professionals.
NIVA car owners community forum
- Unanswered topics
- Active topics
- Search
