Print this article Font size 16
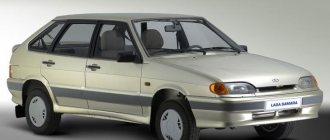
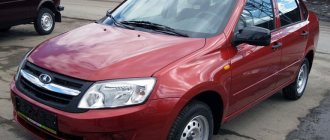
When purchasing a new or used car, the first thing the owner must do is figure out exactly how to operate the car and all its systems. To do this, you should know the pinout of the instrument panel on the VAZ 2114, since this is the car we are talking about today.
Dashboard
We bring to your attention a detailed description of the buttons on the VAZ 2114 dashboard, icons, lights and other devices and indicators.
VAZ 2114 dashboard repair
Hello! Quite often we encounter such a problem as a failure of the dashboard. Without a doubt, this is not pleasant, and costs about 3,500 rubles. And besides this, other problems arise, such as the mileage traveled, because when selling a car it will be difficult to prove what the mileage was before replacing the dashboard.
Together with changing the odometer readings (they will adjust the kilometers traveled from the old PP to the new one) this pleasure will come out to about 4000. This amount is worth trying to revive. And so let’s look at the main malfunctions of the dashboard.
First, let's understand the principle of operation. The arrows are moved by so-called motors, their principle of operation is similar to the principle of operation of an engine temperature measuring device from the classics or any other Soviet automobile industry, except that in this dashboard the position of the arrow no longer depends on the readings of one or another sensor, on what it says to do her dashboard processor. Those. data from the sensors comes to the processor, and it gives an impulse to the motor, and it changes the position of the arrow.
Why do light bulbs fail?
Before changing incandescent bulbs, you need to understand what caused the dashboard to fail. The reasons why the backlight stops working may be:
- burnt out incandescent lamps or LEDs stop working;
- oxidation of connectors;
- defects and short circuits in the electrical circuit;
- fuse box failure;
- deformation of the common contact board;
- failure of the dimensions system;
- no negative battery.
A little bit of history
VAZ 21099 2000 arrived to me. with a 2114 interior. This surprised me, of course, because a friend had a 2109 injection model from 2002, and the panel and interior were 2109. The essence of the problem was as follows. The tachometer needle and the fuel gauge needle are stuck. These two arrows only trembled convulsively when the ignition was turned on. Unfortunately, I didn’t take a photo of this, but it looked something like this.
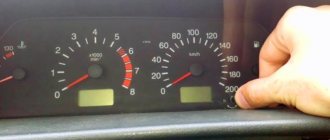
All the electricians in our city prophesied the death of the dashboard, and shouted with one voice, buy a new one, or look for the same one but used. Seeing that the odometer was alive and normally recording the kilometers traveled, it was clear that the processor was alive. You can verify that the processor is alive using a simple command: with the ignition off, press the reset button for the daily clock readings and turn on the ignition.
If the arrows on the dashboard describe an arc, it means that the test mode has started, then press the odometer button again and see the firmware version, then press it a third time and see the error code.
In self-diagnosis mode, the instrument panel displays the following error codes:
2 – Excessive voltage 3 – Fuel level sensor error* 4 – Coolant temperature sensor error* 5 – Outside temperature sensor error** 6 – Engine overheating*** 7 – Emergency oil pressure*** 8 – Brake defect*** 9 – Low battery*** E – Recognition of an error in the data packet stored in the EEPROM
This is what happens!
If the self-diagnosis mode has started, then the percent is alive, and let’s move on to disassembling the dashboard.
Let's disassemble it completely, we only need the board for work.
Next, we arm ourselves with a soldering iron and a “tin sucker” and solder the faulty motor.
The place where the gearmotor stood is circled.
And here we are holding it in our hands.
We take a scalpel or something very strong and thin and carefully disassemble the motor into two halves.
The photo shows two of the three breakdowns, which can occur and which can be easily fixed. What is circled in blue is a spring that prevents the gearbox gear from going down, and keeps constant resistance for the mechanism to work; it should be in the form of an arch. But the breakdown that brought the wanderer to me is circled in red. You can see how the transmission shaft jumped off its groove, and thus could not set the gearbox in motion. This happened due to the old age of the plastic; over time, the plastic aged and a gap formed between the halves; it can also occur due to excessive force when installing the arrows. Once in the turboflight zone, the shaft jumped off. There are times when wedges are knocked out with wedges. Those. entering this zone again brings life back to the gear motor, but it is clear that this is temporary, and with our roads this will happen indefinitely. But the third reason is a malfunction of the left or right winding, but this cannot be repaired and requires a donor.
And so we carefully clean the grooves under the transmission shaft with an awl or a scriber, put a new lubricant (litol, CV joint) with a match, the main thing is not to overdo it, and apply a small amount of super glue to the places shown in blue.
Now we start assembling, the main thing is that now, due to the glued elements, a gap will not form for a long time.
And we solder it back onto the board, but before that you can check the gearmotor with a 1.5V battery by placing the arrow in its rightful place and connecting the battery according to the diagram given in the picture. If everything is fine, then we solder the gearmotor to its rightful place.
When the instrument panel is assembled and the time has come to install the arrows, we will again need the test mode for proper calibration. We set the arrows, started the test mode, at the end of the test the arrows will drop to zero, you will only need to remove the arrow from the rod and put it in the zero position, and then make sure that it is correct by restarting the test mode, the arrow should make a full move, for example on the speedometer The needle in test mode should move from 0 to 200 km/h, the same applies to other devices.
Make sure that all the legs of this stabilizer are well soldered so that there is no undercontact.
I hope my article will help you. And at the expense of your hands it will save money.
Tuning options
You can perform tuning in several ways:
- cover the panel with leather;
- paint;
- install overlays;
- combine materials.
Before tuning the dashboard yourself, you need to familiarize yourself with the rules and the car’s passport. You cannot use fur or ordinary fabric to cover the panels; the paint must be automotive grade. This is due to the operation of the stove, since as a result of high temperatures, ordinary paint and the described materials will begin to disintegrate and release harmful substances.
Before tuning the dashboard yourself, you need to familiarize yourself with the rules and the car’s passport.
You also need to take the choice of colors seriously. The color of the covers and interior trim are taken into account. If black and white are combined in any way, then when selecting other shades you need to use special tables of color combinations.
Panel painting
One of the simplest and most affordable options for tuning the VAZ 21114 dashboard is painting it. Here you can do everything yourself.
The procedure for painting the dashboard:
- The surface is thoroughly cleaned from dust and dirt. To do this, use a soft sponge and a regular soap solution.
- Sanded with fine sandpaper (P240, P280, P320, P360), this will help improve paint adhesion. The panel is also degreased using a special product for plastic; if this is not available, you can use compositions based on white spirit, dishwashing detergent or wet hand wipes.
- The sealant is applied. This is done at the points where the panel comes into contact with other body elements.
- Painting in progress.
In order to properly paint the VAZ 2114 panel, it must be dismantled
The paint can be applied with a brush, roller or spray. In any case, if the panel is not removed from the car, it is necessary to completely cover all areas that will not be painted. To do this, use masking tape. To properly paint the dashboard, it is recommended to remove it from the car. Although this is an easy way to remodel a dashboard, the work must be done carefully, and if you doubt your abilities, it is better to leave it to the professionals.
Panel cover
Another option for tuning the dashboard is covering it with artificial or natural leather or carbon fiber.
The procedure for covering the dashboard:
- The dashboard is being dismantled.
- The pattern is being prepared. To create a pattern for a specific panel element, remove it and cut out the required piece of material in accordance with the shape that will be pasted over, doing this with a small allowance.
The pattern is made in accordance with the shape of the element to be pasted - The dashboard is cleaned of dirt and degreased.
- The panel is pasted over. The adhesive composition is selected taking into account the material used for pasting, so as not to damage it during interaction. It should be taken into account that the panel gets very hot in the sun, so the glue must withstand high temperatures. A one-component polychloroprene adhesive is suitable for this; it must be heated to 60 °C to ensure a reliable connection (“Glue-88”, GTA Boterm, Mah). There is no need to heat polyurethane glue; it can be “Moment” (good for leatherette), Kaiflex K414, “Titan”, “Demoskol”.
Most often, the panel is covered with artificial or natural leather, carbon fiber
Video: covering the panel with rubber material
Installation of overlays
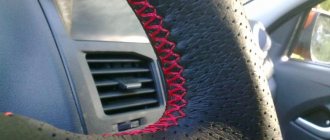
You can transform the dashboard of a VAZ 2114 using special overlays. They are sold in almost all auto stores. This tuning option allows you to change the color of the backlight. This occurs through the use of transparent elements and light filters of different colors. Such overlays must be installed correctly so that there is no distortion or displacement, otherwise the illumination of the devices will be uneven. It should also be taken into account that if light filters are too dark, the power of the factory light bulbs will not be enough, and they will not be able to properly illuminate the devices through such overlays.
The dashboard can be transformed using special overlays
In addition, you can install soft pads on the instrument panel. Unlike a rigid standard panel, they have better sound absorption, are more scratch resistant and have a shelf for small items. The cost of the instrument panel overlay is 1200–1500 rubles.
You can install a soft pad on the instrument panel
Europanel installation
Relatively recently, European-style dashboards began to be installed on the VAZ 2114. They have a more modern design and are made of high-quality materials, so they have become very popular among owners of the old-style VAZ 2114.
Europanel has a more modern design and is made of high quality materials
Installing the Europanel is not difficult, since it is designed specifically for the VAZ 2114 and is simply mounted in place of the old panel. The presence of several drawers for small items makes this solution more convenient. Among the disadvantages of the Europanel, owners note that the movement of the heater control levers is rather tight.
Video: installation of europanel
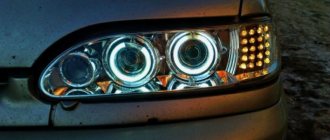
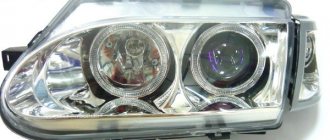
Improved backlight
To achieve a unique visual effect, one of the options for tuning the dashboard is to change the instrument lighting.
Work order:
- Removing the instrument panel.
- Removing protective glass.
- Removing the arrows.
- Removing the standard cover.
- Replacement of standard light bulbs. Green backlighting is installed at the factory. It can be changed so that the illuminated dashboard is in harmony with the rest of the dashboard and interior of the car. Typically, multi-colored LEDs in a plastic socket, a DSM LED or LED strips are used for this. It must be taken into account that the car's electrical voltage is 12 V, and the LEDs operate on a power supply of 2–3.5 V (this depends on the color) and have polarity. If you mix it up, the LEDs will immediately burn out. You can purchase ready-made clusters designed for 12 V, or make such a cluster yourself. To do this, several diodes are connected in series to achieve the required voltage. If you take 3 diodes of 3.5 V, then you also need to additionally set the resistance to 100–150 Ohms.
Changing the dashboard lighting improves its appearance - Reassembly of the structure.
Video: Changing the dashboard backlight
Tuning instrument needles
It is quite simple to implement this type of dashboard tuning, such as improving the instrument needles. In the standard design, the lighting of the heating equipment is yellow, the buttons are green, and the indicators are orange. Many people don’t like it because it resembles a parrot and makes it difficult to feel comfortable while driving at night.
To improve the instrument arrows, you need to disassemble the instrument panel and install a red, blue or other color LED under each arrow. To prevent light from scattering, a piece of heat-shrinkable tubing is placed over the diode. The wires from the diode are connected to the heater backlight. As a result of such changes, the instrument needles glow with a rich color.
You can make additional illumination of the arrows
Designations of light bulbs, indicators, icons and buttons on the instrument panel of the VAZ 2114
First, let's look at the descriptions and meaning of the panel icons and buttons, regardless of whether the car is equipped with an injector or a carburetor.
Instrument panel diagram VAZ 2114, 2115
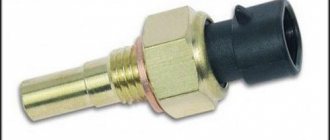
1 — A control sensor that measures the temperature of the coolant in the engine cooling system. During normal operation of the power unit, the antifreeze temperature should not exceed 90 degrees. But minimal deviations are sometimes acceptable. If you notice that the engine begins to overheat frequently, be sure to contact a car service center for help. Sometimes the sensor itself may give incorrect results.
2 — A device such as a tachometer processes information that comes from the crankshaft and displays it on the panel. The tachometer readings indicate the number of engine revolutions.
3,4 — Turn indicators. If the indicators flash simultaneously, but slowly, this may indicate a possible problem with the bulbs themselves or in the electrical wiring network.