INSTALLATION KIT MADLEXXCARS VAZ 08-15 KIT (MLC VAZ 08-15 KIT) for cars of the Volga Automobile Plant (AvtoVAZ) ========================================= ======================== Designed for the installation of REAR DISC BRAKES (RDB) with a mechanical parking brake on vehicles with a DRUM BRAKE SYSTEM (RDB).
Brackets (MLC VAZ 08-15) are installed between the beam and the axle (rear axle) using high-strength fasteners.
As a result, WITHOUT SIGNIFICANT CHANGES IN THE DESIGN (replacing the beam or welding work...), the beam without brackets “WITHOUT EARS” is modified into a unit READY for the installation of new brake mechanisms (BRAKE CLIPS and CALIPERS).
When developing the MADLEXXCARS VAZ 08-15 KIT (MLC VAZ 08-15 KIT) for AvtoVAZ cars, we relied on the experience of other manufacturers of similar disc brake systems.
But unlike them, WE DID NOT USE exclusive and custom-made components, but selected AVAILABLE and COMMON factory parts for our system. From popular and frequently encountered car models (original spare parts and analogues, which are easy to find on sale anywhere.) So that by installing our HTD kit, car owners will not experience absolutely any difficulties in the future with the selection of consumables or repairs.
Calipers, brackets and pads are used from time-tested TRW REAR DISC BRAKE SYSTEMS. (installed on the rear axle of cars similar in weight and dimensions to AvtoVAZ models) Parking brake cables are used from the SPORT model Brake “non-ventilated” 4x98 mm brake discs are selected according to parameters from FIAT/ALFA/LANCIA Additional mounting holes are provided for installing dirt-protective shields from the front axle of VAZ: 2108/09/099/13/14/15
The result was a SIMPLE, CLEAR, COMMON and RELIABLE brake system (BS) for the rear axle with a mechanical parking brake at an adequate cost. __________________________________________________ Applicability:
For installation on VAZ cars with a rear torsion beam with a hub (4x98) without ABS (Rim R14 and more):
VAZ 2110/2111/2112 ___________________________________________________ The kit includes:
1) 2 MADLEXXCARS SPACERS (VAZ 08-15) 2) 8 HIGH-strength BOLTS for their installation, 3) WASHERS for the brake caliper 4) FASTENERS for installing the shields (6 screws, 6 nuts, 6 rivet nuts. ======= =========================================== WE DO DELIVERY TO OTHER REGIONS (By Post RUSSIA or transport companies) find out more about delivery on the madlexxcars website in the delivery section or contact us in any way convenient for you.
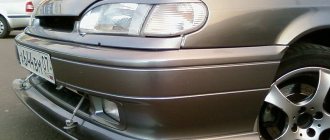
Domestic cars are reliable and quite durable, despite the fact that they are widely criticized. Low cost and availability of components are the key points when choosing a machine. But every driver tries to improve his iron horse, so for beauty and reliability they often install rear disc brakes on the VAZ-2114. Yes, it's beautiful - drums look poor on alloy wheels. And reliably - the effectiveness of the brakes increases several times in comparison with the standard equipment of the car.
Basic information
Since the release of the first car at the car plant in Tolyatti, and this was the Zhiguli-2101 model, popularly nicknamed the “penny”, almost to this day the brake system diagram of all cars has remained unchanged. Discs were placed in front, and drums in the back. This is logical, since the main load during braking falls on the front ones.
Of course, this scheme is much more effective than the GAZ-24, which has drums in a circle. Because it’s no secret that disc brake pads grip much better, and the distance to stop is correspondingly much shorter.
pros
Let's look at why disc brakes are better than drum brakes:
- Braking becomes more reliable, braking distance is reduced;
- Braking forces are distributed more evenly, given that the VAZ 2114 is a front-wheel drive car;
- There is an effect of faster response after pressing the pedal;
- Unsprung masses are reduced;
- Heat dissipation occurs better, which is especially important when driving on a mountain road or during active acceleration/braking. For this reason, the brake system is cooled better;
- Disk ones are much easier to dismantle and replace;
- There is no need to adjust the handbrake after each repair of the rear brakes, although this will have to be done the first time;
- They do not freeze in winter after washing, like drum ones;
- Rear disc brakes installed on the VAZ 2114 are much more convenient to control and promptly notice pad wear.
Tuning VAZ-2114
VAZ-2114 is a fairly recent model that replaced the famous nine. The base of the cars is the same, even such little things as taillights cost the same. But you can significantly improve the car only on your own.
It is worth noting that the Lada Kalina is the first model on which disc brakes are installed on the rear axle from the factory. And it should also be mentioned that you make all changes to your car entirely at your own peril and risk. Intervention or modification of the design, steering, or braking system is punishable by removal of license plates and prohibition of operation of the vehicle. But if this doesn't scare you, you can continue reading.
Minuses
Replacing brakes with disc brakes was not without the famous “fly in the ointment,” although it rather concerns precisely those problems that their installation can cause.
Firstly, our law enforcement agencies consider their installation on a VAZ 2114 as a design change.
What might this entail?
- Fine when passing a technical inspection;
- You can be simply wrong in a controversial accident if traffic police officers emphasize that you have “wrong” brakes;
- And the insurance company may also consider this a reason for non-payment of insurance.
Secondly, the handbrake will additionally need to be modified - or replaced with a hydraulic handbrake, although the latter weakens over time.
Thirdly, it is necessary to refine or carefully adjust the sorcerer so that on the VAZ 2114 the rear wheels do not brake more than the front ones, as this will certainly cause a skid, especially on ice or wet asphalt. To do this, sometimes you even have to grind down the pads by a quarter, or even more.
What is needed for tuning
If you still decide to install rear disc brakes on the VAZ-2114, you need to know what elements are required for this:
- Brake discs. Ideally suited are those installed on the front wheels of the VAZ-2114 or similar models - 2108, 2109. Their diameter should be 240 mm. But you need to pay attention to the fact that you cannot do without a turner - the hub is slightly different in design. More specifically, it will have to be bored from a diameter of 58 mm to 60.
- Calipers, brake pads, hoses - also from the front brakes of the Samara-1 and Samara-2 generation models. Therefore, you can safely purchase the entire set of front brakes for the nine.
- Plates for fastening calipers. You can either make them yourself or purchase them at auto stores.
- 12 bolts M10X1.25, 30 mm long.
- Distance washers – 8 pieces. Ideally suited are those installed in the gas distribution mechanism drive of the 8-valve VAZ-2109 and 2114 models.
Well, that’s all, all the spare parts have been purchased, all the necessary tools are available. All that's left to do is carry out a complete modernization. It should be noted that fairly new VAZ-2114s (their price on the secondary market remains high) do not have rear brakes, but can be converted without much difficulty.
Installation
It's time to install disc brakes instead of the removed rear drum brakes.
Having knocked off the hub, we will put it back, but in a different way:
- It should be installed through the plate into which the caliper is already mounted.
- Carefully ensure that all holes line up. Particular attention to alignment;
- Next, use a hammer to straighten the corner of the beam so that the caliper does not rest against it;
- Now you can put the brake disc on the hub, placing spacers between these parts, and secure the disc with a bracket;
- We install brake pads from VAZ 2114;
- First, carefully and securely attach the brake hose to the caliper, and then to the tube;
- To reduce the braking force of the rear brakes compared to the front, you need to partially grind off the friction material of the pads.
Disassembling the unit
Before disassembling the entire brake system on the rear axle, the fluid must be drained. To do this, unscrew the bleeder fittings located on the calipers. Therefore, in the future you will have to pump it. The initial work looks like this:
- Loosen the cable and move the pads together. Unscrew the guide pins that secure the drum to the wheel hub. If you cannot remove the drum easily, generously coat the seat with WD-40 penetrating lubricant. It should always be at hand when carrying out such repairs. Even more - in advance (about half an hour) all threaded connections should be treated with this liquid.
- Remove the springs using a flathead screwdriver and remove the spacer bar. By disconnecting the handbrake cable, you can completely dismantle the old, now unnecessary, pads.
Please note that now you will not have a handbrake (unless you install a hydraulic one). Therefore, absolutely all components that in one way or another relate to the cable, including it, can be removed. Now we need to talk about installation.
Dismantling
To install disc brakes back, the first step is to remove the old drum mechanisms. For this:
- Remove the wheel rim, loosen the tension on the handbrake cable and move the rear pads together;
- Unscrew the two guide pins with a 12mm wrench;
- Use a hammer to carefully knock down the brake drum, after cleaning its seat with a wire brush and WD40;
- Strike carefully, gradually around the entire circumference. If it does not give in, constantly turn the drum and hit it with a rubber hammer;
- Using a screwdriver, pry up the spring that tightens the pads and remove it;
- Next, the small guide springs are removed. They press the pads against the boot;
- Grasp the bottom of the shoe and lift it up, resting its top against the brake cylinder;
- Remove the spacer bar, remove the shoe from the cylinder and remove the shoe tension spring;
- Remove the handbrake lever from the cable;
- Remove the second block;
- Unscrew the bolts securing the hub to the beam. Be careful not to cut off the edges;
- Remove the brake pipe with a split wrench. Having torn it off, unscrew it completely and bend it slightly to the side;
- Close the tube with the cap from the brake cylinder bleeder fitting to seal the hole;
- You have reached the point of no return. The hub is now held only by the seat of the beam;
- You need to hit the element as accurately and forcefully as possible. Hit the support disk from the inside. First from below, then from above and so on alternately;
- Don't be afraid to ruin the support because you won't need it;
- When the hub separates from the beam, begin striking with less force;
- Tap the hub completely.
Topic article: Engine coolant heater
Upon completion of this stage, be sure to carefully check the integrity of all elements, so that after replacing the drums on the BDT, you do not have to disassemble the structure again for the purpose of additional repair of individual components of the brake system.
Dismantling works
Installation of disc brakes
- Decide on the location of the caliper - behind or in front of the axle. This does not affect the effective operation of the brakes.
- Let's take the installation route at the rear of the axle. The picture turns out to be more symmetrical, plus indirectly the weight of the braking devices will contribute to better braking.
- Join the faceplate and hub into a single mechanism.
- Make sure that all technological holes line up perfectly.
- If there are any misalignments, correct them by simply tapping with a hammer.
- Make sure that the alignment was carried out efficiently and correctly.
- Adjust the beam angles. If this is not done, the calipers may rest against them, which is not good. This can be done with a hammer, flattening the corners. An alternative option is to use a grinder.
- The processing of a particular angle depends on which rear disc brake placement option you chose at the first stage.
- Whether to install a grower or not, the decision is yours. It is not recommended to place it under the upper left hub mounting bolt. If this is done, the bolt head will have to be cut out with a grinder. This will cause the brake caliper bracket to push against the bolt. So option two - grinder or refusal of the grower. We advise you to choose the second option.
- Place the rear brake disc ground to the required diameter onto the hub.
- Install the bracket onto the faceplate.
- A spacer is placed between them at the connection points. With their help, the necessary gaps are determined and fixed in the “caliper-caliper-brake disc” scheme.
- Sometimes the spacer is a different size. In this situation, you should select specifically for the VAZ 2114.
- The tightening process when connecting the faceplate and bracket is performed with an applied force of 3-4 Nm.
- Place the pads and screw the hoses back to the caliper.
- Next, the line for sealing the brake pipes and hoses must be closed.
- Under no circumstances should you do the opposite.
- Seal the brake line system.
- Check the tightness of the brake system by increasing the pressure by pressing the brake pedal.20. If there are no leaks, proceed to replacing the rear disc brakes on the second wheel.
- Upon completion of work, be sure to diagonally bleed the brake system.
Article on the topic: How to transport newborns in a car
Result of modification of the brake system
Bleeding is a mandatory step for any intervention in the brake system. When installing disc brakes instead of drum brakes, you should not forget about the final procedure. Additionally, we recommend changing the brake fluid to a fresher and more effective one.
Replacing drums with disc mechanisms on a VAZ 2114 is quite a risky undertaking, since when the brakes are applied the car stops dead in its tracks. This is great in extreme situations when you need to brake quickly, literally instantly.
But be careful, gradually get used to the behavior of a car with disc brakes at the rear, so as not to cause an accident or end up in an unpleasant situation.
Installation of disc brakes
The location of the mechanism support can be either in front or behind the rear wheel axis. It will work in any case, but if you install it at the back, the efficiency becomes a little higher. Next, your task is to correctly connect the hub to the faceplate. Pay attention to defects, even the most minor ones. If there are deficiencies, carry out the joining work again.
Necessary tool
Replacing a brake disc with your own hands does not require specialized technical knowledge; it is enough to prepare the necessary tools to carry out the work according to the list:
- Jack;
- Balloon wrench;
- Key for 12 and 17;
- Hammer and wooden block;
- Liquid WD-40 or its equivalent.
Useful : Step-by-step instructions for replacing rear pads on a VAZ 2114
The replacement procedure takes from 3 to 5 hours, depending on your repair experience.
Positive qualities of rear disc brakes
Yes, the main advantage is increased security. The braking distance is reduced, and it does not depend on the weather. The operation of the node is stable, the weather does not affect it in any way. For example, when it rains, drum brakes become ineffective and the braking distance increases. This is not observed when using disk drives.
Overheating is not a problem for disk structures. For example, when braking at high speeds, the fluid in the system heats up due to high friction force. The drum and pads can heat up almost red hot – up to 600 degrees. As a result, the pedal fails and braking efficiency deteriorates significantly. You'll never feel that way with disc brakes. Their device is simple and reliable, so you don’t have to worry about safety.
Important!
It is always worth remembering that replacing drum brakes with disc brakes is fraught with some dangers. You need to get used to the new design, as when triggered the machine stops very abruptly.
This is good when you need an instant reaction in extreme situations, but on ice and slippery asphalt, this feature can play a cruel joke and lead to dire consequences.
Therefore, be careful and drive and brake very carefully at first in order to understand exactly how much pressure should be applied. You should not change the brake system in winter. It is better to do this in the summer so that you have time to get used to the ice.
Domestic cars are reliable and quite durable, despite the fact that they are widely criticized. Low cost and availability of components are the key points when choosing a machine. But every driver tries to improve his iron horse, so for beauty and reliability they often install rear disc brakes on the VAZ-2114. Yes, it's beautiful - drums look poor on alloy wheels. And reliably - the effectiveness of the brakes increases several times in comparison with the standard equipment of the car.
Bleeding the brakes
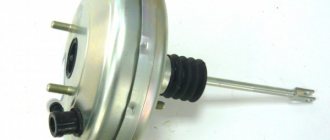
After all the work has been carried out, it is necessary to perform bleeding - getting rid of air in the system. This is essential to improve operational efficiency. And once you’ve started upgrading, don’t forget to change all the components that have been serving for a long time. Replace hoses, front pads, VAZ-2114 vacuum brake booster, master cylinder. As for the fluid, it should be changed approximately every two years. Briefly, the pumping procedure looks like this:
- Pour liquid into the expansion tank.
- Bleed the right rear caliper.
- Check the fluid level and add if necessary.
- Bleed the left rear caliper.
- Repeat step 3.
- Bleed the right front caliper.
- Follow step 3.
- Bleed the front left caliper last.
Here's how to bleed the VAZ 2114 brakes correctly, the essence of the procedure is to go from the farthest to the nearest caliper (relative to the main brake cylinder).
WE CHANGE BRAKE DISCS (TD) AND PADS WITH YOUR OWN HANDS
Replacing brake discs on a VAZ 2114 is a fairly simple process that, if you have the necessary equipment and 2-3 hours of free time, you can easily do it yourself.
To replace the disks yourself, you will need the following tools:
- Jack;
- Screwdriver;
- Keys at 17, 8 and 13;
- Balloon key.
- Rubber hammer.
Rubber hammer in action
We replace discs in the following sequence:
- We place the fourteenth on a flat surface, preferably asphalt. We install wheel chocks under the wheels;
- If the car wheels have not been removed for a long time, it makes sense to treat all threaded connections with WD-40 and wait 10-15 minutes - this will greatly facilitate the removal process;
- We tear off the nuts securing the wheel from a dead point using a wheel wrench. Since this can cause the car to sway violently, this should be done before lifting the car on a jack;
- After the fastenings are loosened, install the jack in the place of the special stop and raise the car;
- We twist all the fixing nuts with a wheel wrench and remove the wheel;
- We remove the block; to do this, you need to unscrew the caliper that secures it. This is done with a 17 key. You must first remove the brake hose fasteners (with a 13 key) and drain the leaking fluid into a prepared container;
- Remove the brake cylinder. It is secured with two bolts that can be unscrewed with a 13mm wrench;
- Now we have free access to the disk. It is secured with two guide pins (pins), which we need to unscrew with an 8 key;
- After removing the clamps, use a rubber hammer to tap the back side of the disc so that it comes off the hub. To do this, you can use a regular hammer and a block of wood as a backing, but everything must be done extremely carefully;
- Once the dismantling is complete, the disk is installed. Installation of a new part is carried out according to the same algorithm as the removal of a VAZ brake disc, only in the reverse order. Before installation, the connection point with the hub must be lubricated with a special high-temperature lubricant; the so-called “copper” lubricant is well suited.
Often, along with replacing the discs, it is also necessary to replace the front brake pads on the VAZ 2114.
This is done as follows:
- After removing the wheel and cleaning the parts from dirt, remove the brake fluid supply hose from the bracket;
- Using a 17mm wrench, unscrew the upper caliper mounting bolt. To unscrew this bolt, you need to bend the counter curtain, which prevents the bolt from turning when driving; this can be done with a regular flat-head screwdriver;
- Similarly, loosen (no need to unscrew completely) the lower caliper mounting bolt;
- Move the bracket covering the brake pads up (it will be held on by the loosened bolt);
- We remove the worn out pads and install new ones in their place;
- We screw the caliper back, attach the fluid supply hose back to the bracket and install the wheel.
Related article: How to properly tighten tapered wheel bearings
Knowing how to replace front brake discs and pads, you can complete all the work in 2-2.5 hours - there is nothing difficult about it. However, if you have never done this before, then it makes sense to contact a car service and carefully monitor how everything is done, and the next time you take on the work yourself.
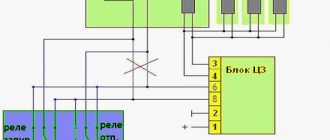
Need a handbrake?
But some motorists cannot do without a handbrake. And the new VAZ-2114, the price of which at one time was close to 300 thousand, does not have a handbrake, and this is not very convenient. In cities, parking lots are simply impossible without it. And if an autostart system is installed, then you simply cannot do without a handbrake - it is not recommended to set it to speed.
What is needed to install this mechanism? First of all, this is the handbrake itself, but not a cable one, but with a hydraulic cylinder. As a rule, they are universal, and new Chinese mechanisms cost from 1,500 rubles and more. And the rear disc brakes on the VAZ 2114 will be equipped with a handbrake system.
The installation procedure is extremely simple - put it in place of the old one, fasten it with bolts, connect it to the hydraulic system, namely to the part that controls the calipers on the rear axle. That's all, from now on you will have a handbrake that will work perfectly in any conditions. Neither overheating, nor frost, nor torrential rain is scary. And even in cold weather you can use the handbrake.
Examination
Having carried out all the above operations - first on one wheel, and then on the second, you also need to check the system for leaks. The first phase is to simply press the pedal.
The fact that everything is done normally is indicated by the fact that the pedal is pressed with force, quite tightly.
But this is not enough. Have someone else press the brake pedal while you try to rotate the parts that make up your new rear disc brakes.
If nothing moves, it means that your VAZ 2114 now has new rear disc brake systems - better and more reliable than the previous ones.