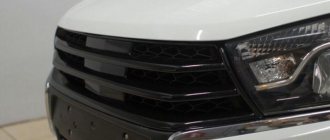
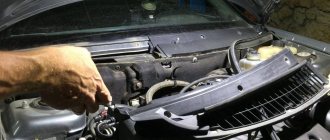
The Priora radiator grill affects several factors at once: the visual perception of the front of the car, the quality of radiator cooling and the protection of the engine compartment from various types of contaminants that enter from the outside while the car is moving.
Many owners, in order to somehow improve the performance characteristics of this element and give the Lada a more modern and sporty look, carry out various kinds of tuning of the Priora.
Content
How to remove the radiator grille on a Lada Priora
Selecting and installing a new grid
Modifying the grille on a Lada using moldings
Recommendations
Replacing such an element as the Priora radiator grille often arises in the minds of owners of a Lada car of this model. This car's grille doesn't have the most attractive appearance. To improve the appearance of the car, car owners often resort to tuning. Designers of automobile corporations never cease to amaze us with new forms and models of vehicles. Small details play an important role in the overall appearance. The radiator grille is no exception.
New radiator grille for Priora
There are always large holes on the bumper. They serve to keep the engine cool and the engine compartment to be freely blown and ventilated. A mesh is placed behind the radiator grille. It is designed to protect the insides of the car from various debris, insects, and small birds that can get under the hood while driving. The mesh performs a protective function. In tandem with the radiator grille, the mesh also plays a decorative role. This is why craftsmen love to experiment with this part of the body and make the car unique.
If you install a new grille on the Lada Priora, you can significantly change its appearance. Before you begin work on improving the design, you need to know how to remove the grille. Consultation with a specialist will not be superfluous. An experienced master will give advice, make recommendations and share the secrets of performing the work.
Replacing the Priora radiator grill is a simple process that you can do yourself. The process will depend on which grille you plan to replace the old one with. Before starting work, disconnect the wires from the battery and remove the engine splash guard.
There are two ways, with and without removing the bumper. To remove the grille on a Priora, you need to press on the washer that secures the bumper, and then remove the washers that hold the grille directly.
The Lada Priora se radiator grille is attached with nine screws, so there is no need to remove the bumper. Just open the hood and pull it out.
Replacing the radiator grille on a Priora
How to remove the radiator grille on a Lada Priora
So, to remove the radiator grille, you can use two methods:
- with removal of the front bumper;
- without removal.
If you decide to completely transform the appearance of your car, then the second method would be ideal. It may be needed if you decide to install new tuning elements or replace an existing bumper with a new one.
How to remove the radiator grille on a Priora? If dismantling the body kit is not required, we perform the following processes:
- We open it, and with the help of a support, we fix the hood of the car.
- Unscrew the three side screws securing the headlight mudguards.
- We also unscrew the fasteners securing the bumper and car body.
- Bend the upper part of the bumper away from the body. This must be done carefully.
- We remove the screws holding the radiator grille on the top and bottom sides. Due to insufficient space, we carry out the work using a short screwdriver.
- We pull the grill forward and carefully take it out.
- We install the grille in place in the same way, only in reverse order.
Removing the radiator grille on a Lada Priora car
Selecting and installing a new grid
A fairly common tuning method is to install a mesh instead of a radiator grille. This action can improve the protection of the space under the hood from various debris and insects. The appearance of the car is significantly improved. The radiator is cooled better. You can use a mesh made of different materials. The most popular are plastic and metal.
Installation steps:
- The radiator grille is dismantled.
- All unnecessary elements are cut off, leaving one outline.
- The holes formed during work are covered with putty or fiberglass.
- After the putty layer has dried, the surface is sanded.
- Cover with a layer of soil.
- We paint using a roller, brush or spray paint.
- We attach the finished mesh. For plastic, glue is used, for metal, screws are used. The metal mesh should be preheated to prevent breakage.
- We cover the entire surface of the part with a layer of paint.
- Apply a protective layer of varnish.
- We install it on the car.
Mesh for the Priora radiator grille
When choosing the size of the cells, take into account the fact that the open space is intended for cooling. You should not install a grid with too small cells. If you choose a medium-mesh mesh, both protection and cooling will be of high quality. In order for the radiator grille on the Priora to serve for many years, you should choose it from high-quality material, and not just guided by external factors. In the cold season, professionals advise using special covers for the Lada Priora radiator grille. This will save fuel and, accordingly, your finances.
Modifying the grille on a Lada using moldings
Quite an interesting way to transform the radiator grille with the help of moldings is preferred by many drivers. It allows you to radically change the appearance of your car. Tuning the Priora radiator grill will ensure the exclusivity of the part. The use of automotive moldings is the simplest and most cost-effective option for modifying a part.
Required tools and materials:
- moldings;
- scissors;
- masking tape;
- glue, preferably epoxy.
Using a hacksaw, cut off the badge from the hood of the car. We attach two moldings of the same length on the outer and inner sides of the mesh and secure them with tape or masking tape. We apply glue to the grille and attach metal strips to its inside. All that remains is to glue the moldings and remove the tape. Finally, use the bolts to install the grille in place.
Removing the front bumper upper grille
You will need: pliers, long and short straight screwdrivers.
- Remove the 6 screws of the upper bumper mounting;
- Bend the upper part of the bumper along with the grill towards you;
- Remove the fixing washers (on Priora SE, remove the screws) of the upper bumper grille by inserting your hand with a short screwdriver through the resulting hole;
- Remove the upper bumper grille by pulling it towards you.
It is worth noting that those with large hands may not be able to get their hand through or may break the upper part of the bumper. Mounting diagram for the upper and lower bumper grille:
Making a part with your own hands
The radiator grille from Priora se is easy to make yourself. To do this you will need the following materials:
Where to unscrew the screws from the grille
First, the old unit is dismantled. The middle of the part is cut out with a jigsaw. To carry out tuning, holes are drilled in the mounting points. Then you will need a thin and bendable material - plastic or cardboard. It goes around the internal contour of the future unit. It is recommended to note how many centimeters the part will go inside. Based on the obtained dimensions, cardboard or plastic is cut.
Content
How to remove the radiator grille on a Lada Priora
Selecting and installing a new grid
Modifying the grille on a Lada using moldings
Recommendations
Replacing such an element as the Priora radiator grille often arises in the minds of owners of a Lada car of this model. This car's grille doesn't have the most attractive appearance. To improve the appearance of the car, car owners often resort to tuning. Designers of automobile corporations never cease to amaze us with new forms and models of vehicles. Small details play an important role in the overall appearance. The radiator grille is no exception.
New radiator grille for Priora
There are always large holes on the bumper. They serve to keep the engine cool and the engine compartment to be freely blown and ventilated. A mesh is placed behind the radiator grille. It is designed to protect the insides of the car from various debris, insects, and small birds that can get under the hood while driving. The mesh performs a protective function. In tandem with the radiator grille, the mesh also plays a decorative role. This is why craftsmen love to experiment with this part of the body and make the car unique.
If you install a new grille on the Lada Priora, you can significantly change its appearance. Before you begin work on improving the design, you need to know how to remove the grille. Consultation with a specialist will not be superfluous. An experienced master will give advice, make recommendations and share the secrets of performing the work.
Replacing the Priora radiator grill is a simple process that you can do yourself. The process will depend on which grille you plan to replace the old one with. Before starting work, disconnect the wires from the battery and remove the engine splash guard.
There are two ways, with and without removing the bumper. To remove the grille on a Priora, you need to press on the washer that secures the bumper, and then remove the washers that hold the grille directly.
The Lada Priora se radiator grille is attached with nine screws, so there is no need to remove the bumper. Just open the hood and pull it out.
Replacing the radiator grille on a Priora
How to remove the radiator grille on a Lada Priora
So, to remove the radiator grille, you can use two methods:
- with removal of the front bumper;
- without removal.
If you decide to completely transform the appearance of your car, then the second method would be ideal. It may be needed if you decide to install new tuning elements or replace an existing bumper with a new one.
How to remove the radiator grille on a Priora? If dismantling the body kit is not required, we perform the following processes:
- We open it, and with the help of a support, we fix the hood of the car.
- Unscrew the three side screws securing the headlight mudguards.
- We also unscrew the fasteners securing the bumper and car body.
- Bend the upper part of the bumper away from the body. This must be done carefully.
- We remove the screws holding the radiator grille on the top and bottom sides. Due to insufficient space, we carry out the work using a short screwdriver.
- We pull the grill forward and carefully take it out.
- We install the grille in place in the same way, only in reverse order.
Removing the radiator grille on a Lada Priora car
Selecting and installing a new grid
A fairly common tuning method is to install a mesh instead of a radiator grille. This action can improve the protection of the space under the hood from various debris and insects. The appearance of the car is significantly improved. The radiator is cooled better. You can use a mesh made of different materials. The most popular are plastic and metal.
Installation steps:
- The radiator grille is dismantled.
- All unnecessary elements are cut off, leaving one outline.
- The holes formed during work are covered with putty or fiberglass.
- After the putty layer has dried, the surface is sanded.
- Cover with a layer of soil.
- We paint using a roller, brush or spray paint.
- We attach the finished mesh. For plastic, glue is used, for metal, screws are used. The metal mesh should be preheated to prevent breakage.
- We cover the entire surface of the part with a layer of paint.
- Apply a protective layer of varnish.
- We install it on the car.
Sequence of work
The answer to the question of how to change the grille on a Priora to a prettier one lies, first of all, in what model of grille you purchased, and whether you need to remove the front bumper to install it. This operation is quite simple. But before dismantling the bumper, you need to disconnect the ground wires from the battery, remove the engine splash guard, and then unscrew the bolts that secure the bumper.
So, how to change the radiator mesh on a Priora? Replacement can be done in different ways. Without removing the bumper, you can remove the grille as follows. You need to press on the locking washer near the bumper, and then remove a few more washers holding the radiator mesh. The grill itself then tilts forward and pulls upward towards itself.
On the Priora SE version, the grille is held in place by only 9 screws (5 of them are located in the upper part of the protective casing and 4 in the lower part). So there is no need to remove the bumper at all. Simply lift the hood and remove the grille. You can start creating an original homemade grill. A hacksaw, scissors, epoxy glue and double-sided tape are the main tools you will need for this.
Do-it-yourself radiator grille tuning usually begins with cutting off the nameplate. To make a homemade tuning Priora radiator grille, you can use freely sold moldings of a suitable size and shape. Naturally, they will not go into action entirely.
At the first stage, the moldings are covered with masking tape and epoxy glue is diluted. Then, using cardboard, something like a sketch of the future grille is made in handmade style, right on top of the old part - it will serve as the basis for the remodel. After creating the contour, the mesh is cleaned and degreased so that the moldings stick as best as possible.
After degreasing, the surface is sanded, the prepared molding parts are glued, and at the final stage of work, the resulting original product is primed and painted. After drying, the homemade tuning grille is installed in its place. It turns out especially beautiful when using chrome moldings. The main thing is to take your time and mark the contour correctly.
Replacing the radiator grille on a Prior
Welcome! Radiator grille - for some it is just an appearance, but for others it is also the safety of the car’s cooling radiator; if the car does not have a radiator grille installed, then a pebble flying towards the car may simply fall into the cooling radiator, then this can cause deformation the radiator itself and as a result of which you will have to replace it with a new one, because if you do not change it, then you will have constant problems with cooling the engine, and the leaking coolant will contaminate the engine and thus you will still need to constantly add coolant to the tank , therefore, it is recommended to change a worn or deformed radiator immediately and not hesitate to replace it, but still today we are discussing not the radiator but its grille, not all people know how it can be replaced on a car, although it is attached only to small washers by removing them you can easily remove the grille, and you will learn how to do this today from this article on replacement.
Note! To replace the radiator grille with a new one, you will need to take some tools with you, namely you will need: Two types of screwdrivers, as well as a small set of basic socket heads, you can also try using socket wrenches and wrenches instead of heads, but this will be somewhat ineffective convenient, so if you don’t have sockets, then use wrenches, but if you still have a small set, we advise you to take it, because with the help of socket heads it will be much easier to unscrew all the bolts and nuts!
Is it difficult to change the grille on a Prior? We are asked this question quite often, mostly by young motorists who buy a new beautiful grille at a car shop and want to install it to replace the old one, so to change the grille it doesn’t actually require a lot of time, as we said a little earlier ourselves The grille on the bumper is attached with just three washers, which if removed, then the grille can be easily removed, so replacing the grille is not difficult and this operation will not take much of your time.
Comments
Repair manuals
Boris
wrote on 07/19/2015 Removing and installing a new radiator grill is not a problem at all, you just need to have a screwdriver with you and let your hands grow from the right place. The problem is that lately designers have been dodgeing the topic of car design, because of this, changing the radiator grille becomes more and more difficult every year. The video shows that first you need to find and remove the fasteners, and only then change the grille, all this is done very easily, there are very few cars on which it is difficult to change the main parts. The main thing is that the grille fits your car, everything else is not a problem.
How to replace the radiator grille on a VAZ 2170-VAZ 2172?
Note! Before you get started, you will need to explain a few things, namely that the grille can be removed in only two ways, this is after completely removing the bumper from the car (it will be very easy to reach it after removing the bumper and therefore such a replacement will be faster, but due to the fact that you will remove the bumper, the time will increase and as a result you will work longer, but in this case it will be easier to get to the radiator grille), the second method is when you do not remove the entire bumper but only unscrew the top screws that secure it and after unscrewing these screws you will need to bend the top edge of the bumper and thereby crawl under the washers that secure the grille itself (This method is faster, but due to the fact that you will bend the top edge of the bumper, you can deform, so you will need to work more carefully here)!
Recommendations
And finally, the main tips and misconceptions that Priora owners may encounter when changing engine oil:
- It is better to fill in new oil when it has darkened sufficiently. This is not entirely true, since even with infrequent use, it must be changed every season. Untimely replacement leads to poor circulation of lubricant in the system and damage to spare parts of the motor. But, at the same time, it can darken due to the fact that products from incomplete combustion of fuel dissolve in it.
- All-season lubricant is of worse quality than that intended for a particular season. In fact, you can successfully use all-season lubricant, since it is designed specifically for difficult operating conditions.
- Does it make sense to pay more for “synthetics” compared to “mineral water”? There definitely is, because synthetic products retain their lubricating properties longer and are less susceptible to oxidation. For these reasons, the interval for using such oil can be increased compared to mineral oil.
- Some owners find that it is useful to add additional additives to the lubricant. However, in high-quality products the composition has already been selected and balanced so that only the necessary elements and substances are present. Therefore, there is no need for any additives or additives.
https://youtube.com/watch?v=IeLZcVSjgPk
Now you can see for yourself how important it is to promptly maintain the engine and change the oil in Priora cars. Although all of the above is quite true for other brands of vehicles. Recommend us to your friends, and you are guaranteed to be up to date with the latest automotive news
See you soon!
Recommend us to your friends, and you are guaranteed to be up to date with the latest automotive news. See you soon!
Radiator grille Lada Priora
The Priora radiator grill affects several factors at once: the visual perception of the front of the car, the quality of radiator cooling and the protection of the engine compartment from various types of contaminants that enter from the outside while the car is moving.
Many owners, in order to somehow improve the performance characteristics of this element and give the Lada a more modern and sporty look, carry out various kinds of tuning of the Priora.
Tuning the radiator grille on the Lada Priora
Basic faults
The single most common malfunction of the plastic from which the Priora part is made can be mechanical damage. The part may crack or even break into several pieces. In this case, it will perform its task worse, because a large gap will appear that will allow foliage, dirt and dust to pass through.
The solution to the problem ends with the usual replacement of the part - it should not be connected with anything, because under the influence of vibration this connection will become loose, and then the gap will appear again. The second option is often for tuning and ordinary parts made to look like chrome, this pasting peels off from the frost. Sabers are susceptible to this. Replacing the radiator grille will completely get rid of this disease. The Priora is not so expensive that it is impossible to buy new spare parts for it. Another point is that this is not practical. Some practical pelvis workers paint this spare part after it peels off in the cold.
How to remove the radiator grille on a Lada Priora
If you decide to tune the radiator grille on the Lada Priora, or you need a replacement, you will first need to remove it. There is nothing complicated here. Let's figure out how to dismantle the grille on a car without removing the front bumper on a Priora.
The process looks like this:
- unscrew the 6 screws that secure the front bumper on top;
- bend the bumper and radiator grille;
- put your hand into the gap formed and unscrew the upper fasteners;
- remove the grille by pulling it towards you.
A replacement or tuned product on a Lada Priora is installed in the reverse order.
Upper mountings of the radiator grille Lada Priora
Saber – article number, price
Sabers are special facing linings that are installed on the front and rear of the Priora. At the factory they are installed chrome plated, but with the help of simple tuning they can be changed.
- radiator grille molding (saber) hood – 2170-08402104-00, price – about 700 rubles;
- decorative trim (for the trunk of a sedan) – 2170-08212512-00, price – 900 rubles;
- decorative trim (for trunks of hatchbacks and station wagons) – 2171-08212526-00, price – 1500 rubles.
Tuning "Lada Priora" using moldings
A very interesting radiator grille (Lada Priora) is obtained if you use a couple of moldings. This tuning allows you to radically change the appearance of the front of the car.
The work is quite simple - you do not need any special skills.
- remove the radiator grille;
- cut off the VAZ icon located in the middle;
- We mark 2 chrome moldings along the length and cut them to the required size with a hacksaw;
- Using epoxy resin, we glue the moldings to our base and wait for it to dry;
- use a file to smooth out any unevenness if necessary;
- We install the resulting product on the car - and the tuning is successfully completed.
In the photo you can see what the radiator grille (Lada Priora) will look like after you do this tuning.
Grid installation
Quite common is tuning, which consists of installing a mesh instead of a radiator grille. This allows you not only to give the car a more modern appearance, but also to provide effective protection from dirt and high-quality radiator cooling.
For this purpose, you can use a plastic or metal mesh. The installation process looks like this:
- remove the radiator grille;
- Using a hacksaw, we cut off all unnecessary vertical and horizontal elements, leaving only the outer contour;
We apply a mesh to the back of the Lada Priora radiator grille
- we seal the resulting holes using putty (some use fiberglass for this purpose);
- When the putty dries, sand it until smooth. This is a rather labor-intensive process - you need to carefully monitor the shape and smoothness of the lines;
- prime;
- paint with a spray can or a regular brush;
- We attach the mesh with self-tapping screws (the base will need to be heated so that it does not burst), or with glue if it is made of plastic;
- apply paint to the entire product;
- varnish;
- we install it back on the car - at this point the work can be considered complete.
The level of protection for the engine compartment will depend on the size of the cells. You need to remember the right balance: with large cells the cooling will be better, but the level of protection will be lower. For small cells the opposite is true. When choosing a grid, try to maintain the “golden mean”.
Appearance and Features
This element is made in the shape of the Priora front end. The front bumper of the Priora is plastic, the design has a streamlined shape. Includes projections for headlights, grille protecting the radiator. In the center of the radiator grille is the famous AvtoVAZ “rook”. Below is a recess for the front license plate, with an air intake grille underneath it. Through the grille, atmospheric air enters the engine filter, and then into the intake manifold. On the sides of the air intake grille there are round recesses for installing fog lights.
The bumper also protects the energy-absorbing beam, which protects the power unit. The overall design, due to the fact that it is made of plastic, is not super durable. It may crack due to severe frost. Often cracks appear along the bend line.

