The green control wire from terminal 85 is brought into the interior; drilling of the engine shield is allowed. In this case, the installation of PTF usually does not require separate preparation of the installation site, since the fog lamps are placed in ready-made places, covered with plugs.
If there is no free button on the instrument panel, you will have to mount it in a convenient place. We also recommend reading the article on how to connect a radio with your own hands. The benefit from such illumination is zero, but such a technique will be fully blinding. how to connect a car relay (light ignition, etc.)
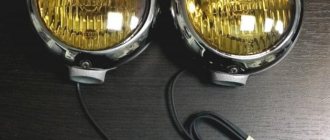
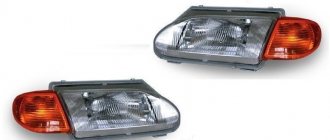
Pairs of terminals and interchangeable.
When using non-original headlights, there may be discrepancies in dimensions and mounting points.
Some fans of SUVs mount additional lights at the level with standard optics or on the roof of the car.
This technique eliminates the possibility that the driver may forget to turn off the PTF on his own. Volgograd region Available with low beams, running lights or fog lights. PTF Priora COMPLETE INSTALLATION of wiring, connection to the ignition system
Purpose and advantages of PTF
Fog lamps are needed to illuminate the road surface during rain, fog, etc. Other purposes for using PTF:
- to illuminate sections of the right edge of the curb;
- to illuminate the area located directly in front of the car hood;
- allows you to get maximum visual information about the condition of the road;
- like daytime running lights.
Advantages of using PTF:
- wide functionality - their inclusion allows you to solve several problems related to lighting at once;
- the best view of car dimensions even at a great distance.
The rules for installing PTFs depend on their type. There are certain connection diagrams that should be followed during installation.
Installation features: instructions
To install fog lights, do the following:
- Install the headlights into the bumper.
- Stretch the wires.
- Connect the relay and fuse.
- Replace the shift knob or install a button.
Each vehicle model has its own characteristics. Advice: find out in advance about the tricks for connecting PTF from people you know with similar cars or on car forums. Installation begins by removing the battery terminal with the minus sign. Let's look at all the stages of the procedure in more detail.
Headlight placement
At the initial stage, car owners usually have difficulty dismantling the bumper. Here a lift or inspection hole will be a faithful assistant. The following recommendations will also help speed up the placement of the PFR in the front bumper:
- Prepare in advance a place to place the bumper to be removed.
- Do not remove it using brute force. Such actions will cause damage to it.
- After dismantling the bumper, make appropriate openings for installing PTF. Start with a small hole and gradually increase it to the size of the headlight you need. This way you will prevent the appearance of gaps that will allow dust and moisture to pass through.
- Special decorative plugs are available for sale. Use them, and then processing holes for PFR will be significantly simplified.
- Attach the brackets to the bumper surface and secure the headlights.
As soon as the installation process of the foglights is completed and the bumper is returned to the car, the power wires should be connected.
Wiring
Purpose of the stage: pulling wires to the fuses. The size of the wires (20 cm-1.5 m) depends on the “filling” of a particular vehicle and the connecting circuit.
What's the point of connecting? The fact is that the switch will activate the relay, and it will close the power circuit and supply voltage to the PTF. The entire procedure is performed according to a universal scheme, the same for almost all car models (see video No. 2)
The description looks like this:
- We connect the pole contacts of each headlight to each other. Next, connect them to the desired circuit relay using one common wire.
- We connect the “–” pole of each PTF to the chassis or body of the car. The connection area should be reliably isolated from dirt, corrosion and paint.
- We attach additional wires to body parts or other wiring using electrical tape or plastic harnesses.
- We insert the fuse and relay into the desired socket.
Installation of the PTF switch
The vehicle model determines how the fog lights are turned on. This could be a separate button in the control unit or a special handle that will need to be removed. Another block with a PTF switch is installed in this place. It is necessary to remove all fasteners of panels and casings in a timely manner so that the disassembly process does not result in additional difficulties in the form of broken plastic parts.
Once all installation steps are completed, be sure to check the practicality and consistency of the connections. Next, you need to connect the “–” terminal to the battery and turn on the PTF. If the check is routine, the direction of the light flux should be precisely adjusted in accordance with the proposed scheme:
In the future, take care to timely clean the fog lights from dust and dirt, as well as regularly replace burnt out bulbs.
Installation requirements
Most motorists who have diligently studied the theoretical course at a driving school know that they cannot voluntarily install devices on their cars that are not provided by the manufacturer, but the installation of fog lights is prescribed in the traffic regulations.
Even if the car from the manufacturer is not equipped with fog lights, each car owner can install them by removing them separately or by redoing the bumper. It must be remembered that when reworking, serious changes are made to the design of the machine, and this is already considered a partial re-equipment.
Installation rules:
- it is allowed to install two fog lights;
- the maximum distance between the headlight and the side surface is 0.4 m;
- The minimum distance from the PTF to the road is 25 cm.
Installation of PTF is carried out in accordance with the established standards.
On a note!
The PTF may need adjustment, since the angle of incidence of the light flux on the road surface must comply with the rules.
Methods for installing PTF on VAZ 2113, 2114, 2115
Installation of fog lights can be done in several ways. Which one to choose, each car owner decides for himself, based on his capabilities and preferences. Let's look at the most common installation options:
- Buying a front bumper with PTF. In this case, the headlights are sold already mounted in the front bumper. As a rule, a part can be purchased without any problems at a car tuning studio and immediately installed and connected. The disadvantages of this option include high financial costs.
Buying a bumper with PTF installed is the most expensive option for installing fog lights on a car.
- Buying a bumper with holes for PTF. With this installation method, you should purchase a bumper with holes for the lights and the headlights themselves with all the necessary elements (wires, relays, power button, etc.).
When purchasing a bumper with holes for fog lights, you will need to purchase the lights themselves and all the necessary components for connection
- Self-installation of PTF is the most common installation method, since it requires minimal financial investment. The car owner only needs to purchase headlights with the necessary installation kit and facing elements.
The most common option for installing PTF is to purchase and then install a set of fog lights yourself.
PTF location diagram on a car
Before connecting the fog lights, it is important to install the devices correctly on the front of the car. This is done in accordance with certain rules, which clearly stipulate the location of the light source. On modern cars, the installation locations for fog lights are marked from the factory. Basically, such lighting elements are installed on more expensive car configurations. If the headlights were not installed from the factory, then the places for their installation are closed with plugs.
Fog lights on the front of the vehicle must be installed in accordance with established regulations
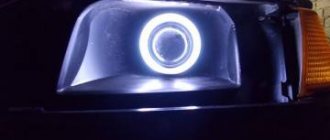
Is it possible to install xenon in PTF
Many car owners seek to install xenon in fog lights, arguing their actions by increasing lighting efficiency. Is this really true? Let's figure it out. First of all, when installing xenon in standard PTF housings, focusing is disrupted, which is due to a different operating principle in contrast to conventional lamps. Since standard fog lights are designed to operate with certain lamps, they simply cannot cope with xenon. The result of such changes will be too much reflection in the reflector, the rays are refracted, and the light becomes blurred. A well-known situation arises - the blinding of drivers of oncoming vehicles, which increases the risk of an accident. Installing xenon in PTF is far from the most successful solution and the effectiveness of such light is questionable, so it should be abandoned.
When installing xenon light in standard fog lights, focusing is disrupted, which leads to dazzling oncoming drivers
Video: how to choose fog lights
PTF selection
First, determine the location of their installation on the car. Often, foreign cars have niches on the bumper for installing additional lights. Then the fog lights are selected so that their shape and size correspond to these niches in the bumper.
Important! The quality of performance of PTF functions is practically not affected by their power. Therefore, it is advisable to choose low-power light sources - LED lamps.
On SUVs, PTFs are installed at the level of conventional headlights or on the roof of the car. In this situation, PTFs of any size and shape are suitable. The main thing is that they are equipped with brackets that provide reliable fastening.
The main difference between fog lights is the lamps used in them. There are the following types of PTF:
- Halogen. The most affordable option. The downside is the low lifespan compared to other types of lamps. Before you buy these headlights, make sure that you can easily replace them when they break down.
- LED. Their main advantages are durability and efficiency. The downside is the price. If LED headlights are not installed correctly or are poorly ventilated, their lifespan will be shortened.
- Xenon. Pros: good technical characteristics. Such models are durable and effective. The downside is the high cost.
Malfunctions of anti-fog optics
During the operation of the car, various situations may arise when the fog lights either do not work at all, or work, but with some nuances. Let's list them:
- fuse;
- burnt out lamp;
- relay;
- weight;
- switch;
- lack of food.
Let's look at each malfunction in more detail. Before changing the fuse, it is worth inspecting it and checking it with a multimeter. If it fails, install an element of the same rating. If you cannot find the fuse in the mounting block, it is most likely installed near the PTF or near the relay. In addition to the fuse, the lamps themselves may burn out from time to time. It is also convenient to check their integrity with a device. You can, of course, do this visually, but the hair may be intact and the lamp may not be working.
One of the reasons why PTFs may not work is a failed fuse.
In addition to the above, the reason that the PTFs do not work may be the relay. Each part has its own service life and the relay is no exception. The part is replaced with a known good one. The operation of the element can be checked as follows: when you turn on the fog light button, you should hear a characteristic click (operation of the relay contacts). If there is no click, then the relay is either faulty or there is no power supplied to it (to the winding).
The reason could be the button. The part is simply changed. Poor weight on the body is also possible. It is necessary to check the chain, clean it, secure it and protect it from corrosion. What to do if there is no power:
- if the LED on the foglight switch button lights up, it means that power is supplied to it;
- check the presence of power at relay contacts 30 and 87.
If there is no voltage, you will have to look for a broken wire. The reason may be as simple as corrosion or broken contact.
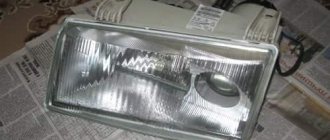
In addition to the listed problems that may arise with fog lights, the windows may fog up, as well as the presence of water inside. How to be in this case? When the headlight fogs up, the light is refracted and the performance is noticeably reduced. The presence of water inside also does not bode well. This situation can arise when sealing is lost, i.e. The headlight glass is cracked. The solution may be to replace the glass or headlight with a new one. Let's look at the procedure for replacing glass, because it is much cheaper than buying a new lighting fixture. In addition, no special tools are required:
- Determine how the headlight is mounted. There can be two options: a bumper or a body. To make the process easier, it is better to remove the bumper from the car.
- Disconnect the PTF power terminals.
- Inspect the headlight and make sure that the reflective surface is not damaged.
- Carefully clean the headlight from any remaining old glass. You may need to break it completely. Then, using pliers and a screwdriver, remove the glass and sealant.
- The glass and headlight rim are degreased (solvent, acetone or other special products). The procedure is necessary, especially in those places where sealant is applied. Before applying it, you need to wait until the surface dries well.
- The sealant is applied until the space between the glass and the headlight housing is completely filled. For this, any sealant can be used that can be used in the following temperature ranges: from -45 C to +150 C.
- After the composition is applied, the glass is pressed tightly against the body of the device. It should be pressed as long as required until the sealant dries completely.
If there is water in the headlight or the glass is fogged, a crack may be the likely cause. In this case, glass replacement is required
We recommend: Determining the signs and causes of wheel bearing failure
That's the whole process of replacing glass. All that remains is to install the headlight in its place, connect the terminals and install the bumper.
Connection options and diagrams
If the car does not have wiring for the PTF, you will have to lay the necessary wires yourself. There are two options - through a relay and through a button.
Via relay
To connect fog lights via a relay, you need to stock up on cutting tools and a terminal block. You will also need corrugation, heat shrinkage and electrical tape.
Installation rules via relay:
- Find a place in the car to mount the relay. Attach it so that it can be easily reached in case of replacement or repair.
- Find a place for the button.
- Prepare the power cables. The length should be such that the wires can be laid freely, without tension.
- Install a 10 A fuse. From pin No. 30, lay the finished wire to the “+” terminal of the battery.
- From pin No. 85, take the wire to the power button.
- Connect ground to the relay using pin No. 86.
- Place the PTF on the bumper.
- Connect the “–” wire from the body and the “+” wire from contact No. 87.
- Turn on the headlights and check their operation.
On a note! It is not recommended to connect the PTF autonomously. They will drain the battery in a matter of days.
Via button
If the PTF is connected via a button, any wire with voltage is sufficient. As a rule, power is taken from the “+” dimensions or from the ignition system wiring.
The red wire carries “+”, the black wire carries ground connected to the body. Find a place on the panel that your hand can easily reach, and place the button there.
This connection scheme for PTFs is recommended for motorists who tend to forget to turn them off when stopping the car. They turn off when the driver, having finished driving, takes out the ignition key.
Comments and reviews
The connection point must be well cleaned of paint, rust and dirt. To avoid problems, you need to study the requirements for installing fog lights. When you turn the key, the fog lights will immediately light up, and when you turn off the ignition, everything turns off.
This way you can avoid additional complications and breakdowns. To ensure that the headlight connection complies with current legislation, the PTF button is connected to the car’s exterior lighting switch. So how do you install it in a car?
A few tips The power button can be used from the rear fog lights. The main purpose of fog lights is to accurately project light in front of the vehicle. Contact 85 of the relay goes to plus 12V, which appears when the ignition is turned on.
This measure prevents the headlights from working when the engine is off. Moreover, it doesn’t matter what weather you’re driving in - with a cloudless sky or with thick fog - this optics always copes with its function. Correct connection of DRLs, they light up after starting the engine, Ford Focus 2.
Connection diagrams
The connection diagram for fog lights is chosen by the car enthusiast at his own discretion. There are two options - serial or parallel connection.
Parallel circuit
In a parallel circuit, the potential difference is supplied only when the engine is started or the ignition is turned on.
The “+” wire is connected to the headlights from the relay element contact. The latter is recorded through a 15 A fuse - its limit is quite enough for most foglights. It is recommended to install the fuse link closer to the battery terminal.
If you connect 12 V to the PTF from the charging control signal wire, then when you turn on the engine, the headlights can turn on automatically.
Connection order:
- The “–” contact from the headlights is connected to the body.
- The “+” terminals are connected to each other and connected to relay terminal No. 87.
- Relay contact “+” No. 30 is connected to the battery.
When switched on in parallel, each headlight is fully powered, which allows you to maintain the brightness of the lamps. The current consumption increases.
Series circuit
This circuit minimizes current consumption, and the bulbs burn less brightly than they could. This scheme is used if PTF replaces the main headlights.
Procedure:
- The “–” contacts of the headlights are connected to each other.
- The “+” terminal of one headlight is connected to the body, the other is soldered into the relay.
- The button and cable “+” from the ignition are connected to terminals No. 85 and No. 86.
- Contact No. 30 is connected to the “+” terminal of the battery.
The fog lights come on when the engine starts and turn off when it stops.
On a note! Modern foreign cars provide special pre-installation electrical preparation - this is judged by the “fog lamp relay” terminals.
What will you need to install fog lights?
To install fog lights yourself, a minimum set of tools is required. The car owner must have knowledge and skills in working with electrical wiring, since the safe operation of the car as a whole depends on the correct installation.
Set of tools:
- color electrical diagram of the car;
- nippers or side cutters;
- wire cleaning knife;
- terminal crimping pliers (terminal block);
- soldering iron
Set of materials required for installation:
- a set of fog lights suitable for installation in standard holes in the bumper or universal ones that are mounted on the surface of the bumper;
- stranded copper wire with a cross-section of 1.5-2 mm² with insulation capable of operating at low temperatures and resistant to gasoline and oil vapors;
- relay for turning on (standard headlight turn-on relays from front-wheel drive VAZ models are usually used);
- remote housing for installing a blade fuse;
- 30 A blade fuse;
- a control key that matches the interior design (preferably with a backlight);
- connectors and terminals for connecting wires to circuit elements;
- heat shrink tube of suitable diameter;
- electrical tape on a polyethylene or fabric basis;
- plastic ties;
- automotive corrugated hose for laying wires.
Set of fog lights for Ford Focus 3
Mounting options
Before installing the PTF, an electrical wiring diagram is developed - it will eliminate unnecessary wiring and guarantee the functioning of the electrical circuit.
Bumper mounting
There are 3 installation options: in the openings provided by the manufacturer, on a bracket or in a blind bumper where there is no niche for PTF.
To configure, use a homemade template. It is installed at a distance of 5 cm from the PTF. During adjustment, the coincidence line is set at a distance of 10 cm below the center of the lamps. By adjusting the headlights, they provide increased visibility and minimize the likelihood of being dazzled by oncoming cars.
Installation in a blind bumper
This option is labor-intensive; you have to cut out holes for the PTF.
Procedure:
- Remove the bumper and mark where the headlights will be.
- Drill holes around the perimeter, and then cut out a piece of the bumper with a sharp knife.
- Attach the headlights with appropriately sized bolts. Mount the protective cover - attach it to the bumper.
The headlights are adjusted using a special key - it is included in the package.
Other installation methods
PTF can be placed on a bracket made of durable steel. The bracket is fastened in accordance with the PTF installation standards. The part is secured with self-tapping screws. PTFs are installed at the mounting points and the wiring is connected.
Installation in the opening provided by the manufacturer:
- Raise the car by placing a 20 cm thick wooden beam under the front wheels.
- Remove the protective shields that cover the bottom of the bumper.
- Unscrew the fasteners from the plugs provided by the manufacturer.
- After inserting the PTF into the guides, attach them with self-tapping screws.
If non-original headlights are installed, the dimensions and mounting points may not match. Then the elements have to be adjusted.
What requirements must PTFs meet?
Finally, we note what rules modern fog lights must meet:
- In order to illuminate the road surface well, this type of optics must have a clear beam boundary at the top. Thus, the light in the headlights is scattered slightly above the horizontal plane.
- If the car manufacturer has not provided space for PTF fasteners, do not install them above the headlights under any circumstances. Try to place them as close to the roadway as possible. The lower this optics is, the better it will “break” the foggy barrier in front of you. But don’t forget about the car’s ground clearance. If the headlight is located at a distance of 10 centimeters from the asphalt, then during rainy weather it will constantly get wet, and water that gets inside the reflector will linger there for several weeks. And throughout this period the glass will be cloudy, and the quality of lighting will deteriorate significantly. On cars like the VAZ “classic”, the optimal solution to the problem is to install the PTF under the steel bumper. This way you will “kill two birds with one stone.” Firstly, at such a distance from the road the headlight will never get wet, and secondly, it looks very attractive and does not disfigure the appearance of the car. But where there is no point in installing PTF at all is on the roof (owners of SUVs often do this). The benefit from such illumination is zero, but such a technique will be fully blinding.
- If this is not factory optics, it is advisable to purchase it with special plugs. This way you will significantly increase the service life of your headlights and ensure their high safety when driving on rough terrain. And the cap protects the fog lights all year round at any time of the day.
- During operation, it is important to prevent clouding or fogging of the optics glass. To prevent this, you should regularly treat their surface with special polishes (at least once every 2-3 months).
Common Mistakes
If a car enthusiast does not have experience in electrical installation work, it is easy to make a mistake when installing a PTF. In order to properly connect the headlights, it is recommended to learn in advance about the typical mistakes of beginners.
Disadvantages and problems:
- The problem arises when connecting the PTF to the dimensions. This system is not designed to handle the current that it must carry due to the additional load introduced. As a result, overheating and melting of the wires is observed. If the PTF lights up along with the dimensions, the equipment will quickly fail.
- If the PTF installation parameters do not meet traffic regulations, traffic police officers may file claims against the driver. If they find a violation of established standards, the driver will be fined.
- It happens that a car enthusiast chooses the wrong place for a button. If it is located too far away, it is difficult for the driver to reach it. This can cause an accident.
If you often drive in poor visibility conditions, you should install PTF. Thanks to them, you will be able to better control your car in difficult conditions, which will provide you with a higher level of safety when driving.
Installation and connection of front and rear PTFs on VAZ 2113, 2114, 2115
Before you begin installing fog lights, you will need to select a certain list of tools and additional elements. You can purchase a ready-made connection kit or select the necessary spare parts separately. When everything is prepared, you can mark on the front bumper a place for installing future headlights. The VAZ 2115 comes with standard holes from the factory, but in the case of the VAZ 2113 and VAZ 2114 you will need to work with a tool (a jigsaw or a drill). If you don’t want to damage the bumper, you can install the lighting fixtures on special brackets.
To install foglights in the front bumper, you need to make holes using a jigsaw or drill with drill bits, having previously completed the markings
Installation Tools
You will need:
- file;
- drill and drill bits;
- electric jigsaw;
- roulette;
- marker.
Installation materials
As a rule, the kit for installing PTF on VAZ 2113, 2114, 2115 includes the following elements:
- headlights with bulbs;
- set of wires;
- electromagnetic relay;
- PTF power button;
- ties and clips for fixing wires;
- PTF connection diagram VAZ 2113, 2114, 2115.
The kit for connecting fog lights should include wires with terminals and connectors, a relay, a button
The installation of the lighting sources in question must be carried out using a button and an electromagnetic relay. The fact is that fog lights consume quite a lot of current and connecting directly to the ignition switch will lead to burning and subsequently burnout of the contacts. All this can contribute to damage to the wire insulation and the occurrence of a short circuit, which may result in failure of the electrical wiring.
Step-by-step installation and connection of PTF
To install fog lights, the following procedure must be followed:
- Installation of the headlight switch button in the cabin. You can choose any location for the element, as long as the driver can easily operate the key. Quite often, the part is installed instead of plugs on the dashboard.
The PTF activation key is usually located instead of one of the plugs located on the dashboard
- The grille with the dynamic head is removed from the front panel. Behind it there are two blocks designed to turn on the headlights, indicate the operation of the PTF and illuminate the button.
- Having placed the button in a convenient place, connectors are connected to it. After this, the grate can be put back in place.
- The relay is installed under the hood on the partition of the engine compartment near the mounting block. To remove it, you need to unscrew 2 nuts, lift it and find 2 pads (numbers 7 and 8).
The relay is fixed near the mounting block, for which it is necessary to unscrew the two fastening nuts
- A block with a harness of four wires with contacts included in the kit is laid to the relay block.
A wiring harness with four contacts, which is included in the kit, is laid to the mounting block
- The connection of the wires that come from the PTF relay is carried out according to the diagram in the following order: the wire from the 30th contact of the relay is connected to block No. 8 of the mounting block at the 8th terminal, the 87th contact of the relay goes to the 1st terminal of the connector, 86 is “ground”, and 85 is connected with the 17th terminal of block No. 7.
Diagram for switching on fog lights: 1 - fog lights; 2 — relay for turning on fog lights; 3 — mounting block; 4 — fog lamp switch with a control lamp (on the left) and a backlight lamp (on the right); 5 — external lighting switch (fragment); A - to power supplies; B - to the instrument lighting regulator
- The positive wires are pulled to the PTF, the mass is mainly secured to the nut of the headlights. The “+” voltage is supplied to the fog lights from the 2nd and 3rd contacts of block No. 8.
The ground is attached to the headlights, the positive wires are connected to pins 2 and 3 of block No. 8
- After all connections, the connectors are installed in the mounting block and secured.
We recommend: 20 most economical cars
As for the rear PTFs on VAZ 2113, 2114, 2115, on these modifications of the car such a light source is installed from the factory, i.e. another light bulb is used in the rear light. Control is also carried out from the passenger compartment using a button, but without fixing, since a slightly different relay design (electronic) is used. It’s worth knowing about this and not trying to install a latching key.
Video: installing PTF on a VAZ 2114
Checking the performance of PTF on VAZ 2113, 2114, 2115
After the lighting devices are installed and connected, you need to check how correctly everything works. To do this, just turn on the headlights and press the key that supplies voltage to the PTF relay, after which the headlamp lamps should light up. When the headlights are turned off, the PTF lamps should also go out, regardless of the position of the fog light button. After checking the functionality of the light source, you will need to adjust the light output so that oncoming drivers are not dazzled.
After installation and connection, we check the operation of the PTF: when the lights are turned on and the fog lights are pressed, the lights should light up, when the lights are turned off, the lights should go out
Fog optics are essential lighting equipment for any car. Such devices greatly facilitate travel in poor visibility conditions. If a certain car model does not have PTF installed from the factory, you can carry out the installation yourself. This does not require special tools or special skills and knowledge.
Fog lights. Are they necessary?
From an aesthetic point of view, of course, extra light sources on a car always look more impressive, especially if they are bright. But how urgent is the need for fog lights, what lamps are best to use in them, how to connect them and where to install them? And what color should the glass be? A lot of questions, but they all break down into one single “I want.” In principle, fog lights are needed if they correspond to their name and purpose. Fog lights are more than just additional headlights. This is a light that is designed specifically for driving in poor visibility conditions, namely in fog.
That's why they install a yellow filter in fog lights.
In this case, it doesn’t matter at all what kind of lamp is in the headlight - halogen, a regular incandescent lamp or diode fog lights. The main thing is the color of the light flux
And that's why. Fog is a water suspension consisting of microscopic particles of moisture. When hitting the surface of each drop, white light is refracted and scattered, turning into an impenetrable veil. It turns out to be a solid wall of white light, a cloud through which it is difficult to see anything. The yellow spectrum is able to penetrate suspension without scattering as much, therefore visibility in general is better when using a yellow filter.
Basic recommendations for driving techniques
Safety measures during fog on the road also include some driving features. The atmospheric phenomenon itself is not as dangerous as excessive faith in one’s own experience and ability to cope with any situation.
Try to avoid sudden braking and sudden stops. If you need to stop, do it smoothly. To warn motorists behind you, press the brake several times. Before doing this, turn on the turn signal (right).
When making a detour, it is recommended to personally make sure that nothing will interfere with this action. Overtaking in fog is prohibited, even if you are sure that there is no one on the road.
In the daytime, to expand the visible part of the road, it would be more advisable to use stronger main headlights. Using special fog lights will make your car more visible to other drivers.
There is one more feature when driving in foggy conditions, which many motorists forget about or do not pay attention to. It lies in the fact that the road surface becomes wet and slippery due to the settling of water vapor. This makes the grip of the wheels on the asphalt surface weaker.
At night or on cold autumn days, moisture on the road may freeze and ice may form.
In such a situation, you should exercise maximum caution and composure. Don't be distracted from the movement and watch how the car behaves
If you have little driving experience, then in such conditions it is better to wait out bad weather conditions in the parking lot.
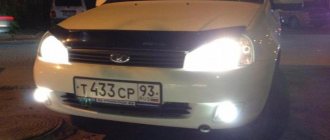
Which fog lights are better for Granta: Kirzhach or Bosch
In more expensive trim levels, the Lada Granta is equipped from the factory with a set of fog lights produced by Avtosvet LLC, Kirzhach. Judging by the reviews of the owners, they work well. There is also a set produced in Tolyatti, which was also equipped with factory cars. Its catalog number is 2190-3743010 and 2190-3743011. The average price of good domestic fog lights is about 40-50 dollars.
What is included in the PTF Grant kit
The PTF kit for Granta includes:
- Fog light relay.
- Connecting wires complete with connectors.
- PTF power button.
- About three meters of corrugation.
- Fog lights.
In some cases, you will have to purchase additional inserts for the front bumper, matching the body color, or unpainted. On sedans, as a rule, there are no inserts and you have to cut the holes for the foglights yourself.
Bosch, Kirzhach, or SE?
There are a lot of opinions on choosing the best fog lights for Granta. As a rule, the public does not have much trust in inexpensive Chinese brands, of which there are also plenty on the market. They are preferred by PTF LLC Avtosvet (Kirzhach) and Ryazan Bosch. There is an opinion that:
- Bosch fog lights are equipped with thicker glass and have valves to remove moisture;
- the distance from the lamp to the glass in Ryazan PTF is greater, so the glass does not heat up as much and does not break;
- PTF Kirzhach often suffer from glass damage, both due to temperature changes and mechanical damage.
Fog lights of the third type, from the SE configuration to a standard place in the bumper, are not recommended by many to be installed due to poor build quality and thin glass
Installation Guide
On a VAZ 2110 or even - a completely reasonable solution, because these optics can perfectly cope with the problem of illuminating the road in fog. If the car owner has never encountered such a problem before, then he will probably be interested in learning how to connect the fog lights on his own. We will tell you more about this below.
Tools and materials
To install or xenon in PTF, you will need:
- The headlights themselves, which can be purchased at any store. Domestic stores can supply headlights in two variations - for old-style center consoles it is optimal to use PTF for “ten”, but if your car is equipped with a new torpedo, then you will need optics for the VAZ 2115. In this case, the difference lies in the buttons for turning on the optics.
- Multimeter for measuring voltage.
- Indicator light with wire.
- Heat shrink packaging.
If you decide to use xenon in fog lights, then you will also need an additional xenon kit.
Connection diagram
How to properly connect fog lights to your car:
- First you need to open the fuse box and unscrew one screw, after which the device itself needs to be unfolded. The wires that will need to be connected additionally are marked in green in the photo. The number 1 marks the cable that transmits a positive charge, which can be checked using a test lamp. The connection of this wire is made from the relay to connector 20, as for the wire numbered 2, this is also a plus and it needs to be connected to the relay on pin 87.
- Next, you need to connect wires to the safety elements, which will subsequently split into the left and right lights. The wiring is installed, and the corresponding wire (also with a female output at both ends) is connected to the output with a double “female” contact, the length of which should be 30 cm.
- After these steps, you need to insert the cable with single female contacts into the white connector on the block. As for the double female connector, it must be removed from the block and connected to the male output, which is located behind the trunk opening button.
- Next, the black cable, which is marked with the number 3 and comes from output 87, should be routed from the top of the power supply; this wire is a minus. Here you can see the wires that were installed at the factory; they are connected under a nut that can be opened with a 10 key. The cable, which is marked with the number 4, ensures activation and deactivation of the optics.
There are several options where you can lay the foglight control cable:
As an option - from the side lights directly, without using a switch. In this case, the fog lights will automatically turn on along with the side lights.
- Another option is from the same side lights in a sequential manner, but using a switch. In this case, voltage will be supplied to the fog lamp switching regulator. However, the optics will only turn on if the button is pressed.
- Another option is from the ignition system via a switch. That is, when the driver turns on the ignition, there will be a plus on the optics switch. As in the previous case, the lights will turn on only after the switches are activated.
- In the engine compartment, disconnect the wires that are connected to the fluid control regulator and the washer expansion tank. To do this, unscrew the washer fixing nut and remove the block with wires, which is located under the left side member.
- For the Ш-1 connector you will need three cables - one yellow and two black-yellow.
- After this, you will need to cut two pieces from the yellow cable - they should be pulled into the vehicle interior. The wiring is thoroughly cleaned and male terminals are connected to it. Having completed these steps, the connectors must be connected to the block in such a way that the marked cable is connected to the black and yellow wire. Next, the block must be connected and two yellow cables attached to the harness. Having done this, the washer reservoir can be installed in place.
- After this, you will need two more pieces of wire, each should be 0.5 m long. You need to connect a ground terminal to these wires, and then fix it to the stud along with the ground cable from the optics.
- The cable from the PTF must be pulled from the front side member and brought out to where the lamp itself will be fixed. A ground terminal must be connected to each cable.
- After these steps, the brackets are mounted on the bumper itself, and the terminal blocks are connected to the wires. The final stage will be the installation of light bulbs in the lanterns (the author of the video is the proVAZ-2110 channel).
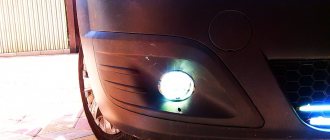
How to connect xenon to fog lights
Fog light kit for installation
When installing xenon in fog lights, it is necessary to additionally install an ignition unit.
The use of this type of lighting certainly improves visibility at night. The connection diagram does not differ from that described above, only a xenon ignition unit is installed between the xenon lamps and the fog lamp , which is responsible for heating such a lamp. Of course, the cost of installing such a kit is higher than a regular one.