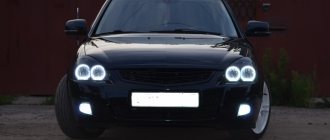
A large number of accidents that happen on the roads at night are due to poor lighting. In the modern world, it is especially important for car owners to choose the right headlights for their car. Therefore, many are interested in the question of which headlights on the VAZ-2110 still shine better, and also how to improve road lighting in the evening and at night?
The factory head optics of vehicles of the tenth family, without a doubt, do not shine with variety. It is limited to two main positions:
- Kirzhach - produced by the Avtosvet plant (they can be purchased at an average price of 2500 to 2700 rubles);
- Bosch (their price is 200-400 rubles lower than the first ones).
Which manufacturer’s “products” should I choose?
What to choose?
It would seem that we are talking about German quality products, which by definition should be better than their domestic counterpart. But in reality things are somewhat different.
Let's look at the key features of Kirzhach and Bosch headlights to determine which ones you should choose for your VAZ 2110 model.
- The purpose of any low beam is to provide good visibility of the roadway at night, while at the same time avoiding dazzling oncoming traffic. Headlights from German and domestic manufacturers cope equally well with these functions.
- The headlights from Kirzhach have a low beam lens, and a reflector is provided for the high beam. German products have two reflectors - for low beam and high beam. The lighting is ultimately the same, but Bosch has better brightness.
- Lenses are actually better than reflectors. They create a clearer line of light and allow the installation of xenon optics.
- As a study of reviews of VAZ 2110 owners using German devices shows, they are characterized by worse illumination in low beam mode.
- Bosch headlights have a very important advantage for many - when the car is driving in cloudy and rainy weather, it provides a better quality glow compared to Kirzhach devices. It's all about the larger surface of the low beam reflector.
- This Bosch plus also comes with a minus - you are deprived of the opportunity to install xenon optics.
- Note that, regardless of the manufacturer, these headlights contain H1 format lamps.
- If we take into account all other characteristics, then the undisputed leader here will be the products of the domestic manufacturer.
It is noteworthy that this is one of the few exceptions when domestic products turned out to be better than foreign ones. Sad but true.
Alternative option
If the driver of a VAZ 2110 car seems that simple Kirzhach headlights do not provide good road lighting, then a bi-xenon module can be installed in them if desired.
The Kirzhach headlight module and the bi-xenon module are not very different, but this will not be an obstacle to replacing them.
Installing a bi-xenon module consists of several stages:
- Removing the module seat in the headlight to install a new part in its place;
- The next step is to connect the xenon lamp wiring to the standard wiring.
Installation of xenon lamps is very simple, because it occurs without changing the wiring. After the alteration, the lighting will be completely different from what it was before. After changing the modules, the ignition unit is attached to any point, there are many places for this, it is installed anywhere at the driver’s request.
Afterwards, everything is put back in its place and the glow at night is checked in practice.
After modernization, modifications and various alterations, at the request of the driver, the Kirzhach headlight must be mounted back on the VAZ 2110 using a sealant or a special construction sealant.
Many owners of this car complain about poor light, so upgrading the Kirzhach headlights on the VAZ 2110 will be an opportunity for them to improve it. There are many complaints from drivers about it; they note the poor light of products from Germany, a narrow luminous flux and some other shortcomings. The situation cannot be corrected by installing more powerful lamps, so owners are forced to resort to various tricks.
If there are problems with optics, alternative proposals appear, but their cost is high.
Modification of Kirzhach headlights on the VAZ 2110 is a real proposal for a way out of this situation. If you take the time to search for suggestions on how to improve the lighting on this car, you will find many suggestions. With our advice, we will try to help drivers improve the illumination of the road, and therefore increase the safety of themselves and other road users.
The problem with new headlights
It happens that after installing new headlights, purchased for a lot of money from a reliable, excellent manufacturer, the quality of the glow leaves much to be desired.
Inexperienced drivers attribute everything to a defect or the purchase of a fake disguised as a trusted company. But in reality everything is completely different.
Headlights shine efficiently and efficiently not only depending on the manufacturer. Settings that some people don’t know about or simply forget play a big role
Choosing a headlight manufacturer
Drivers, first of all, always need a good low beam. Kirzhach headlights are equipped with a lens for low beam and, accordingly, a reflector for high beam. Bosch uses reflectors in both cases. Unlike a reflector, the lens has a much clearer light line; in addition, Kirzhach lighting devices can be legally “equipped” with xenon, which is not provided for Bosch. However, if we compare the results of the review of experts and the opinions of car owners, it is worth noting that they are somewhat different. Bosch headlights have weak flare from the side in the low beam, but besides this, they are the ones that cause preference. In addition, they have a large surface for low beam due to the reflector. This has the best effect on the quality of automobile road lighting in cloudy weather.
In order for lighting to be as productive as possible at night, choosing high-quality optics is not enough. The headlights should be adjusted correctly, and the glass should be clean (the glass should be secured with a sealant, but on Bosch they are held on by sealants. This makes the process of replacing glass easier). However, the best option would be to use bright halogen lamps for car lighting.
Tips for improving lighting on a VAZ-2110
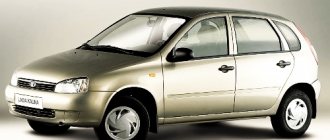
The history of the VAZ 2110 brand is very interesting and fascinating. This car can easily be called one of the most popular on the domestic market. And you shouldn’t be surprised, because the car is inexpensive and completely unpretentious to use. At the same time, many owners of “ten” complain about their light. In this situation, you should know that this problem can be easily corrected by at the same time slightly modernizing your car. To do this you need:
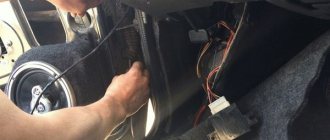
- Wash the headlights. Often it is the adhering dirt that is the main reason for the deterioration of lighting. If you do not have the opportunity or simply do not want to always wipe the headlights yourself, then you can install washers. The factory version of the car is not supplemented with this function. Volga washers are well suited for the “ten”. To install them, remove the bumper, make the appropriate holes, then insert the washer modules there and tighten them tightly with the bolts. Next, you need to connect the hose to the washer reservoir. Be sure to connect a button in the cabin that controls the washer. It should only be connected via a fuse.
- Next, carefully examine whether the headlight glass is intact. It is possible that it is cracked. In this case, you need to install a new one. To do this, remove the headlight unit, but before doing this, disconnect the negative terminal from the battery. Next, wash the headlight. Afterwards, you can take a hair dryer and, using it, heat the edge of the glass in a circular and smooth motion to soften the sealant. Then pry up the glass and remove it. Old sealant must be removed from the case and glass. After degreasing the body and edge of the glass, apply a layer of sealant to it. The glass should then be carefully pressed against the body.
- If the old reflector has peeled off, it can be replaced. To do this, you must first remove the glass from the case. Next you need to unscrew and remove the light bulb. Remove the reflector to be replaced, install a new one and reassemble the headlight in reverse order.
- You can also replace the “original” light bulbs with halogen ones. They will shine much brighter. Cost-effectiveness and durability are their main characteristics. However, in addition to halogen devices, you can also install xenon. Similar lamps come in different wattages, and the subsequent brightness of the glow depends on this. You only need to install bulbs that have been recommended for use on a specific car.
Types of lighting devices
Depending on the year of manufacture, the VAZ 2110 can be equipped with either Kirzhach or Bosch headlights. Both of them are a block that includes high and low beam headlights, side lights, and direction indicators.
No matter how much difference there is, there are some nuances:
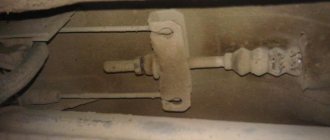
- In Kirzhach, the glass is sealed, so both removing it and replacing it with a new one is more difficult. In addition, the low beam glass has a lens that makes the light output more focused, although limited; Left headlight block Kirzhach
- Bosch glass is secured with latches. They are sealed with rubber gaskets. Their low beam boundary is more blurred, since there is no lens in the glass. Right headlight block Bosch
It’s difficult to say unequivocally which headlight unit is better. But disassembling Boshevskys is definitely easier. In any case, it doesn't hurt to know how to do it in both cases.
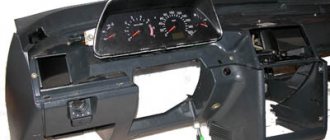
To remove the headlight unit, you need to open the hood:
- De-energize the VAZ 2110 (this must always be done during repairs, especially anything related to electricity) by disconnecting the negative terminal from the battery;
- Remove the lining from the radiator;
- Disconnect the block with wires from the headlight;
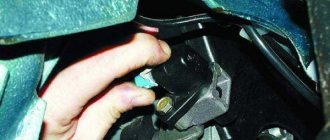
- Press the latch of the hydraulic corrector cylinder and, turning it 90° to the right, remove it from the socket. There is no need to disconnect the hoses;
- Unscrew the three bolts securing the headlight unit, then move it back;
- After which, move the device to the side, towards the center of the car, until it disengages with the wing hook;
- Loosen the upper bumper bolts;
- Press the pad from below until its flange disengages from the buffer, then remove the pad;
- Unscrew the nut securing the headlight from below;
- By pulling the headlight unit towards you and disconnecting the block from the turn signal, you can remove it.
Having carried out the correct removal without breaking anything, you can replace it with new equipment. Or you can disassemble and perform tuning or independent repairs.
The disassembly goes like this:
- Unscrew the fastening screws (there are two of them);
- Disengage the two hooks on the turn signal from the headlight. Now you can disassemble it into two parts.
Adjusting headlights on a VAZ 2110
The road in front of the driver in the evening and at night should be well lit. Also, the direction of light from the headlights should be such that oncoming drivers are not blinded if they turn on the low beam. Based on this, the headlights on the VAZ 2110 must be adjusted correctly and in accordance with the requirements. It is produced using rotating screws (1 and 2 in the figure), which, when moving, rotate the corresponding optical element in the horizontal and vertical planes. The most convenient option is considered to be the use of mobile optical devices when adjusting headlights on VAZ “tenth” series models. However, if they are not there, then adjustments can be made using the screen.
Finalization
In order to make the glow better, they are refined, which includes the following steps:
- Shifting the lens closer to the reflector;
- Modernization of curtains;
- Changing the shape of the reflector.
These are the main stages that will ultimately lead to the complete modernization of Kirzhach headlights on a VAZ 2110 car. Now it is necessary to consider each individual stage.
Lens in the headlight of Kirzhach VAZ 2110
Shifting the lens closer to the reflector
The alteration begins with shifting the lens to reduce the area of the lens onto which the light flux falls. As a result, the curvature of the lens will also become smaller.
- Disassembling the module and removing the lens from it. Carefully mark the cut at the intended location of the module. It is imperative to ensure that the lens curtain does not move from its place, but remains at a distance of 50 mm due to the focal length of the lens;
- Cut off the lens at the marked location and attach it to the module. It is attached using the cuts that were made earlier, but the module itself will become shorter. The main thing in all this is that the closer the lens is, the more heating will occur due to its small area. In order not to miss the distance, the most optimal would be to approximate the lens by 10 mm.
This material can provide assistance in choosing an alternative to a low beam lamp:
Carrying out modernization of curtains
To carry out modernization and modification at the highest level, good and high-quality light distribution is done. The curtain is made straighter so that the light does not blind passing drivers driving in front of the VAZ 2110 into the rear mirrors. This type of curtain was developed according to the European GOST standard and is very successful.
To do this, you will need cardboard from which the curtain template will be made. The prepared cardboard template is transferred to a plate of metal material. To cut it out, metal scissors are used and the finished curtain is attached to the module. Also, if desired, it can be wrapped in foil to provide better light dispersion; it can also be used to install fog lights.
An article dedicated to connecting fog lights on a VAZ 2110 is located here:
Under the lens on the module body, the edges are cut off. If they are cut correctly (no more than one millimeter along the ring), then the edge of the ring will not interfere with the correct flow of light.
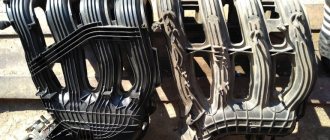
Changing the reflector shape
If you want to change the width of the light output without changing its height, then you can change the shape of the reflectors yourself. By the way, on imported cars the reflectors have an oval shape, which is the best option.
Refining the headlights with a complete change in the shape of the reflector will help to significantly increase the width of the light beam. The reflector on a VAZ 2110 car has a standard round shape, and if you take it and press it to the floor, you can easily get an oval shape.
To reduce the cost of the reflector, it is made from ordinary sheet metal using an inexpensive cast method and therefore this material is very elastic and can be easily changed in shape.
Reflector in the headlight of Kirzhach VAZ 2110
To avoid cutting your hand, you should wear a glove. But you shouldn’t get too carried away, since there are certain standards for the width, which should be 93.2 mm in the flattened part. If this standard is not maintained, then the light beam will have a deformed feed shape. Therefore, when changing the shape of the reflector, efforts are applied little by little, controlling the change in size. So that when installing the reflector, all the fasteners coincide, they are also made oval in shape, as is the reflector fastening itself.
These changes, simple in their technology, will allow you to easily and without additional costs upgrade the Kirzhach headlights on a VAZ 2110. But the main thing is that all the changes made are not certified and fall entirely on the responsible shoulders of the driver.
After upgrading the headlights, it is imperative to adjust the VAZ 2110 headlights.
We install “foglights” with our own hands
Fog lights are a very useful attribute of every car when you need to drive in bad weather conditions. These headlights on the presented model are provided in the “Lux” configuration. As a result, their installation falls entirely on the shoulders of the car owner.
First, decide where on the machine you want to install them. The best option is the bottom of the bumper. There are holes here where they will fit perfectly. Next, you should choose their type: with transparent or corrugated glass. The first ones shine with spots, so it is better to refuse them. The second option perfectly diffuses light, illuminating the entire surface of the road. Next, you need to purchase frames for them, a set of wires, a relay and a power button. Route the wires that are located in the dashboard directly into the engine compartment. Connect the wires to the connectors on the headlights and insulate them well with electrical tape. Next, install the headlights in the frames and secure them firmly in the appropriate place on the bumper. Connect the wires. If you need the headlights to be turned on from a button, then you need to install it in the gap of the corresponding power wire. When the work is completed, adjust the headlights.
Rear lights for VAZ 2110. Tuning
It is quite easy to do tuning of VAZ 2110 headlights with your own hands. However, this time we will talk about the rear lights of this model. To “repair” you will need several photos, videos, a lot of LEDs and a “car” of patience. Beautiful LED taillights on the VAZ 2110 will always and everywhere give the car special elegance and individuality.
First you need to disassemble the lights. Since the glass is soldered and not glued, you should cut off the corner of the lantern until the knife gets inside. Then we remove the glass. After this, we measure the dimensions inside and cut out the corresponding blanks from plexiglass. Then, with maximum care, we place future holes for the LEDs. We drill these holes and glue the LEDs there using superglue. Next, we solder the resistors and fill everything with silicone. Afterwards, we assemble the structure and glue it. To prevent water from seeping through, we coat the seam with silicone. Such independent tuning of a VAZ 2110 with your own hands will always stand out with its “bright” originality.
How to remove glass?
Removal will be necessary if, for example, it is necessary to replace broken glass on a VAZ 2110 or it has become cloudy, covered with microcracks, etc.
If you are dealing with Bosch, then you need to release the latches, then easily remove the glass. When installing a new one, it’s worth inspecting the rubber; replacing it won’t hurt either. Some also use sealant, although there is no particular need for this, unless, of course, you are dealing with genuine products and not Chinese fakes.
You'll have to tinker with Kirzhach a little longer. Here, in order to remove the glass, you must first carefully insert a flat-head screwdriver into the corner of the glass, forming a gap. Then connect a thin stationery knife to the process.
So, with the help of a knife and a screwdriver, you may be able to detach the glass. If the sealant “sticks”, you need to warm it up with a hairdryer and immediately continue removing the sealant while it is warm.
When installing new glass, the headlight block can be placed on a softer, construction sealant. In addition, by removing the glass, you can disassemble the reflector from the outside of the car if it also needs replacement.