Repair of VAZ 2107 seats is carried out for two reasons:
- damage to seat trim;
- failure of the front seat adjustment mechanism.
Before repairing the mechanism or seat trim, they must be dismantled.
- Removing the front seats of a VAZ 2107
- Repair of front seat slides
- Reupholstery of the front seats of VAZ 2107
- Rear seat removal and repair
- Replacing seats
- Installation of car seats
Removing the front seats
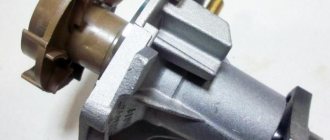
The seat needs to be pushed all the way forward, after which you can see two mounting bolts on the slide that need to be unscrewed. After this, the chair is moved back as much as possible, the two fastenings at the front are unscrewed. In this case, you need to unscrew the nut on the left with a No. 13 wrench. After these steps are completed, the chair can be easily removed from the interior, making it possible to repair it.
The front seat adjustment mechanisms are known to jam quite often, so they can also be disassembled for the following work:
- cleaning from dirt,
- applying lubricant,
- repair, repair
- replacing worn parts.
The VAZ skid consists of a limiter, a bracket for a screw rod, a lock for the internal guide, a rod, guides, sliders and a roller with a rubber ring, a spring, a latch, a back reinforcement, a cotter pin, a handle for the latch from the mechanism for moving the skid, and other parts.
To carry out the work, you need to dismantle the spring, remove the pin from the rod, unscrew the bolts from the mounting of the slide on the VAZ seat and remove the slide. After this, the cotter pin/screw rod is unscrewed (removed from the bracket), the sliders are moved along the guides, the rollers with limiters are removed, and the sliders are removed. Assembly is carried out in reverse order.
If the lock for the backrest position of the chair is broken, then in the store you need to purchase a spare part such as a lock comb, or the lock itself. Now you should cut off the broken part with a grinder and weld a new one, having previously covered the chair in places close to welding with a wet cloth so as not to burn it. If the repair is supposed to be done in a workshop, then car owners are advised to remove the seat trim, take out the foam rubber, springs and give only the frame, since the welder does not always work carefully. By the way, the seat upholstery can be washed or cleaned at the same time.
Tuning the interior of the "Seven"
It would be a good idea to reupholster the updated chair yourself. To do this, the old seat upholstery must be carefully ripped apart at the seams, moistening the places where it is glued to the cardboard elements with gasoline. The removed covering is used as a pattern, on the basis of which a blank is made from a suitable fabric. It is assembled using glue, thread or heat sealing. The foam elements and springs are updated, and new upholstery is put on the seat.
The rear seats often require updating of the upholstery precisely due to its wear and tear, since children or pets are usually placed here. The seat at the back is a sofa consisting of a back and a saddle, which are attached to special elements so that the entire structure is in one position.
Novikov Maxim Glebovich - Repair of the seat backrest tilt regulator VAZ-2107.
This is probably completely funny, but today I am publishing another article about repairing broken parts of VAZ cars, which, as usual, cost pennies anyway. I was prompted to write this article by another breakdown of my car, namely the passenger seat backrest tilt adjuster. I don’t know who I drove so heavy (and I never bombed), but on the passenger seat the adjuster comb was completely cut off, and the backrest did not lock in any position at all, tipping over into the back seat when I tried to lean on it. Naturally, I was too lazy to go to the service center, and I decided to see for myself what was broken there, and whether it was possible to fix it myself.
In general, this breakdown happens on Zhiguli cars quite often. Usually, for repairs, the chair is removed, the welded comb is cut off, and a new one is welded. But at home, it would be possible to do without welding, simply by drilling out the spot welds, cutting off the weld with a chisel, and screwing the new comb into place through the drilled holes. But I didn’t have time to look for a comb, and I had already taken the drill from the dacha to Moscow (and I started doing repairs at the dacha). Therefore, I decided to simply fix the backrest in one position, since none of the potential passengers are particularly trying to adjust it.
So, the method for quickly fixing the tilt of the seat back of a VAZ-2107 car in case of a comb failure:
1. Remove the chair. To do this, move the chair all the way back, unscrew the two front bolts on its lower runners, then move the chair all the way forward and unscrew the two rear bolts on the same runners. We pull the chair out and turn it over, as if putting it on all fours. We study the lower part, in particular the latch itself.
The picture shows a chair back tilt lock with broken comb teeth. Thanks to the teeth, part 1 should be fixed in part 2, but since the teeth of part 2 are broken, fixation does not occur.
However, as you know, all the parts in Lada cars have clever design features, which seem to be specially laid out so that we can repair or modify these parts. Let's pay attention to the grooves of part 2, marked with arrows in the figure. They are approximately the same width as the distances between the ribs in part 1 (actually a little wider). This allows us to easily fix these two parts by inserting the part shown in the next photo.
2. We make a retainer. It is easy to make from a fairly common metal strip, a fragment of which can always be found by rummaging thoroughly in your or your neighbors’ barn. I found such a strip, and its width turned out to be exactly equal to the distance between the extreme points of the grooves, and the thickness was exactly equal to the width of the grooves, which is important for eliminating backlash. All that remains is to cut out a notch in the center and use sandpaper to slightly narrow the thickness of the plate within the boundaries indicated by the red lines, since, as mentioned above, the distance between the edges of part 2 is slightly less than the width of the grooves themselves, and therefore the thickness of the part.
| Please note that the teeth of the clamp have different widths, corresponding to the depth of the grooves of part 2. |
Rear seat repair
The backrest of the rear seat can be easily removed. To do this, you need to lift it slightly so that the staples are separated from the latches. To remove the saddle, you should grab it by one edge with both hands and pull it up strongly, this will ensure it moves away from the lock. Then the same is done with the other side, after which the repair can begin.
Fastening the front seats
Many owners of the VAZ 2107 model, which has already been discontinued, want to decorate the interior by installing seats from other car brands. This primarily applies to the front seats. In this case, you should pay attention to UNP products. Which seats are suitable for VAZ from the company’s catalog? Almost everything. You can choose anatomical seats, such as “Boxer”, “Racer”, “Sport”, etc. They are quite lightweight, since the frame is made of durable fiberglass, have a steel frame and a bucket shape with side supports, which increases the quality of driving. The seat backs often have reinforcing pads, and the headrest is integrated. The seats are thin due to fiberglass, which gives additional space to passengers sitting in the back.
Sports UNP seats are perfect for the VAZ 2107. They have maximum lateral support, a one-piece design, an integrated headrest, allow you to install sports belts (3-6 attachment points), additional pillows, including lumbar support. All UNP products can be easily integrated into any car due to the availability of installation adapters, which are sold along with the seats. In the case of the VAZ 2107, we are talking about the slide and side mounting brackets.
Installing a sports or anatomical car seat is not a cheap pleasure, so many car enthusiasts want to know whether seats from a foreign car will fit in a VAZ 2107. Experts believe that almost anything that fits the dimensions can be supplied if it is possible to carry out high-quality welding work. For example, in the “seven” you can try to put parts from Opel (Vectra A, Cadet) or from Skyline.
It should be borne in mind that the installation of non-original seats may raise questions from regulatory authorities, since such an operation is considered to be making changes to the design of the machine.
Which is better to choose?
Let's now look at which of the listed seats is best suited for your car. It should be borne in mind that a lot depends on the availability of a particular seat option. It is not always possible to find a suitable option in good condition and for the best price.
It is important to understand that worn-out seats from a foreign car will have worse characteristics than “Zhiguli” ones; take this into account when choosing
If you have a junkyard nearby where old German cars constantly appear, then you are very lucky. Surely you can find seats from Mercedes W210
. They are not very popular among drivers of modern foreign cars, but they are ideal for the VAZ-2107. Moreover, at showdowns they usually don’t ask for much for them. At the same time, buying such seats secondhand can cost a significant amount.
If you live in Siberia or the Far East, then you better look for Toyota Corolla seats. Usually in the eastern regions there are no problems with searching, which cannot be said about the European part of Russia. In any case, if you can find such seats, purchase them. Not only do they fit perfectly, but they also look really good in the salon.
The remaining options listed in the previous part of the article make sense to use only if there are no more suitable options. As a rule, their installation requires additional modification of the fasteners.
PS They forgot to mention that they are also suitable for Mazda 6. There is an option to look for them at a disassembly site, chances are high that they will be there.
How to repair a broken seat back on a VAZ 2107
All owners of the domestic VAZ 2107 car know how uncomfortable and peculiar the front seats are. In addition to everything, during the operation of the car, this often happens when the back of the VAZ 2107 seat breaks. It suddenly stops being held in an upright position. How to fix the breakdown, and what is better to choose - repair or installation of new chairs, we will find out in the process.
Additional interior tuning
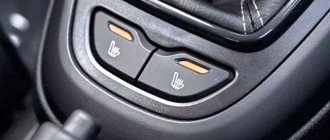
In addition to installing new seats, other modifications to the interior can be made, which will significantly increase the level of comfort. For example, many drivers connect heated seats to their seats. You can do this in several ways:
- Choose chairs with built-in heating function;
- Do the heating yourself.
Both options are quite feasible, so you can choose the one that suits you best.
Another fairly common modification is interior reupholstery. It is worth noting that the standard trim on the VAZ 2107 is not very sophisticated. Therefore, many drivers are trying to correct this shortcoming. This work is quite difficult, but if you have the right patterns, there won’t be any special problems with it.
Conclusion
. Domestic “classics” do not have a high level of comfort. Therefore, it is often tuned, with an emphasis on increasing comfort. In this case, it is useful to know which seat is suitable for the VAZ 2107. This will allow you to make the right choice, as well as install a new seat in the cabin with almost no problems. In fact, there are quite a lot of options, but not all of them allow replacement without additional modifications.
Removing front seats instructions
The need to dismantle the front seats arises in the following cases:
- A breakdown that can only be repaired after dismantling.
- The need for soundproofing of the interior, in particular the floor.
- Replacing standard seats with others.
One of the common problems with seats on the VAZ 2107 is a broken or malfunctioning backrest. The design of the front seats provides the ability to change the angle of the back support, but when the mechanism breaks, this function stops working. The driver or passenger does not have the opportunity to lean on the backrest, because it tilts (the seat folds out) even with minimal back pressure, and driving a car in this position of the backrest is inconvenient. To find the cause of the breakdown and eliminate it, you will first need to dismantle the faulty seat and remove it from the car.
Instructions on how to remove the front seat on a VAZ 2107 are as follows:
- First, the seat moves all the way forward. For this purpose, the mechanism has a corresponding lever in its design. After moving it forward, the inside of the slide will open from the rear of the cabin, fixed to special bases on the floor of the car using two bolted connections.
- These bolts must be unscrewed and removed using a socket head or an “8” spanner.
- After this, you need to pull the chair movement lever again and move it as far back as possible.
- There are also two bolts on the front of the slide that must be unscrewed to dismantle the chair. At the same time, keep in mind that one bolt securing the slide at the front goes under the head at “8”, and the second at “13”.
- Now you can remove the chair from the interior by turning it towards you.
How to remove the front seats
The question of how to remove the front seats on a VAZ 2106 arises quite rarely, and in most cases this happens due to their breakdown. The most common of them is when the backrest is not fixed in a vertical position. There are also cases with the slides when the chairs begin to move on them with difficulty. In general, in this case it is better to remove the seat and figure out what is causing the damage. For this procedure you will need:
- Head 8 with extension
- Ratchet handle or crank
- Open-end wrench 13
The chairs are secured with 4 bolts, two of which are in the front, and the other two are in the back! First, move the seat all the way forward, thereby gaining access to the rear mounting bolts:
Standard seats VAZ 2107
If we compare the equipment and appearance of the VAZ 2107 with previous models, it looks much better. By creating this car, the Soviet auto industry tried to make a “luxury” model. This was noticeable in the exterior, as well as in the interior equipment. We will not dwell on all the differences, but will consider only the standard seats.
The difference between the “Seven” and previous VAZ models is that it has front seats with lateral support. The backrests have headrests made in a single body, whereas in previous versions the headrests were inserted into the backrest separately. The peculiarity of the rear sofa is that it has a folding armrest, which improves passenger comfort.
As in any other car, the seats of the VAZ 2107 have a complex design. They are designed to ensure maximum comfort and safety for all occupants.
The seat consists of the following main elements:
- frame - is the base and is made of steel;
- pillow;
- back.
The frame of the front seats can be moved back and forth along special guides. To do this, press the lever and then move the seat to the desired position.
The backrest and cushion of the front seats are hinged. It is possible to set a comfortable backrest angle. The height of the backrest is designed to provide reliable support for the shoulders of a person of average height. The presence of a headrest is responsible for supporting the head. The front seat cushions and backrests have side bolsters that provide a snug fit for the passenger and driver and also hold them in place during cornering. The cushion and backrest of the rear seats are rigidly fixed and there is no way to change their angle.
Springs are attached to the frame. The structure of the pillows and backs is layered. They consist of the following elements:
- foamed polyurethane foam;
- upholstery made of durable fabric. Covers can be used to protect the upholstery.
Front Panel
The standard front panel of the VAZ 2105 interior is far from perfect and many owners are not satisfied with it. The main nuances boil down to the dim illumination of the instruments and the constantly opening glove compartment lid. Therefore, we have to resort to various modifications using modern materials and devices.
Dashboard
By making changes to the dashboard, you can improve the readability of instruments and increase its attractiveness. To do this, replace the standard backlight lamps with LEDs or LED strip. It is also possible to install modern instrument scales, which are applied on top of the factory ones.
The dashboard can be modified by installing LED elements or new devices
Glove box
The glove box on the “five” copes with its functions, but sometimes this product causes inconvenience. With minimal financial and time costs, the glove compartment can be modified, increasing its reliability.
Glove compartment lock
To prevent the glove compartment lid from opening randomly and knocking on bumps, you can install a small furniture or post lock.
To secure the glove compartment, you can use a small postal or furniture lock
Another solution to this problem is to install magnets from computer hard drives. Power is supplied to the magnets through a limit switch.
To ensure the glove compartment closes securely, you can install magnets from your computer hard drive.
Glove compartment lighting
From the factory, a backlight is installed in the glove compartment, but it is so weak that when it is turned on, almost nothing is visible. The simplest modification option is to install an LED instead of a standard light bulb. For better lighting, the glove box is equipped with an LED strip or a suitable lampshade from another car, for example, a VAZ 2110. Power is connected from the factory lamp.
After installing the lamp, the lighting of the glove compartment is significantly improved.
Glove compartment trim
Since the glove box is made of plastic, the objects in it rattle during the trip. To correct the situation, the inside of the product is covered with carpet. Thus, you can not only eliminate extraneous sounds, but also make this element of the front panel more attractive.
To finish the glove compartment, you can use carpet, which will eliminate rattling.
What seats can be installed?
If we talk about the standard seats of the VAZ 2107, they cannot boast of originality and the fact that they provide an ideal fit. This can be explained simply: the VAZ is a budget car and the manufacturer’s installation of special expensive seats on it would cause a significant increase in the price of the car.
In addition, we must take into account that people have different weights and configurations. A seat that may be comfortable for one person may not be suitable for another. That is why, in order to improve the appearance of the car, as well as to choose the most comfortable seat for the driver, many car enthusiasts install seats from other cars on the VAZ 2107.
Racing
This is the most expensive option and is very rarely chosen for VAZ. Such seats are used by racing drivers, and their price can be comparable to the cost of a “seven”.
When creating such models, fiberglass is used. Their main feature is that the back and pillow have a one-piece design. To perfectly fit the seat to the driver's figure, special inserts are used.
Although the seat is highly durable and reliable and perfectly follows the driver’s figure, getting in and out becomes more difficult. The fact that the backrest and cushion are made of fiberglass makes driving on our roads unbearable. These seats can only be used if the car is racing.
Sports
If we compare racing and sports seats, the latter have backrest adjustment, as well as shoulder rests, hip and back support. They are quite comfortable, which allows the driver to drive the car comfortably. The sports seats are equipped with a four-point belt, which ensures high safety. It should be taken into account that sports seats are comfortable if there is a hard suspension; if it is soft, then such seats are not suitable for long trips.
Anatomical or ultra-comfortable
If you prefer a comfortable and slow ride, then you should choose anatomical seats. These seats provide a comfortable seating position and good torso support during sharp turns or sharp maneuvers.
They have different adjustments that allow you to customize the chair for a specific person, taking into account his anatomical features. There are models in which heating is installed, and they also have the possibility of vibration massage. This solution allows you to drive a car for a long time, and a person will not feel pain in the back, neck or lower back even during long journeys.
Seats from foreign cars
Often VAZ 2107 owners install seats from foreign cars in them. There are many options, but the most commonly used are the following, as they require little or no modification:
- seats from Mercedes W210 (1996);
- Toyota Corolla (1993);
- SKODA and Fiat.
Volkswagen seats fit well, but their disadvantage is that the seating position is high and therefore this solution is suitable for people of short or average height. When installing seats from Peugeot and Nissan, you will have to work hard, since their fastenings are slightly mismatched. To more securely fix a chair from a foreign car in the body of a VAZ 2107, it may be necessary to create additional holes.
Experts say that almost any seats can be installed on the VAZ 2107, the main thing is that they fit in size and it is possible to carry out welding work.
Video: types of car seats
Installing a new seat
Let’s look at some of the nuances of installing foreign-made seats in “classics”. True, we will analyze only the most common problems. After all, each chair has its own requirements for installation and it will not be possible to describe all the options step by step in one article. Drivers usually face the following difficulties:
- A common problem is the misalignment of the mounting slides. In this case, you will need to install the skids from the “original” car. To do this, you will need to drill additional holes for fastening in the bottom. Do not forget to carry out anti-corrosion treatment;
- The simplest drawback is that the driver's seating position is too low. As a result, you cannot fully control the traffic situation. To avoid this problem, it is recommended to weld cross members into the bottom and install the seat slides on them;
- Also, some drivers want to install an electric seat drive on the VAZ 2107. This approach allows them to be adjusted without effort. The process of installing an electric motor is not complicated. But, be sure to connect through a fuse. Moisture often accumulates on the floor of the car, which can lead to a short circuit.
- https://automotogid.ru/remont-perednego-sidenija-vaz-2107/
- https://semerkavaz.ru/raznoe/zamena-sidenijj-na-vaz-2107/
- https://expertVAZ.ru/2107/remont-sidene.html
- https://provaz07.ru/salon-i-kuzov/kakie-sidenya-podxodyat-na-vaz-2107.html
- https://www.vazzz.ru/kakie-sidenya-ot-inomarki-podhodyat-na-vaz-2107-bez-peredelok/
Front seat malfunctions and repairs
With proper use, the front seats of the VAZ 2107 serve for a long time and reliably. As with any other element of the car, damage to the front seats may occur during long-term use, but in most cases you can repair them yourself.
Removing the front seat
To carry out repair work, you must first remove the front seat. For dismantling and repairs you will need the following tools:
- set of wrenches;
The procedure for dismantling the front seat of a VAZ 2107:
- Move the seat forward all the way.
The back does not lock and does not recline
The impossibility of fixing or reclining the backrest occurs due to the failure of its position lock. Repair consists of replacing the retainer or its comb. It is not difficult to find such parts in the store. Repair sequence:
- Using a grinder, cut off the broken comb.
Video: front seat comb repair
Doesn't move horizontally
If the seat does not move back and forth, then the reason is a broken slide. They consist of the following elements:
- Slide guides.
- Slide sliders.
- Video clip.
- Rubber roller ring.
- Limiter.
- Slide latch.
- Inner slide guide lock.
- Back reinforcement.
- Traction.
- Spring.
- Cotter pin.
- Screw rod with backrest tilt mechanism handle.
- Latch handle for the slide movement mechanism.
- Screw rod bracket.
In a horizontal position, the seat will not move if the slide is clogged with dirt or one of the elements is broken. Repair of the skids will be carried out in the following sequence:
- Remove the spring.
- Release the rod fastening pin.
- Unscrew the slide from the seat body.
It is necessary to clean all parts from dirt and old grease. After this, they determine whether there are any failed elements and, if necessary, replace them with new ones.
Front seat reupholstery
The front seats are usually used more often, so they get dirty faster, especially if they don't have covers. There are situations when the seat upholstery is damaged. In such cases, the chair must be re-upholstered:
- Rip out the sheathing at the seams.
- Dismantle old material.
- Blanks of new fabric are cut out according to the shape of the old sheathing.
Video: replacing seat springs
How to solve the issue with “subsidence”
With the seat cushion removed, you can check the condition of the springs.
“Sagging” occurs because the springs break off from the sides of the chair, causing it to collapse under the weight.
To solve the “sagging” problem, you need to strengthen the seat. To do this, you should weld the metal plates and reattach the broken springs. Notice the wires that hold the seat springs together. If they are lost, install new ones.
If you want to make the seat harder, install a sheet of fiberboard and place it on top of the springs.
Front seat reupholstery
If covers were not initially installed on the chair, they will quickly become dirty.
When the upholstery is damaged, you need to re-tighten the seat:
- spread the sheathing along the seam;
- remove material;
- cut the workpiece according to the shape of the removed skin;
- inspect the structure - if necessary, replace the foam rubber and repair the springs;
- secure the new casing with thread, glue and heat sealing.
Installing the chairs does not require any special skills. The sequence of actions is the reverse of what you did when withdrawing.
Before installing the chair, be sure to lubricate the slides and other moving parts. You can use motor oil for this.
Rear seats
Removing the rear seat back is very easy. It is attached to the car body using special hooks. It is enough to raise the back slightly up. After this, the clamps will disengage and it can be removed.
To dismantle the lower part, you need to take the seat from one side and sharply pull it up. This releases the spring clips. After this, do the same on the other side and remove the saddle.
Video: dismantling the rear seat
To a large extent, the comfort and convenience of the driver and passengers depend on the seats. That is why special attention must be paid to the choice of this interior element. You can always replace the standard seats of the VAZ 2107 with more comfortable and high-quality ones. Thus, not only the comfort and safety of people in the car improves, but also its appearance becomes more attractive.
Lada 2107 Belka+ › Logbook › Repair of driver's seat
Hi all! Surely the owners of classics have encountered such a problem as a sunken seat. Sitting in such a “chair” is not very comfortable, especially if YOU are short))) The reasons for this condition may be different. In my case these are torn springs. After driving around like this for a while, I couldn’t stand it and decided to do it. I took it off, brought it into the house closer to the stove and off we went...))) I took it apart down to the frame.
The condition was sad, everything was torn off, but the springs were intact, the “hooks” were torn off.
It would seem that everything is simple, just take welding and do it! But no...I can’t work as a welder, and my father wasn’t at home. I decided to do without welding. In the garage I found an old protection from Tavria (I think it was in the timing belt area), in general the plate is not very thin and bends well. I cut out 6 pieces of plates from it (I cut it in a hurry, I didn’t pay attention to the shape and beauty), and drilled holes in them.
Then I drilled holes on the saddle frame in the places where the hooks were torn off, and secured the plates with bolts.
Then I tightened the springs and bent the plates. It turned out great)))
Then I made ties between the springs, cut out a piece of fiberboard and threw it on top of the springs so that the seat lip would not cut through among them.
Well, that’s basically it, I put all the upholstery in place, added a little more sponge so that the seat was higher, put it in place in the car, I ride and am happy, it’s like driving a jeep)))
Source
Repair of front seats of VAZ-2104, 2105, 2107 (the backrest falls)
The essence of the problem and solutions
The back of the front seat of the VAZ classic falls back due to wear and cutting of the teeth of the latch comb. This is the part that will have to be replaced during repairs. You can buy it at an auto parts store; there are right and left combs (do not mix them up). At the same time, you can replace the locking screw.
These brackets need to be replaced
The price is not very high, but the repair itself is complicated: you will need to cut out the old part (it is welded by contact welding) and weld a new one. Therefore, you can take on repairs only if you have a garage equipped with welding, an angle grinder, a drill and other plumbing tools and you know how to use them all.
Another way to restore the retainer is to use a repair (reinforced) comb. It is welded directly onto the broken fastener; there is no need to cut anything off and the repair is faster.
Repair (reinforced) seat back clamp for VAZ-2107
If you don’t have all this, then try looking at auto repair shops for a seat with a well-preserved latch. Even if its cover or cushions are damaged, you can transfer the upholstery from your seat to a new frame. Welding is no longer needed here; anyone can do the job.
Removing the seat
You will need “8” and “13” mm wrenches, preferably socket wrenches with a ratchet. Move the seat to the extreme forward position.
We unscrew the two screws of the rear fastenings and remove them from their sockets.
Unscrew the seat mounting screws
Move the seat to the rearmost position. We unscrew the screw at “8” of the outer fastening at the top and the nut at “13” at the bottom of the seat near the inner fastening. We take the seat out of the car. We turn the seat over and place it on a stand for ease of use. You can simply put it back in the trunk.
Installing a reinforced seat clamp comb
To install a reinforced comb, you need to straighten a worn and broken comb. Protect the seat cushion and the screw with linings made of fireproof materials. Boil cracked parts. Install the reinforced comb, aligning it with the screw and welding it to the bracket.
Installation of a reinforced seat clamp comb VAZ-2107. Arrows indicate welded cracks.
Disassembling the pillow
If you decide to install a new factory-made bracket, you will have to remove them to avoid burning the foam and other parts of the seat cushion when cutting and welding the bracket.
To do this, remove the covers, if any, and use a flat screwdriver and pliers to bend the metal tabs around the perimeter of the seat.
Bend the trim tabs
Carefully unhook the trim and remove the pillow.
Removing the worn-out bracket
We take out the wire retainer of the screw and turn the screw out of the socket. To avoid interference, it is better to remove the seat slide from the side of the bracket by unscrewing the two fastening screws.
Remove the stopper and turn out the screw
To remove the old part, you need to drill out the welding points with a drill of about 5 mm. Where this is inconvenient, you will have to use a grinder and a chisel.
We adjust and weld new parts
Set the backrest to the “sitting” position and mark the position of the new part.
We grab the comb at two points and check once again for correct installation.
We finally boil the part.
After cooling, we clean the seams with a grinder and cover them with paint or anti-corrosion mastic.
We weld the backrest clamp bracket
We check the condition of the springs, solve the problem of “sagging”
While the seat cushion is disassembled, another problem can be solved. The springs often break off from the sides of the seat and it begins to sag greatly under your weight. Weld metal plates of suitable replacement in place of the broken ones and fasten the springs in place. You also need to return the wires that connect the springs to each other. If they are lost, then look for a suitable replacement.
Torn spring mount
For those who like a firmer seat, we can recommend cutting a lining from a fiberboard sheet to a size slightly smaller than the pillow and, when assembling the seat, placing it on the springs.
Assembling the seat and installing it in place
Screw the slide into place, using a socket wrench to tighten all screws securely. Also tighten the screws on the second slide.
Replace the adjusting screw and install the wire retainer.
Place the pillow in place, secure the cover to the tabs and fold them in.
Lubricate all moving parts with any liquid lubricant. VD-40 and analogues, motor oil, etc. are suitable.
Place the assembled seat in place by first tightening the front and then the rear screws.
Fastener repair video
Tuning the VAZ 2104 engine
Initially, the VAZ 2104 was equipped with a 64 hp engine. s., a little later it became more powerful (75 or 85 hp). Such an engine cannot boast of good dynamic characteristics.
Therefore, when tuning a car, special attention is paid to the power plant. There are many options for increasing the power of the stock Four engine.
Let's look at them in more detail.
- Carburetor modifications. Engine tuning can begin with small modifications that do not affect the design of the engine itself. To do this, you can replace the standard carburetor diffusers from 3.5 to 4.5 mm. Then change the diameter of the accelerator pump nozzle from 30 to 40 mm. Replacing the jets with elements with a higher throughput will also allow a slight increase in power: the main fuel jet in the first chamber is replaced with a product with a diameter of 162 mm, in the second - with a diameter of 190 mm (depending on the installed carburetor). In addition to these modifications, it is possible to install two carburetors, which will ensure a more uniform fuel supply.
- Ignition system. Refinement of the ignition system involves replacing standard high-voltage wires with parts of higher quality, for example, from Finwhale or Tesla. Spark plugs (Beru, Champion, NGK) must also be replaced. In addition to these elements, a contactless distributor is installed, which will ensure stable engine operation.
- Camshaft One of the options for improving the “four” engine is the installation of a sports camshaft. This part has sharper cams, which provide a greater degree of valve opening, which improves the gas exchange process and increases engine power. However, in this case, the load on the gas distribution mechanism increases. To avoid “freezing” of the valves, it will be necessary to install springs of greater rigidity. With such changes, more effort is required to open/close the valves, which can sometimes lead to their breakage.
- Boring and grinding of the cylinder head. When boring the cylinder head (cylinder head), the flow area of the channels (intake and exhaust) is increased. After this procedure, valves with large plates are installed. The cylinder head can also be modified by grinding, i.e. grinding down the plane to a certain amount. This will increase engine power by using fuel with a higher octane number and increasing the compression ratio.
- Engine block boring. When boring a VAZ 2104 engine block, an increase in power is obtained due to an increase in working volume. The process involves removing some of the metal from the cylinder walls, which will require disassembling the engine. This work is carried out using specialized equipment. Depending on the engine installed on the “four”, the block can be bored for pistons up to 82 mm.
- Tuned piston group. You can increase the compression of the standard VAZ 2104 engine by installing extended connecting rods and shortened pistons. Sometimes lightweight T-shaped pistons are used for such improvements.
- Crankshaft tuning. The operation of the crankshaft plays an important role in torque. In addition to replacing the piston, it is worth thinking about lightening the crankshaft, that is, reducing the mass of the counterweights. Today you can purchase a lightweight shaft, and in addition to it, install a lightweight flywheel. In this way it will be possible to reduce inertia.
- Turbine installation. One of the options for tuning the engine is to install a turbine, but the cost of such an alteration will be about 1 thousand dollars. With such a device you can significantly increase compression. The operation of the unit is based on unwinding under the influence of exhaust gases and air supply at a pressure of 1.5–2 atm. into the engine. In addition, after installing the turbocharger, proper engine tuning will be required.
Removing the front seats of a VAZ 2107
To dismantle the seats you will need a pair of keys - 8 and 13 mm. The procedure is as follows:
- Move the seat forward as far as it will go.
- Unscrew a couple of bolts securing the slide.
- Move the seat back.
- Remove the two bolts securing the front seat.
- Repeat the steps for the second chair.
- Remove the VAZ 2107 seats from the interior.
Repair of front seat slides
VAZ front seat slides include the following parts:
| 1 — slide guides; 2 — slide sliders; 3 - roller; 4 — rubber roller ring; 5 - limiter; 6 — slide latch; 7 — retainer for the internal guide of the slide; 8 — back reinforcement; 9 - traction; 10 - spring; 11 — cotter pin; 12 — screw rod with the handle for the backrest tilt mechanism; 13 — latch handle for the slide movement mechanism; 14 — screw rod bracket |
Repair of seat mechanisms is carried out with the seats already removed. To restore the functionality of the mechanism, the following operations should be performed:
- clean from dirt;
- if necessary, replace worn or damaged parts;
- lubricate
Dismantling the slide is done as follows:
- Remove the spring.
- Remove the rod pin.
- Unscrew the bolts securing the slide to the seat.
- Remove the skids.
- Remove the screw rod from the bracket.
- Move the sliders along the guides.
- Remove sliders and rollers.
After disassembly, you can inspect the parts to determine the cause of the breakdown. The lack of fixation of the seat back of the VAZ 2107 can be eliminated by replacing it (or replacing the comb or clamp). To do this, you will have to cut off the broken part with a grinder and weld a new one in its place. The upholstery of the chair must be protected from welding by covering it with a wet cloth. If possible, it is better to leave one frame of the chair before welding. At the same time, you can wash the seat upholstery.
DIY generator repair
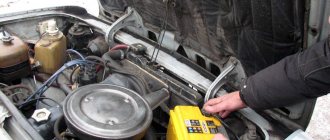
A common type of repair of VAZ 2104 units is the elimination of breakdowns associated with the car’s generator. Malfunctions are divided into three groups.
- Incorrect belt tension adjustment.
- Belt failure.
- Damage to the generator itself.
The belt in the VAZ 2104 engine passes through 3 pulleys: the generator itself, the crankshaft and the coolant supply pump shaft. The correct degree of belt tension can be checked by measuring the free deflection of the belt between the crankshaft and water pump pulleys. The deflection is measured with the engine not running, in the middle of the belt span between the pulleys. The standard value is 10–12 mm. If the deflection is higher than normal, repairs are necessary: the belt is tightened.
You can do this kind of work yourself. To do this, loosen the nut securing the generator to the adjusting bar. Move it away from the engine crankcase until the belt tension is restored to normal.
To repair the generator yourself you will need:
- portable multimeter;
- three-jaw puller;
- a soft metal drift for pressing out the front and rear bearings;
- mandrel for pressing bearings;
- set of keys and screwdrivers.
During the repair, you will probably have to grind off the pierced ends of the bolts securing the front bearing cover with a grinder. You will need a fully equipped locksmith workshop. There are craftsmen who can rewind a burnt-out stator winding, but this is an activity for fans of VAZ 2104 repair. You will spend more money on the wire than on purchasing a used generator from disassembly. And you don’t need a new one: your car is “old,” well-worn. It's unlikely to survive the new generator.
Reupholstery of the front seats of VAZ 2107
To reupholster the seats you need:
Rip out the old sheathing at the seams.- Moisten the places where the covering is glued to the cardboard elements with gasoline.
- Carefully remove the casing.
- Using the removed error as a template, mark and cut the workpiece from a suitable dense fabric.
- Renew foam elements and springs.
- Assemble the pieces of sheathing and secure them using heat welding, glue and thread.
Replacing seats
You can make the interior more comfortable by installing seats from another car model or special seats for auto tuning on the VAZ 2107. The latter are produced in various modifications, which allows you to choose a seat that suits the car owner.
You can install any car seats from foreign cars that are suitable in size in the VAZ interior. It should be noted that such a replacement requires welding to change the fastening design. During welding, it is necessary to protect the casing from sparks. If you don’t have a welding machine at your disposal, you will either have to be content with the available selection of car seats, or contact a specialist.
Interior lighting
There is no lighting as such in the interior of the VAZ 2105. The only light source is the lampshades on the door pillars. However, they only signal that the doors are opening and nothing more. To improve the situation, you need to purchase a lamp from a modern car, for example, from Lanos.
As a lampshade for interior lighting, you can choose a product from Kalina or Lanos.
The product is built into the ceiling lining, for which a hole is first cut in it. Connecting the lamp does not raise any questions: we connect the ground to the fixture of the lamp, plus it can be started from the cigarette lighter and another contact is connected to the limit switch on the doors.
Installing a modern lamp can significantly improve interior lighting at night.