Hi all. Let's begin the epic. Our experimental device was a Lada Kalina instrument panel from a friend’s car. The green color of the instruments is somehow already starting to bother me, so it is to be demolished, long live the approach to foreign basins) Let's go... What we need: the instrument panel itself, a white and blue LED strip, wires, alcohol or vodka and of course cotton swabs) 1.
We take the shield itself, on the back side we see 10 bolts for a slotted screwdriver, unscrew them.
2.
Removing the back cover we see the board. it also has bolts: the red ones hold the light diffuser on the front side, on which the scales are glued; green ones hold the LCD screen housing. And the screen pressure plate latches are marked in blue.
3.
Before unscrewing the bolts in the previous photo, remove the arrows, turn the tacho and speedometer counterclockwise and pull them towards you, temperature and gas clockwise in the same way.
4.
We unscrew the bolts that were on the board and disconnect everything into components.
Electronic instrument cluster flash x4 for Lada Priora, Kalina, VAZ 2110-2112
Electronic instrument cluster with GPS navigation Itelma on Lada Kalina
Instrument cluster connector for Lada Priora, Kalina, Kalina 2
Complete set of instrument cluster with GPS navigation Itelma for Lada Kalina
Electronic instrument cluster gamma gf 822 for Lada Priora, Kalina, VAZ 2110-2112
Electronic instrument cluster gamma gf 818 black for Lada Priora, Kalina, VAZ 2110-2112
Electronic instrument cluster flash 2 for Lada Priora, Kalina, VAZ 2110-2112
Instrument cluster vdo k310 for VAZ 2110, 2111, 2112, Lada Kalina
Electronic instrument cluster gamma gf 819 black for Lada Priora, Kalina, VAZ 2110-2112
Electronic instrument cluster gamma gf 822s for Lada Priora, Kalina, VAZ 2110-2112
Programmer Gamma gf 910 for gearbox
Green connector (block) without wires for the instrument cluster of Lada Kalina, Priora (normal)
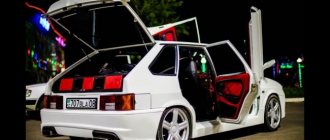
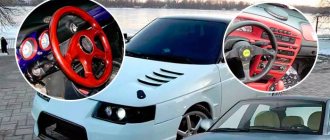
Installing a sports steering wheel and sports seats
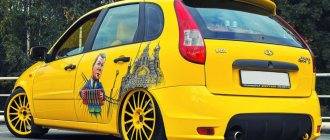
The appearance of the Lada Kalina car can be changed by tuning the Lada Kalina interior.
It's definitely worth installing a sports steering wheel. It will increase the ease of driving and improve the appearance of the interior. Next, when tuning the interior of the Lada Kalina, you should install new seats or upholster the old ones.
The sports seats look impressive. They have a fixed fit, which will be beneficial for the spine. But a comfortable seat for the driver helps better concentration, as well as health.
Economical tuning option - interior trim
A more economical option for tuning the interior of the Lada Kalina will be interior trim. For this, various materials are used, such as tweed, velor, leather. Leather is the most durable and durable material, however, it is also the most expensive. It is important to choose the right color; usually it matches the color of the car body.
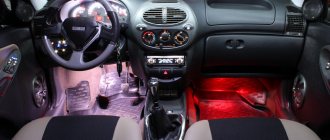
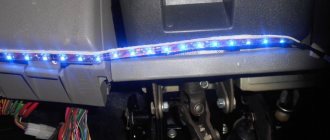
Proper, contrasting lighting will improve both the appearance and provide better visibility. Old lamps are replaced with LED or neon ones. You can also equip new lighting, for example, in the glove compartment.
Dismantling the console on Kalina
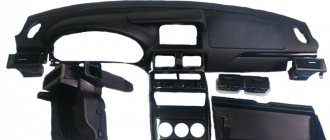
This stage involves removing the Lada Kalina torpedo into its component components.
- Remove the ashtray: pull it towards you and unscrew the 4 screws. They keep her in her nest.
- Next we get to a pair of plugs, which are located on both sides of the emergency button. They need to be pryed off with the same screwdriver and put aside.
- Let's move on to the screws located under the plugs. It is these mounting components that hold the console underneath.
- Having unscrewed a couple of screws, we begin to pull the console towards us. We do it slowly in order to avoid a break in the electrical connections.
- We disconnect the cable blocks from the sockets of the current collectors, simultaneously marking them.
- It's time to unscrew the steering column cover. It is held in place by a pair of size 10 bolts and five screws.
- We unscrew the screws (2 pcs.) holding the casing of the panel itself.
- The upper section of the panel is held in place by nuts, the number of which should be seven. We “defeat” them.
- Removing the stove air duct is problematic. To “surrender” it, we tear off two lock washers, and then unscrew the remaining list of screws. During subsequent installation of this particular small unit, it is enough to use only screws.
- We look for all the “hidden” screws around the perimeter and “sentence” them to unconditionally unscrew them.
- Only now can you carefully pull the panel towards you. If she “listens” to you, then everything was done correctly. If any obstacles appear, it is not difficult to find the “hidden” fastening element.
Let's check: are all electrical connections disconnected? If yes, then the dismantling procedure on the LADA Kalina model has come to an end.
Instrument panel tuning
When tuning the interior of a Lada Kalina, you should replace or simply change the appearance of the dashboard. To do this, the old panel is removed, and in its place either a new one is installed or upholstered with special material.
As mentioned earlier, you can use leather. Then the car will look very stylish. The material is carefully glued to the dashboard, holes for the instruments are cut out. When the material has fixed, you need to remove all unnecessary elements.
An interesting option for tuning the interior of the Lada Kalina would be an updated clock and its lighting. You can create your own clock markings and print them. Then take a transparent folder cover that allows light to pass through, and attach a printed dial to it, make holes on it, and thus get a dial of your own design.
To get even illumination, you need to install LEDs in a circle. You will get evenly diffused light if the reflectors are sanded before installation. This will make an excellent tuned watch.
How to remove a panel on a viburnum
Removing the instrument panel assembly with heater Lada Kalina
How to remove the panel on Kalina? This question is asked by almost all car enthusiasts who have purchased a new or used AvtoVAZ car. Lada Kalina is an almost legendary car; there are a lot of jokes and stories about it. Of course, listening to all this is quite exciting, but when you yourself are faced with one of the comic problems, it’s no longer funny.
Kalina has many different flaws, and one of them is the dashboard. At the factory, its installation is carried out manually, which can later cause squeaks, unpleasant noise and other annoying sounds during a trip.
They check exclusively the gaps, and rarely pay attention to the quality of the torpedo connection. Because of this, many owners try to remove the panel themselves to eliminate the source of the noise. But this is not so easy to do either.
But this is not so easy to do either.
Removing the instrument panel is carried out in several stages, and everything should be disconnected extremely carefully
Disassembling the panel
To dismantle the instrument panel in Kalina, you should arm yourself with a set of high-quality screwdrivers and patience. To work you will need:
- crosshead screwdriver;
- slotted screwdriver;
- 10mm wrench with round head;
- marker or tape to indicate disconnected wires.
Disassembly begins from the sides. How to remove a torpedo? The sequence is:
- The first step is to disconnect the rubber seal that prevents the panel from being removed. Using a flat-head screwdriver, bend it to make room for dismantling.
- Next you need to remove the plastic casing with three clips. It is located on the front pillar of the cover. Again, a flat-head screwdriver will come in handy, which can be used to pry off the socket.
- The next step is to detach the trims in front of the glass. You can unscrew them using a Phillips screwdriver by unscrewing the fasteners on both sides.
- After this you will be able to remove the black trim under the glass. It is secured with iron clips and screws, so there is no need to rush. Slowly pull towards you until it comes loose. It may happen that the clips get stuck under the panel or some of them will be missing altogether.
- We unscrew all the screws that are nearby and remove the covers from the side air ducts.
After removing all the side and side elements, you can begin to dismantle the central part.
Removing the console
Now we need to start sequentially disassembling the panel in Kalina into parts. How to disassemble the panel?
- Remove the ashtray: pull it towards you as far as it will go and unscrew the 4 screws that secure it.
- After this you can get to two plugs. They are located on the sides of the emergency lights. Use a flathead screwdriver to pry it off and set it aside.
- We unscrew the screws that are located under the plugs. These fasteners from below hold the console.
- After the two screws are removed, pull the console (shield) towards you, but slowly so as not to break the wiring. We disconnect the wiring, first marking the wires so as not to confuse which is which later.
- Now unscrew the steering wheel cover. It is held in place by 2 bolts, for which a 10mm wrench is useful, and 5 self-tapping screws.
- Next, disconnect the instrument panel cover. There are only 2 screws here.
- The top panel is secured with nuts. There must be at least 7 of them.
- As you can see, the stove air duct is tightly fixed. What to do? You will have to rip off 2 lock washers and unscrew the remaining screws, which, in fact, secure the panel in place. Only self-tapping screws are enough for fastening.
- Next, you can try removing the steering wheel. If it doesn’t work out, you’ll have to work a little harder and find the remaining fasteners. In any case, we look for all the hidden screws and unscrew them to the last.
- Pull the panel towards you. If it gives in, it means everything is unscrewed. If somewhere she doesn’t want to move away, we arm ourselves with a screwdriver and unscrew the hidden fasteners.
- After this you can disconnect it.
That's all the instructions on how to remove the instrument panel in the Lada Kalina.
Tuning the instrument panel is one of the main reasons why a torpedo and its adjacent parts are disassembled. Lada Kalina is not distinguished by its bright design and interesting design. What can you do about it? Install panel lighting. This solution will help improve the visibility of indicators. In addition, the perception of the interior will change. You can also change the panel to another one or repaint its parts. Such tuning of the instrument panel is a radical measure, but absolutely justified. The plastic the panel is made of is simply terrible.
Dismantling the panel is a painstaking task, but the hardest thing is to then put it all together so that the panel does not creak.
You need to fit the parts well and tightly, then no sounds will occur. If you first mark the wiring, then connecting all devices should not be difficult.
Installation of additional sound insulation
When tuning the interior of the Lada Kalina, additional sound insulation should be installed. As you know, the comfort of a car is commensurate with the noise level of the car. For sound insulation, materials such as bombs, vibroplast and modelin are used. After applying soundproofing materials, you need to leave them for a while so that they are well strengthened.
The dashboard of Granta or Kalina can be called modern. This can be confirmed not only by its appearance, but also by the use of LEDs, rather than lamps, to highlight readings and indicators. Let's look at how you can change the standard green color of the instrument panel backlight.
Materials for tuning
Tuning the instrument panel will require the purchase of materials such as spray paint, varnish, primer and solvent. All these materials can be found in any auto parts store for VAZ. It is worth considering that the first 3 substances must be intended for working with plastic, and the solvent can be ordinary.
Before applying paint, it is necessary to degrease the coating, having previously cleaned it of contaminants. After this, a two-layer primer is applied. If you have set yourself the task of updating the entire interior, you will need to paint the plastic trim in the desired places in the same way.
After allowing the primer to dry thoroughly, you need to apply paint in 2 layers. This will help improve the overall appearance of the interior by hiding unsightly and worn-out plastics under layers. To protect the instrument panel from cracks and damage, the painted surface should be treated with clear varnish.
After waiting for the varnish to dry completely, you can begin assembling and installing the instrument panel. All work is done carefully and carefully, since there is a possibility of damaging the painted surface. Upon completion, you can evaluate your efforts; now you won’t need to update the panel for several years. Tuning is complete!
Which LEDs to choose for instrument panel illumination
To highlight the readings in the Granta or Kalina instrument cluster, green SMD-3528 LEDs are used. Instead, you can use SMD LEDs of different brightnesses. Here are the most commonly used:
- very bright SMD 5050 (luminous flux - 15 Lumens);
- bright SMD 3825 (brightness 7-9 Lumens)
- medium brightness SMD 3528 (about 5 Lumens);
- medium brightness SMD 3028 (about 5 Lumens);
- not bright SMD 3020 (about 4 Lumens);
- not bright SMD 3014 (about 3 Lumens).
How to change the color of the instrument cluster illumination
1. Use SMD of the desired color. For example, use white LEDs to illuminate one part of the panel, and blue LEDs for the other.
2. Use a light filter (electrical tape or film of different colors) together with white LEDs. We stick it on the desired area, as a result of which we get the illumination of the desired color. To change the color, you do not need to use a soldering iron, just disassemble the instrument panel and stick a film of a different color.
It is worth noting that the hands have an orange coating. To change the illumination of the hands, wipe off the varnish with nail polish remover and, if necessary, apply a new varnish of a suitable color. Another option is to use LEDs for the arrows of the desired color.
You can change the backlight of the screen (display) not only by replacing its LEDs, but also by turning the film over. First, we tear off the film from the display, clean the remaining adhesive with a solvent and glue the film on the back side. This results in an inversion of the panel display:
3. Use RGB-SMD LEDs. If you want to change the backlight color at once. In this case, you will have to additionally output switching control.
Without removing the dashboard and panel
Read:
Another way. dismantle the “furnace” without removing the torpedo. Sequencing:
- Coolant drain.
- Removing the radiator cap and gas pedal. Unscrew the three nuts by 10. To remove the heater without disassembling the torpedo, you need to unscrew the cover
- Removing the retaining ring on the brake booster rod. Removes brake pedal rod with retaining ring
- Cut out the panel behind the radiator so you can pull it out without removing the dash. The radiator is removed through the split shell
- Removing the radiator with the brake pedal depressed. Before removal, the nozzles in the engine compartment are disconnected.
Finally, the radiator is removed!
The above method is good because it produces less labor and time wasted, but then it will be necessary to fix the hole left in the shell using soundproofing material or vibroplast.
Do-it-yourself dashboard overexposure
You will need: remove and disassemble the instrument cluster, SMD LEDs (unsoldered from LED strip or LED lamp), soldering iron.
The process of replacing LEDs on the instrument panel board consists of unsoldering the standard SMD LED and soldering a new one in its place. During such tuning, there are several important points to consider:
- take your time so as not to damage the conductive traces of the board;
- observe the polarity (SMD LEDs have a bevel on one side, install a new LED in the same position);
- do not overheat the LEDs; high temperatures may cause them to fail;
After soldering the required LEDs, it is recommended to check the backlight. To connect the instrument cluster at home, you need to apply +12V to pins 19 and 21, and ground to 17. You can also verify that the installed LEDs are working properly using a multimeter in “tester” mode, connecting the probes to the LED according to the polarity (red probe is plus) :