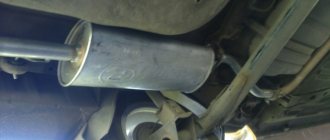
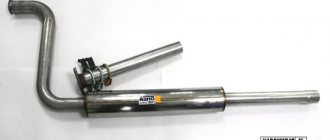
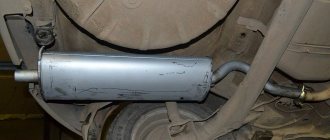
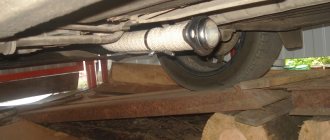
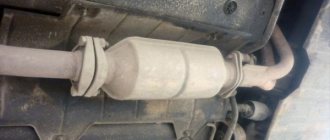
The very first part of the Priora exhaust system that needs to be replaced is the muffler. It burns out faster and more often, and only after it can it come to the resonator.
In practice, for many car owners, the factory muffler may well last up to 5-7 years or up to 100,000 km. This is considered to be a very good indicator and quite a decent service life. If we look at the exhaust parts already purchased at the store, they are unlikely to last even half the life that the factory parts lasted.
In order to replace the muffler on a Priora, you will need the following tool:
- 13 mm head
- 13mm socket wrench
- Ratchet or crank
- Penetrating lubricant
- Hammer (if necessary)
Muffler replacement
The exhaust system operates under conditions of high humidity and constant heat load, as a result of which metal elements are eaten away by rust.
Usually, after 2-3 years of operation, even a high-quality unit is not able to perform its task, and the noise in the cabin increases sharply. The strong roar of the engine creates discomfort for the driver and passengers, so the problem must be solved immediately. Welding work is not the best option. After such repairs, the muffler will not last long. It is better to replace it with a new one as soon as the first signs of malfunction are noticeable. In addition to loss of power and roaring exhaust pipe, this could be knocking on the underbody or fuel tank.
To ensure correct installation of the unit in its original place, it is better to contact a service center or sports tuning company for dismantling and replacement. Removing and installing a resonator (muffler) in car services costs 550-2000 rubles, the exhaust pipe - from 1000 rubles.
Which muffler should I put on the Priora?
The need to repair the exhaust system arises for any car. The action of high temperatures, high humidity, reagents and salt on the roads in winter, all this leads to the destruction of the metal from which the exhaust parts are made. Let's take a closer look at the questions: which muffler to buy for a Priora (VAZ 2170 - VAZ 2172), which resonator to install on a Priora, how many parts does a muffler on a Priora consist of, and how much does the exhaust system on a Priora cost in current realities?
There are options for cheap Ukrainian-made mufflers, there are spare parts that are more expensive than foreign ones, and you can install a direct-flow (sports) exhaust. If you are faced with the problem of repairing the exhaust, we will look at how to replace the muffler on a Priora below in various possible variations.
What parts does the Priora exhaust system consist of?
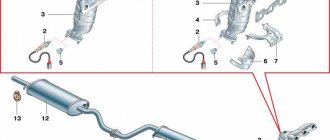
The exhaust system of a Priora car (VAZ 2170 - VAZ 2172) consists of the following components:
collector pipe: as standard, it has a catalyst or particulate filter, which allows it to meet the environmental safety requirements of the car Euro - 3, and later, in the latest models, Euro - 4; the collector is connected through flanges to the resonator
The resonator is equipped with an integrated corrugation, which allows you to reduce the level of vibration in the exhaust, this is important for Priora; the resonator is connected to the muffler through a clamp, this allows you to quickly remove the Priora muffler if it needs to be replaced; from the rear of the car, from the outside, you can see the muffler exhaust pipe, which many motorists decorate with an aesthetic nozzle; all the main components of the Priora exhaust system are connected using pipes into a single, closed and sealed system.. It has become quite common to replace the manifold with catalyst with a regular spider (exhaust pipe) familiar to classic VAZs.
In this case, environmental standards are not complied with absolutely, but the catalyst does not “strangle” the engine. By reflashing the electronics, you get an increase in power and better vehicle dynamics at certain engine operating modes
It has become quite common to replace the manifold with a catalyst with a regular spider (exhaust pipe) familiar to the classic VAZ. In this case, environmental standards are not complied with absolutely, but the catalyst does not “strangle” the engine. By reflashing the electronics, you get an increase in power and better vehicle dynamics at certain engine operating modes.
Mufflers VAZ 2110-(Tenth family)
Silencers by dozens are also divided into 2 body types:
- Muffler VAZ 2110, 2111 – sedan and station wagon
- Muffler VAZ 2112 – hatchback
And here too there are subtypes: new
and old style
. But unlike the Lada Samara, subtypes play a significant role here. Old style mufflers have a hook-shaped mount. Approximately, they were produced until 2007 (but not a fact - this is a VAZ, baby), then they came with pin-type fastenings.
Exhaust pipe VAZ 1111 (Oka)
Muffler VAZ 2114
The Oka has a muffler separate from the exhaust pipe. There are 2 Oka models with VAZ engines, respectively, they are equipped with 2 types of mufflers and exhaust pipes:
- Basic 1111 - a VAZ 1111 exhaust pipe is installed on it
- Modified with engine 11113 - a VAZ 11113 exhaust pipe is installed on it
The differences between them are in the fastenings. In the first case, the pipe is secured with a clamp, in the second, a bolted connection is used.
The cost of a muffler for Lada Priora in Russia is from 1000 to 7500 rubles. The main task of a muffler is to reduce the noise of exhaust gases in the exhaust system to acceptable limits. It also reduces the toxicity of exhaust gases and their temperature.
The unit consists of a metal body (ideally stainless steel) and outlet tubes. The housing contains several channels and chambers through which flows of waste combustion products pass. As gas passes through internal structural elements, sound vibrations are suppressed. All units use a change in flow direction in channels located at different angles to dampen high-frequency noise.
What is a resonator
When people hear the loud roar of a car passing by, they think that the engine is running so loudly. Although the reason for the sharp sounds when applying gas lies not in the engine, but in the muffler of the car.
A resonator is one of the parts of a car's exhaust system. It is he who is responsible for gas removal and reduction of exhaust noise. In addition, it lowers the exhaust temperature and dampens gas pressure.
If you look at the entire diagram of the exhaust pipe, the resonator will be located approximately in the middle. And if a sharp and powerful sound comes from the pipe while driving, then this mechanism is solely to blame.
Node device
Structurally, the resonator consists of one large body, in the cavity of which there are two or three pipes. All pipes have holes - this is necessary so that sound waves and gases pass through them and create resonance with each other. This is how exhaust gases are converted into gases and released outside the vehicle.
The mechanism from the Kalina can also act as a resonator for the Lada Priora. It has the same volume and the same design, making these elements considered interchangeable.
Main malfunctions of the Lada Priora muffler
What is a straight-through muffler?
The main reasons for replacing or repairing this part of the exhaust system are often burnout, rupture of the tank with loud bangs inside, loss of integrity, and deformation of structural parts. Loud roar when operating at high speeds, impacts on the body. An important factor in the failure of the Lada Priora muffler is metal corrosion, which occurs when the protective coating is lost as a result of overheating and condensation of water vapor on the walls.
Fluid in the muffler
accumulation of liquid in the cavity of the barrel or, as experienced car enthusiasts joke, “drips from the end”) is a fairly common phenomenon
It is important to find out what kind of liquid collects inside. Often the reason for this is water condensation formed from the difference in the operating temperature of the unit and the external environment
It has a negative effect on models made of iron-zinc steel that are poorly protected against corrosion. Models made of steel with a share of aluminum or stainless steel are less susceptible to this influence. Many people find a way out by drilling a drainage hole in the corner of the tank. If you find antifreeze or antifreeze in the liquid, it’s time to sound the alarm. Malfunction in the tightness of the cooling system of the car engine (loss of integrity, wear of the cylinder head gasket, depressurization of the cylinder block). You should immediately check the operation of the cooling system and eliminate the cause to avoid further negative consequences.
Loud roar at revs
The sound of the exhaust gases changes when the engine speed reaches over 3000. The reason for this behavior is often the burnout of the partitions inside the resonator, the middle part of the exhaust system, or a clogged exhaust catalyst. Loss of joint density, structural integrity as a result of corrosion, burnout of individual elements, cracks at the joints of parts. All this indicates the end of the service life of the spare part. The only reliable solution is to replace the faulty system unit. Eliminating these defects with a hammer and a welding machine is a temporary solution.
Why does the silencer fire?
Loud pops occurring inside the exhaust system suggest a malfunction. There is a malfunction, of course, but it lies in the operation of the car’s engine. The shot occurs as a result of partial combustion of the gas-fuel mixture inside the cylinders and ignition of the residues already inside the exhaust gas removal system.
The “exhaust” only takes on all the consequences of the malfunction; soon it itself may fail. You should check the spark plugs, spark plug wires, and the entire fuel supply system.
Knocks from under the body
Knocking, vibration, extraneous sounds when driving are unpleasant things for the car owner's ear. The culprit is often the impact of parts of the exhaust system on the underbody and gas tank of the car. There are several reasons for this behavior. Rubber fasteners of exhaust system parts are subject to priority inspection. Loss, wear and tear of which weakens the structure; replacing them will not be difficult. There may be a loss of tightness of the clamp connections of the parts (it is necessary to tighten the fasteners, it is possible that the clamp mounting bolts need to be replaced). Installation of an unsuitable model, with a difference in the bending angles of the pipes of the muffler design. This is fraught with constant contact with the body, chassis, gas tank, vehicle (requires immediate intervention). Reducing the vehicle's ground clearance by installing a lowered suspension (knocks on the beam). This can be solved by installing movable fasteners of a suitable configuration.
How to replace the rear muffler on a Priora with your own hands
So, it’s worth noting right away that it’s most convenient to carry out this repair in an inspection hole. If there are no such conditions, then it is necessary to at least raise the rear of the car with a jack.
So, apply a penetrating lubricant to all threaded connections, and then wait a few minutes until everything settles!
Now we unscrew the two nuts of the coupling bolts of the clamp connecting the resonator to the Priora muffler.
After this, you need to move the clamp to the side and disconnect the exhaust part. If you can’t do this manually, you can carefully and without extra effort hit the joint a couple of times with a hammer.
As a result, we get the following picture.
Now the muffler remains hanging only on rubber hangers, from which it must be removed.
As you can see in the top photo, one rubber band is located almost at the very rear of the muffler, and the second is closer to the beam, that is, at the other end.
Then we remove the muffler completely from the car and replace it with a new one. Installation is carried out in reverse order. When performing this repair, it is best to also replace the bolts and nuts, as well as the clamp itself, with a new one. Carefully inspect the connecting ring for damage and, if necessary, replace it with a new one.
The price of a new muffler for a Priora can vary quite a lot, and depends on the metal used, as well as on the manufacturer. Prices can vary between 1000-2000 rubles.
The main malfunctions of the Priora exhaust tract
Do-it-yourself direct-flow muffler, is it worth installing it on your car?
Due to the fact that the operation of these components is associated with high temperatures, the most common breakdown is the burning out of some part. This could be the gasket under the manifold, or the wall of the muffler, catalyst or resonator. A separate part is the malfunction of the particulate filter or afterburner. But they are included in the section for repairing the injection part of the car, just like the Priora oxygen sensors. In other cases, it is either mechanical damage or simple rust.
The appearance of extra holes in the system is determined immediately and for sure. The engine exhaust just becomes loud and unpleasant. There is a crackling sound and sounds vaguely reminiscent of shooting. In this case, you need to go to the inspection hole, find the hole and replace the damaged unit. Relevant video on this topic:
https://youtube.com/watch?v=lG0OltFW_WU
Replacement
- Unscrew the upper and lower fasteners of the clamp holding the resonator and muffler. Moreover, if we unscrew the top one completely, then the bottom one is a little more than half unscrewed.
- We disconnect the resonator and muffler, remove the seal.
- We remove the rubber cushions, slightly lift the muffler up, and dismantle it.
- We install the new muffler in the reverse order.
Manufacturers of mufflers and prices of analogues for Priora
The choice of Priora mufflers available to consumers is huge. Many of them differ in the name of the manufacturer's plant. Let's look at the main ones that differ in production method and materials:
- Muffler made of steel with a large admixture of aluminum (Lada-Image, EDEX, PHOENIX, etc.), resistant to corrosion, suitable for all body types. Its disadvantage: the presence of welding seams in the design of the part. Price – from 2500 rub;
- The sunset type of production (Phobos, NAAZ, Avtokomplekt, etc.) has the main advantage that the part is produced without welding technologies or the use of stainless steel, so it has an increased service life. The price of such a “stray” is from 3000 rubles;
- Budget muffler (“VVV Tolyatti”) uses iron-zinc steel in production, is short-lived, suffers greatly from corrosion, and wears out quickly. The only plus is the price of the spare part is approximately 1400 rubles;
- A separate type is stinger (spider) forward flow exhaust systems (“MUTE”? “StinGer-auto”, etc.). Advantages - a slight increase in vehicle traction, choice of high-quality materials in manufacturing, long service life.
The cost of mufflers for Priora
The average price of a unit produced by AvtoVAZ for models 2170-2172 is 1100-1300 rubles .
The most budget-friendly Transmaster stainless steel main mufflers cost an average of 1200-1500 rubles . - from 1300 rubles .
Aluminum-zinc Lada-Image and Phobos are more expensive, but reliable. Prices - from 2500-3000 rubles .
A stainless steel resonator with a Transmaster corrugated coupling can be bought in auto parts stores for an average of 2,100 rubles .
Direct flow costs significantly more. Car enthusiasts who want to tune the Priora with a sports muffler can pay attention to MG-RACE, Street Pro and Pro Sport (from RUB 3,100 and above). The most expensive parts of this type are Stinger. The option with a standard nozzle (90 mm) costs at least 4,800 rubles . Prices for bifurcated mufflers with an ellipse nozzle can reach up to 7,500 rubles .
The original AvtoVAZ manifold can be bought from 1,600 to 9,400 rubles , Stinger - from 2,100 rubles .
Mufflers VAZ 2101-2107 (Classic)
Silencers for domestic classics come in 3 types:
- Muffler for a classic sedan body assembled by AvtoVAZ (VAZ 2101, 2103, 2105, 2106, 2107) stamped and welded
- Muffler for a classic station wagon assembled by AvtoVAZ (VAZ 2102, 2104) stamped and welded
- Muffler for classic IZhavto assembly (VAZ 2104, 2106, 2107)
Despite the fact that the length of the classic sedan and station wagon is approximately the same, their mufflers are slightly different. The main difference here is not the length of the exhaust pipe, but the bend of the pipe that goes around the bridge (unfortunately, this is almost invisible in the photo). Also, about the first 2 types of mufflers, it must be said that they can be presented on the market in 2 types of production:
- Stamp welding is a production method in which two metal parts of the muffler can are stamped, then welded together and the whole thing is welded to the pipe.
- Sundown is a manufacturing method in which a sheet of metal is taken and wrapped around the muffler entrails.
Historically, mufflers were previously manufactured only by the stamp-welded method. Then bam, nano technology! A seaming method has appeared, which is cheaper to produce and more reliable compared to the stamp-welded method, because One weld is better than a muffler welded all over. In this case, it does not matter what method the muffler is made of - they fit like originals, both stamped and welded. However, keep in mind that the original muffler for classics is only stamped and welded, because The factory makes them only using the old method.
The presence of the 3rd type of muffler is explained by the fact that when the production of the VAZ classic was completely transferred to Izhevsk, they decided to install their own exhaust system, the production of which had already been established.
From the classics, let's move on to front-wheel drive VAZ cars, where the above-mentioned rule applies 100%: “The longer the body, the longer the exhaust pipe of the muffler.” But there are nuances here too.
Mufflers VAZ and Niva Chevrolet
Chevy Niva was not immediately called that. At first it was the VAZ 2123, which until 2002 was assembled at AvtoVAZ Pilot Industrial Production. After 2002, the car began to be assembled at GM-AvtoVAZ under the name Niva Chevrolet. Accordingly, for us this only means that we have 2 types of muffler:
- Old model VAZ 2123 (Niva Chevrolet) muffler - for a car assembled before 2002
- Muffler VAZ 2123 (Niva Chevrolet) of a new type - for a car assembled after 2002.
I don’t see any point in writing about their differences, because... they are completely different.
Types and design of mufflers
- Resonator (additional, front). The resonator is connected to the collector pipe using bolts. It serves to distribute the gas flow and pre-suppress noise. The part is a perforated tube in a sealed housing, divided into several chambers. Perforation allows vibrations to be dampened due to the phenomenon of interference.
- Main resonant muffler. On Priora, the main muffler is located after the catalyst. It is designed for ultimate noise suppression. Changing the cross-section of the exhaust flow in the chambers leads to the final damping of vibrations. The resonant type unit consists of several perforated tubes located in the housing.
- Main direct-flow muffler. The direct-flow muffler for Priora is installed in place of the standard one. It has a slightly different design. Damping of acoustic vibrations is achieved as a result of changing the direction of flow. Also, sound-absorbing material is used in the forward flow chambers. The engine gets a characteristic sound, like a real sports car. Some Lada owners believe that the factory exhaust system does not allow the 16-valve engine to show its full power, especially when overtaking at a standing start. Although experts are convinced that installing a sports muffler alone will not solve the problem of lack of power. Either the engine needs to be modified or the entire exhaust system needs to be replaced.
- An exhaust manifold. The presence of a manifold with an exhaust toxicant neutralizer is a key feature of Priora cars. In sports tuning, spider manifolds with complex geometry and physics of the structure are used.
Resonator installation
Repair of EUR vaz lada priora in Moscow
Installation of the part is carried out in the reverse order. Compliance with the required sequence, as well as the use of the original resonator for the Lada Priora, ensures simple, easy installation of the part
Particular attention must be paid to connecting the new resonator to the muffler pipe. It is recommended to replace the special metal sealing ring between these components, as well as the clamp itself, with new ones in order to ensure the required level of sealing of the connection, reliability and rigidity of the structure. Clamping of fasteners is carried out sequentially, without distortions in the level of the resonator and muffler pipes
The fastening elements are clamped sequentially, without distortions in the level of the resonator and muffler pipes.
The Lada Priora resonator in the exhaust system is located, as a rule, after the collector pipe (pants) or after the catalyst
On the Lada-Priora car, it is recommended to install a resonator, which is made from stainless steel options. This circumstance allows you to significantly increase the service life of this part. Installation of such a resonator is carried out on its standard mount and no additional modifications or improvements are required in the exhaust system of the car.
Experts do not advise trying to install resonators that are intended for use on other car models. For example, you should not try to install a resonator from the domestic brand Lada-Kalina on a Lada-Priora. This is due to a number of reasons that will subsequently have a negative impact on the technical and operational characteristics of the car, and such a replacement will only turn into a waste of money, time and effort.
When installing resonators from other cars on the Lada-Priora, extraneous noise and unwanted vibration may be observed when the engine is running, which is caused by defects in the bends of the shape and size, as well as differences in the fastening of the part to the suspensions of the car body. All these points are determined by the relevant norms and standards at the manufacturer.
The main advantages of the part include:
- reduced exhaust noise compared to factory;
- the thickness of the partitions is 2.0 mm;
- integrity and high-quality assembly of the housing (pulse argon arc welding is used);
- high-quality processing of welds on the body, which includes several stages and consists of their mechanical processing, subsequent polishing and special acid passivation.
Direct flow on Priora hatchback
I was sitting at home in the evening - there was nothing to do...) Suddenly, by chance, I wanted the most unrealistic drive and dynamics. From which came the idea to carry out a standard procedure to improve the dynamic characteristics of the car, in other words, chip the baby and pile on.)) Delicately and carefully taking the brain out of my combat unit, it was taken to a dark office, where they made it clear that the Euro-4 standard is not good , if you have a vigorous spirit in you.)
The firmware was made to the Euro-2 environmental standard and with 1 lambda disabled, because it was not advisable to do Euro-0, due to the endangered population of polar bears and other good, kind little animals. Unfortunately, it was not possible to settle on the usual firmware, I’m a priority. It was decided to change the standard exhaust system to a peppy collective farm exhaust with 51 pipes. In short, this is a 4-1 spider that everyone is already tired of
, the continuation of which is no longer the standard resonator, but 51 pipes from the same manufacturer painted in stunning black gloss.)
As a result, a terrifying exhaust sound was obtained due to a muffler that had burned out over 5 long years. After driving for a week, it was decided to replace the muffler
and get rid of the vibrations that appeared throughout the body due to the absence of corrugation by sawing it into the resonator pipe.)
the result was partly pleasant. At low gas speeds, the exhaust sound began to meet the standards for driving around the city, now I was not afraid for the hearts of grandparents who were accidentally passing nearby.) But...) When the throttle is open and the speed breaks all records, the exhaust sound begins to excite and this is an integral plus, as for me .) Still, piloting the device should bring pleasure and give positive emotions when needed. What about the conclusion for all the work done? Consumption decreased by one and a half liters in the urban cycle. Dynamics - the increase on the driver’s side turned out to be not very obvious, that is, as for me - yes, faster and more responsive, but the difference from stock did not seem so significant. From the passengers' side, the car's dynamics indicator seemed very obvious, because it evenly presses into the seat in both 2 and 3.) Drive - well, here the exhaust gives a lot of positive emotions ala "burnt-out resonator", I and my valiant passengers like it.)
Roar, shooting, condensation and other reasons to look under the car
It's easy to spot muffler problems. It is difficult not to notice extraneous sounds coming from under the car, or a sharp change in the tone and volume of the response to pressing the gas. It is not uncommon to notice fluid leaking or even splashing from the exhaust pipe. All these are signs of malfunctions, but do they all indicate problems in the exhaust system?
Fluid in the muffler
Fluid dripping from the exhaust pipe is a common occurrence. However, it is worth distinguishing what kind of liquid it is. If it's water, there's nothing wrong with it. When the ambient temperature changes, moisture from the air condenses on the surfaces of the muffler. If a steel muffler is used, this can lead to corrosion, but usually the Priora exhaust system uses aluminized steel or stainless steel, which means that damage from water will be minimal. In cases of heavy accumulation of water, experienced motorists usually drill a drainage hole in the “barrel” of the muffler.
If there is excessive accumulation of water in the muffler, in winter you may encounter icing of the exhaust pipe
If antifreeze drips from the exhaust pipe, the fault should be looked for not in the muffler, but in the engine. The reason may be wear of the cylinder head gasket, as well as depressurization of the block itself. Antifreeze in the exhaust pipe is a symptom of serious problems, and if it is detected, you should immediately diagnose the engine.
Pops and shots from the exhaust pipe
Popping noises coming from the muffler indicate a malfunction. However, this is also a malfunction of the engine, not the exhaust system. Shots or pops from the exhaust pipe indicate that the mixture of air and gasoline does not burn out in the cylinder block, which means that when you hear them, you should check the spark plugs and spark plug wires, as well as the serviceability of the gas distribution mechanism. Problems with combustion of the mixture are not a symptom of a muffler failure, but they can be its cause.
Video: this is what pops from the muffler sound like
https://youtube.com/watch?v=4nj7G3So-6U
Knocking from under the car
A knocking sound from under the bottom of the car while driving or rattling from vibrations is an unpleasant phenomenon. The muffler may touch the gas tank or the underbody. There are several possible reasons for this.
- First of all, check the rubber muffler hangers. Their wear leads to loosening of the entire exhaust system. These mounts are sold at most auto parts stores. Their price usually does not exceed 100 rubles per piece. Replace the suspension with new ones and the knocking will stop.
- It is worth checking whether the clamp connecting the main muffler and the additional muffler is loose. If necessary, replace the fastening bolts and nuts. For replacement, it is best to use fasteners made of heat-resistant materials.
- Using the wrong model of muffler with pipe bends that differ from the original spare part can lead to contact between the exhaust pipe and various components of the car: the body, the gas tank and even the suspension. Be careful when choosing a muffler.
Lowered the car - the muffler is knocking
When installing a short-travel suspension on a Priora, tuning enthusiasts often encounter a situation where the suspension beam, which has moved closer to the body, begins to touch the muffler. This problem can be solved by replacing the muffler hangers with new ones of a more suitable shape.
Loud roar at revs
If a vehicle's exhaust system loses its seal, it cannot effectively reduce the volume of exhaust emissions. In this case, the exhaust often takes on a “pseudo-sports” sound. Therefore, if the muffler growls, you should look for a gap in it. It can be on the muffler body or on the pipes. It makes sense to check the connections and their fastenings. If the metal from which the muffler is made is of low quality, the exhaust pipe may burn out due to temperature. Time, corrosion and the quality of domestic roads cause damage to the exhaust system.
Pressure and temperature can cause holes
A burnt or broken muffler is easiest to replace. If depressurization occurs at the joints, you can limit yourself to replacing the sealing ring and the necessary fasteners.
How to install new
After the old product has been dismantled, there is no need to rush to immediately put a new one in its place. First, you need to clean as much as possible of carbon deposits and dirt from all joints with the muffler and exhaust pipe. This will ensure better sealing of the entire system.
Further work is carried out in reverse order:
- The new resonator is suspended on rubber hangers. If the rubber bands are stretched out, it is better to replace them with new ones, this will improve the fixation of the resonator.
- Then you need to connect the resonator to the muffler.
- Additionally, it is recommended to install a new reinforced gasket between them and secure it with bronze bolts, since only such connections will withstand high temperatures.
- Then you can begin installing the resonator with the receiving pipe.
- At the joints it is also better to install new nuts made of heat-resistant metal alloys.
What does the price depend on?
To manufacture the body and tubes of high-quality components, special stainless and heat-resistant steels are used, designed to operate under constant thermal load with sudden temperature changes. These mufflers last longer, but they are the most expensive. Spare parts made of aluminized steel or aluminum-zinc will also last a long time. To reduce the cost, “ferrous” alloys are sometimes used.
The larger the muffler volume, the better. Other factors that increase the service life and increase the cost of the unit are thicker walls and complex internal design, as well as additional thermal protection.
Resonator
Tips for choosing
The first thing you should pay attention to when choosing a muffler is the material. The best option is aluminized steel; it is stronger than stainless steel or zinc-alumina steel and is resistant to rust. This part will last about six years. The second is the device of the node. Silencers are divided into several types
- by design;
- degree of noise reduction;
- dimensions;
- presence/absence of an additional body layer.
Third, you should pay attention to the manufacturer and the country of manufacture. As a rule, Polish and Turkish companies cannot please you with their quality, while the Germans, Japanese, and even our domestic parts are quite suitable for the job. And lastly, it’s worth remembering that each model is equipped with a certain type of muffler and you need to know this when buying a part. The price for a standard muffler for the Lada Priora is approximately 3,400 rubles.
System breakdowns
There can be many problems with the exhaust system. As a rule, repair is not possible; replacement of elements will be required. Let's take a closer look at them.
- Rust and system destruction due to corrosion. Accumulating condensate especially contributes to this problem.
- Inability to muffle noise. Typically, the malfunction is caused by the destruction of the internal partitions of the main muffler.
- Breakage of fasteners. A characteristic symptom of the problem is a knocking sound from the muffler and the appearance of vibration.
- Oxygen sensor malfunction.
The standard method for solving certain problems is to replace the element. In some cases, temporary solutions are possible, but if the muffler is “burnt out” or rusted, unfortunately, you simply cannot do without installing a new part.
The system for removing waste exhaust gases in a car is an important technical complex that performs many necessary functions: reduces toxicity in exhaust gases, reduces noise from vehicle operation, prevents the penetration of toxic products of fuel combustion into the passenger compartment of the car, participates in regulating the operational characteristics of the car, Thanks to the creation of the necessary resistance of exhaust gases, it creates a certain image of the car brand (timbre of sound, detail of appearance). On the Lada Priora, in this regard, replacing the resonator is not such a rare operation.
Removing and installing the main muffler
To complete the work, we will need two 13-size socket or open-end wrenches. First of all, with their help we loosen one nut of the clamp bolt. Unscrew the nut of the second bolt completely. We take out the bolt and remove the clamp.
With a fairly sharp movement, we disconnect the receiving pipe of the main muffler from the pipe of the additional muffler. We take out the graphite ring, which serves to ensure a tight and reliable connection of the two pipes.
Now, having slightly raised the main muffler, we remove its mounting brackets first from the rear and then from the front rubber suspension cushions. Carefully remove the main muffler.
Installation of a new part is carried out in the reverse order of removal. If the graphite o-ring has significant abrasions or cracks, replace it with a new one.
Which muffler to choose
Stainless steel or aluminized steel
Mufflers for cars of the Priora family are made of steel of various thicknesses. The thicker the steel, the stronger the muffler. The type of steel is no less important. Most car enthusiasts prefer stainless steel that has been proven over the years. However, modern aluminized steel is not inferior to it in terms of resistance to corrosion, and is significantly superior in overall strength and ability to absorb vibrations. This means that an aluminized steel muffler will be quieter than a similar one made from stainless steel.
Manufacturers and prices
Exhaust system parts for Lada-Priora cars are produced not only in Russia. There are mufflers and resonators made in Poland, Turkey and Germany.
A muffler for a Priora costs from one to five thousand rubles. At the lower end of the price range are models made of thin steel; aluminized models usually cost at least three thousand rubles. The situation is similar with resonators. Prices for them start at about one and a half thousand rubles.
Article on the topic: Different compression in the cylinders: what to do and can you fix it yourself?
Design features of “Prior” mufflers
Elements of the exhaust system and mufflers of Lada Priora are made from various metals and their alloys. For this use:
- steel with the necessary additives;
- alloy of steel and aluminum;
- stainless steel.
Products made from an alloy of aluminum and steel are in high demand. Compared to elements made from a conventional steel base, they have certain anti-corrosion properties, and their strength coefficient is higher. If ordinary steel “plugs” are able to withstand dynamic and thermal loads for about one and a half years, then a part made of the above alloy can withstand the effects of exhaust gases, poor road surfaces and difficult weather conditions for about 6 years.
Products made from “stainless steel” are not only the heaviest, but also the most expensive; they are classified as car tuning elements, and accordingly, their price is much higher. They can be ordered at specialized enterprises working with this type of metal.
Instructions for replacing the muffler and more
Replacing the muffler on a Priora can be easily done by driving the car onto an overpass, or placing it above an inspection hole
Some car enthusiasts simply lift one side of the car with jacks, but in this case it is very important to use safety stands
Before you start replacing the muffler, it is worth understanding a few more parts of the exhaust system. The need to replace spacer rings, rubber hangers or corrugations may appear during the inspection or even dismantling of the muffler.
Changing the O-ring
The sealing ring is made of heat-resistant reinforced material and serves to lower the temperature of the exhaust gases. It burns out during use.
The muffler O-ring not only makes the connection airtight, but also reduces the temperature of the exhaust gases
It is most convenient to change the ring while installing a new muffler. To replace, you need to unscrew the bolts connecting the muffler and the resonator. By opening the muffler parts, you will see the O-ring and can replace it.
Installing new rubber suspensions
It is better to replace the rubber suspensions on which the muffler and resonator are mounted at the first signs of wear. This can save you from more serious problems with your exhaust system. To remove the mount, you first need to disconnect the muffler from it, and then remove the suspension itself from the hook. Before installing a new suspension, it is better to wash the hook from dirt so that the new elastic band holds securely.
Muffler hangers for Priora are sold in most spare parts stores
Changing the muffler corrugation
The muffler corrugation serves to reduce vibration of the exhaust system. This unit is usually made of stainless steel. It serves for quite a long time, but over time it still requires replacement. If you have argon welding skills, you can change the muffler corrugation on a Priora yourself.
Weld the corrugation carefully so as not to damage the muffler
First of all, you need to measure the old corrugation and select a new one of the appropriate size. Then you should carefully cut out the old corrugation, and insert and weld a new one in its place.
Instructions for replacing the muffler and resonator on the Lada Priora
To replace the muffler on a Priora, you will need the following tools:
- wrenches 7 and 13;
- flat blade screwdriver;
- chisel;
- hammer.
By following the instructions below, you can remove the old muffler yourself and install a new one. If necessary, you can change the resonator.
- Unscrew the bolts of the clamp connecting the muffler and resonator pipes.
- Open the pipes and remove the O-ring.
- If you need to change the resonator, unscrew the bolts securing the resonator pipe and remove the reinforced spacer.
- Remove the muffler and, if necessary, the resonator from the rubber suspensions.
- Place the main and additional mufflers under the vehicle in the position in which they will be installed.
- Secure the resonator with elastic bands.
- Insert a new spacer and screw the resonator to the exhaust pipe of the catalyst. Do not overtighten the nuts; screw them in until they are tight.
- Hang the muffler on rubber bands.
- Insert the O-ring and connect the muffler to the resonator pipe.
- Check all connections and hangers.
All spacer rings should be replaced with new ones when installing the muffler.
Video: replacing the muffler and resonator on a Lada Priora car
Changing a muffler is quite simple on almost any car, and Priora is no exception. A properly functioning muffler not only protects the environment, but also your peace of mind. When the car runs quietly, and there are no knocks or rattles coming from under the car, you can relax and fully concentrate on driving.
Home →
Maintenance and Repair →
How to remove the old resonator
Before starting any work on the exhaust system, it is necessary to drive the car onto an overpass or inspection pit. You can use a lift or even a regular jack - you need to make sure that the car is securely fixed in this position.
And also, before starting work, it is recommended to lubricate all threaded connections that will need to be unscrewed. This is necessary so that the old fasteners can be dismantled as quickly as possible. After 10 minutes you can begin the main work:
- First, the connection between the pipe and the exhaust manifold is unscrewed. This is the most difficult place to reach in the exhaust system. You can try to remove the nuts with a wrench. But in most cases, even WD-40 is not able to soften the reliability of the connections. Therefore, you have to resort to using a chisel to move the nuts out of place.
- If even after the chisel the nut cannot be unscrewed, you will have to cut it off with a hammer and chisel, while being careful not to touch the stud itself on which it stands.
- After unscrewing or removing the nuts, you can move one edge of the resonator to the side. You can start dismantling from the other edge.
- Next, the nuts of the coupling clamp are easily unscrewed.
- If the nuts suddenly become very stuck, you can cut them off with a chisel.
- The resonator is disconnected from the exhaust system pipes; all that remains is to remove its body from the rubber suspensions.
- After which the product is pulled out from under the car.
Standard muffler - article number and price
The VAZ 2170 Priora is equipped by the factory with spare part item number 2170-120010. Made of light sheet steel with a thickness of 0.8-1.1 mm. Connecting inlet pipe with a diameter of 48mm. Inside the muffler chamber (an oval tank - popularly known as a barrel) there is a series of parallel chambers for the last stage of dampening the force of the sound wave of the exhaust gases. The exhaust pipe allows you to install different types of muffler attachments to add uniqueness and change the sound characteristics of your car's exhaust. The price of such a standard muffler is in the range of 1200-1600 rubles. Of course, you can go much further.
Lada Priora Universal 2012, l. With. - with your own hands
Chelyabinsk
Lada Priora, 2010
225 000 ₽
Makhachkala
Lada Priora, 2014
360 000 ₽
Novosibirsk
Lada Priora, 2012
240 000 ₽
Biysk
Lada Priora, 2014
280 000 ₽
See more cars on Drome
Participate in the discussion can only registered users.
Login Register
Main components of the Priora exhaust system
As already mentioned, this is not one element, but several:
- Timing (gas distribution system) exhaust valves.
- Exhaust manifold with particulate filter (catalyst).
- Oxygen sensor (Lambda probe) 2 pieces.
- Middle part with resonator.
- Tail section with muffler.
Each of these parts must be considered separately.
Release of gases in the cylinder head
This is part of the operation of the gas distribution mechanism. A full description of this mechanism is a separate issue of engine operation. It is enough to mention here that the 8 exhaust valves open in exhaust mode and the piston pushes the exhaust gases into the system. Namely, into the exhaust manifold.
Catalyst or particulate filter in the exhaust manifold
This is one of the most complex and expensive components of the entire exhaust gas system. Essentially, this is a device for afterburning unburned gasoline particles using catalysis. For this purpose, the thin walls of the longitudinal filter honeycombs are made of a special material. Contacting them, gasoline burns (figuratively). The output is ordinary water.
Set of Lambda probes for Euro-3 system
What is Euro 3 standard? In fact, this is the level of purification of car exhaust gases. It is according to the levels of vehicle access to Europe that these systems are distributed. There are several levels:
- Euro level.
- Euro 2 threshold.
- Euro-3 (basic for Priora).
- Euro-4 (Subsequent models and the latest “Priors”).
- Euro-5.
In the first option, a particulate filter was added to the exhaust system. It is mentioned above. But in system No. 2, electronics control has already been connected. A special, rather complex and expensive sensor was developed. Lambda probe or oxygen sensor. Thanks to a special coating, its resistance changes its value depending on the saturation of the exhaust gases with carbon monoxide. That is, carbon monoxide.
To more accurately understand the meaning of the Lambda probe, it is worth briefly describing the history of Euro standards. So.
To reduce toxicity, an afterburner was installed in the exhaust system (the particulate filter described above). This was the Euro system. Further, with the development of the electronic component of the control system, the idea of exhaust quality control came. And installed 1 oxygen sensor. It was placed in the system directly into the collector. Before the afterburner. This allowed us to make adjustments to the gas saturation table in the program. The system with one sensor was called Euro-2.
However, savvy motorists quickly realized that the particulate filter, which reduces engine power, can simply be thrown out. Which is what they began to do with success. Then, after the afterburner, another Lambda probe was inserted into the system. And he already informed the computer that the filter was not working. And accordingly, he again cut back on fuel. This became the new Euro 3 standard. Well, Euro 4 and 5 are just a modification of the software and replacement of fuel to the European level, respectively. The latter, if nothing interferes, should be carried out in Russia by the end of 2022.
This is what the oxygen sensors in the Priora exhaust system are for.
What is the purpose of the resonator in the Priora exhaust device?
It is also called an auxiliary muffler. It is an exhaust system pipe bent at an angle and having an extended section in one place. This makes it possible to initially smooth out the sound vibrations escaping from the engine when releasing gases.
The auxiliary muffler is located immediately behind the manifold and catalyst. And immediately behind it comes the muffler itself.
On some Priora models, two parts, the resonator and the main muffler, are made as a single unit. But the collapsible design is more convenient both in operation and in repair.
Execution of work
The manufacturing process of the structure itself is shown in the video, which is located at the end of the article, so we will not dwell on it in detail. We'll tell you more about installation.
The machine is installed on a ramp or pit. The further procedure will be as follows:
- completely remove the factory muffler along with the clamp securing it to the resonator;
- the finished exhaust system (its right part) is suspended on original cushions;
- leave the left one unfixed;
- the common output is connected to the resonator with a clamp;
- the left exit is applied directly to the spar and the location of the fastening is marked;
- drill holes there for the bracket and mount it;
- the outlet is fixed.
Before fully tightening all the screws, you need to make sure that the dual exhaust system is located at the correct angle to the ground.
Finally, it is worth recalling that since the new pipe runs in close proximity to the fuel supply system, it must be wrapped with a cord made of asbestos - this eliminates the risk of fire.
This video explains how to make a double pipe:
First of all, the dual exhaust on a car is a sign of its power. As a rule, many foreign automobile industries are endowed with this attribute, the power and torque of engines are quite large and require a more complex system for intensive removal of exhaust gases from the cylinders.
But, there is also such a thing as exhaust system tuning, which is when, for some reason, the serial design of the device is subjected to alteration. The reason for such changes today may even be the desire to simply improve the appearance of the car, make it cool and add imaginary power.
Mufflers VAZ 2108-2115 (Lada Samara)
Lada Samara can be roughly divided into 2 generations:
- VAZ 2108-21099 – first generation
- VAZ 2113-2115 – second generation
- With the first generation everything is simple. The chisel in the hatchback body is equipped with a VAZ 2108, 2109 muffler, and in the sedan body there is a VAZ 21099 muffler.
In the second generation of Lada Samara, there is also a principle of division into 2 body types: hatchback - muffler VAZ 2113, 2114 and sedan - muffler VAZ 2115. But in each type there are 2 more subtypes: new
and old style
. I’ll say right away that in terms of interchangeability, they are absolutely the same.
In old-style mufflers, the exhaust pipe has an additional pipe bend; in new-style mufflers there is no such bend. Why was the extra bend removed? Perhaps in order to reduce the cost of production. Why it was there in the first place, unfortunately, is unknown to me.
As for the interchangeability of the first and second generation Lada Samara mufflers, both generations are completely identical in terms of fastenings. But if you buy a cheaper muffler from the first generation to install it on the second, you will have to bend the tail of the exhaust pipe. If you are going to do the opposite, then you are an extraordinary person, and on your car the muffler from the second generation will look ridiculously extraordinary.
Silencers Granta, Kalina, Priora
The exhaust system of currently modern AvtoVAZ models has become easier to understand. There is no division into old/new model. Silencers for Kalina and Priora are divided according to body type:
Sedan and station wagon:
- Lada Kalina - muffler VAZ 1117, 1118
- Lada Priora – muffler VAZ 2170, 2171
Hatchback:
- Lada Kalina - muffler VAZ 1119
- Lada Priora – muffler VAZ 2172
Lada Granta is currently presented in one single sedan body, so there is only a VAZ 2190 muffler on the market.
Let's move on from front-wheel drive to the rest of the VAZ cars.
Exhaust system design
The exhaust system is designed to safely remove exhaust gases, as well as reduce noise levels and harmful toxic substances. The latter has become relevant due to the increase in the number of cars. Lada Priora is equipped with just such a system.
The exhaust system of a Lada Priora car consists of the following main parts:
- Main muffler;
- Auxiliary muffler;
- Exhaust manifold with converter.
All these components are interconnected in such a way as to ensure tightness.
Main muffler
It is a metal structure with an ellipse shape in cross section. Inside it there are several partitions connected to each other in a certain way to dampen the sound wave. A pipe approaches it from both ends. The attachment to the body of the Priora car is made using two soft damping pads that isolate it from vibration.
Auxiliary muffler
Exhaust system Lada Priora
Located after the exhaust manifold of the Lada Priora. The attachment to the bottom is also made using two pillows. The exhaust system of the Lada Priora is designed in such a way that the main and additional mufflers are hingedly connected to each other. This reduces the mechanical load on the pipes when hitting obstacles, and also reduces the impact on the body.
Exhaust manifold with converter
Its task is to neutralize harmful substances and collect gases from each cylinder. The exhaust system of the Lada Priora has a neutralizer built into the manifold. This makes the design compact. The connection to the exhaust pipe of the additional muffler is made using flanges, between which there is a sealing gasket. In addition, a locking plate prevents the nuts from unscrewing due to vibration.
The exhaust system of the Lada Priora provides for the placement of oxygen sensors inside the manifold, as well as thermal protection of the bottom and steering using screens.
This prevents fire and melting of the sound insulation. The exhaust system of Lada Priora has the highest temperature closer to the engine. That's why the screens are located there.
Installation of the Priora exhaust manifold
Before installing the catalytic converter, the mating surfaces of the cylinder head and catalytic converter should be cleaned of carbon deposits. The junction of the catalytic collector with the cylinder head is sealed with a metal gasket. If exhaust gases escape through this seal with a characteristic sound, then the nuts securing the catalytic collector may have become loose. If tightening the nuts does not fix the problem, you should replace the Priora exhaust manifold gasket with a new one. Before tightening the nuts, apply graphite lubricant to the cylinder head studs.
To eliminate tension, the exhaust manifold bracket must be secured in a certain sequence:
- Loosen the bolts securing its components using a 13mm wrench.
- Attach the bracket to the catalytic converter and cylinder head. Use a marker to mark the relative positions of the bracket parts.
Remove the bracket and, following the marks, tighten the bolts securing its components. We finally attach the bracket to the catalytic converter and the cylinder block. We carry out further assembly in reverse order.
By the way, do you know how to install the “spider” on Priora?
Source
