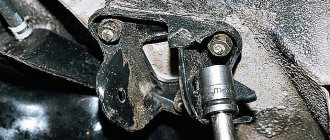
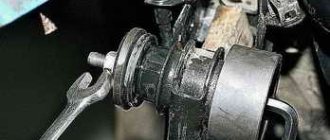
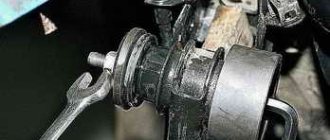
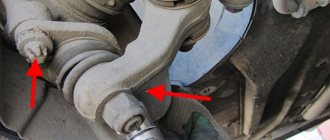
To decide on replacing silent blocks on a VAZ-2115 car model, you can contact a specialized technical center or carry out repair work on a VAZ-2115 car yourself. Each motorist chooses for himself a convenient option for replacing silent blocks on the front suspension and rear beam.
VAZ-2115 car owners should remember that replacing silent blocks is necessary to ensure safe and reliable operation of the suspension of your “iron friend”.
Wearing signs
Because the function of engine support is to reduce vibration, their sensitivity even at idle indicates a problem. Other signs of airbag wear on a VAZ 2114 include:
- Vibration switch lever. This indicates that all engine vibrations are transmitted to the box.
- If you open the hood, you will notice strong vibrations from the engine.
- Irregularities in the car. The fact is that when the silent blocks are heavily worn, the crankcase begins to move slightly in the direction of the clutch. Because of this, the crankshaft position sensor (DPKV) constantly emits different signals. The ECU is forced to mistakenly “catch” the impulse to correct the imbalance.
Rear suspension
Sometimes it is also necessary to replace the silent blocks on the rear suspension of a VAZ 2114 car. They are not as susceptible to wear as in the case of the front control arms, but the fact remains.
The sequence of your work in this situation will be as follows:
If there is no lift, slightly loosen the bolts on the wheels, install a jack, raise the car and completely remove the wheel. It is advisable to place some supports under the beam. Both simple bricks and a second jack will do. It all depends on what you have at your disposal. Now you need to remove the bolts that are attached to the shock absorber and the car body. Proceed carefully to avoid damaging the threads. The bolts are knocked out, the beam moves down or slightly back. This will allow you to get to the desired silent blocks. They are dismantled with a puller. New suspension elements are installed in a similar way to the front control arm silent blocks.
To help them sit in their nests better, use a soapy solution. Reassemble the entire disassembled structure in reverse order. During the disassembly and assembly process, pay attention to the remaining components to which you gain full or partial access. As practice shows, performing certain repairs allows you to study the condition of related components, assemblies and parts of the car, identify emerging problems in a timely manner and eliminate these breakdowns or what may lead to this.
Changing silent blocks on a VAZ 2114 is far from the most difficult type of car repair. Therefore, many car owners cope with this task with some ease with their own hands.
Should you try it if you have no experience at all? Most likely not. But this experience must come from somewhere, right?!
Troubleshooting
Like any part, the silent block has a limited service life and must be replaced if it fails. Signs of unusable silent blocks:
- cracking of rubber (decreased elasticity of rubber, and as a result, reduced absorption of shocks and vibrations);
- breakage of the internal, precision bushing (complete absence of absorption, knocking in the chassis, sharp deterioration in vehicle handling);
- displacement of the central hub from the center (wear of tires and chassis parts, impossibility of setting wheel alignment angles, decreased handling);
- turning the entire silent block in the body (quick failure of the part due to the formation of friction force, increasing play in the suspension);
To replace silent blocks, you need to remove the part on which it is installed (for example, a lever) and remove it using any available method (hitting it with a hammer, pressing it out with a puller or a yew, sawing the inside with a hacksaw, and even burning rubber with a blowtorch). After removal, it is necessary to clean and prepare the landing site of the new silent block from rust and burrs.
Pressing procedure
after preparing the seat, the silent block must be lubricated with a soap solution or any detergent such as “Gala” (lubricants and oils are prohibited, since the rubber on the silent blocks is not oil-resistant and their use will cause premature failure of their parts); there are several ways to press in a prepared silent block, using yews, a press and special pullers (they are designed for removing and installing silent blocks)
Some silent blocks must be installed using a mandrel and impact; when pressing, it is important to maintain the alignment of the silent block in relation to the lever, since misalignment will cause damage to the rubber; after pressing, it is necessary to set the equivalent distance of the inner sleeve from the center;
Tightening
After replacing and installing the levers on the car, it is necessary to correctly tighten the levers on the silent blocks. Due to design features, the movement of the lever on silent blocks has a limited range of action, and if the silent block is not tightened correctly and the radius is exceeded, it can be damaged on the first day of operation. In order to properly tighten the silent blocks, and thereby significantly extend the service life, it is necessary to load the car in the way it is most often used during normal operation (for example: driver + passenger + 70 kg load), in order to set the same lever stroke in both directions .
Stabilize the suspension (by pumping up and down several times) and tighten the silent block mounting bolts one by one with the required force.
Saturday, September 16, 2022
Replacing the hinge in the lower arm of the front suspension of VAZ-2108-2115 and the like
The time has come to change the silent blocks in the suspension of my VAZ front-wheel drive car. I decided to perform this operation without going to the service station myself. The first time I tried to do this using a vice, the hinge did not want to fit into the hole. Or he entered halfway and stopped. Having found various silent block pullers and pressers on the Internet, I went to the stores in our city. Naturally, it was not possible to find such a device. After talking with friends, I found out that people don’t give a damn and just buy ready-made levers and install them on their cars. This option didn’t suit me.
To turn such a device from a turner costs the price of 2 levers. While watching videos on YouTube, I came across one where the author, using a press through the inner race of the bearing, presses the hinge into the lever with a hydraulic press, and all this is done very simply.
After rummaging through the ferrous metal in my garage, I found old races from the front wheel bearing 2108 and also found an old timing belt tensioner pulley 2108. I bought a bolt and nut at an auto store. I picked up the washers from the same ferrous metal. I tried to repeat the operation with the clip and after an unsuccessful attempt, I decided to finalize this design.
Sequence of work when replacing shock absorbers
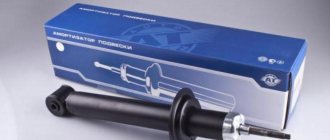
Before dismantling the VAZ-2115 rear shock absorber, you need to remove the plastic plug from the rear strut cup and unscrew the nut securing the rod. To do this, use a special key that simultaneously fixes the rod and unscrews the nut.
After removing the nut and washer with a rubber cushion, jack up the car and remove the rear wheel to gain access to the bottom of the rear strut mount.
Using a 19-mm open-end wrench, we fix the nut, and with a 19-mm socket, we unscrew the bolt, lubricating it with pre-penetrating lubricant, unscrewing and removing the bolt from the hole, and remove the rear shock absorber from its seat. To do this, it is better to use a flat-head screwdriver, carefully prying up the lower part. The strut body is moved to the side, lowered down and the shock absorber is removed.
We take out the remaining rubber gasket inside the glass with the same screwdriver. We disassemble the old shock absorber, removing the spring, rubber bushing, cup, casing, bump stop, and then install these parts in the opposite (reverse) order on the new strut.
When installing the spring in place, the last coil should be in such a position in the lower cup of the rear shock absorber that the end of the spring does not extend beyond the cup. And after the installation of the stand is completed, it should be directed towards the wheel. Before installing the shock absorber, it is recommended to immediately put on the upper elastic band and, so that it does not change its location, use insulating tape to attach it to the coils of the spring.
Upon completion of complete assembly, the rear strut is installed in the reverse order, the upper nut and the lower bolt securing it are tightened.
Sources
- https://remontysvoimirukami.ru/remont-vaz-svoimi-rukami/remont-perednih-stoek-vaz-2115-svoimi-rukami.html
- https://vaz-2115i.ru/2012/11/18/zamena-amortizatora-i-pruzhiny-zadnej-podveski/
- https://ladaautos.ru/vaz-2115/instrukciya-po-zamene-amortizatorov-vaz-2115.html
Self-replacement
Before replacing the pillows, their condition must be diagnosed. The condition of any silent units is checked during installation: it should be subject to resistance that simulates the movement of the engine during operation. If:
A simplified way to replace silent blocks back
beams
VAZ
2108, 2109, 21099, 2110, 2111, 2112, 2113,
2114
, 2115.
- rubber gaps are visible
- The silent block of the bushing refers to the seams,
- the motor moves easily when pressed and beats the protection,
- broken support bracket,
the element must be replaced. Even if signs of wear are not noticeable (for example, the rubber cracks but does not tear), it is better to replace them with a set. Quiet blocks lose their elasticity over time and begin to work poorly.
Standard and reinforced mounts for the VAZ 2114 are available for sale. The second type uses a harder rubber compound, but they are more durable only in quiet driving mode. Fans of sudden starts and brakes will have to change one every 15-20 thousand, they can live with other drivers for 50 thousand km. This is the answer to the question of how much is supported.
VAZ 2114 engine front suspension
The supports of the VAZ 2114 can be completely replaced independently, without resorting to a car service. It is more convenient to use a pit or a span, but you can do without them. To do this, the car is captured and placed on stops (bricks or stumps). If the crankcase is installed, it must be removed.
Replacing the front support. You need to coat the pan with oil. First, head 17 unscrews the 4 bolts securing the bracket to the engine crankcase, then the block cover. To remove the bolt, it is necessary to use the jack in such a position that the engine does not press on it with all its weight
When installing a spare part, it is important to lubricate the silent block bolt well: not only the threaded part, but also the body. It is in contact with the metal sleeve, so it may stick
Side engine mount VAZ 2114
Replacing the correct mount is similar to the difference that it is better to block the engine rather than the transmission. Another option is to install a jack in the area of the oil filter housing. It is attached to the engine crankcase with three bolts. Another trick is that the right pillow needs to be changed together. Without a side stop, the engine moves up, not down. The socket will not help here, so an assistant must apply pressure to it so that the plug of the silent device can be blocked.
Replacing a rear strut is the most difficult undertaking when done without a pit or lift, which requires some auto work skill and persistence. It is located at the intersection of the engine and transmission, so you will have to work in a confined space. In addition, when unscrewing the bolts from the housing, the key may rest against the gearbox housing.
Post Views: 9
How to replace the silent block of the rear beam of VAZ cars
Hello dear readers of the blog RtiIvaz.ru. Today I want to talk about the silent block of the rear beam - the ease of replacement on VAZ cars when doing DIY repairs.
Silent blocks and various suspension parts from the factory are quite reliable and last a long time. Typically, their longevity depends on how you operate and maintain the car and usually last for 80-90 thousand kilometers. Salentblock find out what it is here.
Let's first look at the signs of wear on the silent blocks of the rear beam. When cornering, the car loses stability and uneven tire wear occurs. Or, when driving over potholes and bumps on the road, impacts appear on the body and an unpleasant creaking sound occurs in the rear of the car.
Unpleasant sounds when driving can also occur due to other malfunctions. Knocks can come from one place and be heard in another, especially as they move along they are heard in the rear of the body. Therefore, first you need a thorough diagnosis of the entire rear and front suspension: you will have to check the struts, bearings, supports, muffler, etc.
Having finally made sure that the rubber silent blocks are extremely worn out, we proceed to replacing them. Fortunately, compared to foreign cars, replacing the silent block of the rear suspension of VAZ “nine” or “ten” cars is distinguished by its simplicity and low cost.
To begin with, let’s buy rubber bushings “fungi”, that is, silent blocks for the rear beam in a car store. For VAZ 2108 cars; 2109; 21099 you need to purchase silent blocks with the VAZ design number 2108-2914054-10, and for VAZ 2110 cars; 2112; 2114; 2115 VAZ design number 2110-2914054 is prescribed.
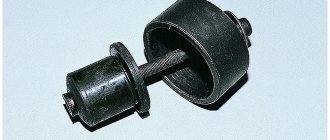
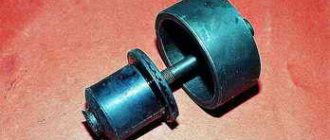
It is difficult to distinguish these silent blocks of these cars from each other, because they are very similar, but different in outer diameter (see the difference in the photo). You will not be able to install silent blocks from the “nine” VAZ 2109 on the beam of the “tens” VAZ 2110, as they will dangle. But the rubber bushing from the “ten”, if you try, can be pressed into the “nine” beam.
It will be useful: Do-it-yourself modification of the frets of the grant: video instructions
Step-by-step replacement of rear beam silent blocks on VAZ 2108 vehicles; 2109; 21099; 2110; 2112; 2114; 2115:
- 1. Replacement of silent blocks should be carried out on an overpass, inspection pit or lift, installing the machine in a way accessible to you.
- 2. Remove the rear wheel so that it does not interfere.
- 3. On the left side, disconnect the rear brake pressure regulator rod from the beam (see photo number 1.) On the right side, remove the handbrake cable to the side (see photo number 2.)
- 4. Using a “19” wrench, unscrew the nut from the bolt securing the rear beam to the bracket (see number 3 in the photo)
- 5. We remove the fastening bolt with a hammer, and then knock it out with a wrench (see number 4 in the photo.)
- 6. Next, lift the car body with a jack and move the beam eye down
- 7. We insert a wooden block between the body and the beam
- 8. Using a hammer and a drift, knock out the rubber bushings of the rear beam
- 9. Having cleaned the seat from dirt and rust, generously lubricate it with a thick soap solution and also lubricate the rubber bushing itself
- 10. Using a tool, press in the bushing. If there is no device, then we hammer it in with a hammer, hitting the head of any suitable bolt inserted with a washer of larger diameter, but so that the washer fits tightly to the rubber
- 11. Then we pull out the wooden block
- 12. Using a jack, we lift the beam and put on our original fastening bolt, then we attach the nut
- 13. Having placed the rear wheel, lower the car
- 14. Open the trunk door, then sit down on the bumper and press the back of the car as far as possible with all our weight.
- 15. Tighten the silent block mounting bolts until they stop
Actually, the work itself doesn’t seem to be difficult if you have a puller. And if it is not there, what should you do then? Therefore, I am writing for those who repair a VAZ car with their own hands. There is no need to complicate the task if you don’t have a special remover. Listen to the advice of car mechanics: do not fool your head and knock out - hammer in the silent blocks on the beams with a hammer.
Design number of the rear suspension arm mounting hinge: VAZ 2110-2914054
Design number of the rear suspension arm hinge: VAZ 2108-2914054-10
Design number of the rear suspension arm hinge: VAZ 1111-2914054
Video:
Tools and materials
Tools you will need:
- Spanners (take a full set at once);
- Socket wrenches;
- Vise;
- Chisel;
- Hammer;
- Puller;
- Silent blocks.
There are several important nuances:
- It is strongly not recommended to take silent blocks from repair kits intended for models 2108-2112. You will simply waste your money because they are not suitable for the fourteenth VAZ model.
- The easiest way to purchase a puller is at auto parts stores. But you can ask your friends for it.
- You can make a device for pressing in a new silent block yourself. To do this you will need a 170mm M12 bolt, a bushing, a washer and a high nut. But if you have the opportunity to use a full-fledged, real tool, do just that.
How should the silent block be changed? What tools will be needed for this?
But it’s worth starting, perhaps, with the selection of the silent blocks themselves. For models 08, 09 and 099 you need to purchase the specified elements with the following catalog number: 2108-2914054. For versions 10, 12, 14, 15, silent blocks with number 2110-2914054 are suitable. The difference between these structures is in the outer diameter (the difference can be seen in Fig. No. 1a). If you try to install silent blocks from the tenth model on the beam of the “nine” or vice versa, an unpleasant surprise awaits you. It's better not to confuse anything.
Now about the tool. In addition to the traditional set of tools, such as 19mm spanners, a pair of jacks and a hammer, you will need a wooden beam and a device that will help press the silent blocks. You can make this device yourself or buy it. If the purchase cannot take place for some reason, then photo No. 1 shows the main details. Their dimensions are as follows: the diameter of the bolt is 12 mm, its length is 170 mm. The diameter of the ring-clip is 50 mm, height is 40 mm. All other elements of the device are easy to select.
Why is the rear silent blocks of a VAZ 2114 being replaced?
It is very easy to suspect a malfunction in a car if you listen to its movement, traction, and maneuverability. And by comparison, observation, testing, you can understand that a planned replacement of the rear silent blocks on the VAZ 2114 is necessary. How to determine this?
The car has a mileage of 50,000-100,000 km. You can take a lower indicator if you often use aggressive driving, test the vehicle in difficult road conditions, when only bumps and holes “disfigure” the city asphalt surface. And if you are an off-road enthusiast, then it is recommended to regularly check the condition of small car parts to prevent them from becoming deformed, cracking or drying out. Sluggish steering, which is unpleasant especially when making sharp turns or covering a long route. It seems that the steering has a life of its own and does not always respond sensitively to the driver’s demands. And if such behavior of the vehicle is noticed, then one of the options is to replace the rear silent blocks of the VAZ 2114. Most likely, the important rubber-metal hinge has worn out and does not perform its functionality properly. Upon visual inspection, you notice that the silent blocks are covered with cracks and seem to be very worn out. Of course, it is not always convenient to carry out diagnostics in your garage. Firstly, there is no hole, there is no overpass nearby for inspection. Secondly, you have no idea what it is - a silent block. And in order to examine it, you need to crawl under the car, clean the part from dust and dirt, and pull off some pipes and underwater hoses with a jack. But without being afraid of difficulties, you can overcome everything. You notice uneven wear on the tread pattern. Perhaps the reason lies in the fact that it is important to urgently replace the rear silent blocks on the VAZ 2114 and carry out wheel alignment diagnostics. The fact is that silent blocks can tear, and accordingly the levers become slightly crooked, causing a disruption in maneuverability and balance in the car. Car skidding on corners has become more frequent. There are situations when the car simply abandons, it has difficulty making turns, uncontrolled drifts are carried out not at the will of the driver
It’s worth paying attention and having the car sent for diagnostics or having it thoroughly examined yourself.
Thus, if the signs indicated above appear, then immediately begin repairs. If you hesitate, look for an opportunity, you will wait for an even greater disaster - the mounting points for the hinges may collapse, then you will have to invest even more money and change the suspension arm.
Troubleshooting
Deformation of the suspension elements, especially body braces, disorganizes the wheel angles and makes it impossible to adjust the camber and toe. First of all, you should check the car's silent blocks, rubber cushions, ball joints, and the shrinkage of telescopic struts.
Repairing a VAZ-2109 requires replacing rubber cushions and silent blocks if there is rupture and one-sided swelling, including after trimming the end surfaces of rubber elements.
You can check the condition of the front suspension ball joint on the car after removing the wheel, by measuring the distance between the lower arm and the disc element of the brake system. If, after pumping the unit, the distance increases from 0.8 mm or more, the hinge should be replaced.
Front arm
Replace the silent blocks on the front suspension arm of a VAZ 2114 with your own hands. To do this, try to strictly adhere to the instructions we offer.
- Place the car on the inspection hole.
- Remove the engine protection, if equipped.
- Unscrew the bolt nuts from the front arms.
- Using a 17 key, remove the fasteners of the front stabilizer strut, which secures it with the lever.
- Knock out the bolt.
- Loosen the wheel bolts, jack up the car and remove the wheels.
- Use a 24mm wrench to remove the brace nut. To avoid having to exert enormous force, first clean the fastener with a wire brush and treat it with WD40. This should help completely unscrew this nut.
- Then remove the two ball joint bolts from the steering knuckle to remove the arm.
- Problems often arise with this nut. It is rarely possible to remove it easily. A good way out of the situation is to remove the lever with a crab and a stretcher. To do this, slightly loosen the extension nut near the crab and remove the three bolts securing the crab and the body. Now remove the entire assembly and, in a more comfortable position, begin to unscrew the problematic nut. The most extreme method is heating or using a chisel.
- You managed to remove the lever. First of all, replace the silent block of the extension. Dismantling the old element is carried out using the most ordinary chisel. Be sure to clean the lugs and take a new suitable silent block.
- It's up to the vice. The silent blocks are pressed one by one into your lever. It is usually not possible to seat the element completely, so the lever should be placed on a flat floor or a sturdy table. The silent block must be installed using a hammer. A few accurate and fairly strong blows should be enough.
- Using the method without using a vice is very risky. Such measures are resorted to either by self-confident specialists or by those who do not mind experimenting with their car.
- Now we change it on the front lever. The first priority is to get rid of the old silent block. If it was completely broken, you just need to remove the bushing and remove the remaining rubber elements of the silent block from the eyes.
- If this method is not relevant, the silent tape will have to be pressed out. You already have a puller.
- The new element is pre-treated with water diluted with any soap, dish gel or simple liquid soap.
- Use the press-in tool to place the new part in its rightful place.
- The fastening bolts should be tightened gradually. The silent block can be twisted at the same time, so try to hold it with a screwdriver.
- Alas, the process of replacing silent blocks on the front lever is much more complicated than in the case of a stretcher.
Parts and components of the front suspension of the OKA VAZ 1111 car
The VAZ car under the symbol 1111 with the name Oka is a subcompact type of compact city vehicle.
Due to its size, this vehicle is one of the most successful solutions for driving in modern big cities.
The general design of the VAZ 1111 is made using standard technology, independent front suspension, transverse rear beam and front-wheel drive.
The Oka car has an independent front suspension of the MacPherson type. This assumes the presence of a shock absorber strut, which is contained in the steering mechanism. The VAZ 1111 suspension consists of several units:
- two steering knuckles and hub mechanisms with bearings;
- two shock-absorbing struts;
- two lower transverse levers with silent blocks and ball joints;
- two lower longitudinal levers with conical bushings;
- steering rack with rods and steering tips;
- stabilizer bar;
- axle shafts with CV joint mechanism;
- stretcher.
Each of these units carries a different functional load, complementing each other in operation, which explains the good reliability of the VAZ 1111 suspension.
A more complete picture of the work can be presented by breaking it down into individual units. This will give you an understanding of what the Oka car is like as a whole and its front suspension.
Front shock absorbers
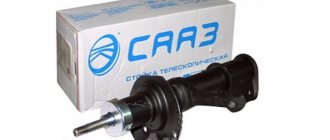
The strut with shock absorbers is the most heavily loaded unit. It is entrusted with the functions of monitoring the adhesion of the wheels to the road surface and participating in the control of the vehicle. The Oka is a fairly light machine, so the serviceability of this unit plays a very important role.
The strut is a hollow glass with a knuckle attached to the knuckle of the hub mechanism, into which the shock absorber liner is inserted and secured with a lock nut.
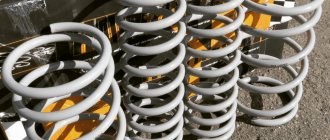
To impart rigidity, it is provided with a support platform for a spring, which gives the Oka machine the necessary vertical stability parameter.
The strut is attached to the car body using a support platform that contains a bearing called a thrust bearing.
This bearing allows the shock absorber to turn after the wheels and at the same time dampens the angle of inclination of the body to the rigid rod.
The lower part of the mechanism is secured to the steering knuckle with two bolts, one of which adjusts the camber angle of the wheel.
Thanks to this design, the stand with a shock-absorbing insert for the VAZ 1111 is very simple, reliable and extremely functional.
Lower control arms, stabilizer bar and steering rack
The purpose of the transverse lower arms is to hold the chassis mechanism in a vertical, stable position. They are attached at one end to the hub and the other to the subframe. It is attached to the steering knuckle through a ball joint; it is designed to rotate the hub. The ball joint is one of the most quickly failing parts of an Oka car.
The silent blocks pressed into them give the levers a small stroke along the axis of attachment to the subframe. They provide the necessary vertical play of the entire chassis, which ensures a stable position of the car on the road.
The longitudinal lower arms are necessary to hold the chassis in the longitudinal plane. They are attached with one side to the transverse arms, and the other to the subframe.
With the help of conical bushings located at both ends of the arms, the chassis of the Oka car provides the necessary longitudinal play.
The tapered bushings of this unit are quite reliable due to the insignificant load and they are changed very rarely.
Despite the fact that the chassis is independent, a stabilizer bar is designed to stabilize its functioning. It combines the entire chassis into a coherent mechanism. The stabilizer is held on the front part of the body and on the transverse lower arms. At the mounting points, the stabilizer is equipped with rubber bushings that provide it with the necessary play.
The main turning mechanism of the VAZ 1111 is a steering rack equipped with rods and ends. Steering tips are installed in the fist and are the main connecting link between the steering wheel and the wheels of the car.
Steering knuckle, hub and CV joint axle shafts
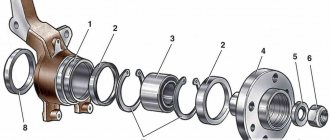
The steering knuckle is the center of the front chassis, to which all other parts are connected. It does not have any moving parts in its design, except for the wheel bearing pressed into it.
This bearing ensures rotation of the hub with the wheel on. The rotational force of the hub is transmitted by an axle shaft with a CV joint mechanism at both ends.
The axle shaft is driven by a gearbox and is equipped with a CV joint, which makes it possible to turn the wheels of the car while driving.
