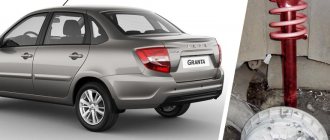
On a VAZ-2115 car, the rear struts are replaced in case of mechanical damage to the unit or when the service life has been significantly exceeded. The shock absorbers must be replaced in pairs. If you install one new one and leave the second one alone, this will affect the ride. Even if one spring is working, it needs to be replaced - this is a prerequisite. The springs are changed in the same way.
How to change the front struts of a VAZ 2114, VAZ 2115
There are two options for dismantling the shock absorber strut: one allows you to avoid subsequent adjustment of the steering wheel alignment angles, the second allows you to quickly complete the work with more compact units, but after that it is necessary to adjust the steering wheel alignment angles. The difference is that in the first version we remove the strut together with the steering knuckle, without loosening the nuts of the lower and upper (adjusting) bolts securing the strut to the steering knuckle. In this case, the amount of work is greater: we additionally disconnect the brake caliper and ball joint.
In the second option, pay attention! Immediately after replacing the struts, the vehicle requires mandatory wheel alignment adjustment. We proceed according to the first option, disconnect the steering rod, remove the brake pad guide with the caliper and the brake disc, remove the outer CV joint from the hub
We proceed according to the first option, disconnect the steering rod, remove the brake pad guide with the caliper and the brake disc, and remove the outer CV joint from the hub.
Shock absorber: its role in suspension operation
An automobile shock absorber is a mechanism in the suspension of a car that serves to partially dampen the swaying (damping) that occurs during movement or completely absorb it.
Giving the car a smooth ride, shock absorbers act as protection for the car's chassis from overloads when driving on uneven roads and rough terrain. In the suspension, the shock absorber acts as an element to increase its elasticity along with the spring and torsion bar.
Shock absorbers are divided according to their types:
- gas single-pipe;
- gas two-pipe;
- oil two-pipe.
On the VAZ-2115 model, standard oil shock absorbers are installed at the factory. Later, when using the car, owners often replace them with gas ones, depending on their driving style.
There are 3 types of racks with different characteristics. You need to choose them based on the roads on which traffic occurs. Oil (hydraulic) – quite elastic. Designed for drivers who prefer a calm, measured ride or frequent trips on unpaved roads.
Gas shock absorbers are characterized by higher rigidity, and, as a rule, they are preferred by motorists who practice an aggressive, highway driving style. Such shock absorbers (gas) prevent swaying that occurs at high speeds and turns. Gas-oil shock absorbers combine the advantages and disadvantages of both types.
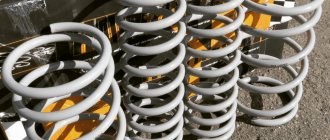
Do I need to change the spring?
A spring is a very durable element, but with prolonged use it can become unusable. Cracks appear, elasticity and length decrease. Diagnosing the condition is very simple:
- Visually inspect the springs for cracks and deformations. If they occur, then the springs must be replaced.
- Apply a load of 325 kg*s (or 3188 N). On export models of the car, the length will be 182 mm. For those produced for the domestic market, the length should be more than 201 mm. If less, then the spring must be replaced.
The springs that were installed on the VAZ-2115 are marked in the form of the letters A and B. The former are capable of working with higher loads. Be sure to install new springs with the same class.
Sequence of work when replacing shock absorbers
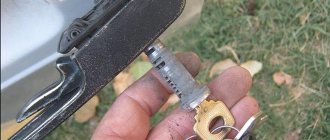
Before dismantling the rear shock absorber of the VAZ-2115, it is necessary to remove the plastic plug from the rear strut cup and unscrew the nut securing the rod. To do this, a special key is used, which simultaneously fixes the rod and unscrews the nut.
After removing the nut and washer with a rubber cushion, jack up the car and remove the rear wheel to access the lower part of the mount
Using a 19mm open end wrench we secure the nut, and with a 19mm socket we unscrew the bolt, lubricating it with the previously penetrating lubricant, unscrewing and removing the bolt from the hole, and remove the rear shock absorber from its seating location. To do this, it is better to use a flat screwdriver, carefully prying the lower part. The strut body is moved to the side, moves down and the shock absorber is removed.
We take out the remaining rubber gasket inside the glass with the same screwdriver. We disassemble the old shock absorber, removing the spring, rubber bushing, cup, casing, bump stop, and then install these parts in the reverse order on the new strut.
When installing the spring in place, the last coil should take a position in the lower cup of the rear shock absorber such that the end of the spring does not extend beyond the boundaries of the cup. And after installing the rack, it should be oriented towards the wheel. Before installing the shock absorber, it is recommended to immediately put on the upper elastic band and, so that it does not change its location, attach it to the coils of the spring using insulating tape.
Upon completion of complete assembly, the rear strut is installed in the reverse order, the upper nut and the lower bolt securing it are tightened.
There is a special offer on our website. You can get a free consultation with our corporate lawyer by simply asking your own question in the form below.
Step-by-step instruction.
Doing it yourself will work out cheaper. The sequence is as follows:
- We prepare the place and tools. The surface on which the car is located must be level. A pit is desirable, but not required. Without it, work will be carried out in a lying position. To be on the safe side, install wheel chocks or chocks on the front wheels. To be sure, you can even turn up the speed;
- Loosen and remove the wheel bolts. A 19mm wrench is required. Before direct repairs, all nuts can be treated with penetrating lubricant (WD-40, by the way, here are the recipes) - this saves time and effort;
- We put a jack and lift the rear part of the VAZ 2114, after which we remove the wheels. We work with the jack carefully and carefully!;
- Open the trunk and remove everything unnecessary. There is a rubber plug “hiding” under the shelf - remove it with a screwdriver. Behind the plug there is a rod with a tightened nut. You can unscrew it with a 17 mm L-shaped key and a special key for fixing the rod. If there is no key, then pliers will do; Next, remove the support washer (using a magnetic handle)
- We unscrew the nut securing the shock absorber to the beam; you will need two 19mm open-end wrenches. Remove the bolt that secures the strut to the beam. If that doesn’t work, knock it out with a smaller bolt. Carefully remove the shock absorber from its seat and remove the entire rack (it may fall, be sure to support it).
- Important: do not forget to remove the stuck insulating gasket (this often happens) from the inside of the glass, which is placed on the spring (see photo).
- We remove the spring, remove the spacer sleeve and shock absorber cushion. Remove the cover from the casing. Remove the compression stroke buffer (bump stop) from the rod.
- After this, we take a new rack with the rod fully extended (otherwise nothing will work) and put the casing, bump stop, cover, cushion and bushing on it. The spring and gasket are installed last. Advice: before installation, you should “bleed” the shock absorbers, as this greatly increases their efficiency and service life. “Pumping” is carried out by turning the structure over. At the same time, the oil spreads throughout the spare part;
- We install the new structure in reverse order. This can be difficult. There are situations when the stand simply “does not want to climb” into its rightful place. This can be corrected by lifting the beam with a jack;
- We secure the rod with a nut and secure it with a gasket. Tighten all the nuts;
- We put the wheels in their place and remove the jacks;
- We repeat the above steps on the other side.
That's all. The withdrawal procedure was successful. Every step is important - there is no point in skipping even one. There are some removal features that you should become familiar with.
Replacement
Having decided on the choice of new racks, you can begin the procedure for replacing them. We recommend that you study training videos on replacing rear struts on a VAZ 2114, which allow you to carry out repairs competently and effectively even without experience in such a matter.
Don't try to repair old racks and look on the Internet for some advice on this matter. Even if something is found, resuscitation of failed suspension components will not give the desired effect. Moreover, you risk making the problem even worse.
Remember - these elements cannot be repaired. The only correct solution is replacement. This procedure is performed as follows:
- Place the car on some flat surface. It could just be the floor in your garage;
- Raise the rear axle and be sure to put some kind of stoppers under the wheels so that the car does not suddenly jump off the jack;
- Remove those wheels where you plan to change the struts. The order of replacement does not play a big role, that is, you can start with either the left rear or the right rear wheel;
- The protection is removed from the top mount;
- Armed with a 13 mm wrench, slightly loosen your grip on the rod nut;
- Loosen the other nuts as well. This time the ones that hold the body;
- Take regular pliers and straighten the cotter pins. This will allow you to remove the old stand without any problems;
- There is also a nut on the steering rod, which should be removed without serious effort. Here you will need a 19 mm key;
- Remove the brake hose by unscrewing the nuts securing it;
- When unscrewing the steering knuckle elements, carefully remove your old strut through the arch;
- When installing a new element, simply proceed in the reverse order. There shouldn't be any problems when assembling the unit.
At this point, the procedure for replacing the rear struts can be considered complete. Now check the car in action, make sure that all previous problems are gone and the car behaves as you expected. Obviously, figuring out how to change the rear struts on a VAZ 2114 is not at all difficult. That’s why car owners often resolve such issues in their own garage. This fact does not force you to do everything yourself, since not everyone is given the opportunity to be an experienced auto mechanic. Don't be afraid to contact auto repair shops.
How to install a rear pillar on a VAZ 2114, 2115, 2109, 2108.
Rack assembly process:
- We pump up the rack.
- We put on a duster.
- We put the bump stop on the rack rod.
- We place a washer with a cushion on the rod.
- We put on a spring with a pillow attached to it.
- We put the stand in place by screwing the top first and then the bottom.
The process of installing a rear shock absorber is not complicated, but everything has its own subtleties.
First of all, we pump the racks before installation. Usually the instructions for bleeding come with the strut, but if there is none, just squeeze the strut rod 5 times until the end and remove it. and do not turn it over after pumping (after pumping, the stand should always be in a vertical position).
One more important detail. If the washers that secure the strut rod with the body are installed incorrectly, we will get a creaking of the rear strut of the VAZ 2114. In order to prevent creaking in the strut, it is necessary to install the lower washer with the cup down, and the upper one, on the contrary, with the cup up. In this case, there will be no creaking in the rear of the car.
The spacer must be between the car body and the spring. To install it without problems, tape it to the spring with molar tape. You need to use masking tape; in extreme cases, you can use electrical tape. When using simple tape, it can make extraneous sounds on bumps.
Assembly of the unit
After purchasing all the new components, you only have to do a few simple steps:
- Compress the spring using a puller. It must be installed in such a way as to engage at least three turns.
- Install rubber pads on the spring; they can be secured with tape or tape.
- Place the bump stop on the rod and the boot on top.
- Install the rod into the hole in the body and tighten the nut.
- Secure the lower part of the shock absorber to the rear beam by aligning the holes and inserting the bolt. Tighten the nut.
Check the tightness of all threaded connections. After a run of 50-100 km, it is recommended to re-tighten all the nuts. When replacing the rear struts of a VAZ-2115, use nuts with plastic bushings - they are much more reliable.
Order of Operations
Removing old shock absorbers and installing rear struts of the VAZ 2114 and other models can be done without an inspection hole or overpass - just jack up the car. But before you lift the car, you need to remove the assembly plugs located in the trunk. So:
- You need to remove the trunk shelf, bend back the upholstery and use a screwdriver to pull out the plug. The rod nuts are located under them; they need to be unscrewed and the washer and plate removed.
Now you need to jack up the car. This is necessary so that the lower rack lock is accessible. This bolt is most often tight, so it is better to pre-coat it with a special lubricant. If after this you cannot unscrew the fastener, you need to knock it out with a smaller bolt.
Now you can remove the stand, be sure to support it - it may fall. It's easier to do this if you move the end towards the rear of the car
Note! After dismantling the stand, a rubber gasket remains in the glass. It needs to be removed because the material has lost its elasticity
A new spacer must be installed, which is purchased separately from the assembly.
Now you need to remove the spacer sleeve, shock absorber cushion and bushing, remove the cover from the casing, and remove the bump stop from the rod.
You can begin installing the new unit. The rod element must be fully extended. We install the bushing, cover, its cover, and bump stop on the rack. The spacer and spring are assembled after all other parts. On a note! It is advisable to bleed the shock absorbers before assembly. This will increase their functionality and service life. The procedure is performed by turning the device over. This will allow the oil to spread evenly throughout the entire assembly.
Installation is performed in reverse order.
Then all the above operations are repeated on the other side of the machine. Difficulties may arise during assembly:
- if the unit does not want to be placed in its normal place, you can use the jack beam;
- if the old parts have lost their integrity, they need to be replaced, if they are in order, wipe them with kerosene;
- if the support bearing comes out separately during dismantling, this is normal;
- to install the spacer without any problems, you need to glue it to the spring with masking tape;
- Some experts believe that when final tightening the fasteners, you first need to remove the car from the jack.
The sequential replacement of the rear struts of the VAZ 2114 can be seen in this video:
Preparing for repairs
When replacing the rear struts of a VAZ-2115 with your own hands, you need to follow a certain sequence. Only in this case the repair will take place as quickly as possible. Rear struts are much easier to change than front struts - there are no steering ends, and there is no need to adjust the wheel camber and toe angles.
Vehicle preparation:
- Place the car on a viewing hole or overpass.
- Install wheel chocks under the front wheels.
- Loosen the bolts securing both rear wheels.
- Lift one side, completely unscrew the bolts, and place a reliable support under the body. Then do the same on the second side.
- As a result, the suspension should be completely unloaded. You cannot work on a loaded suspension - it is dangerous.
You cannot place supports under the beam - in this case the suspension will be loaded. If you only need to replace the silent block of the VAZ-2115 rear pillar, then you only need to unscrew the lower fastening. There is no need to completely remove the assembly.
Selection of new
Look at different photos to see what the assembled rear pillar for a VAZ 2114 looks like. This will allow you to understand what you generally need to look for for this car.
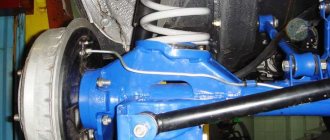
The fourteenth model of the domestic automaker AvtoVAZ provides for the use of a telescopic rear pillar.
Kayaba kit
We will not rant about which ones to buy, with what characteristics, from what materials, and so on. We will simply offer you objectively the three best options.
| Name | Advantages | Flaws |
| SS20 | A high quality device that will provide excellent performance characteristics to the car. | When replacing, you need to additionally purchase a support from the same company. |
| Plaza | Available in three types - Sport, Comfort and Supersport, they have excellent performance characteristics. | Not frost-resistant, therefore problems may arise when used in winter |
| KYB | Available in several types of execution, depending on the driver’s style, they are distinguished by the best characteristics | High cost and widespread counterfeits due to the popularity of racks. |
Replacement features
Sometimes the spring needs to be replaced. On older cars, especially those that have had heavy suspension loads, the spring becomes shorter. This leads to a decrease in the stroke of the shock absorber rod, and the performance of the entire suspension deteriorates. You also need to change the spring if it has cracks or other damage. If you are serious about tuning your car, then it is best to install high-quality rear shock absorbers, springs, and a strut in the luggage compartment.
Installation of the rack occurs in the reverse order. Be sure to change all rubber elements - boots, bumpers, O-rings, silent blocks. Before installation, it is advisable to compress the spring a little and also fix the rubber cushions on it. You can install old bolts, but it is best to use new nuts. It is recommended to use nuts that have plastic thread locks installed inside them.
When replacement is required
If your car is still running on factory struts, you can hardly expect that over the course of many years they will not begin to act up and require replacement.
There are several characteristic signs that indicate that the old rear struts have become unusable and the car needs urgent repairs.
- When hitting holes, potholes, bumps inside the cabin, you feel a dull and strong blow in the area of the rear wheels.
- Even when passing small bumps on the road, the car bounces and so do you. This suggests that the current elements are not working properly, and the level of comfort is significantly reduced.
- After bouncing, the car with working rear struts immediately returns to its initial position. If they fail, the machine will oscillate for a long time.
- In the area of the rear pillars there are traces of lubricating fluids, which under normal conditions should not be present with a working unit.
troubleshooting
To identify damage to shock absorber struts and their elements, you need to perform the following steps:
- Pay attention to the smoothness of the ride when driving, especially on uneven roads.
- Take a closer look to see if the body is skewed on the rear side.
- Look at the coils of the springs to see if there are any traces of impact on them. If so, the springs will need to be replaced. After all, if they break, the shock absorber will also not be able to work normally.
- Press down on the left and right sides of the body, then release sharply. The body should swing a maximum of three times. If more, then the rack has become unusable and needs to be replaced.
- If there are no signs of damage, carefully inspect the condition of the anthers. There should be no cracks or cuts on them. Otherwise, you will still have to remove the struts and replace the anthers.
Try to promptly replace all suspension components that have become unusable. After all, the slightest malfunction will lead to the car starting to pull to the side, and discomfort will be felt when driving over bumps.
How to replace the rear shock absorbers of a VAZ 2114 with your own hands - step-by-step instructions
- First of all, you need to remove everything unnecessary from the trunk. We dismantle the plastic casings and everything that may interfere.
- Next, remove the cup plug, under which there is a nut securing the strut rod.
- Using a special wrench that needs to be used to keep the rod from turning, and a carbon socket wrench we unscrew, or rather “tear off” the rod securing nut.
The next step is to remove the wheels, to do this we “tear off” the wheel nuts, then install the jack and hang the rear of the car
Attention! Working on a jack is dangerous. therefore, install stops or blocks under the car that will securely hold the car and prevent an accident
- We dismantle the wheels. Before proceeding with further work, I recommend treating all threaded connections that need to be unscrewed with WD-40, this will speed up the process.
- We begin to “free” the rack. Using a “19” wrench, unscrew the fastening bolt that secures the rack to the beam.
- We completely unscrew the “torn off” nut attaching to the rod at the beginning, after which we can safely remove the strut along with the spring.
- It should be noted that the stand does not always come out with the support, for example, as in my case. Now let's start disassembling the rack.
- We remove the spring and check the old shock absorber “for ourselves” to make sure that it is really faulty.
- Next, take a new shock absorber and bleed it. Not many people know that pumping shock absorbers is MANDATORY! Some people mistakenly believe that this is not necessary; as a result, the rack “dies” immediately after replacement or simply lasts several times less than the one that was pumped. How to pump up a rack. Everyone has their own answer to this question; some advise turning it over so that the oil spreads, while others, on the contrary, prohibit doing this. In general, there are enough manuals and video instructions on the Internet that will tell you in detail and show you how to bleed shock absorbers before installation.
- We assemble the strut and do not forget about the bump stop and shock absorber boot.
- Let's start installing the shock absorber. Here you will have to tinker. The fact is that sometimes, as in my case, the stand is not so easy to install in place. If difficulties arise, you can jack up the beam with a jack. After the rod has come out, install a sealing gasket in the interior and secure the rod with a fastening nut.
- Tighten all bolts and nuts. We put the wheels back and lower the car from the jacks. We repeat all the above steps in relation to the other rack. Replacing the rear shock absorber of a VAZ 2114 on the other side follows the same principle.
As you can see, there is nothing complicated in this work. Everything, as they say, can be done if you really want to, if you have the desire and the appropriate tool
That’s all for me, thank you for your attention and see you again at vaz-remont.ru
Replacement of rear struts of VAZ 2115 — LADA 2115, 1.6 l., 2010 on DRIVE2
Long time no see. So hello. In one of the previous entries, I indicated that my rear pillars received an LPA. And yesterday after work I decided to replace them.
Of course, I understand perfectly well that all those gathered here are professionals and know and can do everything, but I think that there will be at least one person who does not know how to replace the rear struts, and this is the kind of person my post is mainly aimed at.
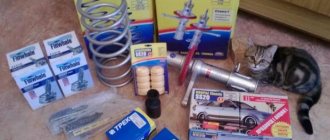
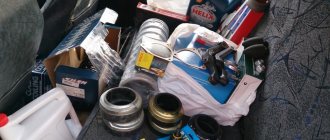
For work we will need: - VAZ 2108 struts themselves - 2 pcs (I took SAAZ); - Rear bump stops 2108 - 2 pcs; - Rear strut boots - 2 pcs; - A set of special keys for unscrewing the rear struts - 1 pc; - Open-end wrenches from 13 to 22, and for 19 in the amount of 2 pieces; - Jack and balloon. - Ties for springs.
So, let's begin. We remove the wheel bolts and jack up the car. We unscrew the wheel and put it under the beam just in case. We see the lower rack mounting bolt. We clean it with a metal brush and spray it with WD.
After that, we go to the salon and unscrew the top nut. I didn’t remove the acoustic shelf and didn’t regret it at all.
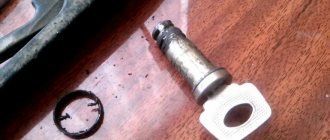
This is the nut we need to unscrew. Even taking a photo is inconvenient, let alone twisting it.
We put on the super key, hold it at 13 and unscrew it at 22.
During this time, the bottom bolt has become loose and we unscrew it safely, the stand falls out. The main thing is that you don’t fall on your feet.
- We change the spring to a new strut with new rubber bands and get the result
We assemble in reverse order. When assembling, it is important to ensure that the ends of the spring fall into the grooves of the rubber band and the stand. It is advisable to coat the threads of the lower bolt with lithol for the future. We change the second rack in the same way.
Covered the bare metal in the trunk. Although the color is a little different, I like it much better.
- Then I finally installed a relay for opening the trunk, I think it’s better this way. Well, closer to 12 at night I remembered about the sticker
Well, then I remembered that it was time to go to bed, and my work was over. In general, this is how I spent my Friday evening. Well, today the vegetable garden is on the agenda. Good luck to everyone! Then let me take my leave, always yours Andrey S.
Analogs
Monroe shock absorber strut
In addition to original parts, there are also a number of analogues that are certified and recommended for use for the 2113-2115 family of cars.
Manufacturer's name Catalog number Price in rubles
| Optimal | A-2873H | 1200 |
| Fenox | A22378C3 | 1300 |
| Weber | SA 2108RG | 1400 |
| Starmann | AS-11350H | 1500 |
| SCT | Z 2873 | 1600 |
| Denckermann | DSF085O | 1600 |
| Patron | PSA341824 | 1700 |
| Profit | 2002-0312 | 1800 |
| Hola | S422 | 2000 |
| Kroner | K350208 | 2000 |
| Pilenga | SH-P 2709 - G | 2100 |
| Al-ko. | 2.873 | 2200 |
| Delphi | D22510165 | 2700 |
| Master-sport | 112295-SET/2/-MS | 2700 |
| Ashika | MA-00274 | 2800 |
| Monroe | 26529 | 2900 |
| Japan Parts | MM-00274 | 2900 |
| Finwhale | 120212 | 3000 |
| Kayaba | 441824 | 3300 |
| SACHS | 112 295 | 5000 |
Shock absorber strut manufactured by Kayaba
Removing shock absorber struts
Be sure to treat all threaded connections before replacing the rear pillar of the VAZ-2115. The repair instructions are as follows:
- Remove the plugs located in the luggage compartment. These niches contain nuts that secure the shock absorber rod.
- It is advisable to use a special wrench to unscrew the nut on the shock absorber rod. But if there is none, then you can clamp the rod from below using pliers, and unscrew the nut from above with a tubular wrench.
- Then you need to unscrew the bottom bolt, which secures the rear strut to the beam. Be sure to hold it with a second wrench so that the bolt does not turn.
- After this, you can pull out the rack assembly.
What tools are needed for repair?
When working, you will need the following set of tools and materials:
- Spring tightening device.
- Pliers.
- Heads for “13”, “17”, “19”, as well as ring wrenches with the same dimensions.
- Hammer.
- Ratchet driver.
- A device for unscrewing the nut from the shock absorber rod.
Penetrating lubricant WD-40 is a must; you can’t do without it, since the spring mounts are located in places where there is constantly high humidity. In addition, dirt and dust penetrate there, so the threads become dirty and the nuts are difficult to unscrew. Therefore, clean all elements in advance and treat them with penetrating lubricant.
How to replace rear struts
Owners of front-wheel drive cars are often in no hurry to begin repairing the rear suspension and do not pay due attention to it. This careless attitude is fraught with big problems.
For example, untimely replacement of rear struts can lead to an emergency. When driving at high speed on an uneven highway, say, a car like a Lada Samara with broken rear struts will strongly throw the rear end a little to the left, a little to the right, so, God forbid, don’t fly off the road!
Therefore, we will begin our article by examining the operation of replacing the rear pillars of the related VAZ 2109, and then we will touch on both the “ten” and Samara. However, first a few words about the reasons for the failure of our units.
- The main reason, of course, is careless driving on bumps, “police” bumps, and on all roads in general.
- Natural wear and tear, of course.
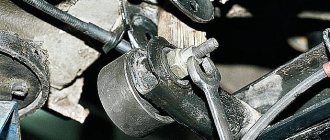
- Perhaps the fastening bolt on the lower silent block was not tightened well - if there is a break point near it.
Diagnosing faults is not difficult, here are a few signs:
- There are oil leaks on the shock absorber; when you press on the trunk with your hand, the rear sways;
- spring with cracks;
- The silent block is destroyed.
Now let's get down to business.
Possible malfunctions of the rear pillar and their causes
Noise and knocking in the car suspension. One of the possible breakdowns, indicated by noise in the suspension, could be:
- wear of the rubber bushings of the rear struts (rubber bands);
- breakage or settling of the strut spring;
- weakening or wear of the shock absorber eye bushings.
The car begins to drive sideways on the road - at speed the car deviates from the “course”, as a result, the driver needs to constantly direct the car, keeping the steering wheel at the ready. Possible reasons for this phenomenon:
- “breakdown” of the suspension due to the destruction of the compression stroke buffer;
- rear suspension overload;
- settlement or breakage of one of the suspension springs;
- displacement of the rear axle due to wear of the bushings of the suspension arms or deformation of the arms themselves.
Frequent breakdowns of the rear suspension . The causes are:
- failure of shock absorbers;
- upset or spring breakage.
How to remove rear shock absorbers on VAZ 2114, 2115, 2109, 2108.
Begin dismantling the rear shock absorber by removing the plastic plugs located in the trunk.
Having removed the plastic, we will see the nuts screwed onto the shock absorber rod. We unscrew them with a special key. If it is not there, then we use a 17 socket wrench and a 6 wrench or an adjustable wrench.
Having unscrewed the top nut, remove the washer and cushion that stood between the nut and the body.
Before unscrewing the lower shock absorber mounting bolt, lift the wheel on a jack. The racks can be removed very easily if the bolts securing the rack to the beam can be unscrewed without any problems.
What to do if the shock absorber bolt is soured.
Removing the struts can be complicated by souring of the bolts with silent blocks. If you encounter such a problem, then you will not be able to remove the shock absorber without a grinder.
Just carefully file off the head of the bolt and knock it out with a hammer.