Soundproofing Vesta with your own hands is a long process, but its quality can be higher. The factory sound insulation of the Lada Vesta differs from that installed on previous VAZ models - in previous models, drivers did everything with their own hands to get rid of all kinds of crickets and noise. During a quiet drive around the city, noise insulation suppresses extraneous sounds, creating comfort for the Vesta driver. And only when driving outside the city, where the surface coverage is full of surprises and driving speed increases, it becomes obvious that in this part of the Lada Vesta there is still work to be done. The need for sound insulation is recognized by many car owners who often travel in their cars. You can do this work yourself if you know the basic rules - read the article and find out how to make noise in the hood, floor, doors, arches, trunk and panel!
Sound insulation assessment of Vesta
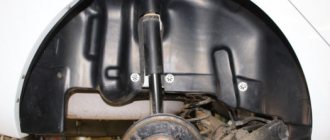
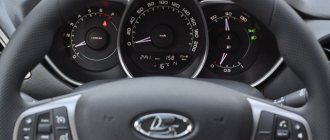
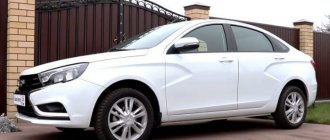
The running engine of the Lada Vesta creates quite a few loud sounds that disturb the driver. Standard noise insulation is not enough to completely cope with them. And yet, experts, having conducted a series of tests, comparing Vesta with other similar sedans, gave an average rating, noting that the acoustic and vibration comfort of Vesta is even higher than that of Volkswagen Polo and Renault Logan. Owners notice that the soundproofing and soundproofing qualities of the car have shortcomings. The reasons for the problems are associated with two features of the car: the absence of rear fender liners, poor door and glass seals. Sound insulation improvements are made taking these factors into account.
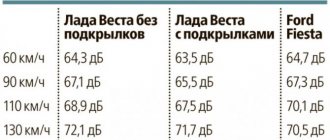
Objective measurements of the sound insulation properties of the Lada Vesta showed:
— At a speed of 60 km/h in a car not equipped with rear fender liners, the noise level in the cabin is 64.3 dB versus 63.5 dB for a car with wheel liners.
— At a speed of 90 km/h the indicators increase to 67.1 dB, 65.5 dB.
— At a speed of 110 km/h – 68.9 dB versus 67.5 dB.
Based on the results, we note that installing rear fender liners improves the quality of noise and vibration comfort for passengers/driver.
In addition to the fender liners, owners also modify the roof, trunk, floor, doors, hood, and front panel. The result is a quiet car in which you can travel long distances.
How to plan your work
It will take several working days to complete soundproofing work on the Lada Vesta. The volume is large: you need to disassemble the interior, remove the seats, remove the factory carpet. In addition, the door and ceiling trims are removed. If you completely glue the engine shield, you will need to dismantle the instrument panel and console.
In the engine compartment, the hood protection is removed, and in the luggage compartment, the internal trim must be removed.
For convenience, the work can be divided into four stages. On the first day, carry out all disassembly work. In the second, glue the bottom, arches, and trunk floor. In the third - doors, roof, hood. Spend the fourth day assembling the car.
General procedure
There is a single procedure for improving insulation with your own hands. The standard algorithm includes a number of steps:
First you need to remove the factory trim - gaining access to the metal. Next, the metal is thoroughly degreased. Soundproofing materials are cut to size. Vibration absorber/sound absorber are installed alternately. Then the anti-creak is installed. The trim is assembled in the car. At some stages, vibration-proofing materials are heated with a construction hairdryer and rolled with a roller so that there are no irregularities or bubbles left.
Disassembling the interior
In order to make soundproofing of the Lada Vesta with your own hands, first disassemble the interior:
- The first thing you need to do is remove the plastic trim on the windshield pillars. To do this, remove the door sealing rubber, then pull the trim with a little force until the three latches snap off.
- The next step is to remove the plastic thresholds. If this is not done, it will be impossible to remove the carpet covering the bottom, as well as remove the plastic lining of the door pillars. First, the door seals on all openings are removed. Then the screws from the plastic thresholds are unscrewed around the perimeter. At the same time, the plastic lining of the rear wheel arch is removed.
- Then there are the plastic door pillar trims. This is necessary for subsequent dismantling of the ceiling cladding. First the seat belt is removed. To do this, unscrew two bolts: one that holds the belt carriage from below, the second that secures the belt eyelet from above. After this, the top trim of the door pillar is dismantled.
- Removing the ceiling trim. It is attached using six clips, sun visors, three passenger handles, and a lampshade. It is removed as follows. First, the six bolts securing the handles are unscrewed. Then the eight screws securing the visors are unscrewed. After this, using a special spatula, the clips are removed: three in the center of the ceiling and three near the rear window. The trim is then removed through the front passenger door.
- Removing the front seats. They are secured with four bolts. First you need to move the seats back as far as possible. Then remove the front bolts securing the slide to the floor. After that, move the seats forward and unscrew the rear ones. After this, they can be removed from the interior.
- Removing the rear sofa. The lower seat is attached using two hinges. You just need to lift the sofa by the bottom so that the hinges come out of the lock. The rear backrest is secured at the bottom with four bolts, and at the top with clamps on the sides.
Roof sound insulation
To soundproof this part of the car, it is necessary to carry out work on the roof metal. First you will need to unscrew all the ceiling handles, remove the lampshades and stands. This will allow you to easily remove the soft covering and gain access to the metal part of the roof. Next, you will need to lay a vibration and noise absorber on the surface. It is better to use sufficiently dense materials that can cope with the sound wave created under the skin. After installing the insulation, you can install the sheathing/parts in reverse order.
How to remove the door trim of a Lada-Vesta
The work takes place in several stages:
- Remove the plastic triangle covering the side mirror mounts. To do this, you need to pry it off with a plastic spatula.
- Disconnect the electrical mirror control connector.
- Remove the lighting shade at the bottom of the casing.
- Unscrew the three screws at the bottom. A T 20 sprocket is used.
- At the end of the casing there is a plug under which the screw is hidden. You need to unscrew it.
- Unscrew the screw located inside the handle next to the power window control unit.
- Remove the power window control unit and disconnect the electrical connector.
- There is another screw under the control unit. You need to unscrew it.
- Use a plastic spatula to unclip the fastening clips along the perimeter of the casing.
Soundproofing arches
To soundproof the arches on the Lada Vesta, you will need to remove all the wheels and lockers. This part of the car gets seriously dirty, so before degreasing it is necessary to thoroughly clean the arch surface. Further work occurs according to the standard algorithm.
It is better to choose a vibration absorber based on bitumen. The process of gluing the outside of wheel arches is labor-intensive. To make the task somewhat easier, you can cut the materials into small pieces, placing them on the surface one after another. The joints formed during the process are coated with rubber-bitumen mastic. An additional layer of noise insulation is then glued to the locker.
We insulate the doors
Soundproofing of Lada Vesta doors is carried out comprehensively. To make it easier to apply vibroplast to the inner surface, the speakers and window lifts are additionally removed. Sheets of sound insulation must be marked in advance and cut according to the pattern. After gluing, they need to be rolled with a roller or pressed firmly against the surface of the door.
The outer frame is also pasted over, but a sound absorber is used here. For example, NoiseBlock or “Biplast”. The material is taken with a thickness of 0.8 cm - it can be glued not to the door frame, but to the plastic door trim on the inside.
Soundproofing the floor of Lada Vesta
The work begins with removing all seats, carpets, and upholstery from the interior. As soon as the metal layer becomes accessible, further actions are carried out. To soundproof the floor, use 3 layers of materials:
High quality vibration absorber. It is recommended to purchase premium material for the best insulation. Sound absorber with a thickness of at least 8 mm. NoiseBlock soundproofer. This design will protect the car from external noise over a wide range. As a result, the interior becomes significantly quieter.
Soundproofing the hood of Lada Vesta
There are several features associated with hood sound insulation. There is an engine located here, which makes a lot of noise and also requires special thermal insulation qualities. Light vibration-proofing materials show the greatest effect during work.
The work itself is carried out only on metal surfaces under the hood. They are thoroughly cleaned of oil and dirt, and then, following the standard algorithm, sound insulation is installed. The work requires skills and patience, so it is ordered from craftsmen to complete it.
Soundproofing the underbody and trunk
Sound insulation of the Lada Vesta trunk and bottom can be done in several ways. The first is when an anti-gravel coating is applied to the outside of the bottom in several layers, which performs the function of noise insulation and anti-corrosion protection - these are polymer substances that are applied with a spray gun. Once cured, they form a thick, porous film and add weight to the car, increasing its stability.
The second option is to apply a thick layer of bitumen mastic from the inside of the body. Bitumen perfectly dampens sound vibrations, increasing the sound insulation of the Lada Vesta. In addition, you can use vibroplast of large thickness - from 5 mm and above.
When gluing the floor, you need to take into account its shape, especially the places where water can accumulate, so the vibroplast needs to be pressed very carefully, without leaving any gaps.
You can use bitumen-based roofing materials. When heated with a hair dryer, they will perfectly take the shape of the bottom without leaving any gaps.
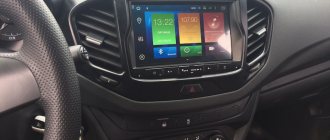
Sound insulation panel
The front panel is insulated to rid the car interior of squeaks and rattles coming from under it. The work is carried out differently, depending on which part the extraneous sounds are heard from. During modification, an anti-creak and vibration absorber are used.
To disassemble the front panel, you need to unscrew the screws and carefully pull it out of the latches located on the side. You need to remove it carefully, not forgetting to disconnect the cable. Next, the panel can be glued with Madeleine or another anti-creaking agent.
Removing the console
All that remains in the cabin is the carpet and the insulation underneath. They are held only by the center console, which consists of several parts. To remove the plastic and the closing handbrake, you need to unscrew the two bolts at the edges and remove the plastic plug near the handbrake lever. The back of the console will become free and can be removed.
The front part is more difficult. In front, along the edges of the tunnel, there are two plastic plugs in the area of the driver’s and passenger’s feet. Under these plugs the fasteners for the tunnel linings are hidden, so first the plugs are removed, then the screws that secure the lining are unscrewed. In addition to these fasteners, there are several more screws in the area of the gearshift lever, but to get to them, you need to remove the plastic lining of the console near the lever and simultaneously disconnect the electrical wiring connectors. The last two screws hold the console near the engine shield, unscrew them and remove the console completely.
Now you can remove the carpet, which consists of several parts.
Average price for noise protection
The cost consists of the price of materials/work of the craftsman. When you contact a car repair shop, where they will completely insulate the noise of the car, you will spend on average up to 40 thousand rubles. Independent work will require almost half the investment. True, the work will take about five days or more. Some stores sell ready-made sets of materials and tools for work, the purchase of which will completely reduce expenses to 10 thousand rubles. True, in this case it will not be possible to choose better manufacturers, but this option may be suitable for unassuming car enthusiasts.
Support bearing knock
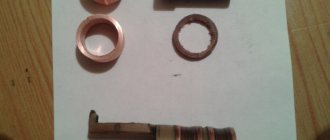
Often, car enthusiasts perceive the shock of the shock absorber rod as the knock of the wheel bearing. This can be explained by the design of the rack: two cylinders and a metal rod.
During systematic use, the bypass valves wear out and the strut does not dampen vibrations. With a sharp push, a blow occurs, which is perceived as a knock of the support bearing.
To guarantee that the latter is faulty, it is necessary to conduct a comprehensive diagnosis. It’s not difficult to do this yourself; in the transport position of the car, it’s enough to bleed the strut with a few presses on the car’s fender. After sharp pressure, the car must stabilize on its own, otherwise the shock absorber strut is faulty.
If there are no complaints about the shock absorber, then you are guaranteed to replace the support joint. The process is quite complex and requires minimal knowledge in servicing equipment. Unprofessional intervention does not guarantee full functionality of the mechanisms.
In order to carry out comprehensive diagnostics and replace worn-out equipment, contact a certified service station for help.