Lada Priora: How to remove the glove compartment
How to remove the glove compartment on a PRIOR
Removing and installing the glove compartment of the Lada Priora (LADA PRIORA)
Repair (glove compartment) of the glove box – LADA GRANTA
Priora, review of improvements to the armrest and glove compartment
Eliminating rattling glove compartment of Lada Priora (LADA PRIORA)
LADA PRIORA DIARY 9 ENTRY (eliminating glove box rattling)
Knock in the right corner of the Priora panel (VAZ-217030)
Removing the glove compartment of the Lada Vesta. glove compartment trim
How to remove the center console on a Priora
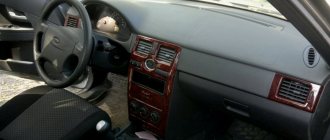
Despite the fact that the interior of the modern Priora is quite comfortable, drivers are often irritated by various little things. These include rattling glove box, poor door lighting, etc. In addition, you want to give the car individuality by showing your skills. Therefore, drivers often tune the interior of the Priora.
Refinement with Alcantara
Alcantara is a non-woven ultramicrofiber. It is made from super-thin polyester fiber, which is coated with polyurethane. With its help you can completely change the appearance of the interior of a simple Lada or Priora hatchback. Tuning with this material is quite simple, and all modifications can be done with your own hands. Alcantara resembles suede, and is often called faux suede. The material is convenient for tuning the interior of the Lada Priora, as it is self-adhesive.
The main thing is to take the correct measurements and draw on the back of the fabric the elements that will be pasted over. Difficulties may arise due to the fact that some elements are not straight, but have corners or roundings. It is convenient to measure such elements, for example, the glove compartment lid, with a fabric meter.
If you need to cut out small parts, you can use a stationery or construction knife. Make sure it is sharp and break off the tip in time. If you try to make a cut with a dull blade, burrs will remain, and the fabric itself will bend and tear. The knife must be perfectly sharp.
Tuning the interior of a Priora with your own hands using self-adhesive Alcantara can completely change the interior. To enhance the effect, you can make a velvet cover for the speed lever and cover the steering wheel with a material that suits the style.
This is the easiest way to tune the Priora's interior.
How to remove the glove compartment on a Lada Priora yourself
The Priora model car is an inexpensive, popular option for economy class passenger transport. Its interior is made of thin plastic, which is not covered with fabric. The glove compartment is a place to store documents, small digital equipment and other personal items. Consequently, the plastic may become dirty, break, or make annoying sounds. In such situations, the glove box is removed and unpleasant moments are eliminated.
Tools for removing the glove box
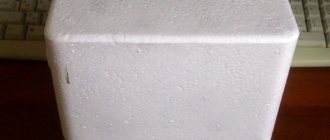
If the reason for removing the part was irritating sounds, and the car owner decided to strengthen the trunk, then in this case he may need not only tools, but also materials. For example, superglue and pieces of foam rubber (to eliminate loose metal axles).
How to drain gasoline from a Priora
How to quickly remove the glove box on a Priora model car
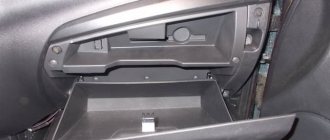
In order not to damage the car interior, you need to know how to remove the glove compartment on a Priora correctly. The design of this part of a passenger car interior is more than simple. The procedure for removing the glove box will take several minutes. Sequencing:
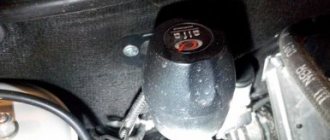
- Open the box lid by pressing the special button and lower it down until it stops.
- There are restraints on the left and right sides of the trunk lid. After opening the lid, you need to release the right stopper with light finger pressure.
- Then you need to do the same procedure with the second, left, limiter. Only after it is released it is necessary to move the part to the left.
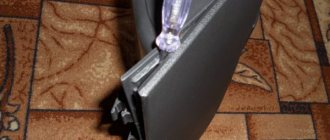
- Next, the glove compartment lid can be easily removed. If after all the manipulations it does not want to be released, you just need to gently pull it down.
After all the planned actions have been completed, you need to attach the cover to the front panel in reverse order.
Work on the glove compartment and armrests
Work on the glove compartment can go in several directions:
- You can cover the glove compartment with self-adhesive film or other material.
- You can use electrical tape to remove the rattling of the glove compartment, which sooner or later appears in any car after prolonged use.
- Improving the glove compartment lighting is also a common option for tuning the Priora's interior.
Armrests
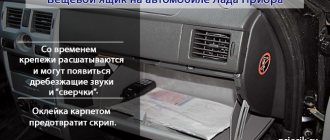
Armrests are usually covered with leather or leatherette. The interior space can be covered with carpet. The material, despite the fact that in terms of softness is very good, is inexpensive, its price per linear meter is about 150–200 rubles. Thanks to this, those little things that are stored in the armrest will no longer rattle when the car moves, as was the case with bare plastic.
Refinement of doors
To add brightness and uniqueness to the Lada Priora, some fans cover the doors, and specifically the handles, with Diamond Chip vinyl film. This material is durable and shiny, which is especially noticeable in the sun.
To cover interior elements with diamond chips, you need to outline and cut out the required piece of material. Glue it using Moment glue. Carefully smooth it out with your fingers, working through each protrusion.
As a result, the appearance of the tuned interior will change under the influence of sunlight. On a cloudy day, diamond chips look like an ordinary matte surface, but on sunny days they will shimmer with light and light up with a million lights.
Ceiling reupholstery
The ceiling is one of the weak points in a Priora car. It is easy to damage, scratch, burn and smudge. As a result, when tuning the interior of a Priora hatchback with your own hands, you must redo the ceiling.
The simplest way is to cover it with artificial suede - a self-adhesive velvet non-woven film. Tuning includes several stages:
- We disassemble the interior, remove all rubber bands, seals and interior elements. To remove the ceiling, it is necessary to dismantle all racks, clips, passenger handles, visors, and other fasteners. It is necessary to disconnect the power supply to the backlights.
- We pull out the ceiling that is sagging. We need to be careful, so we lower all the chairs.
- We paste the plastic ceiling using self-adhesive tape.
- We install the ceiling in place.
Thus, our efforts in tuning the car will not be in vain. We will update the interior and give the car its own character.
Quite often, car enthusiasts are interested in how to remove the glove compartment on Kalina and Priora. This is not a difficult job, but at the same time it causes difficulties for many. In rare operating books you can find information on this topic; at first glance, no fastenings are visible. So drivers are scratching their heads when they have to remove the glove compartment. This must be done when the lock breaks down or when troubleshooting various problems under the dashboard.
Also, many people are annoyed by the high noise of this interior element. The fact is that it is made of fairly hard plastic. Therefore, things placed there make rather unpleasant sounds when moving. In this regard, many motorists prefer to soundproof the glove box.
How to remove the glove compartment cover of a Priora
- Lada Priora: How to remove the glove compartment
- How to remove the glove compartment on a PRIOR
- Removing and installing the glove compartment of the Lada Priora (LADA PRIORA)
- Repair (glove compartment) of the glove box - LADA GRANTA
- Priora, review of improvements to the armrest and glove compartment
- Eliminating rattling glove compartment of Lada Priora (LADA PRIORA)
- LADA PRIORA DIARY 9 ENTRY (eliminating glove box rattling)
- Knock in the right corner of the Priora panel (VAZ-217030)
- Removing the glove compartment of the Lada Vesta. glove compartment trim
- How to remove the center console on a Priora
Malfunctions
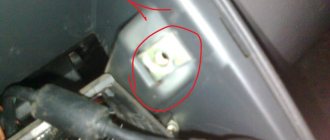
Most often, problems arise with the latch lock. In some cases, the tongue simply does not fit into the groove. Official dealers recommend replacing the entire torpedo. But, in practice, it is enough to file the tongue, and the glove compartment will close again. In other cases, the problem turns out to be in the lock itself. Removing it is not as easy as it seems.
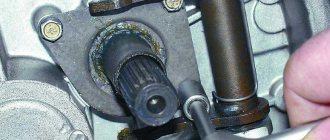
First you need to get to the mount. To do this, bend the handle on one side of the removed box. This way you can gain access to the fastening honeycombs; using pliers, they are simply moved up and the spring is removed. Next, repeat the action on the reverse side. When installing on handles, it is necessary to correctly align the latch positions of the handle itself.
VAZ 2112 how to remove the glove compartment
How to properly remove a torpedo on a VAZ-2110 without damaging it: step-by-step instructions
Each driver solves this problem in his own way, some purchase a new factory dashboard, others install a panel from foreign car manufacturers. A beautiful trim from a third-party manufacturer allows you to decorate the interior to the level of a foreign car. Whatever option is chosen, you initially need to know how to remove the dashboard on a VAZ-2110 car in order to install another one.
The material from which the pad is made is much softer than the factory panel and is not surprising at the presence of a grinding noise while the machine is moving.
In most cases, motorists dismantle the standard panel precisely because of grinding and squeaking. There are several options for the updated panel for the VAZ-2110, which differ in their design. The panel is available for sale as a set:
- New version of the panel, significantly different from the factory design.
- Brackets, buttons, instrument panels and air vent inserts.
- Set of wires and block for switch.
- Buttons for low beam, fog lights, dimensions and heating.
- Special plugs that are installed in places where there are no buttons.
Removing the dashboard takes a lot of time, since there are a huge number of wires under it, through which electricity is distributed throughout the cabin. The fastenings on the dashboard of the VAZ-2110 car are fragile, so every action during dismantling must be careful.
If the fastenings are damaged, it will be impossible to firmly install the panel in its original place, and squeaks and noise during movement will increase significantly.
In most cases, to improve the design there is no need to completely remove the panel; it is enough to dismantle only the upper part, but there are non-standard situations, so the article offers a description of a complete analysis.
Tools
In order to completely remove the housing, you will need:
- a set of keys and screwdrivers;
- marker;
- adhesive based labels.
The main work will involve a 10 mm wrench and a Phillips screwdriver. You will also need a water-based marker, since it washes off easily, it is necessary so as not to mix up the removed parts. This also applies to adhesive labels. There are too many parts and wires, so you shouldn't rely on memory. Stickers and bullet points will help you remember the starting place of all the components.
Preparatory work
Some are satisfied with dismantling without removing the remaining components of the interior, but this takes extra time and complicates the process as a whole. In order not to add more work to yourself, it is recommended to clear the interior for free movement. Strictly observing the sequence, you need to remove:
- armchairs;
- glove box;
- steering wheel;
- disassemble the floor tunnel. To do this, you need to unscrew the screws and move the part back a little.
We dismantle the lower part in the same way. The next step is to remove the glove compartment, after which you should remove the relay and mounting block. As you disassemble, you need to mark all the wires. Particular attention should be paid to the speedometer.
Removing the torpedo step by step
- We find two screws on the central panel on the right and unscrew them. We perform the same action on the other side on the left. After this, carefully remove the shield from both sides.
- Using a flat-head screwdriver, pry off the plug, which is located on the central tunnel. We unscrew the tunnel fastenings located on the sides and behind it. Unscrew the screws holding the central panel.
- This part of the interior can already be removed completely. We see that there is access to the cigarette lighter. We mark the wiring and disconnect it, then remove the cover from the gearbox handle.
- The next step is the air duct. We take the key for 10 and dismantle it. There is access to the central panel, which is held on a mount in the front and rear. Unscrew the screws and remove the panel. After dismantling the central panel, you can move on to the main body of the torpedo.
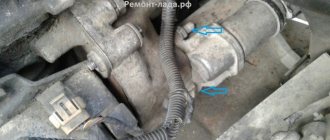
- The glove compartment was removed in advance, as it interfered with the overall process. All that remains is to disconnect the backlight and unscrew the fastener on which it was held.
- Carefully pry up the air duct with a screwdriver and then remove it. There is still a nut on the dashboard that needs to be unscrewed. Now the panel can be easily removed by lifting it up and slightly pulling it towards you. Now it will easily slide off the stilettos. We take out the plugs, not forgetting to mark them with a marker.
The torpedo has been dismantled and can easily be replaced by installing a new panel from a VAZ-2110 or tuned using a more prestigious panel. Assembly must be done in reverse order.
Removal and replacement of VAZ-2110, VAZ-2111 and VAZ-2112 torpedoes
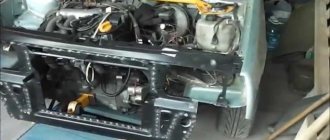
Dear friends, in this material we will tell you in detail and with photographs how to remove the Torpedoun VAZ 2110. VAZ-2111 and VAZ-2112.
This is relevant if you are planning to make additional vibration and sound insulation of your car, this way you will get access to the partition of the engine compartment, as well as if you are planning to replace the stock panel with something more aesthetically pleasing, for example, with a Europanel or a panel from a Lada Priora.
The process takes about an hour, but there is nothing complicated about it, so let's look at it in detail. First, we remove the steering wheel from its place. We described how this is done in another material.
- Now remove the side shields, having first unscrewed 2 screws on each side.
- Next, pry up the plug on the central tunnel and remove it
Torpedo
The glove compartment is part of the car's dashboard, and accordingly also affects the attractive appearance of the interior. Therefore, it is important to monitor her condition. The main factor reducing the effectiveness of a torpedo is dust. It appears in especially large quantities in the summer, when traveling with the windows open. It is its accumulations that must be dealt with first.
The main means of keeping the panel clean is a regular cotton rag. Use it to wipe the dashboard; it is recommended to do this daily. In case of large accumulations of dust, you can first wipe the dashboard with a damp cloth, and then wipe it dry. Polishes are used to add shine. They process the torpedo according to the instructions. A cheaper option is shoe shine. This sponge costs a penny, but the result is in no way inferior to polish. Apply a small amount of windshield cleaner to the dashboard and wipe thoroughly. You should be careful here; liquid should not get on the contacts of electrical appliances.
Conclusion
. The design of domestic cars is quite simple. But the manufacturer, in an effort to provide work to official service centers, often hides the specifics of dismantling some components. Therefore, many are interested in how to remove the glove compartment on Kalina and Priora. There is almost no official information on this issue. And it needs to be dismantled in a variety of situations. In practice there is nothing complicated here.
How to quickly remove the glove box on a Priora model car
In order not to damage the car interior, you need to know how to remove the glove compartment on a Priora correctly. The design of this part of a passenger car interior is more than simple. The procedure for removing the glove box will take several minutes. Sequencing:
- Open the box lid by pressing the special button and lower it down until it stops.
- There are restraints on the left and right sides of the trunk lid. After opening the lid, you need to release the right stopper with light finger pressure.
- Then you need to do the same procedure with the second, left, limiter. Only after it is released it is necessary to move the part to the left.
- Next, the glove compartment lid can be easily removed. If after all the manipulations it does not want to be released, you just need to gently pull it down.
After all the planned actions have been completed, you need to attach the cover to the front panel in reverse order.