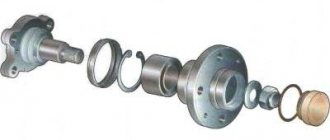
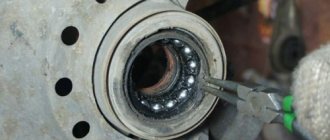
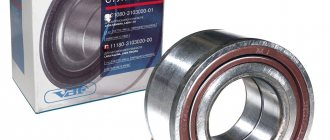
Owners of a VAZ-2110 car are well acquainted with such a problem as whistling in the clutch. The reason for this sound is the release bearing, which often fails during operation. That is why replacing the release bearing on a VAZ-2110 is considered a very pressing issue that is worth finding an answer to.
The release bearing is not the weakest link in the entire clutch system, but for some reason it causes trouble for vehicle owners. Some drivers, ignoring extraneous sounds, have already gotten used to it, so they do not take any action. But you cannot turn a blind eye to this problem for long, because it can lead to serious breakdowns in the car, the elimination of which will require a lot of money. If you let the situation take its course, then replacing the bearing alone will no longer be enough.
Consequences of a malfunction of the release device:
- Damage to the clutch fork.
- Violation of the integrity of the clutch spring petals.
- Deformation of guide bushings.
In order not to spend large sums of money, you need to quickly respond to the appearance of whistles or knocks in the clutch. Appropriate measures must be taken immediately.
Preparatory stage
Before changing the clutch on a VAZ 2110, you need to prepare a place for repairs and tools. For this process, the most suitable solutions are: a car lift or an inspection hole.
If there are no such conditions, due to a hopeless situation, it is possible to replace the clutch with a 2110 in “Spartan conditions”.
It is enough to find a flat surface area in a garage box, a parking space or in the yard.
Clutch diagram for VAZ 2110: 1 - release bearing guide sleeve; 2 — gearbox input shaft; 3 — cable lead; 4 — clutch release fork; 5 — fork axle bushing; 6 — pressure disk assembly (basket); 7 — driven disk; 8 - flywheel; 9 — clutch pedal; 10 — mechanism for automatic adjustment of cable length;
Also, for repairs you will need:
- locksmith set with open-end wrenches and sockets up to 22 mm;
- a jack and several short boards (wooden blocks);
- container for possible draining of transmission oil from the gearbox;
- centering shaft (mandrel).
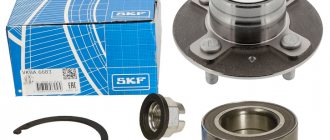
As for the clutch itself, it is sold in sets (3 in one, 2 in one) and parts separately.
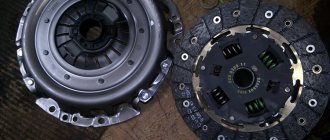
The system includes 3 replaceable elements:
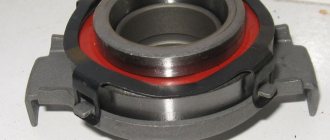
- release bearing;
- clutch disc;
- basket.
It is more practical for a car owner to ask in advance how much new clutch parts will cost to replace a VAZ 2110. This will help prepare the necessary budget. The price of spare parts varies and depends on the manufacturer.
Among manufacturers of quality parts, the leaders are: Sachs, Luk, Valeo and Krafttech. These spare parts are guaranteed to fit the vehicle and have a long service life.
Poor quality parts may not fit at all or may fail in the first days after repair.
After the conditions and tools are prepared, you can begin to work. First, remove the front left wheel and securely fix the car. Please note that there are two repair options: with complete dismantling of the gearbox and without it. In our case, we will talk about how to replace the clutch on a VAZ 2110 without removing the box.
The process is made easier by the fact that you don’t have to drain the transmission oil, disconnect the drive axles, and remove the heavy unit from under the car. The smallest set of operations saves time. However, to be on the safe side, you need to have a container ready where you can drain the oil from the gearbox in an emergency.
- After fixing the car, open the hood, disconnect the battery and remove it completely. For easy understanding, the entire further process of replacing the clutch with your own hands on a VAZ 2110 will be described in the form of step-by-step instructions:
- Unscrew the two ball joint bolts (the wheel has already been removed);
- go to the engine compartment and remove the connector for the mass air flow sensor;
- disconnect the air intake corrugation;
- remove the air filter housing;
- disconnect the clutch cable from the gearbox by unscrewing the two fastening nuts;
- unscrew the starter bolt;
- Unscrew the gearbox bolt, located slightly to the right of the starter;
- we find another upper bolt securing the gearbox to the engine and unscrew it;
- disconnect the speed sensor plug;
- go to the bottom and dismantle the longitudinal rod along with the cup (crab);
- we find the lower starter bolt and 2 gearbox mounting bolts, unscrew them;
- remove the torque mount;
- unscrew the gearbox shift lever;
- place a jack under the engine through a wooden spacer (on the edge of the pallet);
- unscrew the nuts of the rear engine mount;
- lower the engine with a jack (it will fall to one side);
- carefully separate the engine and gearbox;
- We carefully lower the disconnected box down until it hangs on the drive axles.
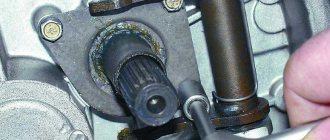
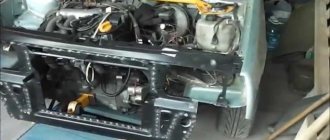
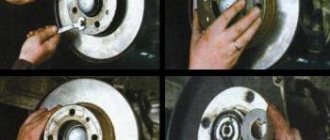
The first stage of replacing the clutch on a VAZ 2110 without removing the box has been completed. As a result of dismantling, there was access to the clutch basket on the engine and the release bearing on the gearbox. Unscrew the bolts securing the basket to the flywheel and remove it. Carefully remove the release bearing from the input shaft.
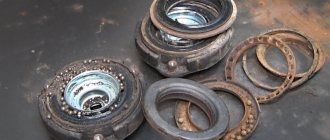
After a careful examination of the removed parts, it becomes clear whether it is worth changing the entire clutch pack or whether you can limit yourself to changing the disc and bearing. It is worth noting that the replacement of the VAZ 2110 clutch basket occurs every 80 - 150 thousand km, depending on the operating mode. The disc and bearing wear out more often.
After purchasing new spare parts, we proceed to the second part of the repair and do the following:
- install the basket with the disk in place and tighten the fastening bolts;
- insert the centering shaft (mandrel) into the central hole of the crankshaft;
- then tighten the bolts tightly and remove the mandrel. It should fit freely into the hole, simulating the gearbox input shaft.
- Next, install the release bearing on the box;
- carefully lift the gearbox and connect it to the engine, slightly rotating the drive axis;
- Once the box is in place, you can fasten it with bolts and install the dismantled parts in the reverse order.
On a note! It is advisable not to leave the box hanging for a long time (more than 2 days). The fact is that the drive seals are under heavy load and they can be partially deformed. The formation of damage will lead to oil dripping from the transmission during further operation.
Setting up the transmission system will help to complete the repair efficiently. To do this, loosen the adjusting nuts on the cable. The clutch pedal will rise. We take a ruler and measure the distance from the front wall to the pedal in the cabin. The working stroke, regulated by the operating instructions, should be 120 mm (±5mm).
Press the pedal several times. Then, tighten the adjusting nut, simultaneously measuring the distance between the pedal and the wall. As soon as the desired value of 12 cm is reached, tighten the nut, holding the lock nut with another wrench. A similar adjustment operation, after replacing the clutch with your own hands, can be performed on a VAZ 2110 with a 16-valve engine.
Conclusion
We have to agree, the repair is complicated - but doable. At the same time, a significantly saved amount of money remains on hand.
In addition, it should be noted that replacing the clutch of a VAZ 2110 with 8 and 16 valve engines is completely identical. The manufacturer installed the same types of transmissions on cars.
Therefore, the instructions: how to replace the clutch on a VAZ 2110 without removing the box will be relevant for all owners of the “tenth” family.
Installing a new element
When you have completed the entire range of dismantling work, you can move on to the final stage - installing a new component.
- The first thing to do is check the condition of the new clutch release bearing. For some reason, many car owners forget to make sure that the bearing that replaced the old one is actually in good working order. This is easy to check. Rotate the bearing, pull it in different directions. If there is no jamming during rotation, and there is also no play, then you bought a really serviceable, good release bearing.
- Insert the new part into the coupling. This must be done so that the protruding part of the inner ring is directed towards the coupling.
- After inserting the element, secure it using the holders.
- Before inserting the new release bearing onto the bushing (guide), do not forget to lubricate it with a grease. The layer of lubricant should be thin, do not overdo it.
- Secure the coupling and bearing using a spring lock.
- Place the gearbox and other dismantled elements in their rightful places.
- The entire repair process is completed by adjusting the clutch.
Do not ignore the most useful thing that you can need when repairing your favorite VAZ 2110 - the instruction manual. Literally everything a car owner needs to know is described in detail there. With its help, you can even perform complex repairs, the cost of which at a specialized service station would be prohibitive.
Source
Clutch diagnostics on a VAZ-2110
Clutch diagram.
Nevertheless, every clutch has its time. The resource of the unit greatly depends on the driving style and operating conditions. And besides, from the kit manufacturer. By the way, it is not at all necessary to change the clutch assembly due to a failed driven disk or release bearing; it is expensive.
But replacing any element of the mechanism, as well as the entire clutch, at a service station will cost at least 3-5 thousand rubles, not counting the cost of materials. Therefore, it makes sense to do the repairs yourself. This is not the simplest operation, but it is quite accessible even for a novice driver.
Clutch kit: basket, disc, bearing and mandrel.
Before removing the clutch on a VAZ-2110, you need to find out its condition based on the following signs:
- The clutch is slipping. This means that when the engine speed changes, part of the torque is lost when the clutch of the driven disk slips - the speed increases, but there is no traction. There may be several options - either the friction linings of the driven disk are worn out, or the adjustment of the free play of the clutch pedal is impaired. In the first case, disk replacement is necessary.
- The clutch drives. When the pedal is fully depressed, the clutch does not disengage. That is, part of the torque is still transmitted to the gearbox; the drive and driven disks do not open. In this case, either adjusting the same pedal free play will help, or replacing the release bearing or clutch basket if the adjustment does not produce results.
- The clutch vibrates. We observe vibrations in the gearbox area at certain speeds or constantly. In this case, the clutch needs to be replaced; most likely, the basket has failed.
- The clutch is noisy. Increased noise when pressing the pedal, extraneous sounds when changing gears. Most likely, either the entire clutch assembly, or the basket or release bearing has failed. The kit needs to be replaced.
If one of these symptoms appears and, having made sure that the adjustment does not produce results, we proceed to disassemble the clutch with our own hands, so as not to disturb the specialists, whose time and labor will cost us a lot of money. We ourselves can replace the clutch assembly in an hour, maximum two.
Installation
When installing the clutch basket and disc, it is necessary to use a simulator of the input shaft. This is necessary so that the parts fit straight. Such an alignment can be bought in a store for 100 rubles. It will also work for a penny.
When installing the box, it is important to get the pin that is on it into the engine hole. It is located in the right drive area. When we installed the gearbox, we didn’t take this fact into account and spent a long time trying to turn the gearbox.
When the box is engaged with the engine, tighten the mounting bolts, but not completely. They need to be stretched when the box sits on the pillows to prevent displacement.
There should be no problems in further stages of assembly.
Don't forget to tighten the hub nut, adjust the clutch pedal and rocker.
I hope this material will help someone when replacing a gearbox. There is practically no difference in repairing VAZ 2110 or 2114 cars. They are all fine)). Frankly, I thought it would be more difficult to change the clutch, but the main thing is to get started, and there’s nowhere to go). If possible, try to repair your car yourself. This is both saving money and gaining experience. Good luck to all.
Source
Repairing the VAZ 2110 clutch. Step-by-step instructions from the owner of the “ten”
For three years now I have been the proud owner of a VAZ 10. The car, as they say, is not for everyone, but I am completely satisfied with it, and I am not going to change it. There have been no serious breakdowns yet, but one unpleasant episode did occur.
Once a friend called me and shared his “car” problem - the clutch on a VAZ 2110 was lost. Naturally, I sympathized with my friend and “moved on,” but not even four days passed before I had to remember this call.
The clutch is an important and integral element of the transmission system. Therefore, if you have suspicions about the inoperability of this mechanism, then it is better to replace it immediately. Today you will learn how to replace a VAZ 2110 clutch, how much it costs at a service station and what needs to be taken into account when changing this mechanism.
If during operation at least one element of the mechanism has failed, be it the clutch basket, release bearing or driven pulley, then it is better not to save money and replace the device completely. This is also worth taking into account when changing from one imported mechanism to another, since the differences can be serious.
VAZ 2110 car
This question is asked by every VAZ 2110 owner when he is faced with the need to choose a mechanism. Below are the results of reviews of devices by experts in the Russian automotive market. It is also worth noting that during the research process, the most popular manufacturers among domestic motorists were considered.
- Krafttek. The kit does not include a bearing, so you will have to buy it additionally, and there is also no quality mark. The basket is equipped with 18 petals and the driven shaft (Y 3200A B0206) has 4 springs. This mechanism is recommended for use in the VAZ 2110.
- German manufacturer Luke (Lamellen und Kupplungsbau). The set is complete, you don't have to buy anything else. The packaging contains the MT14 quality mark. In addition, the driven shaft is marked with markings for proper installation. The element basket also has 18 petals, and the driven shaft is equipped with 6 springs. It is also worth noting that the basket side is marked on the shaft.
- Valeo, manufacturer France. A complete set, you don’t have to buy anything extra. Moreover, this clutch comes with a lubricating fluid for the mechanism, as well as a CD with installation instructions. There are 18 petals in the basket.
- Russian. The kit does not include driven and pressure pulleys, as well as a release bearing. Nevertheless, the product received the AYA70 quality mark. There are 12 petals in the basket, and 6 springs on the driven shaft. The product has been approved for installation in the VAZ 2110.
- Pilenga, country of origin unknown. The kit does not include a pressure pulley and a release bearing, so if you decide to replace the mechanism completely, then these components will need to be purchased. There are 18 petals in the basket. There are 8 springs on the driven shaft. There are no approval marks on the packaging.
Clutch disc at installation location
Actually, any of the clutches listed above is suitable for VAZ 2110 cars. For example, the Luke cannot produce maximum torque, so engine power will be reduced when driving. Krafttek is a fairly reliable, time-tested mechanism, although you will have to purchase some additional elements to install it.
Apparently, the best option is Valeo.
It is worth noting that this unit also has many positive reviews on the Internet from other motorists. But keep in mind that if the package for this mechanism does not contain lubricating fluid and a CD with installation instructions, then this is a fake. Having installed such a device, be prepared for the fact that it may fail after 5 thousand kilometers.
Let's consider the cost of each individual mechanism for VAZ 2110 cars.
- Kraftek. Today the price for a set of Kraft devices is 1,800 hryvnia in Ukraine and about 6 thousand rubles in Russia.
- Luke. At the moment, the cost of the original on the Ukrainian automobile market is about 1,550 hryvnia (5 thousand rubles);
- Valeo. The cost is about 1,600 hryvnia in Ukraine and approximately 5-6 thousand in Russia;
- VAZINTERSERVICE. Its cost also averages about 1,500 hryvnia on the Ukrainian car market and about 4,500 rubles on the Russian one;
- Pilenga. It is the cheapest option presented. Its price at the moment is about 700 hryvnia in Ukraine and almost 2 thousand rubles in Russia.
Depending on the region where you live, prices for installing the mechanism may vary. However, on average in Russia, installing a clutch by specialists will cost a car enthusiast at least 1,500 rubles. As a rule, the average price for installation fluctuates around 2 thousand rubles. In Moscow, prices for installing a device can range from 4 to 6 thousand rubles.
Sorry, there are no surveys available at this time.
Accordingly, in Ukraine, specialists at a service station will charge at least 500 hryvnia for installing the mechanism, but the driver should be prepared to pay a little more for a replacement. At Kyiv service stations, technicians can charge up to two thousand hryvnia for installation.
Why pay if you can do all the work on changing a component of the transmission system yourself? Of course, if you do not have experience in this, then it is better to entrust this matter to specialists. But if you follow the instructions, there should be no problems with replacement.
Getting ready for replacement
- new clutch for your car;
- a set of wrenches, you will also need socket wrenches;
- screwdriver;
- crowbar;
- jack;
- bricks.
The request returned an empty result.
So, if you decide to change the clutch device yourself, but do not want to bother with dismantling the gearbox, then we will look at the replacement process without removing the box. Let's get started:
- Unscrew the screws securing the left wheel of your car and place the front part of the VAZ 2110 on a jack. To protect yourself, place bricks under the car body. Also place wheel chocks under the rear wheels.
- Next, you need to completely remove the wheel and unscrew a few mounting screws that hold the ball joint in place.
- After removing the wheels, open the hood and disconnect the battery. To do this, it will be enough to remove the negative terminal from the battery. This is done in order to prevent short circuits during repair work.
- Now you need to remove the air filter element housing. This must be done in order to gain access to the screws with which the gearbox is attached to the internal combustion engine.
- If there is engine protection, then let's start removing it. Unscrew all the screws around the perimeter of the motor protection and remove it.
- Remove the long screw that secures the anti-roll bar.
- Now let's get down to one of the most crucial moments in this work process. If you decide not to dismantle the transmission, you will still need to move the unit to the side. In order for the unit to move freely, it is necessary to remove the left mudguard. After this, unscrew all the ball joint bolts.
- Next, move the left strut behind the wheel drive. Otherwise, you will not be able to move the gearbox.
- After this you will need to disconnect two connectors from the transmission. To the right of the unit there is a plate responsible for fastening the jet thrust. By the way, the other part of the plate is located at the gear shift lever. Visually remember the location of the jet thrust fastener, otherwise you will have to sweat later to adjust the unit selector to the working position.
- With the connectors disconnected and the torque rod removed, the transmission is essentially freed from its main mounts. Now you need to disconnect it directly from the internal combustion engine. Here, use wrenches and remove several bolts (usually no more than three) and one nut.
- Now it is necessary to dismantle the rear cushion, which, in fact, attaches the gearbox to the engine. This should be done so that the engine is not released too much, so it is better to place the internal combustion engine on a jack or on supports.
- The same must be done with the gearbox, having first moved it to the required distance. Here you may need help, since it will not be easy to move the unit and place supports under it alone. In addition, everything must be done carefully to prevent mechanical damage to the unit.
- You now have access to the clutch mechanism. Replace it, and then reassemble all parts in the reverse order. Tighten the transmission-to-engine screws securely. After replacing the clutch, you need to center the disc.
This video shows the process of changing the clutch mechanism in a VAZ 2110 car with your own hands.
Also check out
- Remove the 3rd transmission mounting bolt. Unscrew another nut located near the right CV joint.
- Remove the torque rod mounting bolts. There are 2 of them.
- Loosen the nut located on the box control drive rod clamp and remove the rod from the box.
- Place the support under the engine, unscrew the 2 nuts that secure the rear cushion (the purpose of this is to avoid a possible breakthrough of the hoses).
Replacing the release bearing Lada 2110 (VAZ 2110)
VAZ 2110 car
The VAZ 2114 release bearing is a clutch element that is located in the clutch. The clutch mechanism assembly is designed to transmit axial force to the pressure plate, which disengages the driven flange so that engine torque is not transmitted to the transmission.
Replacing the release bearing of a VAZ 2114 is a repair that is distinguished by the complexity of the process of dismantling the unit, since in order to change the part, the gearbox is first removed. Note that it is also possible to change the bearing without removing the gearbox, but the complexity of the repair and the risk of incorrect replacement increase.
A clutch with a release bearing (VP) is a mechanism directly involved in the operation of the clutch, so a malfunction of this unit is unacceptable. If you hear a hum or noise when the clutch operates, the bearing or sometimes the clutch assembly will need to be replaced.
Detailed instructions are accompanied by 50 photos with several videos. First of all, the article is aimed at helping you correctly and correctly remove the speed unit, check the condition of the gearbox with the clutch, and replace parts if necessary.
Direct diagnosis is to check the functionality and presence of the following signs of failure. Signs of a malfunction of the VAZ 2114 clutch release bearing, if detected, will require its replacement:
- When you press the clutch pedal, you hear a noise, hum or knocking (rolling, internal vibrations occur due to damage to the tracks with rolling elements, deformation of the cage or the clutch itself).
- A whistle when the clutch is engaged makes it clear that the quantity or quality of lubricant is not enough;
- The speed does not change or the pedal moves hard (occurs when the clutch has fallen apart, as well as if the ear of the release bearing is broken).
- Watch a video example of how the release bearing of a VAZ 2114 makes noise and hums, as well as how the check is carried out. You can also hear the noise of the bearing after disassembling the transmission after removing the VP.
It was previously noted that the process of replacing the VP is difficult precisely when removing the gear shift unit, so first study the device to understand the intricacies of dismantling.
List of necessary tools for replacement: - Two jacks and supports; - A set of spanners with a ratchet; - A pry bar; - A minus screwdriver; - A container for draining oil.
Provide sufficient lighting above the hood of the car, put the car in first gear, and release the handbrake. If possible, ask a partner for help. Below is a detailed dismantling technology, according to the diagrams presented above.
- Open the hood, unscrew the air filter mounts, disconnect the wire and remove the assembly (see photo). After this, disconnect the battery terminals, and to be safe, remove the battery.
- Now we get access to the upper gearbox mounting bolts. Unscrew the long bolt at the back, the short one at the front.
- Let's move on to the starter. We unscrew the two upper studs, then remove the terminals. Now we look for the clutch cable that comes out of the gearbox, twist the nut to loosen the tension.
- We go down to the wheels, tighten the bolts, and remove the chassis. We tear off the nuts of the VAZ wheel bearings to remove the drive axle shaft on both sides. Use the pipe to extend the key.
- We remove the anthers (mud flaps) with a 8mm wrench, then unscrew the engine crankcase protection bolts.
- We find the suspension arm extension bracket (3.4 in the diagram), unscrew the rear nut with the lower bolts.
- Now unscrew the anti-roll bar bolt (8) on the right side, then the ball joint bolts on both sides (key 17). Then remove the lever (7) together with the stretcher (4).
- The gearbox is half disconnected, now we unscrew the plug to drain the oil.
- After draining the oil, remove the wheel drives. First, we remove the CV joint “grenades” from the hubs, then we take the splined side of the shaft out of the box using a pry bar.
- On the side of the box we disconnect the reverse terminal. We find three bolts securing the gearbox to the engine and twist them.
- To remove the starter, unscrew the two bolts from the bottom.
- Now we disconnect the gear shift rod (10) and dismantle the rocker. The speed sensor terminal is located nearby; disconnect it (see photo).
- We unscrew the locknut to disconnect the gearbox from the side support (cushion), then use a long wrench to unscrew the two fasteners of the rear cushion (9).
- All that remains is to unscrew the two gearbox bracket bolts (2) and disconnect the unit from the engine.
- We dismantle the assembly, hold the body with one hand, and move it with the other using a mount. After removing the assembly, we proceed to replacing the release bearing.
After removing the gearbox, it is important to inspect the discs, clutch basket, and also evaluate the condition of the gearbox housing from the inside. Remove dirt and excess used oil, make sure that the ear of the release bearing has not broken, then proceed to replacing the clutch. Below is a diagram of the clutch layout.
The principle of operation of the part is as follows: when you press the clutch pedal, the applied force is transmitted to the fork (4) through a cable (3), which moves the release lever along the guide sleeve of the input shaft (1), then the ball bearing housing transmits the force to the pressure plate (basket) (6), After this, the driven disk is disconnected, then the unit is disconnected from the engine to change speed.
- The guide sleeve, which is shown in the photo, fixes and guides the coupling during its operation. To dismantle the old part, find the edges of the clutch spring, lift them with a screwdriver, remove the clutch VP from the VAZ 2114, the replacement of which is required.
- Using CV joint grease, apply it to the bushing splines, and also lubricate the new bearing and seating surfaces.
- We put the new VP on the guide shaft, then fasten the part with a spring. Check the clutch travel by moving the fork. Unscrew the element with your hands and make sure that there are no rolls or problems with ease of rotation.
- At this point, the replacement of the VP clutch is completed; we install the gearbox in place in the reverse order.
The squeezer design is a ball or roller radial bearing with a wide inner ring, closed type, which is pressed onto the overrunning clutch.
There are two types of such products: hydraulic and mechanical, the difference between them lies only in the method of moving the VP (hydraulic or mechanical (cable with traction)). The VAZ 2114 has a mechanical version installed without modifications.
The following provides information and dimensions of the wide bearing 6-520806, which is the main component of the clutch release element.
Serial numbers (articles):—Clutch release assembly—2110-1601180;—Press bearing—2109-1601182. Markings:—according to GOST—6-520806EC23;—according to ISO—520806K1Y.P6R21.31Q6/L20.
What you need to know
The release bearing is not the weakest link in the clutch system, but for some reason it is the one that causes problems and troubles.
Some car owners have gotten used to the whistle and simply ignore it. But this cannot continue for long, since untimely solution to the problem can lead to even more complex and expensive repairs. If the situation gets worse, then a simple replacement will not be enough for you.
The clutch serves to act on the leaf spring of the clutch basket. It is also called diaphragm, so don't be confused if you hear this designation. Due to this impact, the driven disk is disconnected from the flywheel and the pressure plate of the basket. This disengages the clutch.
If the squeezer is faulty, this can lead to various consequences:
- The clutch fork will be damaged;
- The integrity of the clutch spring petals will be compromised;
- The guide bushings are deformed.
What tools and materials are needed for replacement?
- a set of keys;
- screwdrivers of various types;
- container for removing transmission fluid;
- rags for wiping contaminated areas of the unit.
- new portion of lubricant.
Before carrying out work, it is necessary to lay out the tool in a convenient location for the worker.
Which release bearing is better for VAZ-2110
When choosing a spare part, you should take into account the vehicle data, since not all designs are suitable for universal bearing models. The domestic manufacturer VAZ recommends installing only original spare parts. You can purchase many high-quality analogues on the auto parts market.
If you want to save money and install a release bearing on a VAZ 2110, experts recommend purchasing products from Sachs. You can also pay attention to the German manufacturers LUK, Dello, TRW. Italian brands LPR and Pilenga have proven themselves well.
More affordable options include Turkish (Krafttech, Mapa) and Polish (Profit) analogues. Experts do not recommend purchasing cheap Chinese products, as they are made of low quality metal, which affects their service life.
Notes, recommendations and repair tips
1. Average service life before product replacement is 800,000 off-on cycles.2. Recommendations for extending the life of the release bearing: - Avoid holding the pedal for a long time; - It is advisable to release the pedal slowly and press quickly, without stopping between the extreme positions; - Prevent moisture and dirt from entering the transmission; - Thoroughly lubricate the part during the replacement process (see video below ).3. After replacement, when performing reassembly, treat the threads of bolt connections with graphite lubricant.4. Buy auto parts from previously proven retail outlets, check dealer documents and product quality certificates.5. The video shows an example of performing repairs without an inspection hole, as well as without removing the gearbox.
- What you need to know
- Is noise a sign that replacement is needed?
- I'll eat
- Installing a new element
Owners of the domestic VAZ 2110 car often encounter a whistling noise in the clutch , which is caused by the release bearing of the unit. Moreover, this is a problem not only of the “tens”, but also of other cars from different manufacturers, the clutch design of which involves the use of this element. Therefore, replacing the release valve on a VAZ 2110 is not at all an exceptional problem. But it needs to be solved.
