A car of any brand, including the VAZ-2107, needs regular inspection of its technical condition, since a faithful four-wheeled friend must first of all be considered as equipment that may sooner or later fail. Car owners can fix many problems on their own if they strictly follow the instructions provided by professionals, and if any questions arise, watch a training video tutorial on an online resource.
What consequences can be observed if the cross is not replaced in a timely manner?
If a failed automotive component is not replaced immediately, the consequences will lead to more serious damage:
- vibration from the cardan will constantly increase due to the weakened connection of the element with the cross;
- during a long trip, failure of the gearbox is possible, since the vibration will be transmitted to the secondary shaft of the gearbox;
- the shaft located in the gearbox may break off.
Such breakdowns can only be prevented by timely replacement of the driveshaft crosspiece.
Purpose of VAZ 2107 cardan crosspieces
The need to use cardan crosses (CC) in the design of a car is due to changes in the position of the shafts relative to each other during movement. If the axes of these shafts were constantly on the same straight line, then crosspieces would not be needed. However, when moving, the distance between the axes changes in both vertical and horizontal planes.
The cardan joint is involved in the transmission of torque from the gearbox to the drive axles. Thanks to the KK, a flexible connection of the VAZ 2107 engine with the driving rear axle is ensured. The cardan design also includes hinges, intermediate supports and connecting devices. But it is the crosspieces that are responsible for transmitting torque at constantly changing angles between the shafts during movement.
The VAZ 2107 is a rear-wheel drive car, and its design provides a special role for the cardan. It transfers all engine work only to the rear wheels. Therefore, on the “seven” the cardan is located under the bottom and the floor in the cabin is raised in the middle.
Preliminary diagnostics of an automobile unit
Experts recommend that before replacing the cardan, you carry out independent diagnostics of all kinds of faults, conducting it in the following sequence:
- it is more convenient to check for faults if the car is placed on a special pit for vehicle inspection or on an overpass;
- after installing the machine, be sure to put a stop under both front wheels;
- The handbrake must also be applied.
Next, you should make sure that the retaining rings in the so-called glasses have not fallen out of their places. If such an element is not detected, it must be installed, since without it the “glass” may simply fall out of its seat. After this, you can begin to check for faults in the cross, starting with checking for play. To check, you will need a regular screwdriver, which is installed between the crosspiece and the driveshaft in order to be able to rotate the driveshaft both clockwise and counterclockwise.
If even a slight play is noticed during this event, the automotive unit will need to be replaced.
Where are the crosspieces located on the driveshaft?
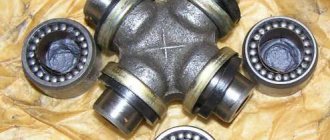
We will not only show where they are located, but also provide a photo of what they look like. You most likely have already looked a little lower and noticed this photo, which shows the location of the crosses with red arrows, and the small photo shows one of the crosses, next to it There are four retaining rings, the same ones we talked about just above.
Tools for work
Before starting work, you should prepare the most necessary tools and spare parts for the car:
- new crosspiece for VAZ-2107;
- the outboard bearing, if during the inspection it is discovered that it has failed, and the retaining rings;
- new connecting fasteners in the form of bolts and nuts for more reliable fixation of the new automotive unit;
- a regular hammer and a Phillips screwdriver;
- keys in sizes 12, 13 and 27;
- a device that will help remove retaining rings (they are called “pliers”);
- copper or aluminum adapter.
Replacing the outboard bearing
After the cross has been removed, the outboard bearing needs to be replaced. To do this, use the “27” key to unscrew the nut of the front cardan fork. After tapping the fork on all sides, release it from the slots. The bearing is held on the shaft by two “13” bolts; after unscrewing them, you should set the suspension on the corners and knock it out with a hammer.
Installation of all elements is carried out in reverse order. After installing the propeller shaft in its place, you need to make sure that all the bolts and nuts are securely tightened, and you also need to immediately check the play.
With proper repairs, there should be no backlash, and when driving at speeds above 90 km/h, there should not be the slightest vibration emanating from the driveshaft. The crosspiece should be filled with oil every season.
How much will this procedure cost at a car service center?
The average price for a crosspiece replacement service is 500 rubles. If any related difficulties arise, the cost increases. It is often suggested that the outboard bearing be replaced immediately, as this will be much cheaper than replacing these parts separately. On average, they require 1000 rubles to replace an outboard bearing.
How to replace the driveshaft crosspiece of a VAZ 2107 (video)
The serviceability of the driveshaft crosspiece directly affects the operation and resource of the entire transmission, as it plays the role of a flexible connector between the engine and the rear axle. Timely maintenance and replacement will significantly extend the life of the VAZ 2107 transmission. This replacement operation can be performed using the repair manual and with a minimum of tools. The main thing in repairs is to be careful and follow the procedure so that the life of the car is as long as possible.
Add ProCrossovers to your favorites
Phased dismantling
First you need to dismantle the car unit:
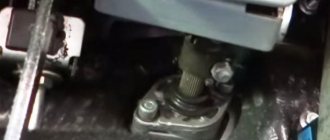
- Since it is not possible to replace the crosspiece without removing the driveshaft, you first need to remove this unit from the car. To do this, you will need a size 13 wrench; use it to simply unscrew the two clamps that secure the suspension bearing to the transverse support.
- The fasteners are unscrewed from the junction of the rear axle shank with the vehicle assembly. To make it easier to assemble the entire structure in the future, experts recommend placing marks before unscrewing the fasteners. Quite often, if the cardan is assembled incorrectly, vibrations and even beating are felt when operating the machine.
- Using pliers, carefully remove the cross from the propeller shaft.
- The locking wheel is removed.
- Next, you need to rotate the cardan to such a position that the crosspiece takes on the so-called “hanging” position.
- Using a hammer and a mandrel, you need to knock the “cup” out of the cross.
- After removing the “cup,” the cardan rotates to a different position to make it more convenient to repeat this process with the next element.
Before installing a new cross, the surface of the assembly must be thoroughly cleaned of dirt and do not forget to inspect the condition of the grooves that are used for the retaining rings.
Removing and disassembling the unit
To make work easier, it is recommended to engage first or second gear, which will lock the cardan. Before you begin removing the driveshaft, you should definitely mark the position of the forks relative to the shaft and gearbox flange. This will allow you to correctly install the cardan during assembly, thereby avoiding imbalance and runout.
First you need to loosen the bolts securing the rear fork to the gearbox flange. This can be done using open-end wrenches (usually 12-13 mm in size). Then we dismantle the intermediate support of the outboard bearing. It will be more convenient to use a socket wrench or a 13mm socket. Now you just have to carefully pull the driveshaft out of the splines on the gearbox side.
After removing the shaft, it must be cleaned of dirt. Using a special puller or available tools (flat-head screwdrivers and an awl), remove the retaining rings from the shaft eyes and the universal joint fork. Be extremely careful and protect your eyes. Retaining rings are made of spring steel, so when they are removed using improvised means, they tend to fly out of the grooves in an unknown direction.
Next, you need to select a cylindrical spacer with a diameter slightly smaller than the eye on the shaft. The old crosspiece has already exhausted its service life and is of no value to us. Therefore, using a hammer to knock out the plug through the spacer, it is opposite to the direction of impact. Similarly, it is necessary to remove the remaining plugs and remove the cross.
After the cross is removed, thoroughly clean the eyes from any remaining dirt so that it does not get into the new bearings during assembly. You can use gasoline and a brush. After cleaning, you should carefully inspect the eyes. If necessary, use a round file to remove any burrs that have formed inside the lugs. The cork should fit in with a slight tension, but it should not bite.
Step-by-step installation
Before installing a new element, you need to pay attention: is there grease on the bearings and on the cardan cross? If such a substance is not observed, lubricant will definitely have to be added. In the case of installing a cross with an oiler or grease fitting, lubrication can be done after installing this element, using a convenient syringe that is intended specifically for this process.
Installing a new cross will not take much time and the car owner will be able to install this element independently and correctly if the process is carried out in the following sequence:
- First of all, you need to remove two “cups” from the cross.
- Next, you need to install the cross into the so-called eyes.
- Slowly moving the element from one side to the other, the “cups” are put on in their original place. This stage must be performed slowly, making sure that when installing the “needles” do not fall apart from the “cup”.
- By squeezing the “cup”, it is worth achieving the formation of a small groove, which should appear under the retaining ring. A copper or aluminum attachment will help simplify this process.
- After installing the locking ring, the cardan is carefully rotated so that the crosspiece moves in different directions. The “cup” is put on the element and compressed again so that the locking wheel can be installed.
At this point, the replacement process is considered complete; every VAZ-2107 car owner can handle such work without any problems. Well, to find any answer to a question on this topic, step-by-step video instructions on the Internet resource will help you, which you can watch at the most convenient time for yourself.
Cardan cross device
KK is a hinge that ensures the alignment of all rotating elements, and consists of:
- cups;
- needle bearings;
- retaining rings;
- sealing cuffs.
Each CC has four cups, which are the protruding elements of the assembly. All of them must be periodically checked for rotation, which should be smooth and even. The cups can be easily removed to check for lubrication.
The cardan cross has a fairly simple structure: 1 - cross; 2 — plastic seal; 3 — rubber seal; 4 — needle bearing; 5 — clamp; 6 - cup; 7 - retaining ring
Bearings are designed to move the cross in different planes. The needle elements located in the cups are secured with retaining rings and prevent the bearings from moving during rotation. The size of the rings depends on the diameter of the axial clearance. They are selected using a four-leaf feeler gauge, which is used to measure the distance from the cup to the edge of the groove - this will be the diameter of the restrictive ring. Depending on the size of the crosspieces, rings with a thickness of 1.50, 1.52, 1.56, 1.59 or 1.62 mm are installed on the VAZ 2107.
Causes of crosspiece failure
It is the responsibility of every driver to monitor the condition of the parts and mechanisms of the transmission, steering, and engine. A malfunction of a seemingly insignificant element can lead to complete immobilization of the car. The importance of the crosspiece in a car transmission is difficult to overestimate: this part transmits torque from the gearbox to all units associated with it.
But, despite this, this element has a fairly large resource - about 150 thousand km
In any case, it is important to diagnose any transmission problems in a timely manner and inspect the component parts of the unit even before leaving the garage in order to avoid serious damage on the road
DIY washing machine cross repair
The process, regardless of the cause of the breakdown and the method of eliminating it, begins with disassembling the tank. In different SMs, the tank is reached in different ways - through the top or from the facade. It is more difficult if you have to dismantle the facade panel. Before removing the cross from the washing machine drum, you have to disassemble the SM. Sequencing:
- Turn off the water supply.
- Disconnect the SMA from the power supply.
- Drain the remaining water in the tank. Unscrew the inlet hose. Remove the drain filter.
- Move the machine away from the wall - you need space to disassemble the device.
- Start disassembling. Start by removing the top cover - unscrew the screws and push it away from you.
- Remove the front wall. It is necessary to dismantle the control panel, cuff, UBL.
- Remove the back wall. Remove the drive belt (if the SM has a commutator motor and a belt drive).
- Disconnect the electric motor and remove the tank. Disassemble it into two parts - if the tank is collapsible. Non-removable is a big problem. You will have to either give up the idea of repairing the broken unit - then the tank will be scrapped, or cut it with a hacksaw.
- Examine the bearings, if they are the cause of the failure, replace them. You'll have to try hard here. Usually they are tight and you have to knock them out with a chisel. It happens that you even use a drill to make cuts in the bearings, and then, inserting a chisel there, knock them out. Replace the old bearings with new ones. Also replace the old oil seals with new ones - since you had to tinker so much, do as many useful things as possible.
If the bearings are to blame for incorrect operation, the repair is complete. You can reassemble the machine in reverse order.
What to do if the part itself needs to be replaced? Before removing and replacing the washing machine crosspiece, you need to unscrew a couple of bolts - they attach it to the outer surface of the drum. Remove the deformed or worn part and replace it with a new one. That's it - assemble the washing machine and check its operation.
Useful video:
Now you know how to change a worn crosspiece. Replacing the part itself is not particularly difficult - just two bolts separate the old part from the scrap. The difficulty lies in disassembly and diagnosis. Disassembly takes a lot of time and effort, and to make a correct diagnosis of a worn-out unit, you need the experience of professionals.
Bad 1
Interesting
Super
How is the cross made?
The crosspiece is attached with bolts to the rear gearbox and rotates due to the bearing, this is the main element. The crosspiece itself is a hinge that controls the alignment of the axes of the driveshaft, gearbox and gearbox shank. The cross connects the two forks. They are attached to each end of the cross.
From the above, it turns out that the cross is a reliable connection between the engine and the rear axle to transmit torque to the wheels.
Symptoms of a faulty crosspiece
The most important sign of a crosspiece malfunction is the appearance of vibration. Moreover, if there is a slight play in the crosspiece, vibration can appear only at high speeds and only when the needle bearings are completely destroyed, it appears at a low speed of rotation of the cardan.
Another sign of the destruction of the crosspiece is a small, single blow when starting from a place forward or backward. It occurs because when the needle bearings are already destroyed, the cross hits the cups when rotating.
Well, the last sign of a malfunction is a metallic creak when driving in the area of the rear axle.
To diagnose the condition of the crosspiece, just drive onto a hole or overpass and rotate the cardan forward and backward. A serviceable part will not have any runout in the bearings.
Checking the condition of the cross
The car must be driven into a viewing hole or onto a lift. It is worth remembering safety precautions! The car must be put on the handbrake before starting all work.
To diagnose the crosspiece, you need to hold the gearbox flange with one hand, and the cardan shaft itself with the other. Make turns in all directions, there should be no play or characteristic clicks. If any malfunction is detected, then the crosspiece needs to be replaced.
The following reasons may also serve to replace it:
- destruction or deformation of the cross;
- vibration occurs when driving at speed;
- characteristic clicks when starting off, in the area of the driveshaft.
Preparing for replacement
When you buy a new crosspiece, you should not save, as they say - the miser pays twice. Therefore, it is better to purchase an original part than to change the crosspieces every six months.
The crosspiece is made of steel, which undergoes heat treatment. This provides it with a special hardness of the thorns. Thus, the quality of the material from which it is made plays a very important role and its service life depends on this. How many kilometers can a car travel without replacing the crosspieces? It is calculated that on average approximately 500 thousand km!
