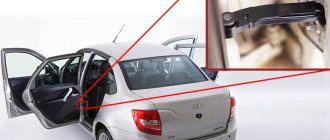
The window regulator does not work on Kalina Lada Kalina cars have several typical “diseases”. One of these inherent problems is the window regulator that constantly breaks. Most often, this problem manifests itself in glass movement jamming. In this article, we will figure out how to eliminate such defects.
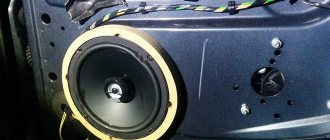
| Speakers in the front doors on Granta - installation Moving in a car should be not only safe and fast, but also comfortable. One of the important attributes of a car is the audio system. There are people who prefer to listen to the sound of the engine while traveling, but there are only a few of them. In most cases, drivers listen to either the radio or their favorite songs. |
| Wheels and tires Lada Kalina 2 Lada Kalina 2 is a car that is very easy to tune. The market is full of parts that decorate the interior and exterior of a car. These include various moldings, bumpers, spoilers, air intakes, seats, pedals, and instrument panels. And among these tuning parts there are those that affect the behavior of the car when driving. One of them is disks. |
| Do-it-yourself installation of VAZ 2110 door trim When a car owner decides to tune his car, he first of all thinks about replacing the dashboard, updating linings, seats, and installing a new audio system. Installing new door trims is not difficult, and there are plenty of examples provided. But now we’ll figure out how to install euro trim on a VAZ door. |
| Installing an alarm system on a Granta with your own hands Lada Granta is a very popular car among domestic consumers. For some unknown reason, the “Norma” and “Standard” trim levels are not equipped with an anti-theft system, although this is a mandatory device for a modern car. In this publication, we will tell you how to fix this defect yourself. |
Do-it-yourself VAZ 2107 wheel alignment
How to tighten the steering rack on an Aveo
The car repair category is the largest section on our website; it contains a wide range of instructions for car repair and operation.
How to tighten the steering wheel yourself
Connecting bi-xenon (photo and video)
Here we have published the most popular articles in the car tuning section, we recommend you read them.
A car for 150 thousand rubles
How to start a car without a key
This section, namely advice for motorists, is filled with super-useful material. We recommend you take a look!
Window regulator does not work
Air in the cooling system
Only here you can find answers to your questions regarding problems in your car.
We install speakers in Kalina-2 ourselves
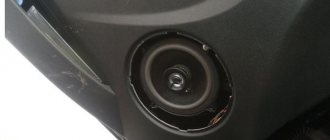
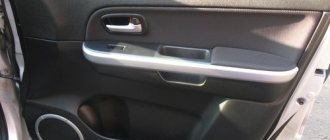
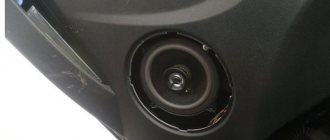
Cars of the Kalina-2 family, produced in the Standard configuration, are not standardly equipped with speakers and a radio. But these cars have already been equipped with audio preparation, unlike, for example, the Granta Sedan Standard. The doors in different configurations of the “second Kalina” do not differ, but their trim is different. More precisely, in the “standard” version she is deaf. But, using a jigsaw, you can cut through the plastic and prepare holes for the standard VAZ trim, which is placed above the speaker.
What exactly will you need to buy?
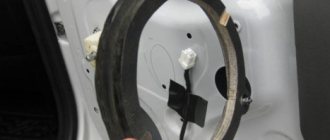
Having opened the catalog of parts and assembly units of the Kalina-2, we find that the speakers are screwed to the rear doors through spacers. There is a spacer for the left door and for the right one, their catalog numbers: 7901032/33. If you want to use standard facing panels (grids), then know that they are usually sold complete with spacers. Catalog numbers of facing panels: 6102096 (“circle” in the front door), 6102094/95 (overlay for the right and left rear doors).
Speaker Installation Kit
It seems that the car has audio preparation, and it will be enough to just screw on the speakers and connect them. In reality, everything looks more complicated - the door trim in Kalina Standard is blind, that is, there are no holes in the plastic panels. In theory, you can buy door trim designed for more expensive trim levels. This option is the simplest and most expensive. We are not considering it.
The plastic rear door trim can be cut along the contour of the trim panel. How exactly will be shown later. The cladding clings to the cladding with clips, and this fastening is reliable. Something similar may be suitable for trimming the front doors.
Delivery by transport company (cash on delivery, no prepayment)
Advantages:
- the cost of delivery of heavy and large-sized orders is much cheaper than that of Russian Post;
- There are practically no restrictions on the weight and dimensions of cargo;
- There is a wooden crate service - this is an additional guarantee of the integrity of the order.
Disadvantages: unfortunately, there are branches only in cities.
The estimated cost of delivery for an order up to 30 kg is 450 rubles.
List of transport companies with which we cooperate:
- TC "PEK" (cash on delivery service available);
- TC "Business Lines";
- TC "Energia";
- TC "KASHALOT" (KIT) (cash on delivery service available);
- TC "SDEK" (cash on delivery service available);
- TC "DPD";
- TC "ZhelDorExpedition";
- TC "VOZOVOZ";
- TC "Baikal-Service".
To send your order by transport company:
- Place an order in our online store by phone or on the website (registration is not necessary);
- After we receive it, our manager will contact you by phone to clarify the cost, delivery time and your wishes. Next, we will pack your order carefully and then send it to you;
- You will receive a shipment tracking number from us via SMS or email (if available). You can monitor the status of the order coming to you using our tracking service, as well as independently, on the transport company’s website using the track number. After the order reaches your locality and the manager of the transport company contacts you, you need to receive the order at their office or order home delivery;
- Upon receipt from the transport company, you pay the cost of delivery and order.
The cost of delivery is calculated based on the volume, weight of the selected product and the distance from the city of Tolyatti.
To send an order you must:
- indicate full name recipient;
- Your locality and region;
- series, number of passport or driver's license;
- Your phone number (contact).
TC "Business Lines" - Urgent delivery of goods from 1 kg throughout Russia. The exact cost can be found on the official website of the delivery service - https://www.dellin.ru TC "PEK" - Guaranteed safety of cargo for the entire duration of cargo transportation, clear information support, delivery of goods throughout almost the entire territory of Russia, Belarus and Kazakhstan in optimal time and accurately calculated cost of services. The exact cost can be found on the official website of the delivery service https://pecom.ru/ru/calc TC "SDEK" - Low tariffs compared to foreign courier companies, while the quality of the services provided meets modern international logistics requirements. Developed network of own representative offices. The exact cost can be found on the official website of the delivery service https://www.cdek.ru/calculator.html TC “ZhelDorExpedition” - Serves only large cities and towns. The exact cost can be found on the official website of the delivery service - https://www.jde.ru/branch TC "Energia" - Cargo transportation in Russia, the CIS and China. The exact cost can be found on the official website of the delivery service https://nrg-tk.ru TC "KASHALOT" (KIT) - Delivery of cargo from 1 kg to 20 tons throughout Russia and Kazakhstan. The exact cost can be found on the official website of the delivery service https://tk-kit.ru/calculate TC "Baikal-Service" - Transportation and delivery of groupage cargo by road in Russia. The exact cost can be found on the official website of the delivery service https://www.baikalsr.ru TC “DPD” - Transportation and delivery of groupage cargo by road in Russia. The exact cost can be found on the official website of the delivery service https://www.dpd.ru TC "VOZOVOZ" - Transportation of groupage cargo by regular delivery routes between Russian cities. The exact cost can be found on the official website of the delivery service https://vozovoz.ru
The machine is already 7 years old. It didn’t cause any problems other than replacing the struts all around, replacing the balls and the right grenade. But then the shelf rattled. The car is a sedan. How is it attached and what can I do to prevent it from “knocking”? By the way, I looked from the luggage compartment, there was metal there. I don’t understand how the top (not metal) one is attached and where the reason for its tapping occurred.
Last edited by Pioneer from the past; 01/05/2017 at 12:45 pm.
In 99 everything was simple. Two metal strings and two plastic latches, which were replaced by two bolts. And no problem. How to do this in Kalina (eliminate shelf rattling).
Maybe also “glue” it to the metal? With self-tapping screws in a straight line from top to bottom? Thanks for the advice.
I didn’t do that fanatically. Of course
The shelf in the cabin is attached with pistons to that iron cross member, which is visible from the trunk. You buy a sheet of vibroplast, recline the back of the rear seat, behind it you will see the pistons + they are still on top. You pull it off the pistons, glue it on the bottom, and put it on new pistons. In the places where it interfaces with the rear pillar covers and the glass, paste it with anti-squeak or non-squeaky tape. I can’t get around to this, so I’m saving myself by turning up the radio)))
Cutting plastic with a jigsaw
See how part 6102094/95 works. There are clips along its perimeter. After removing the trim from the rear door, we place this part on a plane, face up. Then, you need to mark the attachment points. And then, even if not with micron precision, you need to cut a hole of a suitable shape in the part. Here you will need a jigsaw.
The front door trim is finished in a similar way. Here you will need to cut round holes, but note that you cannot use a ballerina. Working with plastic requires a certain skill, and cutting a sheet with a jigsaw is quite simple.
Soundproofing frets
It is most convenient to use a self-adhesive foil sound absorber, at least 1-1.5 cm thick.
To install the insulator, it is necessary to remove the casing. Please note that each front door has screws not only in the handle area, but also on the bottom. And on the driver's side there is also a self-tapping screw in the very middle (hidden under the plug) and in the recess of the latch.
After removing the door decorative panel, it is necessary to pre-treat the internal metal surfaces. They are cleaned of the anti-corrosion compound with aviation gasoline, and then additionally degreased with alcohol or another substance with similar properties.
Next, the insulating material is cut into strips 10 or 15 cm wide. They are rolled into a roll, pushed inside the door one by one and pressed tightly with a hard rubber roller, removing the protective film. Upon completion of the procedure, all technological holes are also closed with the selected self-adhesive material.
Now all that remains is to finish the trim. Sound insulation is also applied to its inner surface. Then the speakers are installed and the panel is returned to its place.
Choosing the Right Speakers
Let's say we want to install 4 loudspeakers, which will not differ in size from the standard ones. It is known that some owners decide to install a subwoofer, as well as a separate amplifier, etc. But the manufacturer prepares the car to connect 4 speakers, which are located in the doors. This is true for all trim levels.
Installing speakers in Kalina 2 in their standard seats is a very simple tuning option. To begin with, you can buy spacer baskets (spacers). And you need to choose speakers so that they fit the spacers.
We also note that the front speakers installed forward are no different in size from the rear speakers. The standard size of the speakers is 5 inches, that is, 12.5 cm. Almost all budget sets are suitable.
Speaker installation process
Installing the rear speaker, oddly enough, is even easier than the front speaker. We take the spacer and screw it to the back door, after which all that remains is to secure the speaker and connect it. With the front door, everything looks more complicated - there you need to glue threaded washers under the holes for the bolts. And normally these washers are held in place by brackets, which are not included in the “standard” configuration.
Rear and front door without trim
Each speaker is screwed onto 4 threaded screws, but it is better to connect the connectors first. One pair of speaker wires goes into each door, and they come from the main connector intended for the radio. Before making the connection, it is better to test the wires for breaks.
Here we could say: do not mix up the wires connected to the speaker terminals. But the worst thing that can happen even in case of an error is that the music will play, but not quite correctly.
We have discussed in full how to install speakers in Kalina 2. We will not consider the method of installing and connecting the radio, but note that it is not at all necessary to dismantle the center console for this.
Crib
Instead of a conclusion, let's summarize:
- You can plug in budget sound into the Grant for an amount of 20,000 rubles or more.
- Podiums in the front doors = impossible to open the glove compartment.
- 16 cm speakers in the front doors - cut the metal of the door or prepare spacers with the factory facing of the speakers.
- The acoustic shelf covers the ISOFIX mounts.
- Audio preparation pulls wires only in the doors.
- Article numbers for ordering speaker covers and mounts are in the “Installing speakers in rear doors” section.
Did you like the article? Write a comment or see what we have about the selection of budget cars for 200 thousand.
Reviews and recommendations
People often ask on forums which set of acoustics to take in order to get high-quality and loudest sound. The advice boils down to the fact that higher-quality acoustics need to be installed in the front, and something simpler is suitable for the rear.
It is desirable that the sensitivity of the “front” and “rear” be the same. The sensitivity of car audio is the number of decibels per 2.83 Volts. Typical values: 89 or 92 dB/2.83 V.
It is impossible to squeeze “real bass” out of five inches. But still, you can notice the following pattern: the higher the sensitivity of the speaker, the less ideally it reproduces bass. So, choose: quiet, but high-quality bass, or loud sound, but without low frequencies. This limitation can only be removed by moving to the “6.5-inch” category. True, then you will need an angle grinder, and some owners also use it when installing a radio.
Installation of speakers in the rear doors of Lada Granta, Kalina 2
The rear doors of the Lada Granta and Lada Kalina 2 are identical and have space for acoustics. But in order to install speakers in them, the design will have to be modified. Let's consider the standard option for installing speakers in the rear doors of modern Lada cars.
- Remove door trim
- Buy speakers measuring 13 cm (you can also install 5x7 “pancakes” if desired)
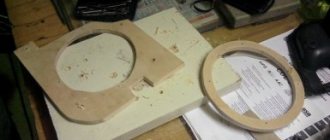
- Buy spacers for the speakers (or make them yourself from 10 mm plywood using a template)
- Buy a decorative plastic mesh (or cut it yourself from a universal piece of aluminum mesh)
It is recommended to make all modifications according to the standard scheme offered by the manufacturer, so we will use spacers for the speakers and decorative mesh for the door trim from the “Lux” package.
The first thing to do is to try the speakers on the spacer. If their depth turns out to be too great, you will have to slightly modify the plastic spacer in place (for example, cut off the bottom). Next, secure the spacer to the door using screws and nuts. One mount may not match. Then install the speaker onto the spacer using screws. It is worth paying special attention to fixing the spacer and speaker; they should be firmly fixed (this will improve sound quality and prevent rattling). Use vibration material for this.
The second stage is the finalization of the door trim. Holes should be cut in it to attach the mesh. The plastic is thick, so during work you will need a sharp knife, file and drill. At the end of the work, the mesh is fixed in the casing using clamps. It remains to reassemble in reverse order.
The entire process of installing speakers in the rear doors is also shown in the video:
Depending on the vehicle's configuration, audio preparation may vary. In some cases, you will need to install additional wires for the speakers in the rear doors. If you are going to connect a radio along with the speakers, use these instructions. Let us remind you that to improve the sound of the acoustics, it is recommended to soundproof the doors.
Speaker size
You should not install a large speaker system in a car, since this is not a concert hall. Therefore, as a rule, for a car, speakers with a size of 10-13 cm that reproduce high frequencies, and speakers with a diagonal of 16-17 cm that produce high and low sound frequencies are sufficient (see photo).
Installing speakers in front and rear doors
How to independently install speakers in the door trim of a VAZ car? The designs of the rear doors in the Lada Granta and Lada Kalina cars, as well as in other VAZ cars, are identical, and they provide places for acoustics. But even to install the speakers in standard places, the design will still have to be modified.
Let's consider the standard option for installing speakers in the front and rear doors of modern Lada cars:
- First you need to remove the door trim (see photo).
- Choose speakers, preferably 13 cm in size (see photo).
- Prepare podiums for acoustic speakers. You can make them yourself from a sheet of plywood using a stencil (see photo).
- Buy a standard plastic mesh at the store, but it is better to cut it yourself from a mesh made of metal fabric (see photo).
Cars of the Lada Granta, Kalina, VAZ 2107, VAZ 2110 series, produced as standard, are not equipped with speakers and a car radio. But in these car models there is a mandatory place for the speaker system. The doors in various modifications of the Lada Grant and Lada Kalina do not have significant differences, which cannot be said about their trim. In the “standard” version, she is deaf. But, using an electric jigsaw, you can make a shaped slot in the plastic and stencil holes for the standard cladding of VAZ cars, which is located above the speaker system.
There are often inconveniences when installing speakers due to limited space in the cabin. Therefore, it is often most convenient to place speakers in the front doors and on the podium. There are craftsmen who install the speaker system directly on the dashboard for ambient sound, but to do this you need to have certain skills to modify the dashboard and install speakers in this part of the car. This is quite a complicated job, and it is better to contact a specialist.
If you do the installation yourself, then the most convenient option for placing the acoustics is in the interior doors. This will allow sound to travel in all directions. To do this, you should choose small speakers with a diagonal of 10-13 cm and a sensitivity of about 92 decibels.
The first thing you need to do when installing a speaker system is to try on the speakers before starting work. If their depth turns out to be too great, you will have to slightly modify the plastic substrate in place (see photo). You may need to trim the bottom a little. Next, using nuts and screws, you need to secure the part in the door and make sure that all fasteners fit and are in place. After this, you can install the speaker, securing it with screws. It should be remembered that the speakers must be firmly fixed, which will improve the sound quality of the speakers and prevent rattling. For this purpose, it is best to use a material that protects against vibration.
Next, you need to drill holes in the door to securely attach the mesh. For this work you will need a knife, a file and a drill, since the plastic is thick, and you will have to tinker with it to make the holes even and correspond to the given dimensions. After the work is completed, the mesh must be firmly fixed in the casing using special fasteners (see photo). After this, you can assemble the structure in reverse order.
All that remains is to use the instructions for using the car radio and connecting the speakers and lay the necessary wires in the rear doors of the car. We must not forget about soundproofing the doors so that the acoustic system sounds better and pleases its owner.
There are different configurations of the Lada Kalina and you will not find speakers in the doors on all of them. Which speakers to choose, how best to mount them in the doors and rear parcel shelf - these are the questions we will answer today in our article.
Which speakers to choose for Lada Kalina
First, let's determine what size the standard speakers in Kalina are.
– The speakers in the front doors measure 13 cm.
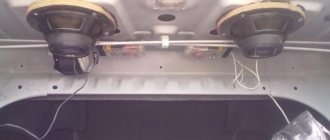
– The rear speakers on the Kalina sedan are 18 cm, but you can manage to fix 17 cm, or 9x6 pancakes.
– Rear speakers for Kalina station wagon 16″, you can attach other sizes, starting from 13 cm.
– The rear speakers on the Kalina hatchback are installed in a shelf; the size for the “pancake” speakers is cut out as desired.
When choosing speakers for a viburnum, keep in mind that the front speakers should be the main ones, and the rear ones should be secondary. Therefore, it is recommended to install 16 cm instead of the standard front 13 cm speakers.
Let us recall that in the previous article we looked at which is the best rack to choose for a Priora. When choosing, the main thing is to rely on quality, since the condition of domestic roads wants to be better.
Installing front speakers on Kalina
There is audio preparation in the front doors, but on new Kalinas, in the standard configuration, there is no wiring in the front doors.
You can install 13 cm speakers in the front doors of Kalina in various ways.
1. Quick and easy installation, no need to remove door trim. Just attach the ring from the speaker to the door trim and circle it with a marker. Use a sharp knife to cut a hole in the upholstery. It is worth considering that the standard audio wires are short, so it is best to install the speakers in the viburnum door with the connectors facing down, otherwise the wiring may break when the glass is released.
