Articles
Priora sedan interior sound insulation
The sound insulation of the Lada Priora often does not meet your desires. Any owner of such a car notices unwanted noises in the cabin and unpleasant squeaks; today, this is a common disease of domestic car brands, and even of most foreign cars.
You can fix the problem yourself, or by paying a lot of money for the services of specialists.
Where should you start soundproofing a Lada Priora car?
You should begin work by studying the materials with which you will work. All materials that are used in car sound insulation are divided into groups:
- Sound-absorbing materials - used to dampen sound waves;
- Soundproofing materials - used to reflect sound waves;
- Vibration-absorbing materials - used to suppress body vibration;
- Thermal insulation materials - used to maintain the temperature inside the car;
- Anti-squeak materials - eliminate squeaks and rattles in the cabin.
- Tools for disassembling the interior and dismantling fasteners - screwdrivers, wrenches;
- Stationery knives;
- Stitching roller.
Second soundproofing layer
The second layer of sound insulation is designed to suppress unnecessary sounds and retain heat, depending on the material used. The basic principle of operation at this stage is to glue sound-absorbing Accent and heat-insulating Splen on top of the vibration-insulating material. Both materials have a self-adhesive base, so their installation does not require significant effort and special knowledge in the field of sound insulation.
Stages of work on sound insulation of Lada Priora Hatchback
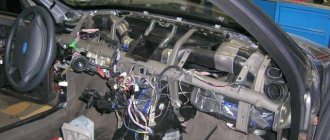
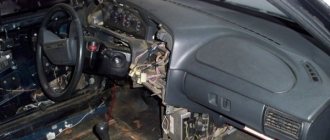
Disassembly of the interior. To soundproof a car with your own hands, you need to start by disassembling the interior. The work takes place in several stages:
- Dismantling the ceiling fastening elements of the Lada Priora. The work should be done very carefully, since the plastic parts are quite fragile. Dismantling must be carried out by two people: the first one opens the plugs and unscrews the handrails, the second one must hold the ceiling in the cabin;
- Removing the ceiling. The ceiling must be removed through one of the rear doors, while not forgetting to disconnect the backlight terminals;
- Removing the trunk compartment trims should also be done carefully so as not to damage the integrity of the fasteners;
- Next, you should degrease all metal surfaces. This work should be done very carefully so that there are no problems with gluing the insulation in the future.
Soundproofing the ceiling in the car interior
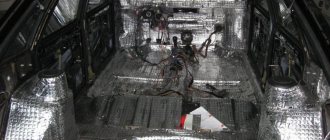
Applying a layer of vibromaterial. To make vibration isolation with your own hands, many people use separate sheets of foil with layers of bitumen. Everything should be done with gloves to avoid damaging your hands.
The work is carried out in two stages:
- The required pieces of material are measured and cut for each section of the roof, trunk and doors;
- Gluing and careful smoothing. Smoothing the vibration-proofing layer onto the surface is necessary for a better bond between the metal and the bitumen. The work is done using a stitching roller, a rigid ruler or something similar.
Soundproofing material sticker. To make high-quality sound insulation, you need to take special materials based on polyethylene foam with an adhesive backing.
Do-it-yourself soundproofing of a VAZ takes place in several stages:
- The material should be glued directly to the vibration insulation layer;
- Since polyethylene foam is soft, it needs to be glued to the surface, and only then remove the excess. This is done so that the insulation fits more tightly and has as few joints and pieces as possible;
- After the sound insulation of the Lada Priora is completed, the interior and trunk parts are assembled in the reverse order.
Soundproofing of VAZ is completed.
If you follow these simple tips, the noise in your car will become noticeably less, thereby increasing comfort while traveling.
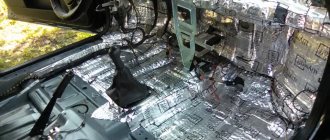
If you are planning to completely soundproof your Lada Priora, then the first step is to soundproof the floor. Since when driving, the main noise comes from the road.
Do your feet often get cold in your car in winter? If you haven't done soundproofing (noise) of the floor, then this is a typical problem. After complete gluing, the floor becomes much warmer.
Car audio, maintenance, car alarms
We will look at how to soundproof a trunk with our own hands using the example of a Lada Priora car. It is simply necessary to create comfortable operating conditions for the vehicle.
In this article we will tell you what points to consider when installing sound insulation. The stages of the technological process for soundproofing the trunk in all cars, despite their type and model, are approximately the same. In order for sound insulation to be implemented correctly, it is necessary to apply an individual approach in each specific case.
Soundproofing the trunk of a Priora hatchback should begin by removing the trim in the trunk. You also need to remove the central and side shelves. You should also remove the trunk roof trim, and then thoroughly wipe the working surface with some degreaser such as White Spirit.
Soundproofing Lada Priora doors.
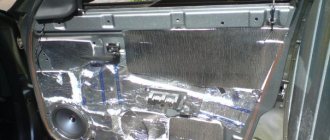
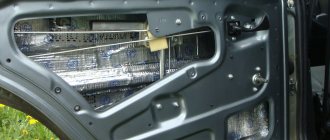
The doors will be covered with 3 layers of sound insulation; first, we carefully dismantle the door trims and prepare the surfaces for installation, namely, clean and degrease. We prepare the vibration insulation by heating it in a special oven. It is important to thoroughly clean the inside of the door from dirt and degrease, for a tighter and better fit of the material so that condensation does not occur. Shumoff M2 inside the door
and carefully roll it out with a roller. Avoid leaving an unrolled area.
We cover the technological holes and the door frame with vibration insulation Shumoff M2
.
We cover the inner surface of the door trim with sound absorber Flex 15
.
Flex 5
sealing and anti-creaking material .
Manufacturers' recommendations (different methods)
Installation diagrams for trunk sound insulation with materials:
| Shvi layer | Material | STP (thickness, mm) | Shumoff (thickness, mm) |
| 1 | Vibration isolation (vibration damper) | StP Aero Plus (3mm) Bimast Bomb Premium (4.2mm) | Noiseoff L2 (2.2mm) Shumoff Mix F (6.2mm) |
| 2 | Sound-absorbing | Accent Premium (8-10mm) Biplast (10mm) | Shumoff P8V (8mm) |
| 3 (optional) | Soundproofing (soundproofing membrane) | NoiseBlock (2mm) | Germeton A30 (3mm) |
Approximate price of materials (depending on body type):
- Budget option (2 layers, thin vibration damper and heat insulator), up to 2,500 rubles.
- Popular option (2 layers, vibration damper and sound absorber), about 3,000 rubles.
- Maximum effect (3 layers of vibration damper, sound absorber and sound insulator), more than 3,000 rubles.
Soundproofing the floor of Lada Priora.
The floor of the Priora is almost completely covered with standard sound insulation, but it does not adhere to the body at all and, accordingly, does not work, so it only faces complete dismantling.
We clean and degrease the body before installing the materials.
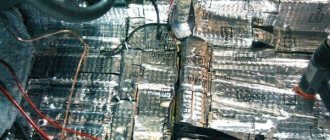
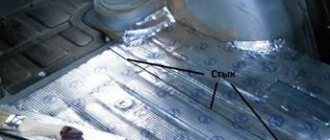
Let's start soundproofing the interior Degrease the surface and begin installing the first layer of vibration insulation Shumoff M3
.
Sealing the front arches and the engine bulkhead as high as possible. To vibration insulate the surface under the rear seat we also use M3
. We take all the sheets already preheated from a special oven and carefully roll them after installation.
This layer will allow us to significantly reduce vibration from the road, increase the integrity and knock-down of the car, and also reduce sensitivity from the road structure itself.
We degrease the floor surface again and begin applying the second layer. We cover the entire floor from the engine bulkhead and under the rear seat with noise and heat insulator Shumoff P4
; This will allow you to achieve higher efficiency and eliminate difficulties when assembling the interior.
The second layer will allow us to reduce noise from the wheels and road surface, as well as significantly increase the thermal insulation of the interior.
Causes of unpleasant sounds
Noise in the car - loud extraneous sounds, vibrations that distract and irritate the driver:
- They arise as if from external sources - the hum from cars passing by, music and screams from the street
- So in the car itself - the roar of the engine, the vibrations of the body and the rustling of tires, the sound of rain on the roof and pebbles on the bottom of the car.
- The cause may be internal malfunctions of the engine, transmission units and their mountings (pillows), steering and even brake discs or drums
- This noise and vibration can only be eliminated by repairing units, tightening fasteners, and turning discs (drums)
- Therefore, for Priora, sound insulation begins with car maintenance
- The remaining noise is dampened by comprehensively applying sound insulation to the machine
Replacing the old trunk lock
Initially, you should perform a series of sequential actions:
Then all rubbing surfaces are lubricated and a new lock is installed; the parts are assembled in the reverse order.
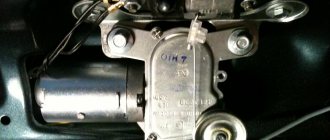
Remove the lining, unscrew the gear motor. Disconnect the gear motor, remove the lock drive rod . Disconnect the rod from the lock drive lever . Then the lock drive rod is removed from the switch . Unscrew the fastenings, remove the lock. Loosen the fastenings and remove the trunk lid drive lever.
Video
For a method of adjusting the trunk lock on a Lada Granta, see the following video:
Unscrew the bolts Remove the lever You need to lubricate the parts well Does
the trunk close poorly or are the gaps between the trunk lid and the bumper too large/small? These are signs of an out of adjustment lock. Its adjustment on all modern LADA cars (XRAY, Vesta, Largus, Granta, Priora, Kalina Niva 4x4) is carried out in the same way. There are no fundamental differences.
Malfunctions that owners of LADA cars (and other car brands) encounter when the trunk lock is not adjusted:
: 10mm wrench, Phillips screwdriver or Torx T40.
How to adjust the trunk lock
Lada Largus has two tailgates. Not only the bracket on the body can be adjusted, but also the lock latches on the doors themselves. The process is similar: loosen the mounting screws, move the latch or bracket, tighten the screws:
Have you ever had to adjust the door locks yourself? Let us remind you that in order to extend the life of locks and seals, they should be lubricated regularly. By the way, do you know how to make the trunk lid of a sedan (Grant or Priora) or station wagon/hatchback open automatically?
Advantages and options for upgrading car locks
Any option for modifying your own car has its pros and cons. It was already discussed at the beginning why exactly it is worth modifying the trunk lock of the Kalina hatchback and station wagon. Now about the possible options. Installing the trunk lock activator alone solves one problem - the issue of using the key. The downside is that when the ignition is on, pressing the trunk open button will not help Kalina hatchback and station wagon: the engine will definitely have to be turned off.
True, you no longer have to remove the key from the ignition. That is why the issue of installing a trunk release button for Kalina hatchback and station wagon remains relevant. This modification option has its drawback: you will have to run the electrical wire through almost the entire car. Most car owners are willing to put up with such inconveniences, since they are one-time use.
The Kalina hatchback trunk lock drive and the issue of modification are a matter exclusively for the car owner. It is possible that it is impossible to independently modify the trunk lock of the Kalina hatchback, and there is nowhere to turn. In some regions, purchasing a lock for a Lada Priora car can be difficult. According to many motorists, this disadvantage can somehow be put up with.
For particularly skillful car owners, options for controlling door opening/closing mechanisms, including the fifth door, are available. For example, the simplest option is one in which all the doors of the car are unlocked simultaneously. And the most complex option, which is not achievable for everyone, since it requires a somewhat non-standard approach, is that the driver, passenger and fifth doors are controlled separately.
Naturally, the options for modifying the Kalina hatchback and station wagon lock differ in cost, execution technique, and time required for a full range of work. The decision which option to choose is always up to the owner.
In order to successfully replace the trunk lock in a domestic car Lada Kalina in a sedan, station wagon and even a hatchback, you will need to stock up on some tools and accessories. The algorithm of actions is simple, so such work is available to owners subject to responsible preparation.
Next, we will consider in detail the nuances of the replacement process.
First layer of vibration isolation
Adhering to the standard scheme for performing noise insulation of the trunk, the first layer means covering the surface in the trunk with vibration material. The highest quality vibration-absorbing materials available in our country are Shumoff and STP.
First, you need to cut several pieces of a certain shape and size from a sheet of vibration-isolating material, and then slightly heat the bitumen side with a technical hair dryer.
After this, the heated sheets of vibrating material must be carefully laid on a degreased and cleaned trunk frame, and then thoroughly rolled out with a hard plastic or metal roller.
When the first sheets fill most of the surface area of the trunk, you need to prepare the next sheets of vibration-proofing material in the same way. It is better to overlap them.
As a result of the work, the metal surface of the body will be covered by 55-100 percent, depending on the material used.
MAJOR BREAKAGES AND INCONSISTENCES IN THE PRIORA TRUNK
Technically, these faults only appear due to three main reasons:
We need to make a reservation right away. The first two reasons are not worth considering closely in this topic. These jobs are the responsibility of bodywork specialists and require not only special skills, but also many special tools and equipment, not to mention materials. Therefore, you should only contact them if corrosion or damage is detected.
A separate issue is the problematic opening of the trunk. There are two possibilities here:
This malfunction (loops) can already be eliminated independently. Therefore, the issue will be briefly considered.
PRIORA TRUNK DEVICE
The compartment at the back of the car is called the trunk. The Priora has a sedan body and is isolated from the passenger compartment. At the same time, on station wagon and hatchback bodies, the trunk is combined with the interior space.
However, this part, in the mentioned body models, is called not a lid, but a “door”. This is due to the fact that both the station wagon and the hatchback have a glazed window in this “door”. Otherwise, all these cars have a similar device. This system includes:
