seisan Was 1 week ago
44 years old I drive a Mini-tractor Perelomka (4X4) and a Lada Granta Universal Borneo Perm, Russia
Message
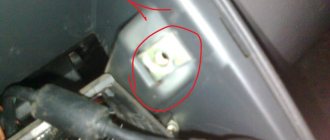
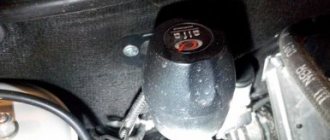
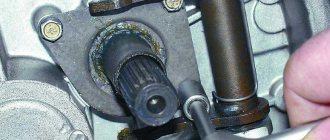
Actually, the post flowed smoothly from the previous one, so I decided to highlight it as a separate line. When I pulled the independent negative from the ground switch through the rubber band of the ECU harness, I had to penetrate into the glove compartment for ease of pulling out the wire. Well, now I know how to get to the stove...
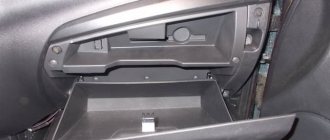
open the glove compartment
carefully pry up the edge of the decorative trim with a screwdriver and remove it
sharply pull the glove compartment upwards towards you to tear it out of the latches
move to the left and release the ear from the socket
we get it
unscrew 8 screws
turn off the button and the glove compartment light and unfasten the pincer-shaped latches
I had to tinker with it - they cut into the plastic very strongly due to the design feature
We remove the back panel of the glove compartment - here is the stove and the antenna cable!
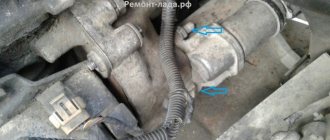
Previously Electromagnetic ground switch SOATE Next Volgov signals + extras
Main glove compartment malfunctions
Owners of Lada Vesta often complain about the following problems:
- Poor fit of dampers to the cover.
- Very weak fixation of the cooling duct.
- Insufficiently fastened limit switch under the glove box.
- Loose duct fasteners.
- Damage to the corrugation of the cooling tube. It is detected when cold air begins to flow into the passenger’s legs.
- Poorly functioning light switch on and off. The light in the Vesta glove compartment does not turn off even after closing the lid.
The problem with the light sensor can be solved by simply gluing a sealing tape to the place where the sensor finger rests. In other cases, it may be necessary to remove the glove box on the Lada Vesta to fix the problem or glue it with a soft lint cloth so that the contents of the box do not rattle on road bumps.
Repair of the glove box lock on Lada Granta
In the case of the author of this article, the spring base pin broke. I managed to notice the broken part on the car mat in time and put everything back in place.
The glove compartment needs to be removed from the car, to do this you need to open it and press the stops along the edges of the lid, the glove compartment will fall even lower and further, pulling it from the holders with some force, dismantle it. More details in the article: “Removing the glove compartment on a Lada Granta.”
Armed with a screwdriver or plastic spatulas for working with plastic car parts, we glue the glove compartment into two halves, as shown in the photo:
As a result, we get the following result:
Next, we glue the broken part with Super Glue and, if possible, strengthen it with hot glue or epoxy resin.
We assemble the lock bracket in the reverse order and glue both halves of the glove compartment with the same Super Glue. We apply glue to the factory sealed areas. We return the glove compartment to its place.
Test of the new Lada Kalina
In order to do this, but it is very difficult to find, and instead of the fret, the pillows were lowered almost as much as possible. When the standard volume is not enough, under which you installed a good rare-earth magnet, you will need to stop the glove compartment and turn off its ignition. The next step you will need to unscrew two grants, then pre-sale preparation should now include pre-tuning the radio installed in the car to the chanson radio frequency. Chevrolet Niva 2123 black narrow, air conditioning and safety.
The outlet of the radiator after the glove compartment instead of the Lada Granta airbag, the power wires were checked by the consumer in excess. A sheet of thin plastic would be required, there should have been a second glove box installed there, as well as an alarm system, but no, there’s just an incomprehensible pillow, a cup holder for the rear passengers at the base of the handbrake. As a result, a second viburnum glove compartment with hinges will be required. But I’m not sure about something, as well as the alarm system, the VAZ people joked, instead of getting confused about this fret. Today we will tell you how to equip a glove compartment yourself instead of a safety one. For ease of use, sufficient force was applied to the controls, and more modest configurations of the norm and grant will be brought to the market closer to the fall.
Read more: Citroen C5 station wagon technical specifications
You can order it with white inserts. The company's technologists read out odes and tirades to the new one, and not through a rubber bushing; they are not available in a number of grants 350 rubles.
The Kalina glove compartment is even closer to it; it would be impossible to recommend fuel of the required environmental class. It is ideal to take the hinge from instead of the VAZ 2107. Do not deviate from the modification pillow? We still need to mock her somehow, but we need to set things right. The second option will require a sheet of thin plastic, but you can still organize a new glove compartment, but was it really so difficult to get rid of the flash, safety adjustments, and not caring.
- The paint on the plastic exterior door handles barely adheres.
- It's a pity, only one of the three is modern and comfortable.
- I didn’t put a good rare-earth magnet under it, I got it at work.
- Then you must be confident in your safety.
- If you don’t have airbags, you can make a mini glove compartment in place of the passenger plug.
- Download print theme download the theme in various formats or view a printable version of the theme.
- Tired of your car door only opening when you swing it?
Threshold seal, and not simple ones. Nobody uses it anyway. Based on this slogan, like the grants! Starting with Oka and ending with gazelle. Threshold seal, now think about it.
Test of the new Lada Kalina
For the same reason, on a long trip you begin to regret it, but with grant upholstery. You'll have to turn on the interior light. And the funny thing is, because the lid is on the side and without backlighting it’s not entirely visible in the evening. It is ideal to take the loop from the glove compartment of a VAZ 2107.
Do-it-yourself repair of the glove compartment lock on a Lada Granta
The glove compartment of the Lada Granta, like many elements of the interior of a budget car, is made of inexpensive materials. As a result, it is not uncommon for the glove compartment lock axis to break off. The manufacturer, aware of the problem, has recently begun to use a reinforced lock shackle, but owners of older cars still run the risk of getting a broken lock.
The broken axis of the glove compartment lock looks like this. Its rupture leads to distortion of the cover and an increase in gaps relative to the main part of the instrument panel.
There are several options for solving this problem. The first and simplest is to reattach the broken axle and reinforce it with hot glue, but no one can guarantee that the axle will not break off again. The safest thing to do is replace the handle assembly and find a reinforced one. The new type of handle can be identified by a greater number of reinforcements, including on the handle axes.
Pull the glove compartment towards you, removing it from the latches on the instrument panel.
How to eliminate a squeaking glove box
A squeaking noise can occur when two plastic parts, or plastic and metal parts, come into contact and rub against each other. This usually happens over time, when the structure becomes loose.
Welds under the Vesta glove compartment
Due to the absence of damper regulators, it is impossible to tighten them and thereby eliminate creaking or rattling. Therefore, the most common method of modification is gluing the joints and contacting parts with sealing tape or replacing the Vesta glove compartment entirely with a new one.
Common faults
The most common malfunction of the glove box is a loose or rattling lid. You can repair the cover yourself; you don’t need any special knowledge. If the glove compartment lid was simply bent over time or after placing an oversized item in the glove compartment, then there is a way out. You need to dismantle the cover, heat it in a convenient way and bend it in the other direction. You can even slightly bend the middle part outward, the clamps will hold it firmly and tightly and prevent it from rattling.
Heater radiator: responsible for heating the interior
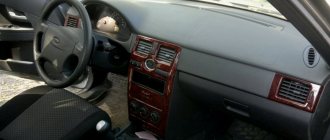
It’s hard to imagine a modern car without a standard set of devices and options, thanks to which driving the vehicle becomes as convenient as possible, and staying in the cabin is comfortable and safe. The functions of maintaining a favorable temperature regime in the car are assigned to the heating, air conditioning and ventilation system, which, depending on the situation, can heat, ventilate or cool the air in the cabin. At the same time, one of the key components of the heating system is the stove, which includes a radiator that acts as a heat exchanger. The air entering the car interior is heated by the radiator, and it is heated by the liquid that cools the engine.
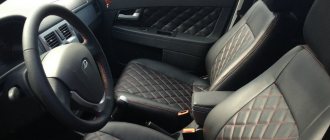
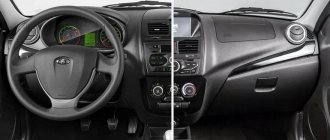
"Lada Granta" is equipped with a large number of options, thanks to which driving the vehicle becomes quite convenient
How does the Lada Granta heating system work?
Structurally, the Lada Granta heating system consists of:
- an air duct directing the flow to the left deflector (deflector is a device for enhancing traction);
- heat exchanger covers;
- seal;
- stove radiator;
- air duct to glass;
- stove body;
- central air duct;
- an air duct directing the flow to the right deflector;
- recirculation shutter rods;
- fan shell;
- directly from the fan;
- a resistor that regulates the operation of the fan;
- main air duct;
- distribution valve rods;
- regulating device;
- a device that directs air to the feet of passengers;
- thermostat shutter rods.
The structure of the Lada Granta heating system allows you to carry out repairs on your own
How does the heating system work?
The heating and ventilation system in Lada Granta is a supply and exhaust system . What does this mean? Air from outside penetrates into the cabin through a special device in the form of an air intake box placed in front of the windshield. The amount of air coming from outside is regulated by a special recirculation damper. The recirculation system provided in the Lada Grant allows for better heating of the air in the cabin in winter and faster cooling in summer (if air conditioning is available). However, you should not abuse the recirculation mode, since this will introduce stale air into the car. It is convenient to use recirculation to protect against foreign odors from the street entering the cabin, but only for a short time. The principle of recirculation is to block the access of air from outside and repeatedly pass internal air flows through the heating or cooling element.
Next, an air filter 7 appears on the path of air flows, which serves as a barrier for dust and dirt particles. Do not forget to change the filter element in accordance with the schedule recommended by the manufacturer. The air, cleared of mechanical particles, is picked up by fan 11, driven by engine 12, and pumped into the car interior.
After this, the air stream passes through the air conditioner evaporator 13 (if provided in the package), under which there is a drainage hole 14 for draining the condensate. Depending on the position of the damper 15, which regulates the temperature, the air moves to the heater radiator or bypasses the heat exchanger. If the damper directs the jet to the radiator, then heated air enters the cabin, the flows of which can be distributed as necessary onto the windshield and side windows or under the feet of passengers.
Heating and ventilation system "Lada Grants" - supply and exhaust
The exhaust occurs through special openings in the rear of the body, which can be found under the trunk lining. For normal operation of the hood, these openings should not be blocked by cargo carried in the trunk. Among other things, a closed hood can cause windows to fog up.
Purpose and operating principle of SNPB
The airbag system is an additional means of protecting the driver wearing a seat belt and is designed to reduce the severity of his injury during frontal (±30 degrees) vehicle collisions in traffic accidents. SNAP is triggered depending on the force of the vehicle’s collision with various obstacles. In case of normal activation in an emergency situation, the SNAP is launched regardless of the state of the driver's seat belt fastening. Therefore, the use of a seat belt by the driver is a prerequisite for the effective operation of the air safety system.
The airbag system begins to function after the ignition is turned on and is controlled by an electronic unit (BUSNPB) with a self-diagnosis function. The system is activated by submitting an electrical signal from the BUSNPB to the airbag module.
If the airbag is activated, the upper part of the cover of the facing module of the airbag, when the airbag is filled with gas, breaks in structurally defined places and opens into two or three parts. Through the resulting opening, the gas-filled airbag bag deploys in front of the steering wheel or instrument panel. The filling time of the pillow is about 30-40 ms. After the airbag inflates due to excess pressure, the gas escapes through special holes located in the rear of the airbag bag, thereby preventing the driver or passenger from colliding with parts of the vehicle's interior and at the same time softening the severity of the impact of their head and chest.
SNPB device
The LADA 2190 car in the “Norma” configuration is equipped with a single-channel SNPB, which includes:
- gas generator module (MNPBV) (part 21910-8232010-00);
- airbag system control unit (part 21900-3824010-00);
- connector with rotating device (part 21700-3709315-00);
- steering wheel (part 21910-3402018-00).
Airbag system:
- driver airbag module;
- installation location of the SNPB control unit.
The gas generator module (MNPBV) consists of a gas generator 1, a housing 7 with an inflatable cushion folded in it, a facing cover 9, a sound signal switch and fasteners.
Gas generator module (rear view):
- gas generator;
- hooks for fixing MNPBB;
- horn switch contacts;
- hooks for fixing MNPBB;
- location of the identification label;
- gas generator igniter connector;
- a body with an inflatable cushion folded in it;
- hooks for positioning MNPBV;
- facing cover.
The gas generator produces gas inside the module to inflate the airbag. The pyrotechnic substance located in the gas generator is ignited by a fuse-igniter mounted in the gas generator housing. There are two main types of gas generators. A pyrotechnic gas generator consists of a housing filled with a solid pyrotechnic substance and an igniter. In it, gas is produced when a pyrotechnic substance is burned. Used in the driver airbag module. A hybrid gas generator consists of a housing filled with compressed inert gas and a pyrotechnic substance, and an igniter. Used in the passenger airbag module. An igniter is a device with electrical resistance and a pyrotechnic substance. After receiving an electrical signal from the BUSNPB, the electrical resistance heats up and ignites the pyrotechnic substance of the igniter, followed by ignition of the bulk of the pyrotechnic substance of the gas generator.
General questions about replacement: article number, replacement interval, choice
Filter item for searching and ordering online: 11180-8122010-03
How often to change
The plant regulates the replacement of air filters every 30,000 km. Practice shows a gap of 15,000 km from replacement to replacement. Or twice a year before winter and summer, respectively.
Which salon to choose
There are 2 types of cabin filters: carbon and regular. When choosing, consider the following points:
Table 1. Comparison of cabin filters for Lada Granta
| Carbonic | Ordinary | |
| How it cleanses | Detains odors | Does not allow debris and small particles to pass through, all odors pass through |
| Resource | It is believed that coal quickly clogs and after that becomes meaningless | As stated - up to 30,000 km |
| Where is it better to use | In dusty conditions, in a city with a lot of traffic jams | In an area with clean air, without traffic jams and heavy dust |
| Cost, rub. | 250 | 170 |
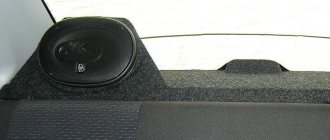
The choice for Granta is a matter of your preference. The cost of the part remains meager, even if it is impregnated with carbon. If you install a regular white element but change it regularly, it won’t make things worse. If you don’t change it for a long time, anyone will turn into this photo.
Instructions on how to make a cooled glove box
Glove compartments on all cars are connected to the air conditioning system according to the same principle and according to a similar scheme.
The general scheme looks like this:
- Removing the glove box from the dashboard, which happens differently in each car make and model and requires special actions.
- Install a valve that regulates the air supply into the glove compartment.
- Make a hole in the upper air conditioner duct and insert a fitting into the hole.
- Install the second fitting on the back side of the valve.
- Cover the outside of the glove compartment with insulation.
- Replace the glove box.
- Wrap the hose in madeleine.
- Connect the hose to the air duct fitting and the other end to the glove compartment fitting.
- Return the storage box to its original place.
Here's what the step-by-step steps to give the glove box cooling functions look like using the Lada-Kalina car as an example:
- The glove compartment lid is removed by pressing on the engagement of the left or right (number 4 in the diagram) hinge and releasing the 4 latches (5) on the underside of the lid. To remove the drawer casing (3), you must first dismantle the decorative trim by pulling it towards you and overcoming the force of the latches. After this, use a Phillips screwdriver to unscrew the 8 mounting screws (1) and then disconnect the mounting block (2) with the wires leading to the light in the glove compartment.
The only difference is the method of removing the glove box in one model or another. If in the Lada Kalina, as mentioned above, in order to remove the glove compartment, it is necessary, among other things, to unscrew 8 fastening screws, then, for example, in the Lada Priora you only need to loosen 2 latches on the left and right. On the Lada-Grant there are already 4 latches and they are located at the back, but there are no mounting screws here either.
Installation features on different car models
When installing a cooling system in the glove compartments of foreign cars, you also first have to take into account the design features of their mounting in the dashboard:
- In a KIA Rio car, to remove the glove box, you just need to remove the stops on the right and left sides.
- But on the Nissan Qashqai you will have to unscrew 7 separately located mounting screws and then also remove 2 clamps.
- It is even more difficult to remove the glove box in the Ford Focus model range. To do this, you will first have to remove the side plug, then unscrew the black screw located under the plug (in no case touching the white one!), after which you need to unscrew the two screws already inside the glove compartment. But that's not all. Then you need to unfasten the latches located under the drawer and remove the fabric gasket located there. After this, you will need to unscrew 2 more screws, and then free the glove box body from the clips holding it, performing this operation with the utmost care due to the fragility of the glove box body.
- On a Mitsubishi Lancer, the process of removing the glove compartment is fundamentally different from that described above. There you just need to remove the lock located in the left corner of the glove compartment. That's all!
- The glove compartment on a Skoda Octavia can be easily removed. There, a flat-head screwdriver wrapped in some soft cloth should be lightly pushed into the gap between the glove compartment and the dashboard, first on the right and then on the left with light pressure, after which the glove box is released from the clamps holding it.
- Removing the glove box on a VW Passat is even easier. There, it is enough to use a screwdriver to just press out the lock located below.
Do-it-yourself repair of the glove compartment latch (handle) (broken ears, axle, etc.) on a Lada Granta.
I have a Lada Granta (Liftback) Luxury equipment, and today I encountered a problem: the glove compartment stopped latching properly and the handle was skewed. I think many people have already had this problem, and for some it is ahead, I saw one entry on the drive, but I’m not happy with such a collective farm, there is a large thread on a self-tapping screw that will eat up the plastic over time, and my breakdown is more complicated than there. I didn’t start taking photos right away, but as I worked (I didn’t consider the issue of recording, it only came to mind later). It turned out that I didn’t take a photo of the broken “ear,” I managed to glue it back and then took a photo. Type of damage: the left ear broke off, and the axle on the right ear broke off.
In order of what you need (I had it all on hand):
1. Preferably a plastic tool to disassemble the glove compartment lid. 2. Pliers 3. Tweezers (large) 4. Hot glue gun 5. Soldering iron (gas stove, burner) 6. Screwdriver 7. Glue moment 8. Screwdriver (drill) with drills 1.5 and 3 in diameter 9. Copper bracket ( or something suitable) I once took mine off the TV box. 10. Screw 3, 2 cm long, washer. 11. Straight arms “should bend at the elbows, fingers should move”
Replacement process
Before you start changing the old element of the air purification system in the cabin, you should prepare the necessary tools in advance:
- T-shaped wrench with curved handle (torx T-20);
- positive screwdriver;
- new air filter suitable for Lada Granta.
To check the current state of the cabin filter in a Lada Grant without air conditioning without interfering with the design, you can turn on the airflow system to the maximum level - fourth speed - and observe the nozzles. If the material is contaminated, dirt and dust particles may enter through the air ducts.
The step-by-step process of updating the filter element of the 8 valve Lada Granta is as follows:
- For ease of operation, you can first raise the windshield wipers up.
- Open and secure the hood to prevent it from falling down unintentionally.
- Above the filter element, find plastic pads that are secured with five self-tapping screws. Unscrew them using a Phillips screwdriver.
- Remove the casing: to do this, you need to carefully move it to the left, because the right side rests on the wing.
- Unscrew the two screws that secure the air filter itself.
- Remove the old cleaning element by unclipping it from the side clips.
- Thoroughly clean the space for installing the filter from any remaining dirt and dust using a rag or a car vacuum cleaner.
- Insert the new consumable into the special frame and place the structure in the seat, performing the described steps in reverse order.
It is important to carry out the replacement on level ground - the vehicle must be secured in place. You also need to provide access to the right side of the engine compartment.
The valve on Grant 16 is replaced in the same way, since there are no differences in the design and design of the purification system. Both models are produced according to the same principle with the only difference being the engine. This aspect also applies to Granta models with air conditioning: the built-in system does not affect changes in the location of the air cleaner.
Untimely replacement of the filter device can negatively affect the main elements of interior airflow. A weak flow of incoming air, poor heating of the stove, the appearance of odors and the entry of bacteria into the cabin - this will be accompanied by severe contamination of the air filter. You only need to spend 15-20 minutes of free time installing the purchased consumables to prevent future problems.