Connecting a new
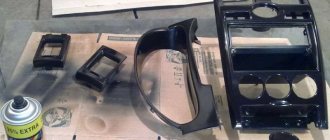
Installation of a new audio device is carried out in the standard mounting hole. When using alternative equipment that has a different configuration of the front part, transition frames are used to allow the unit to harmoniously fit into the interior of the car. For switching, adapters are used to ensure compatibility between the wiring harness on the car and the connector on the player body.
On Priora 2 cars, the standard configuration did not include a standard radio; in its place there was a trapezoidal pocket that could accommodate a 1 din head unit. But additional sealing of the resulting cracks or the manufacture of a decorative frame is required.
Many owners place the radio in place of the plug located below the standard mounting socket. Algorithm of actions:
- Remove the rubber mat in the niche located below the climate control controls. Remove 2 screws.
- Pry up and remove the decorative cover of the gear shift knob, under which there are 3 more screws.
- Remove the lower part of the console, providing access to the lower mounting points of the front cover of the instrument panel console.
- Remove the plastic cover above the control buttons, under which there are 2 more screws.
- Remove the decorative frame.
- Remove the cover and modify the seat to a size sufficient to install the guide shaft.
- Install and secure the shaft in the console, and then insert the radio into it.
After installing the shaft, it is necessary to mount all the removed parts in the reverse order. The same scheme is used to replace the original radio on Priora 2 cars.
How to disassemble the front panel on a Priora
No special tools required!
How to remove a dashboard on a Priora in your favorite garage, and not at a paid service station? Some people think that it is impossible to do this at home due to the lack of the necessary tools. You will be surprised when you find out that for high-quality removal of the torpedo you will not need anything other than two screwdrivers (flat and figured), a ten-point socket and pliers.
The process, although not complicated, is a little painstaking. It will require patience and perseverance from you. Let's get started!
To make it even clearer for you, we decided to divide the dismantling process into 20 steps:
- Disconnect the car battery.
- Turn the mounting block locks 90 degrees. They close the lid - there are three of them in the Priora.
- Unclip the latches that hold the fuses tightly in place.
- Naturally, if the owner of the Priora was not too lazy to install a good radio, it will also need to be removed. This is not difficult to do - you need to insert special pullers on the sides. After that, you spread them in different directions and pull them towards you.
- Was the dismantling successful? Great - now you need to disconnect the connectors and remove the metal frame in which the radio was fixed.
- You will definitely see two screws there. They are located on two sides of the Priora's facing. Carefully unscrew them.
- We're not done with the clamps yet - there are still 2 more screws left to unscrew. Next you remove the ashtray.
- To make the removal process as easy as possible, press one side forward and pull the other towards you.
- After removing the ashtray, you will notice a couple more screws in its place. They also need to be unscrewed, and then the instrument dials must be removed.
- There is very little time left before the torpedo is removed! First, the part that is connected to the floor and the central tunnel is removed. After this, do not forget to disconnect the power sources from the electric power steering.
- Plastic clips hold the left side forward. We snap off on the left, and then repeat the procedure on the right side.
- Using a screwdriver, you will need to pry off the windshield blower nozzle, which belongs to the driver's door. To prevent the procedure from ending in damage and scratches, soft material is placed under the screwdriver. It can be anything - from foam rubber to a rag.
- The Priora panel has a top mount. You can easily find it in the cavity under the nozzle. Actually, the nozzle was removed for this purpose. The same needs to be done on the right side; a ten-point head will be more than appropriate.
- Using the same tool, unscrew the wire bolt.
- We have already completed most of the task. You can take a short break and go smoke, and then get back to work.
At first glance, it may seem that this process itself is very lengthy and takes a lot of time. In fact, from the start of work to the actual removal of the torpedo, no more than 40 minutes will pass. Perhaps the guys at the service station will do it a little faster - after all, the question of how to remove a torpedo on a Priora arises before them several times a month, or even a week. But you save on repairs, and digging into your favorite car (if you really are a fan of cars) is much more pleasant and interesting! We hope our instructions will make the process of removing the torpedo simple and not at all tedious.
I’ll just tell you this for those who don’t know.
To remove the center console you need a Phillips screwdriver.
1. Remove the cover "*** Open ***" and the ashtray below.2. We take out the buttons (they are removed from the front side, just pry them off with a flat-head screwdriver)
3. Take out the “emergency lights” button (the same as those buttons)
4. We take out the radio along with its box.
5. 2 bolts in place of the radio (they will be at an angle towards you)
6. 2 bolts in the pocket where the cover was *** Open ***7. 2 bolts in ashtray8. Now pull the console towards you, smoothly without jerking (resistance is possible)
9. The console will not come out completely, because... the clock and control unit for the stove are connected there. The clock's connector is located between the air ducts
Now turn off the control unit of the stove.
Well, that's all, we have the console in our hands, congratulations!
By the way, I want to “hoard up” a little. To remove the watch, unfasten the latches on the console
, and to remove the used stove, unscrew 4 screws from the console.
Removing and installing the panel (dashboard) Priora
If you decide to install sound insulation for the engine shield, or paint or reupholster the panel, then carefully study the instructions on how to remove and install the Lada Priora dashboard yourself.
Required tools : Phillips and flat-head screwdrivers, 10-mm head, pliers with narrow jaws.
Before starting work, you should disconnect the negative terminal from the battery. Then remove the steering column switches.
Remove the fuse box cover:
- Turn the three locks of the mounting block cover 90°.
- Unclip the fuse box cover.
- Disconnect the middle block with the instrument panel wires from the electrical accessories control unit, to do this:
- We install the panel in the reverse order.
- By the way, do you know how to paint a panel?
Disconnect the wires from the ignition switch.
Then remove the instrument cluster, and remove the central floor tunnel. Disconnect the wires from the electric power steering: Then, in order:
Source: https://PortalVAZ.ru/snyatie-i-ustanovka-paneli-torpedo-priory/
How to remove the center console of a Priora
About the console
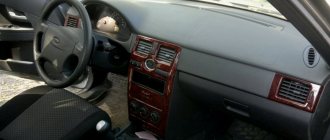
Lada Priora was produced with an interior in two color options: gray and black. It is worth noting that a light interior was installed on the first Priora models, starting in 2007, and later a black interior with black seats and upholstery was added to it. But the center console itself was not subject to changes in color, and many owners of this car repainted or covered the Priora’s center console with film.
Modifications to the center console allowed for a more formal look that would suit the tastes of every owner. Many installed 2DIN radios with a large screen or completely replaced the standard multimedia player with something more advanced and powerful.
It should be noted that when installing a 2DIN radio in a standard Priora console, you need to work with a hacksaw and cut out a completely additional capacity for various kinds of small things. But with the console from the luxury Priora, such alterations do not need to be done.
Types of tuning of the Priora central console
Below are some of the most popular examples of console modifications by Prior owners.
Painting
Painting is carried out in several stages. To begin work on modifications, it is necessary to dismantle the console and remove all attached electrical equipment from it, such as a clock, climate control unit and media system.
Then the factory paintwork on the plastic is sanded, primed and painted.
Pros and cons of this method:
Pros:
- Durability;
- Reliability;
Minuses:
- The impossibility of returning everything to its original appearance;
- Long and expensive work process;
Pasting with film
This type of modification is the most popular and widespread due to its speed and low cost. With such modification, as well as with painting, it is necessary to dismantle the center console and all attachments. After removal, the console is treated with a degreaser and a film is glued to the degreased surface and, using a hairdryer, stretched over all convex areas.
Pros and cons of this method:
Pros:
- Cheapness;
- Rapidity;
- The ability to return to its original appearance;
Minuses:
Not durable, the film quickly begins to sand and crack;
Installing a 2DIN radio
This modification involves sawing off excess parts of the console, which may interfere with the installation of a large two-din radio. Practically no modifications will be required if you install such a radio in the center console of a luxury Priora, since a larger multimedia system is installed there from the factory.
How to remove the center console of a Priora
In order to remove the center console on a Priora, you need to prepare the tool that will be needed in the process of dismantling it. It should also be understood that the work is carried out with plastic parts and excessive force can damage them.
Step-by-step instructions for removing the console
We remove rubber mats from compartments for small items.
We take out the radio and disconnect it from the power supply.
The process of dismantling the center console is complete. We hope our article was useful to you.
Standard instrument panel - article number and price
The original car tidy exists in three types.
- the first is an option for a pre-restyling car;
- the second panel is for a restyled car;
- and the third is the “Lux” option for the restyled one, which has become faintly similar to all previous torpedoes.
Each of them contains standard elements such as a tachometer, so their functionality does not decrease. . Who wants to do tuning of the instrument panel, this option is for them.
Priora first generation
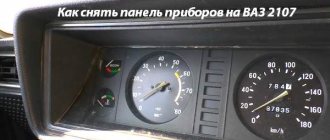
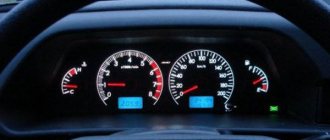
The instrument cluster for the first generation Lada Priora received catalog number 2170-3801010. Cost – about 6,000 rubles. Everything is standard with it - from left to right there are four arc scales with red arrows: odometer, speedometer, coolant temperature, fuel level. Below the speedometer there is a small on-board computer display, and above the arches are all the indicators, including the direction indicators.
Priora 2
For the Priora “Lux” variation there are two more “subtypes” - with or without a CAN bus. Different subtypes were made so that the panel could be connected to any car. Catalog number – 2170-3801010-50 without tire, 2170-3801010-60 with tire. It is distinctive in that it contains an elongated display with a screen that can highlight the navigator.
The catalog number of the combination for the “Norma” assembly is 21720-03801010-20. Cost – 6,500 rubles. Like the “Lux” version, it received a brighter speedometer and odometer, and the coolant temperature along with the fuel level indicator is hidden at the bottom of the speedometer and odometer. The base will not create a route on the display, but will show all the information in color.
How to replace the cooling radiator on a VAZ 2170-VAZ 2172?
1) Before you start work, drain all the coolant from the radiator (read “here” for how to drain the liquid) and proceed to removing the electric fan (If you don’t remove it, you simply won’t remove the radiator), to do this, first reset the negative terminal with the battery by loosening the bolt that secures it, then remove the air filter housing since it will get in the way very much (Read “here” how to do this), and you can start removing the electric fan, first disconnect the wiring from each other, wiring the electric fan has a connector and block on the side (see photo 1), then unscrew (it’s most convenient to use a wrench) two bolts that secure the electric fan to the casing on the left and four nuts, two of which are located on the top and two bottom (see photos 2 and 3 below) and later remove the electric fan by pulling it to the top and putting it aside.
Read:
2) Next, remove the sound signal, since it will not allow you to remove the radiator (For information on how to do this, read the article: “Replacing the signal on the Lada Priora”) and then loosen all the clamps that secure all the supply pipes to the radiator (see
photos 1 and 2, pay your attention to photo 1, there is another pipe indicated by an arrow, so don’t miss it) and disconnect them, immediately after that unscrew the two nuts that secure the radiator to the body (see photo 3) and then pull out the holder , which holds the hose so that it does not dangle from the hole in the cross member of the engine compartment (see
photo 4), and that’s it, you can safely then tilt the radiator towards the car engine and then pull it out of the engine compartment.
Stages of removing the casing
Before removing the trim from the clips, you must remove all bolts, clamps and fasteners that are located in different parts of the door. It is most convenient to do this in a certain order.
Before you begin removing the door trim, disconnect the negative cable from the battery.
From the front door
To remove the door trim on a Lada Priora, you need to get rid of all the fasteners. To do this, follow the following procedure.
- Unscrew the button responsible for locking the door and remove it.
- Unscrew the screw on the inside door handle.
- Remove the handle by carefully moving it away with a flat-head screwdriver.
- Find the two screws in the special pocket that secure the power window control module. They can be hidden under a rubber mat.
- Unscrew both screws and remove the ESP module. Now you need to disconnect the connector with wires from it.
- Locate the three screws at the bottom of the door that secure the trim to the door. Turn them inside out.
- This way you got rid of all the screws and fasteners. Now you need to take a flat-head screwdriver and carefully pry off the casing at the bottom.
- Unsnap all eight clips, which are indicated in the diagram, starting from the bottom of the door. Be careful at this stage: broken fasteners are quite difficult to repair.
- Carefully remove the trim. If done correctly, you should encounter almost no resistance.
Location of the main screws that prevent the removal of the casing
after you remove the trim, your door will look like this
Due to their small size, screws and clips are often lost. To make the reassembly process easier for yourself, before starting work, prepare a container where you will put all the small parts.
To install the trim in place, place it against the door. Make sure the fasteners are in place. Insert and tighten the lock button. Thanks to this, you can pre-fasten the door components. Make sure the handle fits into its hole. Now you can snap all the clips into place and screw the screws back in.
Voltmeter instead of a Priora watch
The current time is displayed on the Priora dashboard, so there is no particular need for a separate clock.
To install a voltmeter instead of a clock you will need:
- digital voltmeter with LED scale of suitable size;
- hot glue;
- file;
- knife or jigsaw;
- a piece of plexiglass or CD case;
- a piece of tint film.
To install a voltmeter in the body of a standard clock, you need to dismantle it and remove the mechanism. After this, you need to install the voltmeter panel into the case, slightly filing its corners. It is better to secure the panel to the housing with hot glue.
There is a hole in the middle of the glass for the time adjustment knob, so you need to find a replacement for it. You can cut new glass from a CD case or from a piece of plexiglass. To hide the “filling” of the voltmeter, the glass should be tinted before installation, for example, with a piece of tinting film. In this case, only the luminous LED display of the voltmeter will be visible from the outside.
Next, all that remains is to solder the wires to the voltmeter terminals and insert the voltmeter instead of the Priora clock. Connecting the wires will be discussed below.
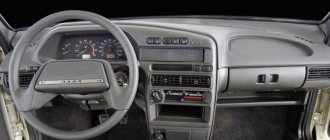
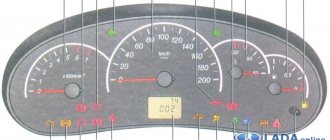
What does the dashboard consist of?
The Priora instrument panel contains all the necessary parts that no modern car can do without:
- regulator of external lighting and internal panel lighting;
- switch for turning, side and headlights;
- signal regulator;
- car instrument cluster;
- windshield wiper and washer regulator.
This is how the dashboard works
In addition, the panel contains an ignition switch connected to the anti-theft system. It contains 3 positions. Among the secondary mechanisms, we can note the presence of regulators for the rear window heating system, alarm and interior cooling. It is also worth mentioning the glove compartment, built-in clock and radio input jack.
Sometimes a certain panel element becomes unusable and you have to look for ways to replace it. In this case, you will need to disassemble the interior. Below is how to disassemble the instrument panel.
How to replace the instrument panel lamps on a Lada Priora yourself
During the operation of the Lada Priora, and indeed any car, the lamp, including the instrument panel, periodically burns out
A burnt-out lamp in the instrument panel, which, for example, indicates the fuel level or oil pressure, can deprive you of important information.
If your instrument panel lamp has burned out, we recommend replacing all lamps at once, since their service life is approximately the same.
What lamps are installed in the Priora dashboard
Depending on the year of manufacture, Lada Priora can be equipped with both lamps with a conventional socket and with a VDO socket.
To accurately determine the lamps, you must first remove the shield and determine the type of socket.
The lamps in the sockets are the same, however, from the factory, the lamp mustaches are soldered to the socket and to replace the lamp, you need to unsolder or pull out the old one and install a new lamp in its place, while soldering the mustaches.
However, you can take a simpler route by purchasing ready-made lamps with sockets. Note that the lamps are installed in them without soldering the mustaches. That is, if the lamps burn out further, you simply change the lamp and that’s it.
- A regular lamp socket looks like this
- This is what a lamp with a VDO socket looks like
Is it possible to install LED lamps?
Instead of conventional dashboard lamps, some owners install LED ones. The advantage of them is that they provide brighter light and you can choose lamps of different colors. However, some LED lamps are longer than conventional lamps, so when installed in the instrument panel, they fit closer to the light filter and create a bright spot. But at the same time, the panel itself and the indicators become brighter.
Advantages of LEDs in the shield
- brighter light, allowing better illumination of devices
- Possibility of choosing lamps of different colors at will
- longer lifespan of quality LEDs
Minuses
- Too bright LED lamps create glare on the panel, which does not look very good
- sometimes the panel looks too bright and distracts from movement
- The bright light of the panel can cause eye fatigue
When installing LED lamps in the instrument panel of a Priora, the brightness adjustment does not really work due to the fact that the diodes consume very little energy and therefore, unlike conventional lamps, do not lose brightness when the current supply is reduced.
Conventional incandescent lamps
- PHILIPS 12V bestsok.W 1.2W price from 25 rubles per piece
- GE 12V bestsok.W 1.2W price from 30 rubles per piece
- OSRAM 12V bestsok.W 1.2W price from 20 rub.
- MAYAK 12v bestsok W 1.2W price from 7 rub.
Removing the instrument panel
To remove the shield you will need a flathead and Phillips screwdriver.
Unscrew the two top screws (as shown in the picture), then carefully remove the panel under the steering column. It is held on top by clamps, and on the bottom by 3 fasteners that just need to be turned.
Under the panel we see 2 more self-tapping screws for fastening the shield; we also unscrew them. Now lower the steering wheel to the lowest position and remove the plastic cover of the shield.
Now all that remains is to unscrew the two screws holding the dashboard itself
They should be unscrewed carefully, as the screws may fall under the panel. It is better to unscrew them with a screwdriver with a magnetized tip.
We pull the panel slightly towards ourselves and see the green block and wiring harness. Disconnect it by pressing the “tab” and pulling slightly upward. After which the instrument panel will be removed.
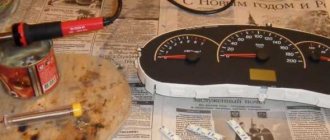
Changing the lamps in the dashboard
- There are a total of 5 backlight lamps in the instrument panel on the Priora - 4 of which are in the middle and one illuminates the lower display.
- We replace the lamps with regular or LED ones and reassemble them in the reverse order.
If you install LED lamps, be careful, they have polarity. Therefore, before installing the shield in place, connect the block, turn on the dashboard lights and check that all the lamps are on.
Step-by-step instruction
1. Set the steering wheel to the lower position.
2. Next we need to remove the instrument panel trim. It is secured with four Phillips screws.
Unscrew the 2 screws on top.
In order to get to the lower mounting screws, you need to remove the plastic from the bottom of the steering wheel.
To remove, turn the three latches counterclockwise half a turn.
After turning the clamps from above, pry up the plastic with your hand and remove it.
3. Unscrew the 2 lower screws securing the instrument panel trim.
4. Using both hands, remove the cover. Let's start from the top.
Be careful not to break the latches.
5. Unscrew the 2 screws securing the dashboard using a Phillips screwdriver.
6. After unscrewing the screws, pull the dashboard slightly towards you.
Do-it-yourself tuning and dismantling of the center console
Dismantling the center console on the Lada Priora is quite simple, but has a number of secrets. First, you need to remove the “Open” cover and unscrew the two screws underneath it. Then remove the ashtray and also unscrew a couple of screws under it. Next, remove the tape recorder and take out the frame, under which again there will be two screws that must be unscrewed. The cover needs to be pulled towards you in order to remove the central nozzles from the stove at the top (overcoming some resistance). After the top disconnection, you need to stick your hand in and remove the connectors from the heating, clock, emergency lights, control system. The center console can now be completely removed.
Car interior tuning
The Lada Priora, which came off the assembly line, has fairly light colors in the interior, which can be made darker by painting the center console, door handles, and replacing the upholstery. For painting we will need white spirit, varnish, acetone, primer for metal and plastic, and spray paint. The center console is degreased, primed in a couple of layers with drying between them, painted in 2-3 layers (also with intermediate drying), and varnished.
The situation is much worse if the instrument panel in the Priora is faulty and requires repair. In this case, pinout is needed, i.e., matching the contacts and wires to a particular device. The description of the combinations for the shield states that contacts 2,3,5,6,8,9,16, 17,22, 28-30 are reserve,
Contact
Device
Step-by-step instructions for dismantling the standard radio:
- Before removing the Priora's standard radio, it is recommended to disconnect the negative terminal of the battery from the body.
- Carefully insert a thin steel plate into the slots located under the Scan and TA buttons. The tools must be placed at a slight angle to the side, being careful not to damage the plastic of the radio panel.
- The plates must be inserted until a click appears, indicating that the latches are actuated.
- Then you need to pull the head unit out of the cavity in the Priora instrument panel. To do this, turn the plates slightly to the sides and use them as levers for dismantling. If the tool comes off, it should be reinserted into the groove until it makes contact with the latch.
- Pull the equipment out of the shaft, carefully disconnect the power plugs, antennas and connections to the speakers.
Many owners cannot remove the head unit from a Lada Priora car using the given method, since the tool bends, but the latches do not come off. Instead of plates, it is allowed to use nail files or special keys used to remove Pioneer or Sony radios.
Alternative dismantling method:
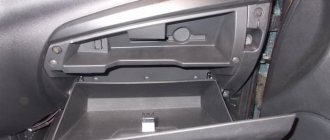
- Before removing the radio from the Priora using nail files, you need to completely open the glove box lid.
- Insert the file into the cavity of the right latch until it makes contact with the latch. Then turn the instrument slightly to the right, disengaging the tongue from the audio device body.
- Gently push the rear of the radio through the glove box. Since it is necessary to simultaneously hold the clamps and push the equipment out of the installation shaft, it is recommended to hire an assistant.
- After the body of the audio device extends 2-3 mm, you should move the latch on the left side.
- Continue pushing the radio until it comes out 30-40 mm from the mounting socket. Further movement is limited by the antenna coaxial cable, which is secured with plastic clamps along the lower edge of the instrument panel near the glove box. It is necessary to cut off the clamp and disconnect the connector located in this place.
- After the audio device is completely removed from the mounting socket, you should carefully disconnect the existing plugs.
What does the dashboard consist of?
On the panel? Priora devices have all the necessary parts, without which no modern car can do:
- regulator of external lighting and internal lighting panel;
- switch for rotary, dimensional and lighting regulators;
- headlight signal;
- car instrument cluster;
- wiper regulator and windshield washer.
In addition to the panel, there is an ignition switch connected to the anti-theft system. It contains 3 positions. Among the secondary mechanisms, we can note the presence of regulators for the rear window heating system, alarm and interior cooling. It is also worth mentioning the glove compartment, built-in clock and radio input jack.
Sometimes a certain element of the panel becomes unusable and you have to look for ways to replace it. In this case, you will need to disassemble the interior. Below we discuss how to disassemble the instrument panel.
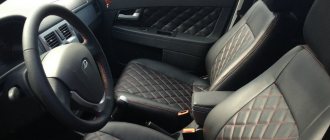
Lada Priora Hatchback “Bobosyan” › Logbook › Armrest reupholstery
Yo, joke people, it's me again.
I decided to overcome laziness and post something in the BZ
So I reupholstered the armrest.
I myself am surprised that I traveled with him for two years. Now I'm even a little ashamed.
We have a local group that sells car stuff. Among other things, they also have door card inserts. Leatherette, stitching, different patterns, everything. If there are inserts, then there are those who sew them. Since there are those who sew them, it means they can sew something besides inserts, I reasoned. A short dialogue on VKontakte confirmed my thoughts.
Guys from Pyatigorsk. The cost of the armrest upholstery is 400 rubles (the same simple material). Production took four days. I went to Pyatigorsk and picked it up. Oh, this Pyatigorsk, especially when you don’t know it at all
So, I have the upholstery. I removed the armrest (two bolts) and brought it home.
To take it apart, I warmed it over the stove. Warmed it up carefully. For a long time. But I figured it out anyway. The old upholstery itself was not even glued, but simply inserted into the cracks of the glove compartment. I took it apart to fit the new one properly.
I glued the new upholstery. If you are also a scourge and stick in a moment, then let the armrest air out. I'm a simple guy - I did it and installed it right away. The next morning I had some kind of gas chamber in my car. Glory to the Germans from Henkel, their moment has been non-toxic for 15 years now. Yes, it evaporated quickly and the smell went away
My armrest was the source of incredible rattling noises, so I made some noise along the way
The spring really did my mind; I didn’t immediately understand why it was and where it was placed. I tried to remove the backlash and gaps of the studs by putting heat shrink on them, but it didn’t work. And to hell with him.
Well, already installed on the car
It didn't turn out perfect, unfortunately, but it suits me. I have gained experience working with similar materials, next time it will be better. In my defense, I can say that it was a little oversized, which was reflected in the front part (a crease is visible in the photo). Yes, and this was the first time in my life that I did something like this, and I couldn’t eliminate the jambs by properly gluing it. It's okay, now I'm a scientist