Tips and tricks for motorists
1. Replacing the Priora support bearing without removing the strut is not recommended, in this case the installation of the new product will not occur correctly, which will affect the service life.2.
To prevent dirt and moisture from getting on new products, come up with additional protection for the “supports” under the hood.3. If you find products in a closed steel case in retail outlets in the price range of 600 rubles - this is a reliable option, feel free to purchase and install.4. Do not purchase open products where the balls are visible. The need to replace the front struts arises after dull knocks alternating with clicks begin to be heard from under the wheel arches while the car is driving over uneven surfaces. Typically, this was not observed at high speeds, but when overcoming speed bumps, they appeared again.
After self-diagnosis of your Lada Priora, it is not always possible to find the cause of the knocking, the suspension is normal, but the noise is still there. After digging a little on the net, I came across several similar topics in which people discussed my problem, and it was there that I learned that the front struts were to blame and that now I had serious work to do called: replacing the front struts with my own hands. After I went to the service station, my verdict was confirmed, it was possible to fix everything right there, but I decided to do everything myself. Read more about knocking in the front suspension here.
After several hours of searching, I found front struts that suited me in all respects; these were Acomi struts model “Comfort CLASSIC A170.2905.002/003-05”.
I chose the front struts with the expectation that they would be softer and, as they say, the price would be adequate, comfort while driving is perhaps the most important thing in a car. The original hard SAAZs are no good, so I didn’t repeat the manufacturer’s mistake.
The front struts I bought are hydraulic, collapsible, which is very convenient; if necessary, you can simply go buy cartridges and replace them yourself, which you will never do with your own SAAZ ones.
Replacing the front struts is not the most difficult procedure I have ever performed, but it is complicated by the fact that it requires special tools in the form of special spring ties and a special puller for steering tips.
In addition, you will need the following set of keys to work:
- End caps on “13”, “17”, “19” as well as caps on “17”, “19”, “22”;
- Hexagon at "6";
- Steering wheel end remover;
- Pliers;
- And, of course, a hammer.
Before you start replacing the struts with your own hands, I recommend treating all connections, nuts and fasteners that need to be disassembled with WD40 liquid; this can be done the day before or the evening before.
Causes of knocking noise when turning the steering wheel
There are a number of reasons why a knock is heard when turning the steering wheel. To more accurately determine the malfunction, it is necessary to determine three circumstances:
Based on such data, you can focus on the source of the knocking sound.
| Place of knock | Causes of knocking |
| Knocking in the wheel | Partial failure of the angular velocity joint (the boot is torn, problems with the bearing), noise from tie rods/steering rods, steering rack when driving on rough roads, shock absorber struts (spring knocking), stabilizer struts |
| Rack knock | Damage to the rack shaft, increased play of the bushing and/or shaft bearings, on machines with electric power steering, mechanical damage to the engine shaft and/or worm drive, wear in the steering shaft driveshaft |
| Knocking in the steering wheel | Partial failure of the steering rack, rusting of the rack drive shaft, wear of the worm drive in the EUR and/or mechanical problems with the electric motor |
| Steering wheel position | Causes of knocking |
| When turning the steering wheel all the way (left/right) | When replacing the front control arm, it is possible that the lever hits the subframe when turning. Sometimes craftsmen simply do not fully tighten the fasteners, which cause them to creak when turning. |
| When turning the steering wheel while the car is stationary | Faulty steering rack, universal joint, loose fasteners, tie rods/ends |
| When turning the steering wheel while the car is moving | The same reasons as when the car is stationary, but problems with stabilizer struts and shock absorber struts are added here. |
Below is a list of reasons why knocking occurs when turning in the area of the wheel, suspension and steering wheel, according to the degree of their prevalence.
Chassis SS20
Life hack: clearance of a Priora car
These spare parts for domestic and foreign cars are produced under the “System Technologies” brand. These racks have become so popular due to their high quality. For Priora, the manufacturer offers 4 product options that differ in hardness. Which stands are better? They need to be selected according to your driving style. The softest ones are the “Standard” series racks. Rear shock absorbers from the same series are also offered.
A reinforced version is offered to increase the load capacity. Next are the “Comfort” racks. According to reviews from many car owners, this is the best option. They are stiffer than the Standard, but the suspension works equally well on bad and good roads.
The “Highway” kit is suitable for those who like stiff suspension and high speed. With these racks you can drive on bad roads, but it will be uncomfortable. “Sport” is the toughest option from this manufacturer for Priora cars. A front suspension of this type is not very suitable for the city, but for sports competitions it is just right.
Set of parts for mounting the air suspension of Lada Priora
The front suspension of VAZ 2108, 2109, 21099 is knocking
The operating principles of air suspension are based on the use of compressed air in the system, which, due to compression, is able to regulate the vehicle's ground clearance. Installing air suspension on the Priora allows you to make driving a vehicle more comfortable on any type of road surface.
The independent suspension on the Priora is installed on the car yourself, and the installation process is simple. Therefore, every car enthusiast can install air suspension on a Priora if you follow certain tips and recommendations from experts.
In order to install the Priora suspension on your own, you need to know some of the subtleties of this operation. In addition, to carry out work on re-equipping the Priora suspension, you will need to purchase a set of parts from a car store. To carry out installation work to retrofit the suspension, the following parts will be required.
| Detail | Description |
| air spring | The air spring is the most expensive part among all the components that make up the pneumatic independent suspension on the Priora. This suspension element is installed on the car instead of standard suspension elements. In the process of pumping compressed air into the airbag, the ground clearance of the Lada Priora changes. When the pressure in the air spring decreases, the ground clearance of the vehicle decreases. Adjusting the ride height is the main function of the Priora suspension airbag. |
| compressor | The compressor is one of the main components of the pneumatic system, ensuring all the functions performed by the suspension on the Priora. A compressor, which is mounted on a vehicle, is necessary to pump air into the air spring. |
| fasteners and braces | An independent suspension is mounted on the Priora using special fasteners and braces. Using these elements, the Lada Priora air suspension is attached to the car body. If you have some skills in working with metal, you can make these parts yourself, but it is best to order these fastening components for the Priora suspension and make them from a specialist. In this case, there will be a guarantee of high-quality manufacturing of components. |
| pneumatic valves | The independent suspension on the Priora is equipped with two pneumatic valves, which are designed to pass pneumatic flow. One of them is intended to inject air into the air bag, and the second pneumatic valve is intended to release air. |
| pressure gauge | To install it in the suspension system on a Priora, you can use the same pressure gauge that is used in pneumatic systems operating at a pressure of a certain range. |
| start button | The start button is designed to adjust the state of the air suspension directly from the interior of the Lada Priora. |
| air supply line | The air line that the independent suspension on the Priora has consists of a system of tubes connecting all the air bags that form the basis of the Priora suspension. |
| air pressure sensor | Pressure sensor - a sensor located in a convenient location on the pneumatic line, is used to monitor the condition of the suspension directly from the passenger compartment. |
| start relay |
Noise or knocking
Life hack: Priora car pump 16 valves
A knock in the front suspension (Priora station wagon also suffers from this), as well as a characteristic noise, is one of the signs of a malfunction. All owners of domestic cars of this family have repeatedly encountered this. Chassis maintenance specialists claim that in this case, strut malfunctions are possible. Also, during operation, the bolts that secure the stabilizer bar to the car body loosen.
Another noise may be associated with wear of the bar itself or the cushions. In the case of struts, to get rid of the nasty knocking, you only need to replace the worn shock absorbers. If the fastener is loose, it should be tightened. If the cushions fail, they should be replaced. It is not expensive. Now there are any spare parts for Priora on sale.
The knocking noise can also be caused by a loose fastening on which the upper support is installed to the body. Experts recommend tightening the support nuts. Another cause of noise is a worn rubber element in the strut support. You need to purchase a new part and install it. Then the characteristic noise will disappear.
If the silent blocks on the levers, braces or struts wear out, the suspension will also knock. These parts need to be replaced. Other faults include worn ball joints, broken or deformed springs, worn compression buffers, and unbalanced wheels.
Unpopular reasons for knocking
It would be a good idea to check the anti-roll bar bracket. This part consists of bushings based on metal and rubber, which are turned in different directions and connected by a thin isthmus. Most often it is he who breaks down. On rough roads, on small bumps and on turns, you can hear a knocking sound.
For a correct diagnosis, you need to pull the end of the stabilizer with one hand. This will work better if the wheels are turned to the right.
Anything can knock in cars. For example, washer barrels. If it is poorly secured in place, the race will knock. There are also many other mysterious culprits behind such sounds.
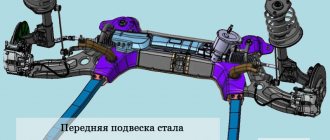
Design and purpose of the VAZ 2110 front suspension
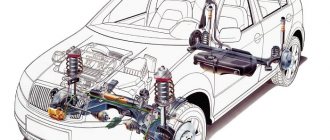
Let's look at how the front suspension of the VAZ 2110 is designed, how well it complies with modern standards, what functions it provides, and what attention it requires.
Purpose
First of all, it is intended for fastening the wheels, and is also designed to provide shock absorption for the entire front of the car, its stability on the road while driving, the possibility of a number of wheel adjustments, namely along the axis of rotation (the angle of its longitudinal inclination), toe, camber.
VAZ 2110 front suspension assembly diagram
Main nodes
Let's talk about its device.
The most important element of the front suspension is its strut (hydraulic telescopic) - indispensable in the matter of shock absorption, that is, ensuring a comfortable ride, without much shaking (as far as possible) over bumps and potholes on our roads. It is thanks to the rack, or rather its steering knuckle with an upper bolt equipped with an eccentric washer and a belt, that makes it possible to change the camber of the wheel.
Telescopic strut of the front suspension of VAZ 2110
The following are installed on the rack:
- Special spring;
- Buffer limiting the compression stroke, made of polyurethane;
- Upper support. Its structure is as follows: it is attached to a stand, to which the mudguard is attached with self-locking nuts. Therefore, if you make repairs yourself, do not miss this moment - you cannot use ordinary nuts;
- A bearing that makes it possible to rotate the stand together with the wheels;
- A shock absorber in which a spring and a plunger are installed for better performance.
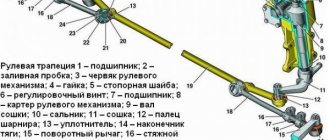
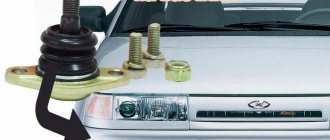
The ball joint combines the lower parts: the steering knuckle and the lever. The longitudinal braces, lower arms, and supports that the crossbar has are connected to each other by rubber-metal hinges. With the help of special washers, it becomes possible to adjust the longitudinal inclination of the turning axis. An angular contact, non-adjustable bearing secures the wheel hubs.
Ball joint VAZ 2110
The cross member is the rod to which the lower arms are connected. It is attached to the body in the middle, helped by rubber cushions. This, in a nutshell, is the front suspension design. Now let’s look at possible malfunctions, which in some cases can be fixed with your own hands, in others it is better to contact specialists.
Cross member VAZ 2110
Knock
If you hear a knock in the front suspension while driving, the main reasons may be:
- Faults in the rack;
- The bolts have become loose, the stretch marks or cushions with which the cross member is equipped may have worn out;
- The attachment to the body has become loose;
- The rubber parts have collapsed, and the knocking has a distinct “metallic” sound;
- A “limp” or even a broken spring knocks;
- Wear of hinges;
- Knocking due to wheel imbalance.
In principle, in any of the listed cases, repairing the VAZ 2110 front suspension, done by yourself, can help, during which you need to replace a worn part or (in the latter case, the reasons why a knock is heard) - balance the wheel.
Vehicle pull to the side
The car pulls to the side when driving straight. The reasons for this malfunction may include:
- Each spring has its own compression ratio. In this case, the spring that has lost its elasticity must be replaced;
- Tires have different pressures. We check and correct;
- The rubber element near one of the strut supports was destroyed. At the same time, a characteristic knocking sound is also heard while driving. The problem is solved by replacing this element;
- The wheel alignment angles are incorrect. Increased tire wear may be associated with this malfunction. If you can’t handle it yourself, it’s better to entrust this task to specialists.
Tire wear
This may be due to improper driving (rash acceleration, braking, exceeding the permissible load of the vehicle), or other reasons:
- violations of wheel alignment angles;
- high wear of the hinges;
- wheel imbalance.
Suspension check
Knowing the meaning and design of the suspension, you will be able to check its condition every time you inspect the machine on a pit (overpass) and perform maintenance.
Pay special attention to the condition of the protective covers on the ball joints. Check to see if any deformations, cracks or dents have appeared on the suspension due to shaking and bumps.
Be sure to check the condition of all rubber and rubber-to-metal parts, as well as the ball joint of each wheel. Remember: a malfunction noticed and corrected in time is much less evil than repairs when everything is already falling apart.
Suspension modifications
Many owners of the VAZ 2110 do not consider the factory suspension to be ideal, and tune it to improve stability and handling on the road.
- Benjamin
3.13.1 Knocks in the engine / VAZ 2170
If it seems to you that there are sounds when the engine is running that were not there before, immediately check whether everything is in order with the engine. Most often, knocking in the engine is associated with serious malfunctions, to diagnose and eliminate which you will have to disassemble the engine in a service center or garage. However, you can try to independently determine the cause of the knocking noises in order to decide whether to go to a car service center under your own power or in tow.
| Warning If you have the slightest doubt about the results of self-diagnosis, remove the tow rope. Major repairs to a damaged engine will cost more than a towing service. |
Knocking noise from main bearings
- very dangerous; Stop the engine immediately; you will have to be towed to a car service center or garage. Low pitch knocking. It can be heard in the lower part of the crankcase, noticeably intensifies under load and with increasing rotation speed. Often its appearance is accompanied by a drop in oil pressure (the emergency oil pressure drop lamp is on almost constantly).
Knock of connecting rod bearings
- very dangerous; Stop the engine immediately; you will have to be towed to a car service center or garage. The sound is rhythmic, sonorous, metallic, medium tone. It increases significantly with increasing load and disappears completely when the spark plug is turned off.
Piston pin knock
- dangerous; Without loading the engine, you can drive to a car service center or garage on your own. Rhythmic, high-pitched with a sharp metallic tint, audible in all engine operating modes and intensifies with increasing engine load. It disappears completely when the spark plug is turned off.
Knock of worn pistons and cylinders
- not dangerous; Without overloading the engine, you can drive to a car service center or garage on your own. A sound reminiscent of the knocking of pottery. It is especially audible when the engine is not warmed up; as it warms up, it decreases or disappears.
Valve knock
- not dangerous; You can drive to a car service center or garage yourself. Metallic knocking against the background of a general dull noise. It can be heard well at low and medium crankshaft speeds from the side of the cylinder head above the valve locations.
Detonation knocks
- dangerous; however, avoiding heavy engine load, you can drive to a car service center or garage yourself. Loud metallic knocks, usually occurring when accelerating a car. The reason is a malfunction of the knock sensor, the use of low-octane fuel, engine overload when upshifting too early, significant carbon formation in the combustion chambers. It is necessary to choose the right gear depending on driving conditions, refuel with gasoline with an octane rating recommended by the car manufacturer, check the knock sensor, and use a special fuel additive to remove carbon deposits on the valves and combustion chambers.
Lada Priora Priora The hydraulic compensators of the VAZ 2170 are knocking
Metallic knock (diesel) in the 126 Priora engine, determine the cause.
THE ENGINE KNOCKS. Diagnostics IN 5 MINUTES!
Knock as it warms up 21126
THE ENGINE KNOCKED ON THE PRIOR / PRIORA / VAZ 2170 / THE TIMING WAS TURNED, WHAT IS THE REASON???? TOP 1 dimas
How to replace the front support bearing on a Priora
Before starting the replacement, familiarize yourself with the structure of the front suspension strut, and it is also recommended to watch the video (at the bottom of the article).
Preparation for repair
Place the car on a flat surface and provide lighting, engage first gear, it is advisable to also place wheel chocks at the rear, and provide insurance when working with a jack. Prepare the required tool:
- new spare parts for replacement.
- a set of keys and a ratchet;
- steering wheel end puller (preferably);
- hammer;
- clamps or spring ties (required);
- jack and vice.
- penetrating lubricant WD-40.
- Torque wrench (optional).
Disassembling the front pillar assembly
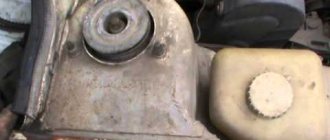
- Open the hood and locate the front support cup.
- First, remove the rubber cover.
- To unscrew the fastening you will need a special elongated double head for 22, sold for 150 rubles.
- We install the head inside, grab it with a balloon or carob.
- We grab the smaller inner head with a spanner.
- First, loosen the nut (do not unscrew).
- Moving on to the bottom of the rack, the wheel has already been removed. We treat the fasteners of the secondary knuckle with penetrating lubricant (WD-40), as well as the steering tip bolt. Let's wait for a while.
- We tear off the rack mounting bolts. The process looks like this:
- You can’t unscrew them right away; you’ll have to knock them out at the end. First, unscrew the tip of the ball joint.
- We loosen it with a spanner, then work with a “ratchet”.
- Next, you will need a special puller, or carefully knock it out with a hammer through a wooden spacer.
- Let's go back to the lower strut bolts. We knock them out carefully with a hammer and a wooden wedge. The fastener on top regulates the wheel alignment - do not confuse it with the bottom one when assembling.
After removing the fasteners, carefully pull the assembly towards you. Don't forget to disconnect the brake hose.
- We return upstairs and unscrew the three support fasteners.
- Now the structure does not hold anything, all that remains is to remove it, we do it from below, pulling the module towards ourselves.
Installing a new part
- We clamp the assembly in a vice, as shown in the photo.
We compress the springs with clamps until the outer part of the support weakens. ATTENTION: do not overtighten the spring.
Now unscrew the locknut on the rod.
- Here is a way to unscrew the lock nut so that the rod does not turn; this is done using a hexagon.
- After this, all that remains is to lift the outer cover and we will gain access to the support bearing for replacement.
- Now, depending on what your goal is, we change the entire support or just the bearing. Mandatory condition: replacement of rubber gaskets - vibration isolators.
- We assemble the entire assembly in reverse order. Do the final tightening of the fasteners when the jack is removed.
practical guide
To ensure proper rolling of the vehicle's wheels, taking into account the operation of the suspension and steering, the front suspension elements must be installed in a certain position.
It is recommended to check and adjust the angles of the front wheels in specialized technical centers that have the appropriate equipment.
The installation angles of the front wheels are indicated in the “Reference Data” section.
The camber angle of the front wheels is the angle of inclination of the plane of rotation of the wheel relative to the vertical. Incorrect camber angles of the front wheels cause the car to pull to the side when driving in a straight line. Too much positive camber (where the top of the wheel sticks out) will cause the outside of the tire tread to wear faster, while too much negative camber will cause the inside of the tire tread to wear faster. The camber angle of the front wheel is adjusted by the upper bolt securing the steering knuckle to the strut. The bolt holds the eccentric head, and it holds a special washer.
Toe of the front wheels is the angle between the plane of rotation of the wheel and the longitudinal plane of symmetry of the car in the position of straight-line movement. Toe is defined as the difference in distances between the rims of the front wheels in millimeters (B - A, Fig). Misalignment of the front wheels impairs the vehicle's handling and directional stability and leads to intense tire wear.
The toe-in of the front wheels is adjusted by changing the length of the steering rods by rotating the threaded inserts.
The longitudinal inclination of the steering axis is the angle between the steering axis of the front wheel and the vertical in a plane parallel to the center line of the vehicle. Violation of the correct angle of inclination of the steering axis of the front wheels causes deterioration in vehicle handling. A large caster angle increases the resistance to rotation of the steering wheel, while a small caster angle impairs the stability of the front wheels in the direction of travel straight ahead.
The inclination of the steering axis of the wheel is adjusted by changing the number of washers installed at the ends of the longitudinal extension of the front suspension.
1. We prepare the car for work.
2. Unscrew the nut of the bolt securing the stabilizer bar to the lower arm of the front suspension and knock the bolt out of the holes in the strut and arm.
Similarly, remove the bolt connecting the stabilizer link to the right suspension arm.
3. Using a 13 mm socket wrench with an extension, unscrew the two nuts securing the bracket of the left stabilizer bar cushion to the body.
Similarly, unscrew the nuts securing the bracket of the other stabilizer bar cushion to the body.
4. Remove the stabilizer bar assembly with struts and cushions.
Disassembly
1. Remove the rack from the rod (see above).
2. Use any available method (marker, adhesive tape) to mark the installation location of the cushions on the bar.
3. Remove the cushion from the rod, having first removed the stabilizer rod mounting bracket from it.
Installation
Install the stabilizer in reverse order.
To make installation of cushions and posts easier, apply a soapy solution to the rod.
To replace the anti-roll bar struts on a Lada Priora, you will need an inspection ditch or overpass.
Removal
1. We prepare the car for work.
2. Using two 17 mm wrenches, unscrew the nut of the bolt securing the stabilizer link to the transverse arm.
3. Using a bit of suitable diameter, knock out the bolt from the rack and lever.
4. Lubricate the end of the stabilizer rod with soapy water.
5. Insert the barb into the hole in the lower silent block and, using it as a lever, rotate the stand from side to side, gradually moving it towards the edge of the rod.
6. Remove the stand from the bar.
Similarly, remove the strut from the other end of the stabilizer bar.
Installation
We install the racks in the reverse order, having previously lubricated the ends of the stabilizer rod with soapy water.
You will need spring ties to get the job done.
Disassembly
1. Remove the rack from the car.
2. Clamp the stand in a vice.
Be careful! A compressed spring has great force and when the tie breaks, it straightens out and can cause injury.
3. Install the couplers and tighten the spring evenly, without distortions, until the load is removed from the upper spring cup.
4. While holding the shock absorber rod from turning with a 6 mm hex wrench, use a 22 mm wrench to unscrew its nut.
5. Remove the limit washer from the upper support of the rebound stroke from the strut rod.
6. Remove the upper compression stroke limiter and the upper support from the rack.
7. Remove the bearing from the upper support.
8. Remove the upper spring cup and rubber gasket.
9. Remove the spring from the rack.
10. Remove the compression stroke buffer and the protective casing of the shock absorber rod.
11. To replace the spring, loosen the spring ties.
Assembly
We assemble the front suspension strut in the reverse order.
Before assembling the strut, by fully extending and retracting the rod by hand, make sure that the shock absorber is in good condition. If you feel dips, jerks, or hear strange sounds when moving the rod, replace the shock absorber. Check the integrity and serviceability of all elements installed on the rack. Replace a damaged or cracked shock absorber rod guard, damaged compression stroke bumper, or cracked or weakened suspension spring.
Front suspension springs are divided into classes according to their stiffness. The class of the spring is indicated by paint on the outside of one of its coils. The front suspension must have springs of the same class installed.
To do the job you will need a reliable stand under the car.
Removal
1. We prepare the car for work.
2. Disconnect the tie rod end from the strut swing arm.
If removing the strut for disassembly, loosen the shock absorber rod nut with a 22 mm spanner while holding the rod with a 6 mm hex key.
3. Using a 13 mm socket wrench, loosen the three nuts securing the upper strut support to the car body.
4. Remove the front wheel.
5. Remove the brake hose from the strut bracket.
and the wheel speed sensor wire.
6. To minimize the violation of the camber angle of the front wheels, use a punch or paint to apply marks on the bolt of the upper mounting of the steering knuckle and on the strut bracket.
7. Using a 17 mm socket wrench, unscrew the nuts of the bolts of the upper and lower fastening of the steering knuckle to the strut, holding the bolts from turning with a 17 mm socket wrench.
8. Remove the washers from the bolts (the washer of the upper bolt is eccentric and remove the bolts.
Frequent front suspension malfunctions
Maintenance and repair of the front suspension in Priora involves identifying the exact cause of the breakdown:
- If there is extraneous noise or a distinct thud is heard, the struts may need to be replaced. Check the tightness of the bolts securing the stabilizer hoses, tighten if necessary. If the cushions are worn out, replace them with new ones. If the supports at the top of the suspension strut are loosened to the body, tighten them. Assess the condition of the rubber component of the strut mount, ball joint, spring device, and compression motion buffer. If they are damaged or defective, replace them. Alternatively, check the wheels for imbalance.
- Liquid may leak from the strut, for one reason - the rod seal has worn out and collapsed. This will be indicated by the appearance of burrs on the rod, damage to the chrome surface, and mechanical defects in the sealing ring located on the strut body. Replace the old telescopic stand with a new one.
- If the suspension in the Priora breaks, you will have to replace the spring device and telescopic strut.
- It has become difficult to drive the car, it constantly skids to the side - it’s time to check the air pressure in the tires and normalize it. If the wheel alignment angles leave much to be desired, perform a wheel alignment. It may be necessary to replace the rubber lining in the suspension mounts or springs.
Which stands are better?
It is difficult to answer this question. Although manufacturers have quality certificates, very often spare parts for the chassis cannot provide the declared comfort of movement and the specified service life. Reviews also do not allow us to understand which is better. It all depends on the preferences of the car owner. Today, Priora is equipped with air suspension.
You can make this system yourself or contact a service station. This solution shows itself very well in terms of comfort and reliability.
The VAZ-2110 is considered the predecessor of the Lada Priora; their front suspensions are almost identical, the only differences are in the spring parts and shock-absorbing components. The problems that drivers noted with the VAZ-2110 with front suspension migrated to the Priora - the wheel bearings leave much to be desired, the ball joints wear out quickly and must be regularly replaced.
Causes of malfunctions in the front suspension
| Cause of malfunction | Remedy |
| Noise (knock) in the suspension when the car is moving | |
| Telescopic suspension struts are faulty | Replace the racks |
| The bolts holding the stabilizer bar to the body are loose. Wear of rubber cushions of guy wires or barbells | Tighten the bolts, replace worn cushions |
| The fastening of the upper support of the suspension strut to the body is loose | Tighten the upper support mounting nuts |
| Settlement, destruction of the rubber element of the strut support | Replace the rubber element of the strut support |
| Wear of rubber-metal hinges of suspension arms, braces or stabilizer bar struts | Replace the hinges |
| Wear of the ball joint of the suspension arm | Replace the ball joint |
| Settlement or breakage of the suspension spring | Replace the spring |
| Destruction of compression progress buffer | Replace buffer |
| Increased wheel imbalance | Balance the wheels |
| Liquid leaking from the strut | |
| Wear or destruction of the rod seal; nicks, scuffs on the rod, damage to the chrome coating; shrinkage or damage to the strut housing O-ring (shock absorber reservoir) | Replace the shock absorber strut |
| Frequent suspension breakdowns | |
| Suspension spring draft | Replace the spring |
| Shock absorber not working | Replace the shock absorber strut |
| Insufficient resistance of the suspension strut during recoil stroke | |
| Leaking recoil valve or bypass valve; insufficient amount of fluid due to leakage; scoring on the cylinder and piston ring; wear or damage to the fluoroplastic layer of the guide bushing; recoil valve spring settlement; the presence of foreign impurities in the liquid | Replace the shock absorber strut |
| Compression valve leaking; insufficient amount of fluid due to leakage; rod wear or damage to the fluoroplastic layer of the guide bushing; the presence of foreign impurities in the liquid; wear, deformation or destruction of compression valve discs | Replace the shock absorber strut |
| Increased ball joint clearance | |
| Wear of the rubbing surfaces of the ball joint parts as a result of contamination caused by leaks or damage to the cover | Replace the ball joint |
| Moving the vehicle away from straight-line motion | |
| Different tire pressures | Set normal pressure |
| Violation of wheel alignment angles | Adjust wheel alignment |
| Destruction of the rubber element of one of the suspension strut supports | Replace the rubber element of the strut support |
| Uneven elasticity of suspension springs | Replace the spring that has lost its elasticity |
| Significant difference in tire wear | Replace worn tires |
| Increased front wheel imbalance | Balance the wheels |
| Increased tire tread wear | |
| Excessive acceleration with wheel slipping | Avoid hard acceleration |
| Frequent use of wheel locking brakes | When braking, do not allow the wheels to lock |
| Wheel alignment angles are incorrect | Adjust wheel alignment |
| Vehicle overload | Do not exceed the permissible loads specified in the instruction manual |
| Uneven tire tread wear | |
| Increased speed when cornering | Reduce speed when turning |
| Extensive wear on ball joints of suspension arms and rubber-to-metal joints | Repair the suspension |
| Wheel imbalance | Balance the wheels |
Have you ever encountered a situation where the suspension rattles (extraneous noises and knocks appear)? Were you able to diagnose the cause yourself?
Let us remind you that we previously told you how to protect the supports (nuts) of the front struts, and also why they install wishbone suspension arms.
Keywords: front suspension Lada Kalina | front suspension of Lada Granta | front suspension of Lada Priora | rear suspension of Lada Kalina | rear suspension of Lada Granta | Lada Priora rear suspension
7
1
Found an error? Select it and press Ctrl+Enter..
Subframe (atypical situations)
Sometimes atypical situations that are quite difficult to diagnose lead to knocking when turning.
For example, there is a known case when, while the car was moving, a small stone hit the subframe and got stuck there. When you turn the steering wheel in one direction or the other, a natural displacement of the steering gear elements occurs, and they seem to run over this stone. When the elements were restored to their original position, they jumped off the stone, making a characteristic sound. The problem was solved by removing the stone. When repairing suspension elements, for example, when replacing the front arm, the latter may touch the subframe when turning the wheel. Naturally, this is accompanied by a blow and a grinding sound. To get rid of it, it was enough to lift the subframe using a pry bar.
Another atypical situation of knocking in the suspension when turning is that the subframe bolt loosens, and the subframe itself can knock when driving, and even more so when turning. It can be eliminated by tightening the corresponding bolt.
Conclusion
It is unsafe to drive a car that makes a knocking noise when you turn the steering wheel. Any breakdown that leads to this will only get worse over time, which will ultimately lead to complex, expensive repairs, as well as dangerous driving. Therefore, if a knocking noise is detected when turning a wheel, it is necessary to carry out diagnostics as quickly as possible and take appropriate measures to eliminate the cause that caused it.
How to disassemble the front and rear suspension
The chassis consists of 41 parts, so disassembly takes longer and assembly may require additional adjustments. The process looks like this:
- Using a wheel wrench, loosen the bolts on the wheel one by one and pull the car onto an inspection hole or overpass. Be sure to tighten the handbrake - this will lock the rear ones, now remove the front ones.
- Unscrew the nuts from the hubs, now you can remove the steel ball joint rod from the damper strut.
- Disconnect the stabilizer from the lever. Unfasten the ball joints from the steering knuckle and remove them.
- Disconnect the bracket from the body, and then remove the extension. At the same time, loosen the pad holders.
- Tie the brake caliper, leaving it attached to the hose. Removing it is not so difficult, but installing it is much more difficult, so it is easier to leave it hanging.
- Unscrew the nuts from the damper, remove it, and then the protective fist.
- Using socket wrenches, remove the fastenings of the ball joint and steering knuckle. Be careful not to damage the protective cover of the hinge.
- Analysis of the rear chassis looks like this:
- Place the car on the pit (it is better, of course, to use a lift);
- Open the trunk, under the trim (which covers the wheel arches) loosen the shock absorber bolts.
- Gradually loosen the wheel bolts and remove them.
- Unscrew the brackets securing the handbrake cables, then remove them - otherwise they will get in the way. Unscrew the drum mechanisms, cable ends, flanges.
- Remove the brake pipes. Unscrew the drive lever washer, then remove the drive itself.
- Remove the damper supports.
- remove the stand.
- Unscrew the fasteners of the beam (from below), and smoothly lower it to the ground.
