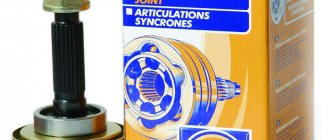
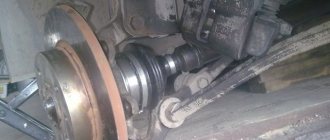
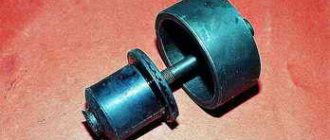
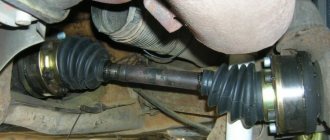
A CV joint is an angular velocity joint. An alternative name is considered to be grenade due to its visual similarity. The main purpose is to transmit rotational movements between the axle shafts. The angle, due to rotation, constantly changes in relation to each other.
Periodic breakdowns are associated with the influence of constant loads; the issue remains during the period of operation. In the manufacturing process of the part, strong carbon steel is used, which can withstand heavy loads for a long period of time.
Over time, the VAZ 2110 CV joint still needs to be replaced. Among the main reasons for failure is contamination with sand getting inside the mechanisms, loss of lubricant, torn boots or mechanical damage to the structure.
Components and types
Content
In order to replace the internal CV joint of the VAZ 2110, it is important to familiarize yourself with its structure:
- The clip is internal.
- Separator. It is a ring that secures 6 balls.
- Special housing with joint, including drive shaft.
If you need to replace a VAZ 2110 CV joint, it is important to determine which one needs to be changed. There are two types: external and internal. Without them, the car will not be able to fully function.
The first grenade is called internal, since torque is transmitted from the transmission to the shaft.
The second grenade is classified as external and interacts with the wheel hub of the car.
Despite the identical principle of operation, they have differences in design, and there are also differences in cost.
What to do if the nuts do not unscrew?
Have you removed the clamps, “soaked off” the rust, bought a wrench with a 1 meter lever, but it still doesn’t work? There are proven ways to unscrew a nut without a grinder.
- Reverse rotation. Sometimes it is enough to first move the nut in the direction of tightening, and the process will begin;
- Tap the nut. Use a small hammer (preferably brass or copper) to tap the edges;
- Heat. A gas torch or blowtorch is an almost 100% guarantee of success due to the expansion of the metal. In an electrified garage you can use a hair dryer. Heat for at least 5 minutes.
What are the types of CV joint defects?
Replacing a CV joint on a VAZ 2110 involves a preliminary study of the problem: what defect has occurred, so as not to harm the condition of the structure. In practice, there are situations when replacing the internal CV joint of a VAZ 2110 does not bring the expected results, or problems arise during the operation of the new part.
Among the main defects are:
- Unsatisfactory quality of the material from which the parts are made.
- Defective design or counterfeit.
- Low quality components or lack of lubricant. As a result, the grenade quickly receives mechanical damage and breaks.
- The outer CV joint boot of the VAZ 2110 needs to be replaced if debris and dirt gets inside the mechanism.
In the case where the VAZ 2110 internal or external CV joint has not been replaced before, it is recommended to watch a video on the topic and understand the proposed operating instructions.
General recommendations
Obviously, the inner joint cannot be removed without lifting the vehicle structure, since the wheel must be removed. This can only be done when the car is suspended. Some technicians recommend draining the oil before such repairs, but you should not do this. Carrying out the replacement according to the instructions will allow you to do without draining.
It is also recommended to replace the CV joint seal together with the hinge. The CV joint is changed separately without replacing the boot and oil seal only in cases where there is a functional reserve, and the wear of the CV joint is more pronounced than other structural elements. Typically, repairs are divided into two stages if it is not possible to complete a replacement in full. Don’t forget to replace the oil seal and boot afterward in order to maintain all variations to maintain the level of vehicle safety.
How to check functionality
First you need to check how the external and internal grenade works. When replacing, the process will be different, as will the symptoms.
If the outer link fails, the main signs of failure will be the appearance of a specific sound, similar to a crunching sound. The reason is the wear of the grooves, and the movement of the balls remains the same, as if the element is in good condition. It becomes more obvious as soon as the car begins to turn, or when the gas pedal is pressed sharply.
To make sure that it is necessary to replace the outer CV joint boot on a VAZ 2110, you will need:
- When starting, you can organize small jerks.
- You can quickly pick up speed and then slow down.
- Move the shaft transversely between the CV joints. If it senses play, the grenade requires replacement.
The internal grenade needs to be replaced less frequently than the external one. As a rule, its malfunction can be detected during ordinary straight movement, or when passing complex routes.
On a VAZ 2110, replacing the inner CV joint must be carried out after a short check:
- Raise the drive wheels to launch the grenade to the maximum angle.
- Start the engine.
- Turn on first speed.
- If a specific crunch occurs, replacement cannot be avoided.
The procedure is similar to checking an external element. The main thing is to listen to see if a sound characteristic of the problem appears.
Replacing a grenade on a VAZ 2110 without removing the drive
This is the first, shortest path, which implies the presence of all the specified tools. Everything is quite simple.
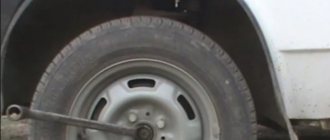
- Then we remove the wheel bolts, jack it up and remove the wheel.
- We unscrew the two 17mm bolts that hold the ball joint, disengage the splines, and move the hub to the side.
- Now, using a tool for removing clamps or a screwdriver, depending on the type of clamp, remove it. Don't forget about the small clamp.
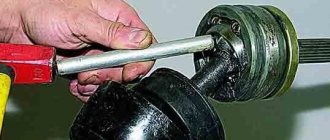
- Now we screw the reverse hammer with a welded nut onto the grenade. We clamp the drive with a gas key so that it rests against the forged lever (saber). This is necessary in order not to tear the drive out of the box, otherwise you will have to take the second path. With a sharp blow we rip the grenade off the slots.
- We remove the boot; as a rule, the grenade fails precisely because it has broken through.
- We install a new boot. We do this very carefully, preferably after washing the slots first. The main problem is the thrust ring; carefully throw the boot over it with a screwdriver.
- Now we tighten the inner clamp, screw the new grenade onto the hammer, and then hammer it into place. Theoretically, this can be done with a hammer through an old nut; knocking a grenade down with a hammer is also possible, but there is a risk of damaging the slots if you are not used to it.
- We take CV joint lubricant, it is usually included in the kit. We squeeze it out in a circle onto the balls, removing the boot and turning the grenade inside out.
- It is very important to tighten the nut just as tightly and be sure to tighten it.
How to carry out the CV joint replacement process
The VAZ 2110 requires replacement of the CV joint, since repair of the part is not possible. The optimal solution is to purchase a new structure and install it instead of the old one. First, it is recommended that you read the instructions and what tools you need to prepare in order to make a minimum of mistakes.
Then you can start working using the following order:
- To organize the replacement of the external or internal CV joint of the VAZ 2110, you will need to lift the car. If you plan to do the repairs in your own garage, then first prepare a lift or there must be a pit, since it is located at the bottom of the structure
- Fixing the car. Engage fourth gear and set the handbrake to the stop.
- If the car is driven under a hole, then it is necessary to install wedges or bars to block the wheels
- Dismantle the protective cap and get rid of the nut in the hub
- Get rid of the hub nut, unscrew the fasteners securing the wheels
- Raise the wheel, where to remove the CV joint on a VAZ 2110. It is recommended to use a jack
- Release the structure from the six bolts. As a result, support will be provided by the flange
- You need to remove two bolts from the bottom side of the support.
- Turn the steering wheel all the way by hand, the part will fall out on its own
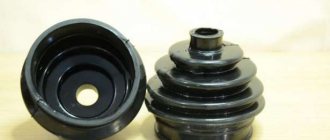
- You will need to remove the boot, which is an integral part of the grenade.
- Remove the retaining ring
- Remove the joint from the shaft. This will help avoid mechanical damage to other elements.
- Check the system to find out if the VAZ 2110 outer CV joint boot needs to be replaced
- Now you can work on the inner CV joint on the VAZ 2110 and make a replacement.
There are many ways to fix threads:
Before unscrewing the hub nut, it is advisable to read the instructions for routine maintenance of your car. It indicates the method of fixation, the direction of the thread and other nuances.
- Changing the geometry of the nut (one side is oval). Anyone who has repeatedly unscrewed such a nut has seen that the threads gradually become unusable;
- Punching after tightening. This solution is not suitable for replaceable units, since this will damage the screw part. However, many car manufacturers fix the hub nut in this way so that it does not unscrew while driving;
- Hairpin. The most reliable method of fixation. The nut does not unscrew on its own, and the thread does not deteriorate. For some reason, not all car designers use this simple method;
- The retainer is a “shoulder-groove”. A common method, more reliable than core punching, but detrimental to carvings. Longitudinal grooves (one or two) are made on the threaded connection of the axle shaft. The CV joint nut has the same number of collars, which bend into grooves after tightening. It is almost impossible to unscrew the nut without damaging the thread;
- A variety of fixing paints and adhesives. Not used on hub connections.
Since the connection is in unfavorable conditions (especially if the boot cap is lost), the nut does not unscrew the first time. An inexperienced driver panics, starts turning the nut in the wrong direction, uses attachments on the wrench in the form of a meter-long pipe, and as a result breaks the thread. The consequences are a forced replacement of a still-living CV joint.
What are the nuances of replacing a CV joint?
It is important not only to know how to correctly replace the CV joint boot on a VAZ 2110, but also to correctly carry out the reverse assembly procedure.
It is recommended to pay attention to a few tips:
- The end of the shaft must be equipped with a plastic plug
- Before changing the VAZ 2110 CV joint boot or other element, you need to purchase a special lubricant
- Installation of the retaining ring is carried out before replacing the boot of the internal CV joint of the VAZ 2110 or grenade
- When installing the drive, it must be placed on the gear so that the device is completely locked. It is advisable to use a hammer.
Replacing a boot or CV joint on a VAZ 2110 does not involve much difficulty. However, experts say that replacing the inner CV joint boot of a VAZ 2110 without removing the CV joint should be carried out by installation staff who have the necessary experience in order to avoid mistakes and damage to the car. Or you can turn to knowledgeable friends for advice on how to replace the outer CV joint boot of a VAZ 2110 without removing the CV joint, and what needs to be taken into account during the preparatory work.
It is also recommended to purchase high-quality parts, which will extend the life of the VAZ without the need for installation work or replacing the inner CV joint boot of the VAZ 2110 without removing the CV joint. In practice, counterfeits are often purchased, due to which the service life is reduced, and changing the design is even more difficult than the original itself, due to irregularities in the production process and other nuances.
How to unscrew the hub nut without ruining the threaded connection
First of all, stock up on quality tools. An ordinary wrench is not suitable for plumbing work, although many car owners stubbornly use them to repair CV joints (the size is the same, but the cost of the tool is lower). An open-end wrench can only be used to unscrew an already “undermined” nut, this is really more convenient.
For the hub (CV joint), only a union head is used. The end cap can be cast or stamped (the second option is cheaper), and exactly match the size of the nut. If you “lick” the edges using a tool with backlash, you will be working with an angle grinder, and you will have to say goodbye to the CV joint.
Important! Reuse of nuts is not permitted. Before unscrewing the old nut, make sure you have a new one.
- Thoroughly clean the surface from corrosion and dirt. If a spline-shoulder pair is used, you need to pick out everything that is in the holes;
- Treat the joint with a penetrating compound for soured threads. For example, WD-40 liquid, or regular kerosene. You may need to "soak" the thread for several hours;
- Remove all fixing devices;
- Place the socket on the nut and try to turn it using the lever. At this stage, it is better not to use handles with ratchets, as the mechanism may be damaged;
- After “undermining”, the nut can be unscrewed with any wrench that is more convenient.
Throw away the old nut and stud. Clean the threaded connection from rust and traces of fixing compounds.
