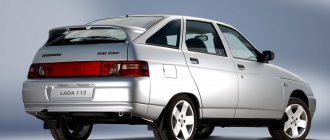
The VAZ 2110 car is built on the basis of the VAZ 2108 hatchback, the first experimental copy was designed in 1985, serial production of the front-wheel drive four-door sedan began in 1995, the first sales started in August 1996.
Production of the model was completed in 2014, the last car rolled off the production line, which operated under an AvtoVAZ license. Over 18 years of production, four modifications were produced: the 2110 sedan, the 2111 hatchback, the 21123 coupe and the 2112 station wagon.
Description of design
The bottom of the VAZ 2110 has the same design for all cars in the line and is made of rolled steel with additional stiffening ribs. The metal frame of the car is a type of frameless body; the entire load from the mounted units falls on the floor and side members, which act as a frame and ensure the massiveness of the entire structure.
Repairing the underbody of a VAZ 2110 in 90% of cases begins with checking the side members and involves the use of welding. The welding points that hold the body structures together are torn apart by vibrations, bolted connections become loose, and the solidity of the structure weakens.
FakeHeader
Comments 26
Is all this felt already shaped or is it just sheets?
The form is “relatively” ready. Those. In general, there is a general outline, but you have to customize it to the exact location...
If you do it, report back with the results) By the way, you are doing everything correctly, this felt is what you need for sound insulation, it’s about like covering a room with carpet, in any case it will be quieter than sticking a hundred layers of bitumen noise on the walls, right?)
Yep, that's how it is. But I’m still “stuck” with the repairs - I ended up in the hospital with a torn back, so I won’t be able to finish the car any time soon...
What happened? Work, I guess?
Yeah, echoes of past work... So I had to stop car repairs until my back was restored. The old lady is currently collecting dust in the garage...
Yep, that's how it is. But I’m still “stuck” with the repairs - I ended up in the hospital with a torn back, so I won’t be able to finish the car any time soon...
By the way, I need your answer) Isn’t this mastic smelly?
Relatively smelly... Doesn't smell any stronger than paint or solvent. Well, the smell is not so pungent, it resembles melted asphalt (there is also bitumen there). There is no smell after drying...
By the way, I need your answer) Isn’t this mastic smelly?
There is also the same bitumen noise protection. Her smell is stronger, but also not terrible...
Preliminary report on the “field tests” of the Shumka. I went to cook the front glasses on a half-disassembled car (in the cabin there is only one seat and a steering wheel with an instrument panel, the dashboard was removed, the front fenders were also removed). I had to drive through the whole city... Disgraceful))) At traffic lights, drivers of neighboring cars stared at me as if I were a monument, they even forgot to move on time when the green light came on))) The effect of the noise was quite pleasing. In the cabin, you can no longer hear the whistling alternator belt or the crackling sound of a worn timing belt (the noise of the gearbox is still the same, well, it has become a little weaker). The “fart” of the rotted and burnt-out muffler has gone back (you can’t hear it from below under the ass now, the noise now comes from the silent rear arches and trunk). The noise of the spikes on the asphalt from the front wheels is also practically inaudible; the shocks of the suspension when driving over large bumps in front became very muffled. The whole picture is spoiled by the rear part of the car (arches and trunk) - the noise of studded tires, the impacts of gravel on the bare metal of the rear arches, the farting of a leaky muffler through the trunk (I will never install a “collective farm” forward flow, especially since its effect is 100 times less than from spider 4-2-1 on standard exhaust). Due to the 5 mm PPE with foil, the car became noticeably warmer - at a temperature outside of -5 -8 degrees (when I was driving to the service station), I turned on the stove for 5 minutes before driving (while the garage was closed and I was standing smoking), as I drove off - I turned it off immediately, as it became very warm in the car. While I was driving, I didn’t turn on the heater, the heat heated up before the trip was enough + the sun through the window maintained the climate in the cabin well. In general, the result: I liked the effect of the budget Shumka - it became noticeably quieter in comparison with the standard factory Shumka, the effect of thermal insulation with a laminate substrate is also pleasing, although only the bottom and the engine shield have been treated so far. If you do the doors + roof + trunk in the same way = I’m sure blissful heat will reign in the winter (well, Africa doesn’t scare you in the summer - I’m already used to driving in Russian basins without air conditioner, well, “the heat doesn’t break my bones”), and it will be quite quiet and at the same time everything will work out It’s even quite cheap for the money... Of the minuses: the large thickness of the new Shumka (I’m getting tired of assembling the interior), fiddling with mastic is quite dirty and smelly work (the real owner of a Russian car is not afraid of dirt and smell). In general, I recommend it to everyone who needs an extra reason to get stuck in the garage with the benefit of their car, without spending a lot of money. )) The most expensive part is the felt carpet (including delivery it cost a little more than 1000 rubles) and mastic (3 cans of 2.2 kg for 240 rubles per can - for the floor and engine shield, plus some left over for the front arches).
Domestic cars do not have high-quality sound insulation. But extraneous sounds are annoying; the driver wants at least a little more comfort. Sound insulation of the VAZ-2110 can save the driver and passenger not only from extraneous noise and vibrations, but also from heat leaks.
In winter, the car will be much warmer, and the efficiency of the stove will increase significantly. The sound of the acoustic system is also significantly improved, the noise level from the engine compartment is reduced, the bottom of the car produces less vibration, and the number of squeaks coming from the instrument panel is reduced.
Are there any differences between the bottom of 2110, 2111 and 2112
The wheelbase size for all cars in the generation is the same and is 2492 mm, while the cars have different lengths, heights and number of doors, depending on the model:
- Sedan (2110); dimensions 4265x1680x1420 mm.
- Coupe (21123); 4193x1680x1435 mm.
- Hatchback (2112); 4170x1680x1435 mm.
- Station wagon (2111); 4285x1680x1480 mm.
The body layout of each configuration has design differences, but these differences do not affect the central bottom. The bottom of the VAZ 2110 has average prices of 3,000 rubles. and is suitable for installation on the entire line. The part is made of ferrous or rolled metal, without protective galvanization, and therefore always needs to be treated with anti-corrosion agents.
The purpose of soundproofing and the necessary tools
A car that has recently left the factory has a certain amount of noise insulation in the interior, but even the new VAZ 2110 does not satisfy all car enthusiasts in terms of this indicator. Things get even worse when he “runs” along domestic roads. Many owners of such a car set out to eliminate noise in the cabin.
We can identify the main sources of noise that create discomfort in the cabin when driving. First of all, the bottom is the source of significant vibration noise. All the sounds made by the tires, as well as knocks and squeaks in the chassis, are clearly transmitted through it. A rather unpleasant source is also located in the panel.
In addition, it is unpleasant to hear the sound of doors closing and the clicking of door locks. Finally, the sound of raindrops hitting the roof distracts the driver and does not create a pleasant sensation. Do-it-yourself noise insulation of the VAZ 2110 aims to eliminate the main sources of annoying sounds. You will need the following set of tools:
- scissors;
- knife;
- hacksaw for metal;
- roulette;
- ruler;
- putty knife;
- paint brush;
- pliers;
- screwdriver;
- wrenches and socket wrenches;
- paint roller;
- hammer;
- mallet.
Return to contents
When repairs are required
For all VAZ models, a mandatory condition is periodic inspection of the body for corrosion. Already from the factory, automotive hardware must be additionally protected from rust. The first VAZ 2110 began to become covered with corrosion from the area of the windshield frame. The paintwork peeled off quickly; after 6 months the first rusty plaques could be seen under the paint layer.
Cooking a rotten car body if the degree of metal destruction exceeds 70% is expensive and impractical. To protect the car from corrosion, once every 6 months it is necessary to carry out preventive maintenance and replace the old used metal.
The main reasons for rapid wear:
- The car is over 7 years old. The bottom is checked in the inspection hole: if there is minor corrosion, metal patches can be used.
- Accidents and driving on bad roads. Any deformation of the metal after an accident leads to the fact that the protective layer of anti-corrosion in places where it is broken is destroyed, and the metal begins to wear out faster. The same applies to frequent trips on bad roads.
- Car parking on the street. VAZ cars need a warm and dry garage. Considering that the car body is not treated with zinc, just one winter outside can cause corrosion of the sills and bottom. Moisture penetrates through the protective layer and destroys the metal of the seal, the outer part of the bottom.
- Water in the cabin. The liquid that has accumulated under the rubber mat quickly penetrates the bottom skin and contributes to the rapid rotting of the metal unprotected by anticorrosive.
A complete bottom repair will be required in the following cases:
- It is impossible to put the car on a jack; the jack falls through.
- It is clearly visible that the floor in the cabin has become uneven - the bottom is 60% rotten.
- It is impossible to adjust the driver's seat due to the skew of the bottom.
- Under the threshold, under a layer of putty, rust appeared. It is checked with an awl if the anticorrosive layer has peeled off.
- The appearance of rust on the inner surfaces of the sills in the interior and arches.
Preparation for repair
When choosing to repair the bottom yourself, you need to prepare tools and materials. For experienced craftsmen, a complete replacement of a part takes at least 3-4 days; the cost of work at a service station averages 45–50 thousand rubles. To work you will need:
- Bulgarian. Using an angle grinder, the corrosion plaque is removed from the bottom, parts of the patches are adjusted, cut off, and welding seams are aligned.
- Welding machine. It is recommended to boil the iron body and bottom, in particular. Semi-automatic welding with wire and carbon dioxide is suitable. You can use gas welding and 3 mm electrodes, provided you are skilled in such work.
- Electric drill for drilling spot welds.
- It is not recommended to carry out underbody repairs in a pit - it is inconvenient; it is better to use stands, a lift or skids; in some cases, the car is turned over on its side.
- Sound insulation sheets.
- Anti-corrosion set: mastic, R-80 sandpaper, primer, auto enamel.
Preparatory work step by step:
- Disconnect the negative terminal from the battery or remove the battery.
- Drain the fuel from the tank.
- Disconnect the electrical wiring from the door power windows.
- Remove the doors, marking the fastener locations on the body.
Before dismantling the doors, it is necessary to insert iron spacers into the openings or weld a channel, this will ensure that the geometry of the body is preserved if the center pillar reinforcement is rotten and there is a possibility that the roof will fall or bend in half.
Dismantling the interior
Replacing the underbody involves work inside the cabin and under the car. Dismantling the interior is carried out in steps:
- Pull out the seats.
- Remove the interior trim by unscrewing the moldings.
- Pull out floor coverings and carpets.
- Remove air vents.
- Remove the sound insulation layer and additional anti-vibration pads.
- Disconnect all internal wiring, twist the cables into a bundle, and remove the fasteners.
- Remove the dashboard to open access to the engine compartment if you plan to completely replace the bottom.
If you are an inexperienced tinsmith and electrician, it is better to distribute all fasteners into separate packages and sign them. When installing the interior, this will help you avoid getting confused with the parts.
Welding work
Welding will be required both to replace the entire floor and during repairs, when the rotten part of the bottom is cut out and a patch is welded. The iron for the patch is cut out in advance; the size of the patch should be 2 cm larger than the hole around the perimeter. There is an option to use the original part of the bottom instead of a patch, which is sold separately.
Replacement of car underbody elements
After the car interior is cleared, a full inspection of the underbody is carried out. In some cases, you can limit yourself to a partial replacement—boil only the corroded areas. Rotting of the floor begins from the thresholds of the car; these elements are inspected first. Replacing the body also begins with reinstalling the thresholds.
The bottom of the VAZ 2110 consists of the main elements:
- support platform;
- bottom panels;
- threshold extension;
- side member amplifier;
- crossbars;
- connectors.
It is necessary to check the condition of the panels under the driver's feet, side member reinforcements, jacks or support platforms. If the overall condition of the bottom is satisfactory, you can limit yourself to installing a patch on the damaged area or replacing the bottom element from the repair kit:
- A drill is used to drill the spot welding points with which the element is installed on the structure.
- The element is cut out with a grinder.
Under the bottom of the car on the driver's side there are tunnels for the fuel line and brake system. Removing the system on a VAZ 2110 is quite problematic; it is recommended to cut off the old lines and install new parts after repairing the bottom.
- A metal patch is cut out.
- The bottom is sanded and a patch is welded.
- Welding seams are cut off with a grinder and cleaned.
- The element is primed, sanded, and treated with anticorrosive.
Replacement of car underbody elements
Most often, when replacing individual parts of the bottom or installing patches, welding is used; a semi-automatic welding machine is best suited for such repairs. If an entire separate part is being changed, for example a cross member, you can drill out the rivets and dismantle the element without welding.
When the bottom and sills are changed at the same time, the latter are removed from the car first, and when replacing sills it is important to control the geometry of the body. When replacing floor panels, the bottom parts are always mounted from below, then welded or riveted. When there are many holes and pockets of corrosion in the floor of the body, it is better to replace the entire bottom, especially since it is relatively inexpensive when assembled for the “Ten”.
Final processing
After welding work, it is necessary to clean the seams with a grinder, carry out anti-corrosion treatment, and install new sound insulation panels. The bottom of the VAZ 2110 must be treated with anti-corrosion agent both from the outside and from the inside. Bottom finishing:
- The welds are cleaned until they shine, a grinder is used, and at the final stage, sandpaper R-80 is used.
- The seams are covered with bitumen-based mastic.
- The bottom surface is primed outside and inside the cabin.
- An oil-based anti-corrosion agent is applied to the inner surface. The composition penetrates into all hidden grooves and pockets.
- The outer part of the body is treated with anti-gravel protection.
- Sound insulation panels are cut to the required size, heated with a hair dryer, and placed on the bottom inside the cabin.
- Doors are being installed.
The work on replacing the bottom is completed, all that remains is to mount the interior, install the trim elements, and connect the electrical wiring.
Effective sound insulation of the interior
First, rigid multilayer sheets with a layer of foil are placed on the bottom (floor) of the cabin, which perform the task of isolating vibration noise. The sheets are pre-cut to the required sizes. Before laying, it is recommended to heat the mastic layer using a hair dryer. The hot sticky layer will ensure reliable adhesion to the metal.
Then flexible sheets (for example, SGM-vibro M2F) are glued to all other noise sources in the cabin. It is also advisable to warm them up before gluing. The next stage is the application of a second layer, which has increased sound insulation properties. Isolon film is most widely used.
With its sticky layer it connects with vibration insulation. The interior ceiling can be covered with two layers of isolon without a vibration-absorbing layer. If joints occur between sheets or film, it is recommended to fill them with polyurethane foam. It can also be used to isolate the mounting points of various elements in the interior of the VAZ 2110.
It is advisable to apply a third layer of foam rubber on top of the isolon on the ceiling and on the bottom of the trunk. Fastening should be done using liquid nails.
The air duct pipe has a seam that must be sealed with a material that absorbs squeaks and other similar sounds, up to 2 mm thick. When working on insulation, you must ensure that nothing gets into the internal channel. When installing the panel in its rightful place, it makes sense to seal all the gaps with Anti-creak.
How to extend the life of the bottom
The body on all VAZ models is not a high-strength unit. To maximize the life of the main part of the car, it is recommended to systematically carry out preventive maintenance. It is impossible to completely eliminate the aging process of metal, but every driver can increase the service life of a new underbody.
- Prevent water from entering the cabin through depressurized moldings on the windshield and side doors.
- Systematically remove the rubber mats under the driver's seat and check the floor for dryness. Systematically clean drains in thresholds and doors. Particular attention is paid to the area under the battery: under the influence of the electrolyte, the drainage holes on the platform become coked.
- If the first rust is found on the bottom of the interior, clean it, fill it with epoxy resin, and treat it with an anti-corrosive agent with the effect of preserving corrosion areas.
- Clean chips and renew the paintwork on the sills immediately after detection: the sills and fenders begin to rot first.
- It is necessary to lift the car with a jack only with the doors closed.
Interior and trunk wrapping
Now you need to soundproof the car floor. For this purpose, vibroplast and splen are used. Vibroplast is laid as the first layer; it must be applied to the maximum area. Cover the material as best as possible so that it adheres to the metal surface. Splen is applied as the second layer. It also needs to be glued to the maximum area of the bottom of the cabin.
Recently, this type of sound insulation has become popular, such as applying a rubber-bitumen mixture to the outside of the car’s bottom. This allows you to reduce the level of vibration coming from the wheels and road surface. But it will be much more effective if you simultaneously treat the inner surface of the bottom. Everything inside the trunk needs to be carefully sealed with vibroplast. It will be a little more difficult here, since there is a niche for the spare wheel, protrusions for the shock absorber struts, and sometimes the edges of the screws come out.
How to choose a part: average prices
To weld the bottom of a car at a car service center, the minimum price is 25,000 rubles. This applies to minor floor defects in all customer materials. A complete overhaul and update can cost up to half the cost of a car. Considering that the price of a VAZ is minimal, such repairs are not profitable for most drivers.
Many people prefer to carry out repairs and replacements on their own, buying a solid bottom. The repair kit is produced by AvtoVAZ, the element is suitable for models 2110, 2111, 2112, 2170, 2171, 2172. The cost does not exceed 4,000 rubles. Cold-rolled steel 0.8 mm thick is used in production.
There are options on the market to buy bottom elements: panels, amplifiers, connectors and cross members. The cost of each element is from 900 rubles. Parts of the bottom are chosen instead of metal patches if local repairs are necessary without welding out the entire bottom.
Self-repair of the underbody of a VAZ 2110
The current condition of the car can largely be assessed by analyzing the body.
If all kinds of consumables need to be replaced, you can even rebuild the suspension yourself and even install a new engine, then restoring a completely rusted body is expensive and pointless. No one will tune, modify, or invest a lot of money in a car if its body is already in its last years. This significantly reduces the cost of the car, even if the engine is in perfect condition.
Therefore, if you want to maintain the attractive appearance of your VAZ 2110, extend its service life, and, if necessary, sell it for good money, keep an eye on the body and periodically carry out repair or preventative body work aimed at combating corrosion.
How much material will be needed
To soundproof the VAZ-2110 interior, trunk and hood, the following amount of materials will be required:
- Vibroplast no less than 32 sheets.
- Splenya 4mm thick, glue-based, at least 7 sheets.
- Splenya 4 mm with a base of sealant of at least 11 sheets.
- One roll of bitoplast.
- One roll of anti-squeak tape.
- At least two rolls of aluminum tape.
The maximum amount of vibroplast required for high-quality insulation of a car can be 39 sheets. Splended with glue and sealant - 14 and 8 sheets, respectively. It’s better to take extra soundproofing materials so as not to interrupt your work.
Causes of rust and preventive measures
The first versions of the VAZ 2110 were characterized by the fact that their paintwork began to peel off in the area of the windshield frame. The problem began to develop from the seal and gradually spread to the entire body element.
Soon the manufacturer changed the painting and installation technology, but still the problem of a body that was not resistant to corrosion could not be completely overcome.
We will look at the main reasons for the probable appearance of rust on the sills, bottom, arches, and side members. We will also give some tips on how to deal with them.
| Causes | Prevention measures |
| Age | After 5-7 years, traces of corrosion may appear on the body and bottom. There are no remedies against age, so listen to the following protective measures |
| Accidents and accidents | It is easy to advise avoiding accidents. In this case this is the only recommendation |
| Poor quality repairs | Do not try to save money on body repairs, since an unqualified specialist will not really do anything, but will only waste your time and money. Choose experienced, proven craftsmen and service stations |
| Weather | The worst thing is snow and rain. Try to knock down and wash away the snow stuck under the bottom. Especially if you often drive on roads sprinkled with salt or snow and ice melters. |
| Humidity in the garage | Think about the issues of moisture protection of the room; in winter, periodically turn on the heater or heat fan in the garage in order to at least partially combat the high level of rust |
| Driving on gravel | Small stones destroy the anti-gravel coating within a year, after which corrosion begins to appear. Avoid such roads, carry out periodic preventive maintenance |
| Moisture in the cabin | It gets through wet shoes and snow brought into the cabin. As a result, the bottom begins to rot from the inside. Be sure to lay down rubber mats with sides in winter; be careful that water does not get inside the cabin during rain or car wash. |
To increase the service life of the underbody of your own car, periodically perform anti-corrosion treatment. Pay special attention to the hidden cavities of the side members and sills.
Rusted thresholds
Problem Definition
It is not difficult to determine the presence of rust on the bottom. Although if you bought the car second-hand, these problems can be carefully disguised.
- Be sure to inspect the body from below. Traces of corrosion may be hidden behind a layer of anti-gravel coating or putty. Use a hammer or awl to hit these areas lightly. If rust is present, you will see it.
- Check the condition of the body along the thresholds, in the cabin at the feet of the driver and front passenger. It is these places that are quite weak in the case of the VAZ 2110.
- If the bottom is rotten, you can notice this by the sagging of the floor under your feet under load.
- When the driver's seat comes off or cannot be moved, a rotten body may also be the cause.
- One of the most unpleasant situations is rotten thrust pads designed for lifting a car on a jack. But this way you will immediately determine that there are problems and they need to be solved.
Preparatory activities
To repair the bottom with your own hands, you first need to prepare in a certain way. You will need a set of tools, premises, a lot of time, experience and desire to do such things.
Of the tools, it is especially important to prepare the following components:
- Welding machine. In the case of repairing the underbody of a car, it is better to use a semi-automatic machine with wire and carbon dioxide. It is better, more efficient and more reliable than gas and electrodes;
- Angle grinder. It will be useful, if necessary, to remove rust from the floor, to adjust elements and patches, to clean seams and surfaces;
- Car stands. Here you can use various items. So look for what you have;
- The rest of the kit is standard and includes such components as anti-corrosion solution, mastic for seams, welding wire, sandpaper, primer, soundproofing sheets, paint, etc.
Now you need to drive the car into the garage or other equipment room and put it on stands.
The machine should be positioned in such a way that it is comfortable and safe to work under it.
Disconnect the battery, then remove the doors. In this case, experts advise providing spacers for doorways in order to maintain body rigidity and the necessary geometry.
Dismantling the interior
Since you need to repair the underbody not only under the car, but also from the inside, you will have to completely disassemble the interior. This is a difficult task that will take a lot of time. Be psychologically prepared for this.
You will have to dismantle:
- Armchairs;
- Floor tunnel lining;
- Carpeting;
- Air ducts;
- Soundproofing layer.
Carefully collect all the wiring, combine it into bundles if they are not collected, so that later there will be no problems with assembly. Collect all fasteners, distribute them into boxes or bags, and label them. This is extremely important because you may face serious problems later.
If you plan to completely replace the bottom or weld a panel to the floor, then the dashboard and beard will have to be removed to create open access to the engine shield.
Lifting a car
Welding
So, you have disassembled your VAZ 2110, so now you can really assess the condition of the bottom, as well as analyze the required amount of work. The most optimal situation is one that does not require replacement of elements. The rust spots are cleaned until high-quality metal is obtained, after which they are strengthened by patches. But not everyone manages to face such a situation.
If the holes in the bottom turn out to be through, this will lead to a loss of body rigidity, therefore it is strongly recommended to replace the element completely.
In the case of the VAZ 2110, the following body elements are distinguished:
- Floor panels;
- Support platforms;
- Threshold extensions;
- Spar extensions;
- Crossbar;
- Connectors.
Now let's discuss a few basic nuances of welding.
- To replace a part that has “slipped” due to corrosion, it must be drilled out at the welded points or simply cut off using a grinder.
- Do not forget that the brake and fuel system pipelines pass under the bottom. It is extremely difficult to dismantle them, so the easiest way is to cut them off and install new pipeline elements during reassembly.
- If the floor panels are in critical condition, the entire bottom assembly should be replaced. But in this case, be sure to dismantle the exhaust system.
- If it is necessary to change the thresholds, they are dismantled and new ones are installed one by one. It is important to control the geometry.
- If the floor and thresholds are being replaced at the same time, the thresholds are replaced first, and only then the floor panels.
- Carefully mark the elements for welding. The old components must strictly correspond to the new ones being cut out.
- You cannot do without an assistant, so agree in advance with someone who can help you.
- Always start the bottom from the bottom, then grab it.
- Do not make the main weld using a continuous weld. Maintain a step of approximately 4-5 centimeters.
When welding work is completed, be sure to carry out anti-corrosion treatment.