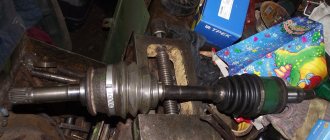
The CV joint (constant velocity joint) is a strong and reliable part. At the same time, the working part of the hinge is protected by a rubber boot, which prevents moisture, dirt and sand from entering, as well as CV joint grease being washed out of the hinge joint.
At the same time, during operation, the specified CV boots (outer CV boot and inner CV boot) gradually wear out. The main problems of the boot:
- rubber dries out, tears and cracks;
- the clamp that holds the boot is loosened, etc.
As a result, small particles and water penetrate the hinge and quickly damage the element. To increase the service life of the CV joint, you need to monitor the condition of the boots and change them when even the slightest defects appear. Read more in our article.
In what cases is it necessary to change the CV joint boot?
The boot can be damaged for various reasons:
- aging of rubber and the appearance of fatigue cracks on it;
- foreign objects entering the surface of a rapidly rotating cover that break or cut through its material;
- chemical corrosion of the boot due to the use of poor-quality lubricant;
- wear and tear due to violation of installation rules;
- cutting through the material with clamps that are too tightly tightened.
In addition, sometimes it makes sense to replace the cover for preventive purposes, for example, if the drive has been removed, which is quite a difficult task. It is advisable to combine the procedure with washing the hinge and putting fresh lubricant into it. This will significantly extend the life of the parts.
Preparation
So, damage to the boot on the VAZ 2199 has been identified. You can replace it and wash the CV joint itself in the garage, the main thing is that there is an inspection hole.
Tools you will need:
- Set of wrenches (socket wrenches, open-end wrenches);
- Set of heads and collars;
- Metal brush;
- WD-40;
- Mount;
- Hammer;
- Jack;
- Wheel chocks;
- Wooden coasters.
You will also need a new boot, CV joint grease-4, a container for collecting oil, a container with gasoline for washing the CV joint, and rags.
It is better to do all work together with an assistant.
For convenience, we will describe the process of replacing the external boot on the left side. The replacement work on the right side is identical.
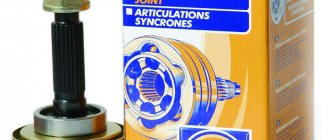
Which one is better to choose anther?
When choosing a part, you should focus on the manufacturer and the material from which the case is made.
The quality of a product is usually clearly dependent on its price, unless, of course, it has been verified by several suppliers.
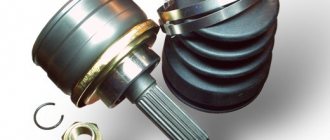
Some of the best and most widespread manufacturers in the spare parts markets are the brands GKN (Loebro, Spidan), Maruichi , SKF . They are also the most expensive, which indicates the best materials used. Such boots will never suddenly break, will last a long time, are very durable, and the repair kits contain everything you need, including high-quality specialized lubricant in the right quantity.
Installation of spare parts
Replacing the CV joint on a Kalina car is done as follows:
- A protective cover is put on the axle. To make work easier, the axle can be treated with lubricant.
- Lubricant is placed in the hinge.
- Lubricant is added inside the protective cover.
- With gentle blows using a wooden block, the grenade is mounted on the axle shaft.
- When the installation of the CV joint is completed, air is removed from the protective cover and fastening is carried out using clamps.
- The steering knuckle is mounted, the hub nut is fixed, and the wheel is mounted in place.
- All fasteners are securely tightened and the car is removed from the jack.
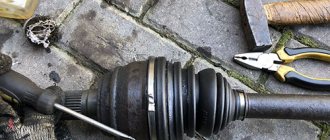
Procedure for replacing the outer CV joint boot
To replace the boot, the hinge will have to be removed from the drive shaft.
There are “unfastening” designs of repair covers, but they are unreliable and not very common.
- the machine is installed on a jack and a safety stand; first, for convenience, it is better to loosen the wheel and hub nuts if you do not have inertial electric or pneumatic tools;
- the wheel is removed and the hub nut is unscrewed;
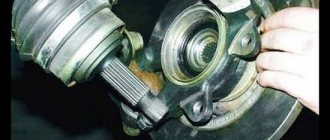
- the attachment of the steering knuckle to the suspension arm is disconnected, after which the drive splines can be removed from the connection with the hub.
You can proceed further in two ways, with varying degrees of convenience and speed of execution.
With hinge removed
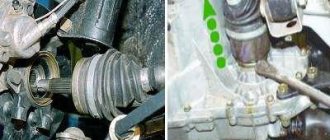
You can remove the complete drive from the gearbox or gearbox, place it comfortably on a workbench and continue to work more confidently. But additional operations and the ability to avoid them if you have skills or devices allow you not to do this.
If it is nevertheless decided to remove the drive, then it must be pulled out of engagement with the differential side gear, which is not always easy due to possible deformations of the retaining ring, after draining some of the oil from the box. In addition, it is strictly forbidden to pull on the shaft, this will only destroy the internal hinge.
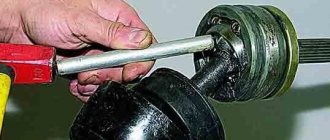
The drive is removed by striking along the inner hinge into its outer cage. Or by placing a suitable knob in the same place, sometimes with a specially turned curly end.
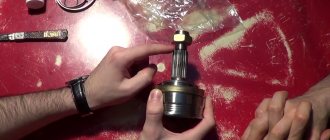
The outer CV joint is removed from the removed drive, blows are applied along the shaft into its inner race. After this, all that remains is to remove the remnants of the cover, wash the parts, lubricate and install a new cover in the grooves provided for it on the CV shaft and body.
Clamp locks can have different designs; sometimes you will need special pliers to install and tighten them correctly.
Without removing the axle shaft
The operations are the same, but you have to work under the machine, which does not add convenience. The main problem may be the outer “grenade” being knocked off the splines, because in this position it is very difficult to hold the shaft so that the inner one does not jump out of the box, dousing everything around with transmission oil.
But experienced craftsmen cope, usually working together, one holds the shaft, the second strikes.
You can use devices to remove the CV joint, but its feasibility is debatable. In severe cases it does not help, but in simple CV joints it comes off with one or two blows.
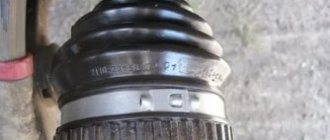
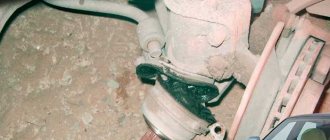
Diagnostic features
You can inspect the mechanism and identify damage to the boot yourself, using a jack and supports. First you need to lift the car and put it on special supports. To ensure stability, the car needs to be rocked slightly. The wheel is then rotated to the side to gain access to the boot, first on one side and then on the other.
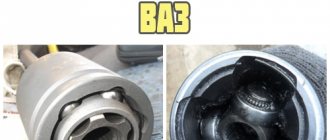
Diagnostics of the CV joint boot
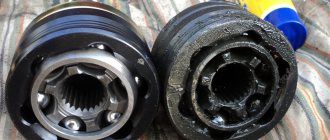
If there are tears or deformations, the rubber elements must be replaced. The anthers are changed, as are the brake pads, on both sides at once. It is advisable to carry out diagnostics regularly to eliminate the possibility of hinge failure.
Inspection of the CV joint boot
How to replace the inner joint cover
If there is no need to remove and disassemble the inner CV joint, then with the outer one removed, it is enough to pull the boot through the shaft and install a new one in the reverse order, so it is advisable to change both boots, no matter which one is torn.
When installing a new cover, it is necessary to control the distance at which the small clamp will be installed, otherwise the boot will be excessively compressed or stretched during operation due to the horizontal movement in the hinge.
Emergency repairs
Every motorist who cares about his own vehicle is simply obliged to know how wheel alignment is performed. This largely prevents a number of problems during operation.
If they didn’t pay attention, or the breakdown occurred unexpectedly, the driver felt the steering wheel creaking when rotating, or other characteristic signs of a violation of the integrity of the boot appeared, repairs need to be carried out.
An emergency repair method is relevant if trouble catches you on the road. But it is only suitable as a temporary measure.
The idea is to wrap the boot with film and secure it with electrical tape or a clamp. The film can be seen with a bag or rubber glove. This is no longer fundamentally important.
There are drivers who have traveled thousands of kilometers using a similar life hack.
If the boot ruptures, water, dirt, dust and sand probably managed to get inside.
Therefore, in the very near future the CV joint will begin to suffer greatly. The best solution in this situation would be to remove, wash, add lubricant, and install a new boot.
What to do if the boot ruptures on the road
It is absolutely unacceptable to move with a torn boot. The hinge will not tolerate even the slightest contamination. Mixed with lubricant, these abrasives will quickly wear out its precision-made and polished grooves and render the CV joint unusable. But it is not always possible or willing to use a tow truck or carry out road repairs.
Temporary protection can be provided in a variety of ways, from wrapping the remaining boot with tape to cold vulcanizing holes and cracks.
Even a simple cloth wrapped and secured around the cover will help filter out dust. The main thing is to do this reliably and control the condition of the patch to the point of repair. And when replacing the cover, be sure to disassemble the hinge, rinse it thoroughly and fill it with new grease as required.
Dust will definitely get there, even if it is not visible. During operation, the temperature of the unit changes; it literally works like a pump for dirty air under the car. It is easy to check the tightness by simply squeezing the case with your hand. You can also check the condition in doubtful cases of the presence of surface cracks, although usually the problem area is immediately noticeable by the grease protruding outward.
Preventing grenade malfunction
Under normal conditions, these joints travel over 300 thousand km. Having a reliable design, the CV joint is able to withstand serious loads, but not in the presence of sand and dust. It is enough to burst the rubber of the protective cover, and the lubricant, mixed with dirt, will turn into a thick abrasive paste, which will inevitably undermine the health of the mechanism. Thus, it is necessary to periodically carry out external inspection of grenades in order to promptly detect damage to the anthers. At the first hint of a leak in the seal, repair and replacement should be carried out.
With torn rubber, a grenade can certainly drive for some time, but the longer repairs are delayed, the more expensive it will have to pay. Even if you change the grenade yourself, the cost of repairs will reach 3 thousand rubles, and there are several such units on the car.
Basic information about LADA Kalina
LADA Kalina has been produced since 2004; production of the popular second-generation car began in 2013. Kalina-1 is available in three body types: hatchback (model 1119), sedan (model 1118), station wagon (model 1117). There are cars available with petrol engines of three modifications: a 1.4-liter 16-valve engine with a power of 89 hp. s., 1.6-liter 8-valve engine producing 81 hp. s., 1.6-liter 16-valve engine producing 98 hp. With. The LADA Kalina-1 has only a manual transmission with five gears. The front axle has a classic MacPherson suspension, the rear axle has a beam with stabilizer, springs, and shock absorbers.
Typical faults of LADA Kalina-1
Significant malfunctions with Kalina rarely occur, but there are a lot of various undesirable trifles. The car’s clutch is not very reliable and has an impressive service life, regardless of the type of engine, so it can malfunction after 40-50 thousand kilometers. The main source of malfunction is a broken clutch disc.
You need to constantly monitor the oil level in the engine - sometimes it leaks through the gaskets or burns through the piston rings. On the instrument panel there is only an oil pressure warning light, but there is no dial indicator. If the indicator lights up all the time, there is a possibility that the crankshaft is knocking.
A common malfunction of VAZ gearboxes is increased noise. It is difficult to get rid of the humming of the gearbox; sometimes neither replacing the bearings nor refilling with first-class transmission oil comes to the rescue. The transmission is noisy even in new cars, because of this the Volzhsky Automobile Plant has repeatedly completed the transmission.
A problematic element since the days of the VAZ 2108 and VAZ 2109 has been the thermostat in the engine, moreover, the valve in the thermostat was capable of jamming in any position. It's annoying when the engine doesn't heat up to the required operating temperature, but if the engine overheats, it's more problematic.
Electrical problems on LADA Kalina appear mainly of three types:
- the ignition module is often damaged;
- very soon the bearings and diode bridge “die”;
- The window lift cable on the driver's door breaks.
When the ignition coil sparks, the first and fourth cylinders or the second and third cylinders stop functioning. The ESP cable breaks when it falls off the guides.
The main source of cracking noise in outer CV joints is insufficient lubrication; At the factory, in order to save money, they put it in sparingly. The consequence of this is severe wear of the hinges, and as a result, the “grenade” needs to be replaced.
A broken timing belt is a very annoying problem. And if on the 8-valve engine 21114 it is possible to change the belt drive and move on, then on engines 11194 or 21126 the valves bend from the oncoming push from the pistons, repairs will be quite expensive. In addition, a break can occur through a jammed water pump, because of this, if the pump begins to make noise, it must be replaced immediately.
Advice from professionals
You should not wait for the crunch that occurs when you sharply press the gas pedal or when turning. The boot must be replaced immediately after cracks and tears are detected on it. If you ignore such problems, the grenade may soon become depressurized and become contaminated.
The main sign of mechanical damage on the protective cover is characteristic greasy traces of lubricant, which can fly away in all directions.
If an alarming crackling noise appears, it is quite possible that it will be necessary to replace not only the boot, but the entire grenade. And this process, as you can see, is quite difficult.
In addition, it is worth noting that during such repair work a lot of related devices and mechanisms are affected. Therefore, if you have some doubts about your own competence, it is advisable to play it safe and contact a workshop.
Purpose and location of the part
A CV joint is a special part that is involved in transmitting torque from the engine to the wheels. The boot is a corrugated tip that protects working units from rapid wear. It does this by sealing the working fluid. The oil, without leaking, continues to provide the necessary conditions under increasing frictional force from the operating mechanism.
The CV joint boot is located in several places, there is an outer and an inner one. One can only be changed by removing the wheel, while the other requires a little more effort. In any case, you can change the CV joint boot in a VAZ-2114 car even without a workshop.
By the way, because of its shape, the hinge is often called a “grenade”, so it is possible to use this definition further.
Clamp fastener
Some European-made cars have switched to using clamp clamps, as they combine reliability and simplicity. To install them, special pliers for CV joint clamps are used.
Placing the clamp on the CV joint occurs in the following order:
- The required diameter is selected;
- The clamp is located on the boot. It should be installed without distortions;
- To perform crimping, clamp pliers are used. If they are unavailable, you can use pliers of a suitable size;
- Upon completion of work, you should check the reliability of fixation of the clamp.
The main advantage of clamping fasteners is that there is no need to purchase expensive special tools. Carrying out the work with conventional pliers will ensure high reliability and long service life.
Band metal clamps
Most often, this type of fastener comes standard at the factory. This is due to reliable fixation and ease of installation. In order for the CV joint clamp to be used for a long time, the following conditions must be met:
- when making the tape, the manufacturer used high-quality steel;
- installation on the boot was carried out using a device for tightening CV joint band clamps;
- To install fasteners, you must have skills in using the tool.
To tighten the CV joint clamps, you can use improvised means, but the quality in this case will depend only on the experience of the craftsman. The only tool you need is pliers. Sequence for tightening the clamp:
- The clamp fits onto the boot;
- The tip is grabbed with pliers;
- Pull with a little force and make sure that the clamp tightens the boot without distortion;
- Create maximum force and bend upward;
- Bend the antennae;
- Fasten the end of the ribbon.
Upon completion of installation on the constant velocity joint, it is necessary to check the uniform fit of the clamp and the absence of distortions.
Location
It will be impossible to replace the CV joint on a VAZ 2114 if you do not know where exactly these elements are located. Their location is easy to determine - on both sides of the front suspension at the bottom of the car. They are oblong elements and fit into the hub of each wheel.
That is, getting to the node is not difficult, but this will require certain conditions.