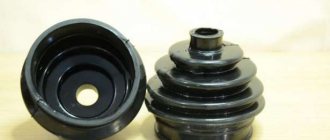
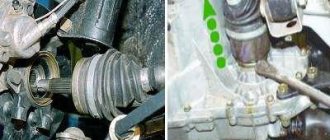
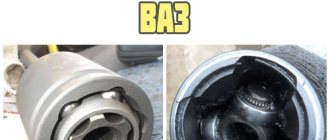
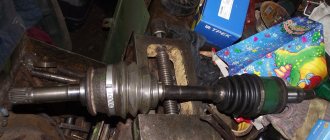
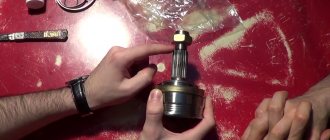
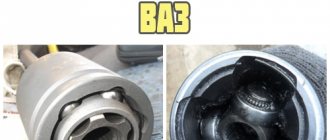
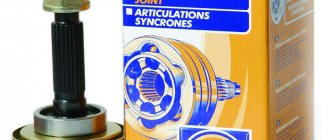
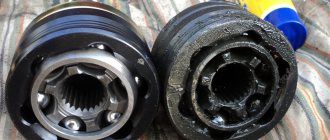
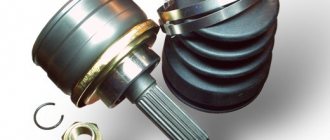
This method is one of the simplest and fastest ways to replace both anthers or one of them. Also, if necessary, you can replace the lubricant in the CV joints or the external grenade.
Necessary tools: a set of open-end wrenches (including 2 pieces for 13 and 17), pliers with variable pitch or just very large pliers, two flat screwdrivers - medium and thin, a hammer 600-800 g, a good drift from soft metal or a CV joint puller, a large or medium-sized vice (or an assistant), CV joint grease-4, a sufficient amount of wiping material, a plastic bag, a stand for the lower arm of the front suspension. Preferably an inspection hole.
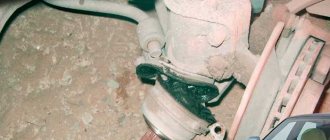
We install the car on the handbrake, you also need to install any rollback wheels under the rear wheels. Loosen the wheel nuts, jack it up, and remove the wheel. We place a reliable support under the lower arm (I use a stack of short boards). We lower the jack, the lever compresses. Unscrew the nuts and remove the three bolts securing the lower ball joint. Unscrew the lower shock absorber mount and push it all the way up:
(R
We knock down the chrome-plated hub cap through a wooden block. We unscrew the hub nut, having first placed a stop (a hammer, for example) under the wheel stud so that the hub does not spin (you can loosen the nut at the very beginning, but removing the cap is not so convenient). We take out the cone washer. Grasping the bottom of the brake disc, pull it towards us and move it to the side, while simultaneously removing the grenade axle from the hub. We place the freed CV joint, as conveniently as possible, on the lower cup.
We go down into the pit. By turning the CV joint by hand, we find a convenient position for grabbing the protrusions of the clamp with pliers:
We squeeze the clamp and use a screwdriver to slightly bend the hook and remove it. We make marks on the grenade body and shaft (with paint or a file - the main thing is not to rub it), so that later we can insert the CV joint in the same way as it was, we remember the position well. We move the freed boot as far as possible from the grenade.
Using your finger, we feel for the wire retaining ring inside the CV joint housing, it is in the groove at the very edge, by touch we find the gap in the ring, and pry it off with a thin screwdriver:
Using the shaft, we pull the CV joint out of the housing:
If you don’t need to change the lubricant, you can immediately put a plastic bag on the CV joint and wrap it around it to prevent the balls from falling out and dirt getting in (the balls are held in place only by the lubricant).
We leave the pit and carefully take out the freed part:
We wash away the dirt. We remove the remaining clamps and cut off the anthers that need to be replaced:
We move the plastic casing and boot of the outer grenade to the inner CV joint. To keep them out of the way, you can wrap them in a bag and secure them. We clamp the shaft in a vice with the outer hinge towards the bottom, remove excess lubricant.
Now we need to knock down or press the inner race assembly with the hinge off the shaft. The radial protrusions shown with a screwdriver are the shaped inner race of the CV joint:
Theory. The inner race of the CV joint is fixed on the shaft with two retaining rings: the outer one (at the very end of the shaft) of circular cross-section; and internal, square section (it is slightly visible in the previous photo between the inner race and the shaft). When knocking down, the holder with a conical groove should compress the outer ring, push it into the groove of the shaft and move further. If the impact energy is insufficient, the ring will open again and the cage will return to its original position.
Option 1. Using a soft metal drift and a hammer, lightly tap the race around the circumference to center the outer ring, then, placing the drift as close to the shaft as possible, knock it down (you can hold it at a slight angle, it’s not scary). The ideal option is for an assistant to pull the hinge shaft downwards. The blow must be strong enough and “long” - using all the inertia of the hammer. 400 g. I managed to knock it down with a hammer only 4 times, although I hit it from all over my shoulder - a heavier hammer would be better. If it doesn’t go astray, the impact force needs to be increased; quantity won’t help.
Option 2. Use a puller. I bought it on the way to the garage, especially for the FAQ, 160 rubles, the price tag said “CV joint puller 2108”. To be honest, I didn’t want to show off the barbaric drift that I had previously used. There were vague concerns about the puller, but as it turned out, it was in vain, I liked working with it, I was so carried away by the new toy that I forgot to take a photo before removal:
Remove the outer ring. Then carefully remove the inner ring from the groove:
Loosen the vice and lightly hit the shaft with a hammer to tighten the ring. The outer groove is narrower, the ring will not get stuck there:
As you can see, the rings and shaft are not damaged:
If a lubricant change is necessary, we wash everything. The outer CV joint can be washed without disassembly, although this takes quite a long time. It can be disassembled; to do this, you need to mark with paint the relative positions of the outer race (housing), the separator and the inner race. Then turn the separator and the inner race until the first ball comes out, remove it, and then remove everything in turn in the same way. Then tilt the separator with the cage at 90 degrees, and, having caught the position, pull it out along with the inner race. Wash, assemble the outer joint and put “CV joint -4” lubricant in 150 and 60 cc sizes into the inner and outer joint housings. respectively.
Lightly lubricate the shaft and put on the boots and cover. We clamp the shaft in a vice and install both locking rings:
We install the hinge on the shaft, and, having felt the splines, lower it until it comes into contact with the outer retaining ring:
Using a hammer, preferably through a spacer made of soft metal, we hit the CV joint shaft and put it in place (do not try to screw the hub or other nuts onto the threads - you will either ruin the nut or the threads). We check the fixation of the hinge in both directions with our hands. I didn’t have a soft spacer, so I hammered it like this, after three fairly strong blows, as we see, nothing happened to the shaft - the metal is hard:
We put the boots in place (the place where the clamps are installed on the shaft corresponds to the deepest groove). We place the clamps in such a way that when moving forward the grass does not cling to them (i.e. on the wool). It takes a lot of effort:
Let's start work.
Before starting work, be sure to install the Niva on the handbrake and insert wheel chocks under the rear wheels.
1. Loosen the wheel nuts, place the car on a jack and remove the wheel.
2. Place a secure support under the lower arm. Lower the jack and the lever will compress.
3. Remove the three bolts securing the lower ball joint and unscrew the nuts.
4. Knock the chrome hub cap through a wooden block and unscrew the nut. Make sure that the hub does not rotate; to do this, you can install some kind of stop under the wheel stud. A hammer is ideal.
5. Remove the cone washer.
6. Grasp the bottom of the brake disc and pull it towards you, then move it to the side. At the same time, the grenade axis should be removed.
The Niva CV joint has been released. You need to place it on the bottom cup in any place convenient for you.
Help the project. Replacement
at the front left CV
external and
internal
.
Replacing the inner right and left CV joints Niva 2121 part-1
Video on the topic Do It Yourself CV16013 Grenade ( CV joint
) Niva internal Fenox right 2121
21212215057 Grenade (
CV joint
) Niva.
Next, your task is to turn the CV joint and find a comfortable position in order to grab the clamp tabs with pliers. Having grabbed the clamp, you should squeeze it well, bend the hook and dismantle it. Leave marks on the car shaft, as well as on the grenade body. This is done so that later, when you put the part back in place, you assemble everything exactly as it was before the repair. When the boot is released, move it away from the grenade.
Now you need to get the wire type retaining ring on the CV joint housing. You can feel it with your finger and, using a screwdriver, pry it off at the break in the ring and remove it.
Grasp the shaft firmly and pull the CV joint of your Niva out of the body.
Japanese duster Maruishi
In Japan, Taiwan and China, there are quite a lot of companies producing similar products. Replacing the inner right Niva 2121, replacing the CV joint boot on VAZ Niva 21213 drives!. But at that time, when there were Japanese “crooks” in my family, I came across this particular brand. The manufacturer Maruishi (Maruishi) deals with rubber bands, anthers and corrugations for the entire Japanese automobile industry, so finding the right size using the selection method is generally not a problem. Corrugated rubber is not afraid of either heat or frost. Replacement of tripoid, inner CV joint boot. The inscription on the boot “made in Japan” warms the soul. The boot in our case can be either external or internal. It is better to use it as an external one. Equipped with tape clamps .
Recommendations for choosing CV joints on Niva
The first thing you should pay attention to is the number of teeth (splines) on the hinge. Until 2004
there were 22 of them (the hub corresponded to this number), then there were 24, but sometimes units with 22 were still installed. So you just need to count them on your machine. But if everything is clear with this point, another question arises - about the manufacturer. Most experienced Niva owners recommend purchasing factory hinges, complete with shafts. The only negative here is the huge number of counterfeit products. There are only three main large suppliers: VAZ, BelMag, Trialli. Another company, LGR, overcomes the 5% sales barrier.
Alternative manufacturers:
- Pilenga;
- STK;
- Hofer;
- Baker;
- G.K.N.
CV joint from AvtoVAZ
Disassembly and maintenance of the outer CV joint
By carefully using a drift and a hammer on the end of the cage, the hinge is knocked off.
Next, the retaining ring is removed from the shaft.
And a stubborn ring.
All elements are washed in kerosene and cleaned with an iron brush.
Causes and signs of grenade failure
A high-quality CV joint is a durable and reliable part of a car’s chassis, but only if the operating rules are followed. The special anthers that protect the units are designed to eliminate the adverse effects of external factors: they protect the CV joints from dirt, dust and moisture.
The performance of the part largely depends on the condition of the anthers. The slightest damage to them when driving on bad roads with numerous potholes ends with contaminants getting inside the CV joint. Under the influence of dirt and moisture, the internal lubrication of the hinges becomes unusable, resulting in increased friction, which leads to breakage of the part.
Another reason for problems with the part is illiterate, extreme driving. Sharp starts with twisted wheels or slipping, and other increased loads on the chassis force the joints to work to the limit. The risk group includes cars with overclocked engines. Standard drives are not designed to transmit additional torque, so their service life is dramatically reduced.
The most vulnerable part of a grenade is the boot
A CV joint can quickly break due to the fault of the car manufacturer. The use of low-quality metal or violation of production technology sharply reduces the quality of the part. The car owner is unable to influence the operation of the hinge, since the fault for its failure lies entirely with the car manufacturer.
You can understand that the CV joint is faulty by the following signs:
- Crunching noise when turning. The assembly begins to crunch due to dirt getting inside and removing lubricant from its connections.
- Jerking when starting to move, accelerating or decelerating the car.
- Vibration at speed, especially when turning.
Diagnostic methods
A characteristic sign of problems with the operation of the mechanism is damage to the boot. If even small cracks or loose clamps are found on the protection, it is worth checking the condition of the unit. Experienced car owners and mechanics advise checking the condition of the boots after every 5–7 thousand mileage.
Experts recommend using one of the following methods for diagnosing the malfunction yourself:
- The car is placed on a lift and the first gear is turned on. A faulty hinge will immediately produce a characteristic crunch.
- Turn the steering wheel all the way, start the engine and drive off. A crunch may appear at the beginning of acceleration.
- Listen to sounds when driving over bumps or picking up speed.
- A clear sign of a joint malfunction is increased play. To check the condition of the part, take the internal hinge at the output of the external drive and swing it: a play of one and a half tens of millimeters indicates a breakage of the part.
Timely diagnostics will help you avoid problems with your car.
This is interesting: What is the ground clearance of the Kia Rio hatchback
Do-it-yourself CV joint replacement on Niva
Many Niva owners are accustomed to entrusting such repair work to specialists at a service station, but everything can be done in a garage, having a list of necessary tools at hand.
Well, then everything is done in the following order:
- We remove the wheel by first lifting the front of the car with a jack.
- Unscrew the fastening of the ball joint to the lever to free it
- Unscrew the hub nut and remove the CV joint from the hub
- For greater accessibility, it is better to remove the drive assembly: pry the inner grenade with a pry bar and pull it out
- After this, the entire drive assembly is removed
- Clamp the drive in a vice
- Using special pliers, we free ourselves from the anther clamps (if necessary, we then replace them with new ones)
- With light blows of a hammer, we knock the desired CV joint off the drive, applying the impact force to the outer race
Usually, after a couple of light blows, the CV joint breaks down without any problems and you can replace it with a new one. Once again, it is worth noting that it is better to inspect the boot for damage and, if necessary, also replace it with a new one.
The new CV joint is driven in exactly the same way until the locking ring clicks.
It is worth noting that as a result of assembling the drives, it is necessary to push lubricant into the inside of the CV joint, such as a CV joint or lithol (as a last resort). If this is not done, wear will occur much faster than if the required amount of lubricant is available.
Also, pay attention to the integrity of the protective boots of both the internal and external grenades. If you see that the boot is damaged, replacing it with a new one is mandatory.
Installation on the vehicle occurs in the reverse order of removal. Also, do not forget to install all removed parts during the repair process.
The price of a new internal CV joint is from 800 rubles, but the external one will cost almost twice as much: from 1,400 rubles. If we consider buying assembled drives, then one can cost you at least 3,500 rubles, and a pair, of course, about 7,000 rubles.
Native construct
I climbed a lot, both SUVs and special equipment. The design of the internal and external CV joint boots of the Niva family is, to put it mildly, original. Replacing the outer and inner CV joints on a VAZ 2110, VAZ. First of all, this concerns the plastic cup on the outer CV joint. A pebble caught between the plastic and the rubber boot turns the latter into a washcloth in a couple of hours. Needless to say, the CV joint itself does not last long after this. The design of the inner boot is no less original. The only thing that saves you is that the engine protection covers it from pebbles on the road. There are good imported analogues for both internal and external anthers, made from normal quality rubber.
See:
How to replace the outer CV joint on a Chevrolet Niva
Replacing the outer CV joint on a Chevrolet Niva is an important undertaking, because if the breakdown is not repaired in time, the consequences can be very sad; the wire may simply jam while driving. One of the first symptoms of this problem is a slight cracking sound when the steering wheel is in the turned position at the beginning of the journey.
Part Features
Constant velocity joints - these elements were created specifically for front-wheel drive vehicles; previously, torque was transmitted to the wheels using a simple cardan. Due to the large load on the hinge, the service life of the part was very short. To avoid such a situation, this node was created.
There are certain parts in the assembly that are constantly moving, so often the parts burst or completely wear out, and this requires their urgent replacement. Repair of the device is carried out when damage to the boot is detected in time, when dirt, dust and other substances do not have time to penetrate inside the grenade.
To identify a breakdown on a Niva, turn the steering wheel all the way in any direction while driving. If there is a problem, then you will hear a characteristic creaking sound in the area of the front wheel. During the repair work, you should determine how many hinges need to be changed - one or two at once. Professionals advise implementing the procedure comprehensively.
Work on replacing the outer CV joint
To carry out the procedure, you must first remove the old grenade, which is removed along with the axle shaft. To do this, you need to raise the body using a jack and install a strong stand under the car to avoid health problems. Before raising the Niva body, it is best to lower the hub nut; for this, a head is used, as well as an extension for the key. After this, the wheel is removed and the lower wheel of the front shock absorber is unscrewed, the nut on the hub is removed, and the grenade is thus pulled out.
After this, replacing the CV joint on a Chevrolet Niva is carried out according to the following steps:
- It is necessary to clamp the assembly that you removed in a vice.
- Removing the damaged boot.
- Knocking down the outer CV joint using a hammer.
- All teeth on the axle gear should be thoroughly cleaned.
- A new hinge is being installed.
- The boot is inserted, which should be clamped using clamps.
- All parts are mounted in place.
To carry out independent repairs, use two heads, an extension, a hammer, a jack, a wheel wrench, a wrench, a ratchet, and a flat-head screwdriver.
Often, Chevrolet Niva owners carry out procedures to increase engine power, after which the load on the CV joint increases, and it wears out many times faster, so professionals recommend strengthening the shaft.
Why can the CV joint on a Chevrolet Niva deteriorate?
Such parts tend to wear out, like all others, so they need to be replaced over time. Among the main reasons for which the CV joint will need to be replaced are the following:
- long service life of the outer CV joint - most often the part has to be replaced after 10 thousand kilometers;
- entry of dust or dirt when the rubber boot wears out (therefore you need to check the condition of the protective part).
In addition, a large load is placed on the Chevrolet Niva grenade when the steering wheel is turned at strong turns, and driving occurs on poor road surfaces.
Having become familiar with all the features of the hinges, an experienced driver will be able to correctly replace the outer CV joint for a Chevrolet Niva on his own.
Replacement of grenades (CV joints) of VAZ 21214, step by step
Since the front suspension and drive axle of the Niva 2121 are designed similarly to the front-wheel drive family of the concern, it will not be possible to avoid damage to the CV joints. An expiring resource is indicated by:
- A characteristic crunch when driving with the wheels turned out;
- Jerks during acceleration;
- Increased vibration while driving;
- Tapping when overcoming bumps.
Since each side has two “grenades”: internal and external, diagnosing the problem for each part has its own characteristics. So, to expose the outer CV joint, it is necessary to put the maximum load on it, turning the wheels alternately in each direction and applying gas; for the inner one, you should find a straight, obviously uneven section of the road. Depending on the degree of wear, the intensity of sounds and other manifestations will vary.
As a rule, the element can withstand a damaged condition for a long time. However, in this case, no one can give a guarantee when the “grenade” itself or the bearing falls apart. The total resource is often equal to the total mileage of the car for the entire period of use, but in most cases it is rented out at 120-130 thousand km.
Causes of failure
An increase in wear rate occurs due to driving habits (frequent and intense acceleration with the steering wheel turned), as well as sand and dirt getting into the bearings through damaged boots.
Which to choose
Depending on the year of manufacture, the Niva 2121 can be equipped with CV joints with 22 or 24 splines. Before 2002, the first version was distributed, after 2002 – the second. According to another version, 22-spline “grenades” were common until 2007.
The surest way to determine the type is to remove the hub washer and count by hand.
Operating experience shows that the best quality “grenades” for the Niva are produced by AvtoVAZ; also, if you are confident in the origin of the product, it makes sense to pay attention to the products of CORAM and Pilenga
Removing the drive
The operation of dismantling the drive elements is possible if you have:
- Jack;
- Churbaka;
- Wheel key;
- Keys for 13, 17 and 23 (the first two varieties in double quantity);
- Slotted screwdrivers;
- Punch;
- A device for removing factory-made clamps or made from adjustable pliers;
- Anthers;
- Clamps;
- Hub nut;
- Grease CV joint-4M;
- A rag for wiping off grease;
- Kerosene.
With the car slightly jacked up, the cap covering the hub is removed, the hub is completely unscrewed and the wheel nuts are loosened.
The wheel is hung up and dismantled.
The lower lever smoothly lowers onto a strong block.
The nuts holding the ball joint are removed (3 pieces). The outer CV joint shaft is carefully removed from the steering knuckle by pulling the latter back and up.
The steering knuckle is secured with a wire to a suitable protrusion. The lower shock absorber mount is released from the lever, after which it is necessary to raise the jack a few more centimeters up.
Using pliers and a screwdriver, it is necessary to remove the inner CV joint boot clamps, as well as the boot itself. Then the retaining ring located inside the “grenade” body is removed, and the structure is removed from the car.
Disassembly and maintenance of the inner CV joint
When the internal “grenade” is in your hands, you should collect the fallen bearings and place all the elements in a bath with kerosene, rinse thoroughly to remove dirt and old grease.
The shaft is freed from the retaining ring that holds the inner race of the hinge, as well as the race and separator.
Using a puller or modified pliers, the thrust ring is pulled off.
Disassembly and maintenance of the outer CV joint
By carefully using a drift and a hammer on the end of the cage, the hinge is knocked off.
Next, the retaining ring is removed from the shaft.
And a stubborn ring.
All elements are washed in kerosene and cleaned with an iron brush.
Installation
After all parts are defective, replaced with new ones, washed, and installed in their places (except for anthers), they are treated with CV joint grease-4m. The average flow rate for external is 60 cm3, internal is 150 cm3.
Recommendations
Instead of standard clamps, it makes sense to use screw clamps. Also, upon completion of work, you should replace the hub nut with a new one and adjust the bearing clearance.
Replacing Niva with VAZ 2121 Trunk
Subscribe and watch new videos:
With the car lightly connected, the hood is removed which covers the hub, the wheel frame is completely unscrewed and the wheel nuts are loosened.
The wheel is hung and removed.
The lower arm is carefully lowered onto the solid block.
The nuts holding the ball layer (3 pieces) are removed
Shaft outer joint Carefully remove the steering wheel by pulling it back and up
The handle is attached with wire to the corresponding projection. The lower damper mount is released from the lever, after which it is necessary to raise the jack a few centimeters up.
Using pliers and screwdrivers, you must remove the CV loading clamps of the CV connection, as well as the sawmill
. The retaining ring, located inside the grenade shell, is then removed from the structure outside the vehicle.
Varieties
SR as a suspension part began to be used on cars from the mid-20th century. Thanks to the unit, it became possible to simultaneously rotate and control the rotation of the wheels at an angle of up to 70 degrees. In the automotive industry, four technical solutions for components are used:
- cam;
- tripoid;
- ball;
- twin cardan shafts.
All these types are united by the basic design, which is a rigidly connected body and holder. The car's joints are also divided into:
- internal, rotating up to 20 degrees;
- external, more mobile and transmitting without power losses.
The part works according to the following principle.
- There are grooves on the surface of the inner race. Their number is the same as the number of bearings inside it.
- The cage is held in place by bearings that separate the housing and the cam.
- The bearings move along the path of the smaller diameter of the fist and the larger diameter of the housing.
- This creates a rotational impulse that transmits torque to the driven shaft.
Chevrolet Niva CV joint boot
It will rest against the separator and will be located in it at a depth of a millimeter from the edge. To install it correctly, you need to lower it vertically into the separator to about half the depth of the groove, and only then turn it. And here miracles are observed, like magicians, the puck turns as it should, while it does NOT fall in or fall out.
Miracles of engineering and no fraud. Next, we change the boot and the fun begins. We take the housing with the separator, insert, as described above, an incomprehensible washer, put in the balls, and then insert the core.
Next, pressing the assembled structure inward with your finger, we put it on the slots, lightly tapping it with a hammer, and place it on the retaining ring. And also slightly pulling the body towards us, we seat the core completely onto the slots. Well, the final stage of the operation: We put the second part of the boot on the body, tighten it with clamps, and lubricate everything through the lid with grease. If there is a slight backlash, then the design is faulty.
There should be no backlash. With sharp movements it is necessary to rotate the shaft around its axis of rotation, while holding the hinge fork-flange with one hand. There should be no circumferential gaps.
When does a device need to be replaced? When the design of the device, so to speak, loses the balancing of the plates, or all parts of the product are replaced, then upon completion it is imperative to re-balance the driveshaft. If, after balancing, the problems with the product malfunction are not eliminated, then the shaft assembly with all elements is replaced.
Balancing the cardan is done either by visiting a service station, where specialists will perform all the related work, or independently, which will save money.
But that is another story. Removing and replacing the driveshaft Removing and then replacing the driveshaft on Chevrolet Niva versions up to a year is carried out in the following order: The vehicle is installed on the overpass.
At the gearbox, the lever is placed in the neutral position, and the parking brake is in the down position. Shoes are installed under the wheels for safety. Before removal, it is necessary to make notches on the ends of the flanges, drive axle and transfer case at the joints.
This will help return the shaft to its original position without the need for balancing. The nut of the cardan bracket is unscrewed, while supporting the bolt so that it does not rotate.
All fastening nuts are unscrewed in the same way. There are four of them on one side. The nuts are Teflon coated to prevent self-turning.
After removal, even if the shaft is not replaced, it is recommended to replace the nuts with new ones. Three fastening bolts are removed from one side, and the fourth is left to fix the product in its original position. We carry out the operations of unscrewing the nuts on the other side of the fastening. The order of unscrewing does not matter.
The last bolt is removed from one side and the cardan is removed, while its parts are reduced to the slot. The product has been removed, it is now being repaired, and if this is not possible, it is being replaced with a new one.
The installation procedure is the reverse of removal. First of all, the car is placed in neutral and the parking brake is in the down position.
A stop is placed under the transfer case, which can be adjusted. The nuts securing the side brackets of the transfer case suspension and the two rear mounting nuts are unscrewed. The box is lowered until it comes off the bracket studs. The cardan is rotated and the nuts securing the shaft to the drive axle flange are unscrewed and removed.
To unscrew the nuts, you will need to install a special blade in the hole between the flange and the CV joint. After this, the CV joint is pressed out with this blade until it moves slightly from the shaft splines and, thus, allows the nuts to be unscrewed.
Now, using two blades, you need to press the CV joint until the fastening studs come out of the slots in the drive axle flange. The transfer case, which has been removed from the studs, will allow this manipulation to be performed.
If you do not remove the transfer case, then the free play of the connection of the splines of both CV joints will be too small. Now you need to hold the shaft with one hand and with the other unscrew the four nuts securing the shaft to the transfer case flange.
How to change CV joint boots on Niva yourself
The shaft was removed from a Niva Chevrolet car. Repair or replacement with a new one is carried out, and then assembly is carried out in the reverse order of removal. You can not hold the shaft, but fix it with a strong rope to the bottom of the car, or use the help of a friend. How to properly install the boot on the CV joint?
Dismantling the drive assembly on a Niva 2121 car
As for the repair procedure, we present the main points below:
- First of all, we lift the car with a jack (it is also advisable that it is in the inspection hole).
- Using a screwdriver and a hammer, knock off the protective cap of the hub nut and unscrew it.
- Using a 13mm wrench, unscrew the nuts securing the ball joint to the steering knuckle.
Now you can remove the drive shaft from the Niva's front wheel hub. And to remove
/replace external
CV joint, remove the retaining ring.
To release the internal one, you must first unscrew the three nuts securing the pressure plate.
- Then we pry up the plate with a screwdriver or a sharp chisel and pull out the inner CV joint from the front axle gear housing.
- Since the space between the shock absorber and the front suspension spring is minimal, it is not very convenient to pull out the drive assembly, so it can be disconnected.
- If necessary, defective CV joints are knocked down and new ones are installed in their place in the reverse order.
- It is imperative to apply a lubricant, such as a CV joint, to each of the grenades and securely fix the boot clamps.
- The assembled drive is installed on the Niva in the reverse order.
Russian CV joint boot Niva
The Balakovo team made a pretty good corrugation for the outer CV joint. It is equipped with conveyor drives. And if it is not damaged somewhere in a rut by a twig or ice, then it works for a long time. The most important thing is that the corrugated rubber does not spread due to molybdenum lubricant. Replacing the right outer CV joint boot for Renault Megane. Supplied with clamps with a latch. I do not recommend using this corrugation in the north and other “resort places” of your beloved homeland. You remove the boot clamps on the outer CV joint from the inner CV joint and replace the inner one. Our tires don't last long there. Neither in the form of cuffs, nor in the form of hoses, nor in the form of anthers.
How much does it cost to replace a CV joint on a Niva?
The price of new assembled drives starts from 3000 per one. If we consider the CV joint separately, then for the internal one you will have to pay from 900 rubles, and for the external one from 1600 rubles and more. The final price depends on the place of purchase and the manufacturer.
In the article, we discussed the removal and installation of front wheel drives in the article - “Replacing front wheel drives.” In this article we will look at replacing the angular velocity joints of the front drive VAZ-21213.
We prepare the car for repair. We install it on a viewing hole or on a lift.
We remove the drive from the car. We clean the hinge from the outside and clamp it in a vice with soft pads.
Since the outer hinge is most often replaced, we will consider this operation first.
1. Using pliers or pliers, squeeze the small clamp by the protrusions and, prying it up with a screwdriver, disconnect it.
2. Remove the large clamp in the same way. If the protective cover is attached using plastic clamps, then simply cut the clamps using side cutters.
3. Slide the protective plastic and rubber cover along the shaft. We clean and wipe the end part of the hinge from old grease.
4. Using a drift made of soft metal or a wooden spacer made of durable wood, we knock down the hinge, striking the end of the cage. We take into account that the drift should not transfer force to the separator or balls in order to avoid their damage. This is the case if you need to put this hinge back on the shaft.
5. Remove the hinge. The joint on the shaft is held in place by a retaining ring, which is located in a groove at the end of the shaft.
6. The locking ring is usually sold complete with the hinge. Pry up the retaining ring with a thin screwdriver
7. Remove the retaining ring
8. Separate the protective covers
9. Remove the rubber cover
10. Remove the plastic casing
11. If you need to replace the thrust ring, remove it with pliers
Install the hinge in reverse order.
We clean the shaft and joint from old grease, apply a thin layer of new CV joint grease and put a casing and a new cover on the shaft. We install a new retaining ring on the shaft. We put 3 CV joint-4 lubricants into the 60 cm joint cavity.
Using a soft metal drift or a strong wooden spacer, press the joint onto the shaft.
We put on a rubber cover. We install clamps. Before tightening the clamps, you need to release excess air from the rubber boot by prying up the seating belt of the boot with a screwdriver.
Depending on the mode of operation, sooner or later there comes a time when on a VAZ 21213 Niva a CV joint malfunction leads to its replacement. The catch is that these elements cannot be repaired and if they wear out, they are replaced with new ones after they break down. Diagnosing problems with the VAZ 21213-21214 CV joint (commonly known as grenades) is quite simple, but extending its service life is more difficult.
It just so happens that most motorists pay attention to some part of the car after it breaks down. A new CV joint is purchased and replaced, which takes time and considerable money.
In fact, there is no drift to the angular velocity hinges installed in the Niva.
Unlike front-wheel drive VAZ 2110-2114 cars, in the Niva the torque is distributed over 4 wheels. This means that the load on the front wheel drive is half as much as in the same VAZ 2114. And if we theoretically assume that not a drop of abrasive dust and dirt gets inside the hinge mechanisms of the axle shafts, then the service life of the CV joint will be equal to the “life” of the CV joint itself. auto. Of course, this is impossible in real life, and the Niva is designed for off-road driving.
It is quite possible to prolong the life of grenades as much as possible. To do this, you must regularly perform the following activities:
- Conduct a visual inspection of the anthers covering the hinges. When the car is operated on an asphalt road, an inspection should be carried out every 10-15 thousand km. When driving off-road or on embankment and dirt roads, the grenade cases need to be inspected more often, especially after driving in difficult conditions.
- If the slightest damage to the boot is detected, immediately replace it with a new one. This also applies to the clamps that hold the covers in place.
- During replacement, remove old grease from the Niva CV joint along with any dirt that has fallen into it and apply new one. The lubricant used is CV joint-4, its quantity for the outer grenade is 40 cm 3, for the inner grenade - 80 cm 3.
What does a CV joint consist of?
Be sure to remember the following before removing the inner CV joint on a Niva. Each car owner decides for himself: either he changes the unit himself, or turns to specialists for help. But in both the first and second cases, you need to know what parts the CV joint consists of and be able to understand the mechanism.
The CV joint consists of:
- Sharikov.
- Fist.
- Cases.
- Separator.
- Internal and external anthers.
The CV joint is an external part located at the very bottom of the car. The internal and external anthers perform two main functions: they protect the hinge from dirt and dust.
It is worth noting that there are two mechanisms on each wheel drive. These mechanisms have the same structure, the only thing is that they differ from each other in shape and size. On most car models, as a rule, the right and left CV joints are interchangeable.
Therefore, if you have any doubts about this, it is best to go to a car service center and check with specialists.
It happens that the entire mechanism requires replacement, but most often the external mechanism is erased, while the internal one continues to function. However, sometimes it may require replacement.
The design of this mechanism itself is quite simple. And in this design there is a separator that spins the balls. They are located in the grooves of the fist and the outer housing. All these elements are covered by anthers. They protect parts from dust and dirt, and also thanks to them, lubricant does not leak out.
If replacement is required, then you can either install a new mechanism, or just change its individual parts.
Why does a grenade break?
Sometimes it is necessary to replace the inner CV joint of a Chevrolet Niva. In order to reduce the likelihood of breakdown, you need to know what reasons lead to this. Specialists and experienced car owners identify the following reasons under the influence of which the “grenade” will require replacement or repair:
- the unit is completely out of order;
- the service life has expired (indicated in the vehicle documentation or in the invoices if repairs were previously carried out);
- driving rules recommended by manufacturers are violated - aggressive style, choice of difficult routes, all this negatively affects the details.
Despite the fact that the Chevrolet Niva is an SUV, it is necessary to ensure that difficult road conditions are not constant. The reasons for the “grenade” to fail include dirt, dust or large particles getting into the components.
According to the statistics of requests, in 90% of cases the outer part of the element requires replacement. To reduce the likelihood of an emergency, it is recommended to regularly check the condition of the protective rubber covers and adjust the fastening in the unit.
