Let's consider such a problem in a Lada Priora car as a non-functioning instrument panel (dashboard). I’ll tell you a case from the practice of a car service. One Priora owner's instrument panel suddenly stopped working, the lights came on, and all the arrows were dead. He did not find out why this suddenly happened, but simply bought another one at a disassembly site and put it in place of the broken one. After some time, it also stopped working, and in the end he had to go to a car service for diagnostics.
The cause of this malfunction was found out; the individual coil was broken to ground, i.e. 25,000 volts hit the ground, and accordingly all the electronics went crazy. A similar problem occurred on the Opel Vectra A, where in addition to the instrument panel, it was still impossible to connect the diagnostic tool. The problem was not with the coils, but with the fact that the high-voltage wires have a very high resistance, their general condition was very deplorable, this led to the fact that the slider in the distributor heated up and began to “break through” to ground.
Here is a broken coil on a Priora:
How was the fault determined?
We immediately heard misfires from the exhaust, and only then began to remove the connectors from the coils and, using a rebuild method, found the problem cylinder that had misfires.
Air conditioner fault codes on Priora
If the air conditioner light on a VAZ Priora is blinking, the malfunction can be determined based on the error code read from the on-board computer.
Depending on the code, the causes of the malfunction are as follows: 9338 - the temperature sensor located in the passenger compartment is faulty; the sensor wire is broken or the connector is oxidized;
9337 - the temperature sensor located in the cabin, or the wire going to it is shorted to ground;
9348 - the sensor recording the ambient temperature is faulty, or the electrical circuit for its connection is broken;
9347 - the sensor circuit that records the ambient temperature is shorted to ground;
9378 - the evaporator sensor is faulty or the electrical circuit going to it is broken.
9377 - the electrical circuit of the evaporator sensor is shorted to ground;
9358 - the wire coming from the radiator sensor of the heating system is shorted to ground;
9412 - short circuit in the electrical circuit of the air mixer micro-reducer;
9413 - the electrical circuit of the micro-reducer is broken;
9420 - the electrical circuit of the micro-reducer winding is closed;
9426 - the electrical circuit of the micro-reducer winding is broken;
9440 - the power supply circuit of the additional resistor that regulates the speed of the heater fan is broken;
9860 - overvoltage of the on-board network;
9861 — low voltage on-board network;
9607 - malfunction of the air conditioning system controller.
Auto-assistance
Pinout, tuning, lighting and removal of the VAZ-2114 instrument panel
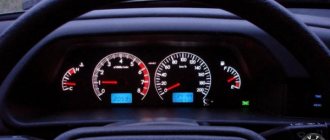
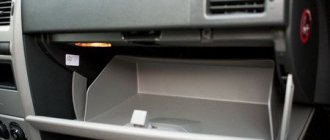
An instrument panel and several switches for various additional devices are installed on the front panel of the Lada Priora car. If you look at the instrument panel from left to right, then it contains: tachometer, speedometer, coolant temperature indicator, fuel level indicator in the gas tank. There is a liquid crystal display under the speedometer, and below it, along the entire length of the dashboard, there are 16 warning lights. Two more turn signal indicator lamps are located at the top left and right of the speedometer. All instruments and warning lamps operate from appropriate sensors, and an electronic control unit takes part in data transmission.
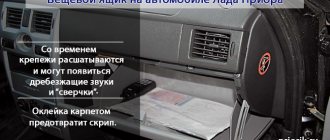
Malfunctions that cause malfunctions in the operation of the instrument panel are purely electrical and are difficult to find without the appropriate knowledge. The following case can be cited as an example. The driver wiped dust from the front panel and instrument panel glass with a microfiber cloth. After these actions, when the ignition was turned on, the instrument panel refused to work at all. All instrument needles were at zero. He searched for the cause of this phenomenon and the elimination of this malfunction for quite a long time, but still found it. Apparently, a microfiber cloth, when moving over a plastic surface, creates a magnetic field, which leads to failure of the instrument panel. And fixing this malfunction is quite simple; you just need to remove the negative terminal from the battery for 10 seconds. But how much time was wasted in order for this rag, which is the cause of this malfunction, to be thrown into the trash.
A complete failure of the instrument panel can also result from the failure of the 7.5 amp fuse F10; in this case, the interior lamp and brake lights will also not light up. So it’s quite easy to check it without even opening the mounting block.
If only one device does not work, then you need to start looking for the cause of this malfunction by searching and checking the functionality of the sensor that powers this device. But again, all signals from the sensors to the dashboard instruments go through the electronic control unit. And if replacing the sensor does not give positive results, then you will have to check the electronic unit and the instrument panel itself, and here you cannot do without specialists.
The only thing the driver can do on the instrument panel is to check and, if necessary, replace a burnt-out warning light bulb. Sometimes the cause of the malfunction is simply poor contact in the connecting blocks of the wires. The driver can also check their condition himself.
The more complex the filling becomes on modern cars, the more difficult it is for the driver to find the cause and eliminate any malfunctions that arise. In these cases, knowledge and fairly easy access to information about the causes of these malfunctions are needed.
Standard instrument panel - article number and price
The original car tidy exists in three types.
- the first is an option for a pre-restyling car;
- the second panel is for a restyled car;
- and the third is the “Lux” option for the restyled one, which has become faintly similar to all previous torpedoes.
Each of them contains standard elements such as a tachometer, so their functionality does not decrease. . Who wants to do tuning of the instrument panel, this option is for them.
Priora first generation
The instrument cluster for the first generation Lada Priora received catalog number 2170-3801010. Cost – about 6,000 rubles. Everything is standard with it - from left to right there are four arc scales with red arrows: odometer, speedometer, coolant temperature, fuel level. Below the speedometer there is a small on-board computer display, and above the arches are all the indicators, including the direction indicators.
Priora 2
For the Priora “Lux” variation there are two more “subtypes” - with or without a CAN bus. Different subtypes were made so that the panel could be connected to any car. Catalog number – 2170-3801010-50 without tire, 2170-3801010-60 with tire. It is distinctive in that it contains an elongated display with a screen that can highlight the navigator.
The catalog number of the combination for the “Norma” assembly is 21720-03801010-20. Cost – 6,500 rubles. Like the “Lux” version, it received a brighter speedometer and odometer, and the coolant temperature along with the fuel level indicator is hidden at the bottom of the speedometer and odometer. The base will not create a route on the display, but will show all the information in color.
Diagnostics using the built-in BC
Dashboard lighting: how to do it yourself
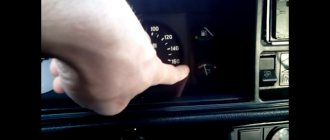
To view the error codes, you need to find the daily mileage reset button on the dashboard, press it and, holding it, turn the ignition key. The self-diagnosis mode will turn on. All arrows on the instruments should move from minimum to maximum values and back, and all positions on the LCD display should light up. You need to look: if any position does not light up or the arrow on any device does not move, then you should check the corresponding sensors, their networks or display for malfunctions.
Priora on-board computer
In the same mode, press any button for switching modes of the built-in BC 2 times, after which digital codes may appear on the liquid crystal display:
- 2 - very strong voltage in the BS;
- 3 - errors in the fuel level sensor system in the gas tank;
- 4 - error in the coolant temperature sensor system;
- 5 - error in the air temperature sensor system outside the car;
- 6 — motor overheating;
- 7 — emergency low oil pressure;
- 8 - malfunctions in the brake system;
- 9 - battery is low;
- E - error in the data packet stored in the EEPROM.
Many drivers ask how to reset error codes on a Lada Priora. Perhaps their built-in BC is faulty, since a working on-board computer automatically exits the diagnostic mode after 30 seconds if you do not press any control buttons.
Why does the instrument lighting not work on the Priora?
How to replace light bulbs on a Priora instrument panel
On a VAZ 2170 Priora car, lamps without base lamps are used to illuminate the instrument panel. Each lamp is installed in a special socket, with which they can be removed from the socket and installed back in place. To prevent the lamp socket from jumping out of the socket while the car is moving, when installing it in the socket, it is fixed by turning it clockwise.
If only part of the instrument panel is not illuminated, then one of the backlight lamps has either burned out or lost contact with the path through which electric current is supplied to it. To eliminate this malfunction, the instrument panel will have to be removed.
In case of loss of lighting of the entire panel and simultaneous failure of the devices located on it, it is necessary to check the F10 (7.5A) fuse in the mounting block and the fastening of the ground wire.
If only the dashboard lighting on the Lada Priora does not light up completely, and the rest of the instruments and warning lamps are working, then you need to get to the plug connector and check whether contact No. 18, through which power is supplied to the lighting lamps, has oxidized. If everything is normal with the contact, it means that the track on the plateau from which the lamps are powered has burned out.
The driver who can disassemble the instrument panel can fix this malfunction himself by gluing a piece of foil to the burnt area with tape, having previously cleaned the ends of the track to ensure contact.
Is it possible to install LED lamps?
Instead of conventional dashboard lamps, some owners install LED ones. The advantage of them is that they provide brighter light and you can choose lamps of different colors. However, some LED lamps are longer than conventional lamps, so when installed in the instrument panel, they fit closer to the light filter and create a bright spot. But at the same time, the panel itself and the indicators become brighter.
Advantages of LEDs in the shield
- brighter light, allowing better illumination of devices
- Possibility of choosing lamps of different colors at will
- longer lifespan of quality LEDs
- Too bright LED lamps create glare on the panel, which does not look very good
- sometimes the panel looks too bright and distracts from movement
- The bright light of the panel can cause eye fatigue
When installing LED lamps in the instrument panel on a Priora. Brightness adjustment does not work very well due to the fact that diodes consume very little energy and therefore, unlike conventional lamps, do not lose brightness when the current supply is reduced.
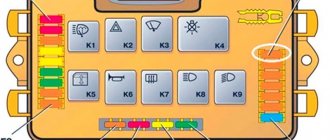
Additional block
Additional relays are mounted on a bar and located under the dashboard, near the front passenger's feet. To get to them, you need to remove the right tunnel lining. Next to the additional relays is the electronic engine control unit (ECU).
If its connector interferes with access to the relay, disconnect it by first removing the negative terminal from the battery.
Circuit breakers
F1 (15 A) – main relay circuit, starter blocking.
F2 (7.5 A) – power circuit of the electronic control unit (ECU).
F3 (15 A) – electric fuel pump. If the fuel pump has stopped pumping (this can be determined by the absence of a sound when the ignition is turned on), check together with relay K2. There may also be problems with the immobilizer, it blocks the pump, see information about F20. If the wiring, this fuse and the relay are good, most likely the fuel pump itself has failed. To remove it, you need to disconnect the battery, remove the rear seat cushion, unscrew the cover, ring and fuel hoses, then carefully remove the entire fuel pump.
K1 – main relay.
K2 – electric fuel pump relay. See above about F3.
Fuse box in the passenger compartment of VAZ-2170, -2171, -2172
The fuse box in Priora is located at the bottom of the dashboard, on the left side of the steering wheel. To get to it, you need to open the cover, which is held on by three latches. Rotate each locking knob 90 degrees and pull the lid down and it will snap open.
Fuses in the interior mounting block
F1 (25 A) - radiator cooling fan . If your fan does not work, check its motor by applying 12 V directly to it from the battery. If the engine is working properly, then most likely the problem is in the wiring or connectors. Check the serviceability of relay K1.
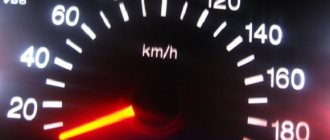
The fan in the Priora usually turns on at a temperature of 105-110 degrees. Do not allow the engine to overheat, watch the arrow of the temperature sensor.
If the fan runs constantly and does not turn off, check the coolant temperature sensor located on the thermostat. If you remove the connector from the working sensor, the fan should turn on. Check the wiring to this temperature sensor, as well as the contacts of relay K1, move this relay, clean the contacts. If this is the case, replace it with a new relay.
F2 (25 A) - heated rear window . Check together with fuse F11 and relay K2. If the rear window does not fog up, the heating element threads may have broken. Inspect all the threads and if you find a break, seal it with special glue or varnish, which can be bought at car dealerships for 200-300 rubles. Check the connection contacts at the terminals to the heating elements at the edges of the glass, as well as the switch on the dashboard and the wiring from it to the rear window.
Replacing light bulbs yourself
So, on your Priora the arrow indicators are not illuminated or the information on the LCD display is barely visible. One or more backlight bulbs have definitely burned out, and now we will try to replace them ourselves. In order to get to these bulbs, you need to remove the instrument panel.
Removing the instrument panel
To work, you will need a Phillips screwdriver about 10 cm long. A longer one will do, but it will be inconvenient to work in cramped conditions. First you need to remove the decorative trim of the dashboard. It is secured with 4 screws, the two lower ones being covered with a decorative trim under the steering column. The cover is secured with two latches at the top and three swivel fasteners. If you have ever looked into the mounting block, say, to replace fuses, then you can handle dismantling the cover in a few seconds.
After removing the decorative trim, you will get to the two lower screws that secure another plastic trim - the dashboard trim. Unscrew them.
Now find the two top screws - they are recessed into the panel. It is quite difficult to get into there with a long screwdriver (although it is possible), so I suggested stocking up on a short tool.
Unscrew these screws and the cover will come off easily.
In order to remove this trim, you do not need to dismantle the steering wheel! It is enough to install it in the lower position.
All that remains is to remove the Priora indicator panel itself. It is attached with two screws, which you can easily see when you remove the cover.
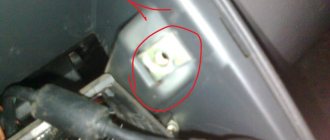
We unscrew them and carefully pull out the shield, to which there is a harness of wires connected through the green block - connector. The connector is very convenient: to disconnect it, just press the latch with a screwdriver and turn the lever
Disconnecting the PP power cable connector
Disconnect the connector and remove the instrument panel. We place it face down and see the back of the five light bulbs - these are the backlight bulbs.
Rear side of the Priora instrument panel
In order to remove the light bulb, you need to lightly press it and turn it 90 degrees counterclockwise. Take out the burnt ones and install new ones in their place.
Which lamps are suitable
Depending on the year of manufacture, the Lada Priora instrument panel is equipped with two types of backlight bulbs:
- The bulb of the light bulb is simply inserted into the socket, which is a kind of base.
- The bulb is inserted at the factory, and its leads are spot welded to this cartridge.
Non-separable (left) and collapsible light bulbs for illuminating the Priora instrument panel
The collapsible design is convenient because you don’t need to buy the entire light bulb assembly; you just need to stock up on bulbs, which are sold separately.
In the second case, you have two options:
- Buy a light bulb with an assembled socket.
- Buy a light bulb with long leads and, after biting off the burnt one, solder a new one.
Of course, the first option is simpler in terms of installing the lamp, but will cost more. The second option is suitable for those who know how to hold a soldering iron in their hands.
Removing the instrument panel
To remove the shield you will need a flathead and Phillips screwdriver.
Unscrew the two top screws (as shown in the picture), then carefully remove the panel under the steering column. It is held on top by clamps, and on the bottom by 3 fasteners that just need to be turned.
Under the panel we see 2 more self-tapping screws for fastening the shield; we also unscrew them. Now lower the steering wheel to the lowest position and remove the plastic cover of the shield.
Now all that remains is to unscrew the two screws holding the dashboard itself. They should be unscrewed carefully, as the screws may fall under the panel. It is better to unscrew them with a screwdriver with a magnetized tip.
We pull the panel slightly towards ourselves and see the green block and wiring harness. Disconnect it by pressing the “tab” and pulling slightly upward. After which the instrument panel will be removed.
Priora instrument panel lights do not light up
Guys, help) the whole tidy is on, only the speedometer is not on, you put the lights from the speedometer in another place, they work, and all the working lights on the speedometer do not light up, what could be the problem? Where and what to see or change? If you have the skills, then disassemble the device and look for a burnt out track or restore an erased contact pad.
If you have the skills, then disassemble the device and look for a burnt out track or restore an erased contact pad.
Now the whole panel has gone out(((we didn’t even have time to climb in(((
Apparently it was especially bright LED. )))
Not at all. She was dazzling)))
Correct the connector first.
Corrected me, I'm not a fool
How to make the instrument panel turn on the ignition
If you mean the backlight of the tidy when ignition, then you already wrote here)))
If you mean the backlight of the tidy when ignition, then you already wrote here)))
Yes, the topic is about backlighting)), but how can I search from my phone?
Yes, the topic is about backlighting)), but how can I search from my phone?
13 - contact - white - instrument lighting (remove the white wire from the block, instead apply it from the ignition switch or the D+ signal from the generator - the instrument will be illuminated when the ignition is turned on or when the engine is running. The indicator - "gauge" will work normally, as usual when incl. dimensions)
The entire instrument panel periodically began to go out (if you turn on the turn signals, the indicators turn on, but the rest of the panel is still without light), and all other indicators too. The backlight comes from the electrical package controller, contact X2-2 (white wire), then branches somewhere in the harnesses on several wires, diverging to all places, including the dashboard lighting. To begin, pull connector X2 of the electrical package controller several times (it is 20-pin), maybe the contact is bad, or you can turn on the backlight, wait until it stops working and use a needle to measure the voltage on the specified wire.
How to find X2-2: https://xn—-8sbabr6ahc3e.xn--p1ai/images/LADA_Priora/Tuning/Other/podkluchenie-antiradar-priora/mus2.jpg
If the car is new and the Central Body Electronics Unit is installed instead of the electrical package controller, then everything is simpler - the backlight takes its origins in the lighting control module, pin 58b, the wire is also white.
Hello comrades. I have the following problem: the lights on the instrument panel, heater knobs, heated glass, cigarette lighter are not on, but the lights on the power windows and MUS are on. In addition, the left side of the lights does not light up, the low beam lights up normally. What can non-burning elements have in common and where to go?
Added after 7 minutes and I was also mistaken, the MUS is not lit either
Lada Priora Hatchback Belaya Laiba › Logbook › Self-repair of the instrument panel
So, the first entry and the recent breakdown. In general, the speedometer got stuck at 120 km/h and wouldn’t let go. My father-in-law at the speedometer was 0, it was 120, if you go 50, then the speedometer shows 170 km/h))) it’s a very inconvenient thing that turned out like this. The tachometer was also downward by 500 rpm. I read here on the website who treated it. Reset the terminal from the battery, run a tidy test, etc. nothing helped. It was decided to remove the tidy and set the arrows by hand. I put it out, I think everything will be fine. I connect the device, run tests, what is the result? The tachometer needle still doesn’t show correctly (goes down), and the speedometer is fine at first, but then there are some crackles and it again starts to show incorrectly, going far beyond 200 and resting on the bottom of the dashboard... Taking a friend to help, we decided to open it completely and see how everything works there and what interferes with the shooters. After much thought and fiddling with a thin screwdriver, we uncovered the “motor” that turns the speedometer needle. The whole problem was that the gear on which the arrow was mounted was not entirely intact, or rather, 4 teeth on it were broken. Again we thought about how to solve the problem. Don’t buy a new device for 3400 just because of one gear... The solution was simple. I opened the temperature gauge motor and swapped the speedometer and temperature gears. Having empirically determined that broken teeth will not harm the temperature gauge. We collected everything except the temperature needles and speedometer. We connected it to the car and did a test so that the motors would drop to zero. Then I set the arrows evenly, ran the test, and lo and behold, everything works! Saved RUB 3,400.
Why does the instrument lighting on the Priora not work?
Everyone values the time of day! TROUBLE! The instrument lights do not light up. First things first. My speedometer lights probably stopped working half a year ago. Today I decided to do it, changed two light bulbs. I put it in place, turn on the dimensions, and then “Hello.” Only the tachometer backlight is on and that’s it. The rest of the instruments are not illuminated, the arrows also do not light up. The BC monitor is on and working, the arrows are also functioning, the indicator lamps are all on. Only the devices do not light up. I changed the other light bulbs. the same. Zero result.
Maybe someone had something similar? What could it be? Is it really necessary to change the device?
Good day! The question is, the dashboard lights do not light up, all the sensors are on, except for the sensor for turning on the side lights and headlights. The fuses are also intact. Thank you in advance! Priora instrument panel lights do not light up.
White backlight of the Lada Priora dashboard (part 2)
This is the first post about the white backlight of the dashboard. The photo shows that the light is very good, but in real life it is much worse. After driving around, some diodes began to blink, apparently there was a bad contact, all this began to stress me out and I decided to change the backlight a little.
So. To begin with, we bought 1 meter of LED strip and a soldering iron with a thin tip. I held the soldering iron in my hands only 3 times and didn’t really know how to solder, but that didn’t scare me
Let's begin. We take the tape and cut strips, 3 diodes in each, and solder the wiring to them. I took solid copper wire.
Next, glue these strips in the same way as shown in the photo. In some places it is necessary to drill holes for the wires.
Let's check this whole thing. To test the LEDs, I bought a 9 volt Krona battery. All the diodes glow, I was very happy about that)
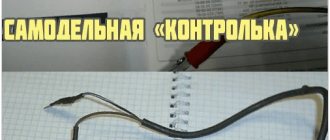
We take the board and connect it to the car, turn on the dimensions and use the control light to find the plus and minus of the backlight. And solder the wiring to them.
Possible reasons
What to do in a situation where the instrument panel backlight on a VAZ-2110 car has disappeared? First of all, you should look for the reason why this malfunction occurred. Sometimes it can be identified immediately, but in some cases this process takes some time. In fact, there may be several reasons, so you will need to check everything methodically.
The most banal and simplest option is that someone turned the rheostat knob, which is responsible for the amount of light flux, all the way to the left.
This, by the way, is often the sin of children who are placed in the front seat. “Young drivers” love to turn all sorts of knobs, press buttons and switch levers. Perhaps the adults overlooked it, and the child “corrected” the dashboard lighting. The problem, as you understand, is solved by simply returning the rheostat knob to its previous position. Therefore, before you start looking for possible reasons for the sudden disappearance of the backlight, check this particular point.
I would like to remind you of one simple rule. In a situation where there may be several possible causes of failure, when searching you need to follow the path of least resistance. In other words, test the simplest assumptions first. You may be lucky and find the problem with minimal time and effort.
If the reason is not in the position of the rheostat handle, you need to proceed to further search for the causes of the breakdown. Possible sources of problems here could be:
- fuse;
- instrument panel circuit board;
- contacts;
- wiring;
- failure of light bulbs due to short circuit.
So, let's look at some of the above reasons in more detail. After the rheostat handle, you should check the integrity of the 5-amp fuse F1. You can also usually turn on the side lights and see if they work on the left side. Everything is explained here simply. The lamps that illuminate the instrument panel, the left side lights, as well as the trunk lighting operate through this fuse. The dimensions located on the right side of the car receive power through F11, that is, they are not of interest to us in this particular case.
You may see the following situation. The left side parking lights, or trunk light, work, but the instrument panel light does not. This means that the problem is not in fuse F1. Therefore, you need to continue searching for the possible cause of the malfunction. In particular, it is necessary to check the contacts of the rheostat that illuminates the dashboard lighting. It is not uncommon for plugs to fall off. Accordingly, the lighting of the shield disappears due to lack of contact.
However, the rheostat itself can also fail. It is quite easy to check this assumption. To do this, you must first remove the rheostat, and then directly connect its contacts. If after this manipulation the instrument panel lights come to life, it means that the problem has been found, and you just need to replace the failed part. If not, then you need to continue searching further.
see also
Comments 44
How was the problem solved? I have the same problem, tried several devices, same thing
Did you figure out what the reason was? Otherwise the same problem happened
The tidy was dead, but everything that was measured was with canshina, that’s why they didn’t work
Help me figure it out too, I start the car, move away, the arrows are on (revolutions, speedometer) after a few km they start working
During the test, these hands shake while standing still...
To change the color in the tidy, you just need to change the light bulbs and that’s it?
By the way, I also tinkered with it, changed the fuse, untwisted it and just made the contact tighter, then it started working on its own
I had the same thing, the car was parked clean for 2 weeks, I drove it around and it came back (tidy) to work on its own
Well, let's hope, although I have already planned to buy a new one!
Thank you all for your help, after all, the panel is dead, I’ll have to buy a new one (((
under the hood there is a fuse on board the network, etc. in the Murzilka, read it, I had a recharge on the 2110 and the shield froze...
Does anyone know if it is possible to replace the pointer motors? My tachometer is broken!
Anything is possible! It’s soldered in from another panel! I’ve never seen it separately!
Briefly speaking . I have this problem and this is how to treat it. It pops up periodically. once every couple of months. There is a fuse there, I think for 15 And it also goes to the ceiling light. So I take it out, put it in and everything works again. It’s strange, but if you just move it, the result is zero. The fuse is red on the right, if memory serves, 4th in a row.
Eh, I checked all the fuses there, pulled them out, the result is the same, I'll check it in the evening with another panel, we'll see what happens