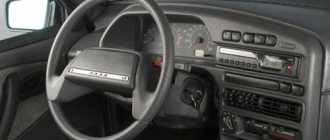
Sometimes, especially in winter, the dashboard “freezes” in domestic classics. Lights do not light up, some or even all appliances do not work, the battery refuses to charge, although the car starts and runs.
With the interior warming up or tapping the panel with your fist, this problem usually disappears and everything gradually turns on, but the consequence of this is a discharged battery, loss of time due to warming up the car and dead nerves.
The reason for this disgrace is poor contact of the terminals with the instrument board due to the fact that they are not connected through soldering, as on all machines, but through copper rivets.
Over time, oxides form on the metal, and at low temperatures frost also forms, the metal is deformed and the current cannot break through this barrier. Therefore, many drivers solder these connections with a regular home soldering iron, which we will do as well.
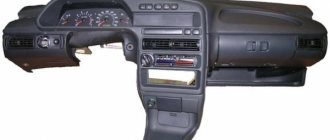
First, we need to remove the instrument panel from the car panel. To do this, unscrew the mounting bolt, pull out the radio if it is installed there instead of the air ducts, and disconnect the heater motor activation key.
Use a screwdriver to pry up the lower right edge of the panel and press it out of its seat.
Since plastic clips are in the way on the left edge, we move the panel a little to the right and perform the operation with a screwdriver on the left side.
Carefully remove the block as far as the steering column allows.
Then we crawl into the niche with our hand and unfasten the 3 chips from the terminals, remove the cotter pin and disconnect the daily odometer drive cable, unscrew the speedometer cable, and by moving it to the right we take out the entire instrument cluster.
Since the plastic contact chips are attached to the board with aluminum rivets, we drill them out with a drill with a drill bit 2-2.5 mm thick. This must be done carefully so as not to scratch the tracks and not to carry chips inside the panel.
The second half of the rivet remains in the housing and can be removed either by removing the light bulbs or drilling a small hole in the corner of the housing. Only then should this hole be sealed with sealant to prevent dust from entering.
So, let's start soldering the contacts, treat them with fine-grained sandpaper if necessary, apply flux and solder in 1-2 directions, or in a circle.
You can also solder the connections with the nuts, having previously tightened them, and the junctions of the diodes.
Soldering areas can be treated with a special varnish for reliability.
We put the chips in place in the same way as they were originally and fix them with rivets, if possible, or with ordinary galvanized self-tapping screws with a flat head 10-15 mm long.
Now we put the panel back in the order of removal. We also prudently inspect the wiring harnesses and chips to see if there are any short circuits or contact oxidation, and check the ground.
Before reinstalling the panel, thoroughly wipe and inspect it. The resulting connections can also be further tested with a multimeter or an indicator lamp connected to the battery.
Good luck on the roads!
Source: https://autovazremont.blogspot.com/2017/02/paika-paneli-vaz-2107.html
The instrument panel of the VAZ 2107 does not work
Hello everyone, today I would like to look at the main reasons why the instruments on a VAZ 2107 do not work. You will probably agree that when the instrument cluster does not work, some kind of discomfort is created and the driver does not feel very comfortable.
Moreover, the instrument cluster of the VAZ 2107 car provides a lot of important information that is needed both when starting the car and when driving. Well, let's move on to the most important thing, namely, finding the reasons for the failure of the instrument panel.
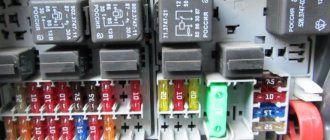
So, the first thing you need to do is check the fuse that controls the tidy. On the VAZ 2107 this is fuse F10 (10A) which is located in the mounting block. If necessary, this fuse must be replaced.
If you checked the fuse and it is ok, then the problem is in the instrument panel itself. First you need to remove the instrument cluster and check the two black wires that are attached to the car body.
As you may have guessed, this is a mass; you need to check whether the contact is seated well and how well the fastening nut is tightened. You also need to check the contact blocks.
The most common reason why the instrument panel does not work is the pins, which are attached with rivets, and such a connection is not very reliable and due to vibrations and other shaking, the contact disappears, and the instrument panel of the VAZ 2107 car stops working or works intermittently.
This is especially noticeable at sub-zero temperatures while the seven-cold panel in the cabin does not work, and after warming up, when the metal expands a little, the contacts are restored again and the tidy starts working again.
But as you understand, this is not an option to drive like this. In order to fix this, you need to remove the aluminum rivets that hold the board and get to the connectors of the pads.
Then, using a soldering iron, you can restore the contacts. And after that, you can forget about the disease of the instrument cluster of the VAZ 2107. And yes, by the way, instead of the rivets that were drilled out, you can screw in self-tapping screws. Well, that's all for this, if you had other reasons, then write in the comments. Bye everyone.
Removal
1. We prepare the car for operations (see “Preparing the car for maintenance and repair”).
2. Disconnect the wire from the negative terminal of the battery (see “Battery - removal and installation”).
3. Using a thin screwdriver, remove the two plugs for the screws securing the shield.
4. Using a Phillips screwdriver, unscrew the two screws.
5. Disconnect the wires from the fan switch terminals. The top wire is blue-black, the middle wire is yellow-blue, and the bottom wire is red.
Advice. To avoid injury from the protruding plugs of the switch when disconnecting the speedometer drive cable, we recommend removing the switch by squeezing its latches.
6. Moving the instrument panel as far as possible to the left, unscrew the knurled nut securing the speedometer cable by hand and disconnect the cable.
The instrument panel does not light up on the VAZ 2107: causes and troubleshooting methods
If the instrument panel on a VAZ 2107 does not light up, then this does not have a negative impact on the operation of the car during daylight hours. However, very strong inconveniences arise at dusk. It is very difficult to drive a car at night if the dashboard lights are not working. We will consider in detail what could be the reasons for the malfunction of the instrument lighting on a VAZ 2107 car, as well as ways to eliminate them.
What can a constantly burning battery charging lamp indicate?
If the battery charging light is on in a VAZ 2107 or VAZ 2106, there can be only one reason - the battery is not receiving voltage from the generator, or is receiving it, but its value is insufficient. There may be several malfunctions that lead to this:
- violation of normal contact at the battery terminals;
- loose tension or damage to the alternator belt;
- lack of contact of its “negative” terminal with “ground”;
- break in the rotor excitation circuit or wear of the generator brushes;
- diode bridge malfunction.
- defective fuse;
- failure of the relay regulator.
What are the reasons for the dashboard backlight not working on the VAZ 2107?
The situation when, when the instrument panel backlight is turned on, it does not work, is definitely unpleasant. If this happens, then it is necessary to fix the breakdown as quickly as possible, since operating a car at night is not at all uncommon, but a common occurrence. If the backlight of the VAZ 2107 dashboard does not light up, this may be due to the following factors:
- Faulty incandescent lamps. This rarely happens, however, due to the fact that from the factory the lighting of the panel is realized through the use of incandescent lamps, their burnout periodically occurs. The problem can be fixed by replacing the lighting elements, or better yet, installing LEDs. To make a replacement, you will need to dismantle the instrument panel. This is not difficult to do, but it will take a lot of time to disassemble the shield. The panel contains lighting elements, which must be replaced in order to restore the functionality of the VAZ 2107 instrument panel lighting. Before replacing, you should first check the serviceability of each lamp. The design of the shield uses 4 main lighting elements, which are responsible for lighting, as well as additional ones that act as an indication. If you had to disassemble the panel, it is recommended to immediately perform its tuning.
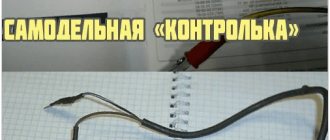
These are the main reasons for the malfunction of the instrument panel lighting on the VAZ 2107. In addition to the main faults, there are additional ones, for example, damage to the power cable. If you have a multimeter in your arsenal, then identifying such a malfunction will not be difficult. Even if you don’t have a multimeter, it’s not at all necessary to contact a car service to fix the problem; you can use a probe with a light bulb.
What lamps to install in the instrument panel for lighting
One of the common causes of malfunction is burnout of incandescent lamps. To restore the functionality of the tidy lighting, you will need to disassemble it and replace the lamps. Due to the fact that the illumination of the instrument panel of VAZs is realized through the use of conventional incandescent lamps, many car owners seek to modernize this design. Let's find out which lamps to install in the tidy to restore the lighting functionality.
- If it is necessary to replace the incandescent lighting elements responsible for the backlight, then you will need light bulbs of the AMN 12-3-1 (T3W) type. These are ordinary filament bulbs that are installed in the dashboard of VAZs from the factory.
- If it is necessary to replace indicator lights, then type A 12-1.2 elements are used.
If there is a problem with the incandescent lamps of the VAZ 2107 tidy burning out, then it makes no sense to buy the same elements, since their main advantage is their low price. However, they have a short service life, and their glow quality is poor. That is why it is recommended to immediately install LED lamps in the backlight of the seven’s instrument panel.
This is interesting! If you change the incandescent lamp indicating the battery charge, you will need to solder a resistor of the appropriate value to the LED. If you simply replace the halogen charge indicator with an LED lighting element, the battery will not charge correctly.
As can be seen from the material, it is not at all difficult to troubleshoot the backlight of the instrument panel of the seven. To do this, it is necessary to properly approach the identification of the causes of the breakdown and carry out troubleshooting. If there is a desire, the tidy can be tuned not only by screwing in LED lamps instead of halogens, but also by adding LED strips to the dashboard, which will improve the quality of lighting of the dashboard and add individuality.
Troubleshooting with your own hands
The oil can icon may not light up for various reasons:
wiring problems;
malfunction of the sensor itself;
the indicator light has burned out;
The fluidity of the oil is temporarily impaired due to low temperatures and prolonged storage.
The first three reasons can be considered a signal to action, since they must be eliminated as soon as possible for safe operation of the machine. The fourth reason has only one way out - start the engine and wait for the oil to spread throughout all components and parts.
The first indicator on the left shows malfunctions in the engine lubrication system
Preparing the tools
To troubleshoot the oil pressure light, you may need the following tools and devices:
screwdriver with a flat thin blade;
new indicator light;
Operating procedure
First of all, car enthusiasts are advised to start by inspecting the sensor and its connector, and only then move on to solving other issues.
If the sensor has a whole body and the connector is connected correctly, then it is recommended to check other elements of the system
To make it easier to find a fault, it is better to adhere to the following operating scheme:
Check the connector that connects to the oil pressure sensor. As a rule, the sensor is located on the engine cylinder block, usually on the rear side. You can find out the exact location of this element in your car's manual. It is recommended to remove the connector, make sure that it is clean and free of dirt, and then connect it back. If this simple procedure does not help, move on to the second point.
Measure the oil pressure with a pressure gauge. It should be within the range specified in your vehicle's owner's manual. If this is not the case, change the oil pressure sensor.
After this, you can remove the wiring from the sensor and connect it to the engine ground. If the oil can in the passenger compartment does not start to burn, then you will have to check the entire wiring or change the indicator light.
It is easier to replace the light bulb on the indicator - it is quite possible that it has simply burned out, and therefore does not light up at those moments when it is necessary. It is enough to remove the protective strip from the instrument panel, unscrew the old lamp and insert a new one.
If this does not help, then the last chance to fix the problem is to replace the wires. You can usually visually notice abrasions or breaks. It is recommended to immediately replace the entire wire rather than trying to rewind it with electrical tape.
Video: what to do if the oil pressure light does not light up
That is, in any case of malfunction of the oil pressure lamp, it is recommended to begin inspecting the car with the sensor and its connector. According to statistics, it is this element that fails more often than others.
The backlight of the VAZ-2107 instrument panel does not light up (injector, carburetor): reasons, repair
Hello everyone, today I would like to look at the main reasons why the instruments on a VAZ 2107 do not work. You will probably agree that when the instrument cluster does not work, some kind of discomfort is created and the driver does not feel very comfortable.
Moreover, the instrument cluster of the VAZ 2107 car provides a lot of important information that is needed both when starting the car and when driving.
What does the oil pressure lamp show in a car?
On the instrument panel of any vehicle there is a lamp in the form of an oil can. When it lights up, the driver understands that something is wrong with the engine or the oil pressure. Typically, the pressure light comes on when the oil pressure in the system is low, when the engine does not receive the required amount of lubricant to do its job.
Thus, the oil can icon serves as a warning about emergency oil pressure in the engine.
The oil can icon is highlighted in red, which the driver can notice immediately and take appropriate measures
The backlight does not light up
Well, let's move on to the most important thing, namely finding the reasons in the event of a failure of the instrument panel. So, the first thing you need to do is check the fuse that controls the tidy.
On the VAZ 2107 this is fuse F10 (10A) which is located in the mounting block. If necessary, this fuse must be replaced.
If you checked the fuse and it is ok, then the problem is in the instrument panel itself. First you need to remove the instrument cluster and check the two black wires that are attached to the car body. As you may have guessed, this is a mass; you need to check whether the contact is seated well and how well the fastening nut is tightened. You also need to check the contact blocks.
The most common reason why the instrument panel does not work is the pins, which are attached with rivets, and such a connection is not very reliable and due to vibrations and other shaking, the contact disappears, and the instrument panel of the VAZ 2107 car stops working or works intermittently.
This is especially noticeable at sub-zero temperatures while the seven-cold panel in the cabin does not work, and after warming up, when the metal expands a little, the contacts are restored again and the tidy starts working again. But as you understand, this is not an option to drive like this.
In order to fix this, you need to remove the aluminum rivets that hold the board and get to the connectors of the pads.
Then, using a soldering iron, you can restore the contacts. And after that, you can forget about the disease of the instrument cluster of the VAZ 2107. And yes, by the way, instead of the rivets that were drilled out, you can screw in self-tapping screws. Well, that's all for this, if you had other reasons, then write in the comments. Bye everyone.
The most common breakdown
Before digging into the inside of the car, check how securely the ground wire leading to the front panel is secured. A restless passenger in front often simply pulls him out of his place with his feet. To prevent the situation from repeating itself, after fastening it is worth insulating the wire from reach.
Its signs are very characteristic:
If the fuse is intact , this is not a reason to immediately leave it alone. It would be a good idea to remove it and check the contacts: if the fuse is live, but the terminals are oxidized, the circuit will be interrupted, and the device will stop showing any signs of life.
The next weak link : It is the ignition relay. It is located to the left of the steering column, fixed on a pin, so to speak, upside down. You need to remove it and try to make direct contact with the wires. If there are obvious signs of revival on the instrument panel, it immediately becomes clear that the time has come to change the relay.
What to do if the instrument panel on a VAZ 2109 does not light up
When the instrument panel on a VAZ 2109 does not light up, this is one of the common malfunctions of this unit. To fix a problem, you first have to find the cause of its occurrence.
Tidying up nine
Types of panels
Instrument panels on the VAZ 2109 are of at least three types:
- Low panel;
- High panel;
- Electronic panel on nines with Europanel.
Europanel
On versions with a low panel, failure of the entire panel is extremely rare. This is due to the fact that here the speedometer and econometer are equipped with mechanical drives. Therefore, it is unlikely that they will fail along with the electrical component.
Dashboards with a high panel do not have an econometer, but the speedometer is also based on a mechanical cable drive.
Why doesn't it light up?
If suddenly electrical appliances and indicator lamps on the dashboard stop working, certain actions must be taken.
- First, remove the cover of the mounting block and make sure that the fuse is intact. The fuse markings are located on the inner surface of the cover. You should look for fuse F16 or F5, depending on the year of manufacture of your VAZ 2109.
- If the fuse is intact, be sure to check whether the contacts of the fuse you are looking for have not oxidized. It is not uncommon for shields to fail due to broken contact.
- Check if there is power to the dashboard. To do this, you will need a warning light and the ignition on. Disconnect connector X4 in the mounting block and check for voltage at pin 3. The disadvantage of the VAZ 2109 design is that when it rains, the mounting block immediately becomes wet. This causes oxidation of the contacts in the pads, which causes the electrics to stop working. Sometimes not only the contact is oxidized, but also the board of the Nine mounting block.
If none of the above actions yielded results, you will have to be disappointed. After all, now you need to remove the dashboard and check the condition of the wiring, contacts, and negative connections. Here it is better to trust a professional electrician or set aside a whole day to troubleshoot problems yourself. There is no need to rush here.
The VAZ 2114 has two blocks
The electrical circuit of the VAZ 2114 fuses is divided into two mounting blocks:
The main set of instruments is mounted under the hood on the left side (when viewed from the driver's position). The plastic cover is held on by latches, with the help of which it can be easily snapped off and can then be removed. The inside of this cover is equipped with a layout diagram that shows the rated current for each element. A detailed electrical diagram of the mounting block with the order of connecting contacts to the plugs is shown in the Lada 2114 instruction manual.
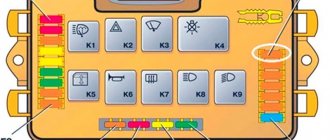
It is not allowed to insert a fuse whose amperage exceeds the permissible values in the circuit. This puts electrical equipment at risk. There are tweezers in the upper right corner of the mounting block. The design of this unit provides seventeen working fuses (which are schematically named F1-F16) and four backup protective elements (F17-F20): gray (2 A), pink (4 A), yellow (20 A); green (30 A).
The second mounting block of the VAZ 2114 is located in the cabin under the glove compartment, to the right of the central instrument console. You can get to it by moving the passenger seat all the way back. This mounting block includes a protective element for the fuel pump (with a rated current of 15 A). The remaining ES are designed to protect the fan relay, speed sensor (built into the gearbox), and mass air flow sensor.
The rated amperage of the element is 7.5 A. An element with the same rated current is provided for the ignition unit and ECU.
The instrument panel does not light up on the VAZ 2107: causes and troubleshooting methods
If the instrument panel on a VAZ 2107 does not light up, then this does not have a negative impact on the operation of the car during daylight hours. However, very strong inconveniences arise at dusk.
It is very difficult to drive a car at night if the dashboard lights are not working.
We will consider in detail what could be the reasons for the malfunction of the instrument lighting on a VAZ 2107 car, as well as ways to eliminate them.
What are the reasons for the dashboard backlight not working on the VAZ 2107?
The situation when, when the instrument panel backlight is turned on, it does not work, is definitely unpleasant. If this happens, then it is necessary to fix the breakdown as quickly as possible, since operating a car at night is not at all uncommon, but a common occurrence. If the backlight of the VAZ 2107 dashboard does not light up, this may be due to the following factors:
- Faulty incandescent lamps. This rarely happens, however, due to the fact that from the factory the lighting of the panel is realized through the use of incandescent lamps, their burnout periodically occurs. The problem can be fixed by replacing the lighting elements, or better yet, installing LEDs. To make a replacement, you will need to dismantle the instrument panel. This is not difficult to do, but it will take a lot of time to disassemble the shield. The panel contains lighting elements, which need to be replaced in order to restore the functionality of the VAZ 2107 instrument panel lighting. Before replacing, you should first check the serviceability of each lamp. The design of the shield uses 4 main lighting elements, which are responsible for lighting, as well as additional ones that act as an indication. If you had to disassemble the panel, it is recommended to immediately perform its tuning.
Appearance of the standard instrument panel light bulb of the VAZ 2107 - Brightness control - the fault may be hidden in the part that is responsible for adjusting the backlight intensity. Although this part fails extremely rarely, its malfunction cannot be ruled out, especially if it has been established that the incandescent lamps are in good working order and do not need to be replaced. The light brightness control is located directly on the right side of the steering wheel near the headlight range control. If diagnostics have shown that this particular part is the reason that the backlight does not light, then it should be replaced.
- Fuses - the search for the reason why there is no instrument lighting on the seven should start directly with the fuses. These elements protect the circuit from voltage surges, and as soon as a large current flows in the circuit or a short circuit occurs, the fuse link blows. If such a malfunction occurs, replace the fuse and check the power circuit.
- Absence or poor contact at the point where the chip connects to the power wire. The reason for the lack of contact may be that the chip is not tightly pressed to the terminal block of the instrument panel. Poor contact occurs when contacts become oxidized. You can fix such breakdowns yourself by cleaning the contacts from oxides.
Auto repair
The most important indicators of the vehicle’s “life activity” are located on the car’s dashboard. There are few of them, but you need to know them well in order to notice a malfunction in time.
While driving, a professional driver periodically (every 2-3 minutes) takes a quick glance at the dashboard to assess the operation of the most important systems of the car, and, if necessary, adjust his actions.
Here are the most common emergency situations while driving:
- The oil pressure warning light comes on . You must stop driving and turn off the engine! Check the oil level in the engine sump. If it is insufficient, you need to add oil and start the engine. If the alarm light continues to light, then you need to turn off the engine and look for a way to transport the car by tow to the repair site. If you continue driving with the warning light for insufficient oil pressure, then after a few minutes your engine will “knock” - the connecting rod bearings will turn. If you continue driving after this, then after a few more minutes the engine will simply jam. The consequences will be the saddest - you will have to do a major overhaul of the engine.
- The battery discharge warning light comes on . Here the consequences will not be so catastrophic. First of all, check the battery terminals - maybe they are oxidized and there is simply no reliable contact. If this does not help, then for some reason the generator is not producing the required level of current to charge the battery - this means that all the car’s power is supplied from the battery. If it is daytime in good weather, then you can try to get to the nearest service station. In this case, you must turn off all electrical appliances (windshield wiper, radio, heater, etc.). A good battery under such conditions can last 100 kilometers or more (in this case, the battery energy only goes to power the engine ignition system). Most often in such cases, the voltage regulator relay fails.
- If the brake fluid warning light comes on , stop immediately (if this is still possible)! Here the consequences can be the most catastrophic, because... this is directly related to traffic safety - driving without brakes is not an extreme sport that needs to raise the adrenaline in your blood. First, check the brake fluid level in the reservoir and top up if necessary. If the brake system has not completely depressurized and the car can slow down, try to slowly drive to the nearest service station or garage. Otherwise, call a mechanic or fix the cause of the breakdown yourself on the spot.
- The coolant temperature sensor is in the red zone - unfortunately, the "classic" does not have an engine boiling alarm - an inexperienced driver can easily "miss" this moment (although it is necessary not to notice how steam will pour out from under the hood be able to). It is necessary to stop driving and allow the engine to cool. Do not immediately go under the hood and try to open the radiator cap - you are guaranteed a severe burn! After the engine has cooled down, check the coolant level and add if necessary. If the coolant system pipe has not broken, then try to slowly drive to a garage or service station and find out the reason for the increase in temperature. The most common: thermostat failure; The radiator fan does not turn on.
- The fuel level sensor is at zero - when there is less than 5 liters of gasoline left in the gas tank, a warning light comes on, which cannot be ignored. Find the nearest gas station and fill up with gasoline.
Also, while driving, pay attention to the tachometer needle readings - engine speed should not exceed 5000 rpm.
An experienced driver will try to keep the economy needle in the green zone, thereby ensuring the most economical driving mode.
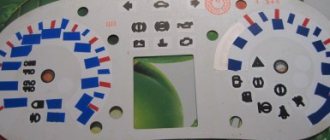
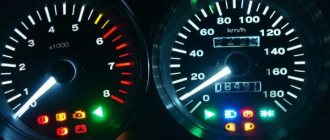
The left side of the dashboard of the VAZ-2107
On the left side of the VAZ-2107 dashboard there are:
- Engine efficiency sensor (red sector - uneconomical engine operating mode; green sector - optimal mode ).
- Engine coolant temperature sensor (white sector – “cold” engine ; green sector – mode ; red sector – engine “boiled” ).
- Tachometer - shows the engine speed.
The right side of the VAZ-2107 dashboard
On the right side of the VAZ-2107 dashboard there are:
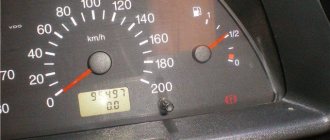
- Speedometer - shows the speed of the vehicle (km/h). The lower counter shows the total mileage of the vehicle; the top counter is the “local” mileage (the driver has the ability to reset this counter).
- Fuel sensor (the warning light lights up if there is less than 5 liters of gasoline left in the tank).
- Battery charge level sensor (red sector - discharged battery ; green sector - normal battery charge; yellow sector - battery overcharge
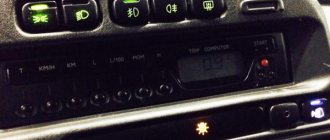
Between the left and right parts of the dashboard there is a signal panel:
- direction indicator;
- signal light for opening the air damper (choke);
- emergency lamp for lack of battery charge;
- side light signal lamp;
- high beam headlight warning light;
- warning light for lack of oil pressure;
- parking brake and brake fluid warning light.
Ignition switch VAZ-2107
The ignition switch of the VAZ-2107 has 4 positions:
- III (parking position) - initial position of the key. Only in this position can the ignition key be inserted and removed. In this position, the following operate: windshield wiper, heater, exterior lighting. Be careful - in this position, all electrical appliances are powered by the battery (since the engine is turned off), therefore, prolonged operation of electrical appliances in this position will quickly discharge the battery!
- — in this position all electrical appliances are turned off.
- I (ignition) - In this key position, all position III circuits are turned on + ignition system, generator excitation, control devices, turn signal. Be careful - in this position of the key with the engine not running, the ignition coil can quickly fail.
- II (starter) - in this position all circuits of position I + starter are turned on. Be careful - it is highly not recommended to install the key in this position while the engine is running - you can damage the starter.
All instruments and sensors on the instrument panel have failed
After purchasing my VAZ 2106, literally a couple of days later, the following trouble awaited me.
When the ignition was turned on, neither the emergency oil pressure light nor the battery charging came on, and the gasoline level sensor did not work.
At first I thought that the battery terminal had simply come loose, but then I checked and everything turned out to be normal. Just in case, I decided to turn the starter, and as it turned out, everything worked, it turned and the car started up normally.
But even after this, none of the instruments and sensors worked; by the way, the tachometer also stood still and the needle did not budge. This was the picture with the ignition on and even the engine running, all the instruments froze tightly:
I decided to check all the fuses, since I simply could not see any other reason for what was happening. Since the location of the fuses in the mounting block of the VAZ 2106 was not familiar to me, I decided to check everything at random. I took the fuses out of the block one by one and inspected them.
It was already quite dark, and not at first glance all the veins on each fuse were intact. In the morning I checked everything again and saw that on one side, barely noticeable, the wire had burned out. The photo below shows the fuse that is responsible for the functionality of the sensors and devices of the VAZ 2106.
After I replaced it with a working one, all the sensors and arrows started working and everything fell into place.
So, if someone has a similar problem, or this is your first time encountering this, keep in mind that the fuse, which is shown in the middle photo in this article, is to blame. I hope that my experience will be at least useful to someone.
IMPROVEMENT OF INTERIOR LIGHTS
The interior lighting of the VAZ 2114 can be customized with your own hands to suit your purposes and needs. The most interesting option is considered to be the complete removal of the standard lampshade, and the installation of a programmable analogue along with integrated LEDs instead. It is better to do such an upgrade as soon as it was noticed that the light in the VAZ 2114’s interior does not work - why repair an already broken old lamp if you can replace it with a new and much better one.
In addition, the new lamp will have the following functions that the standard version does not have:
- The ability to select brightness from three possible options, adjusted by pressing a button;
- Automatic shutdown after a certain time if the door is not completely closed or just open. This will prevent the battery from draining overnight;
- Smooth extinguishing of the lamp, switching off occurs within 10 seconds.
