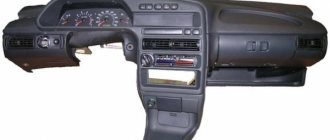
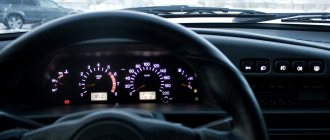
The search for possible reasons why the VAZ 2114 instrument panel may not work periodically worries one or another owner of cars of this model. It’s clear that if you don’t see a single parameter on the dashboard, you can only drive, as they say, by touch. True, there are certain specialists who still managed to somehow crawl to the base without all the evidence, but somehow I don’t want to follow their example.
And is it necessary to create possible troubles for yourself and increase the risk of getting into an accident? I think no! In today's article I want to tell you about the possible causes of a malfunction in the VAZ 2114 dashboard, and give some ways to repair it yourself.
Why does the VAZ 2114 instrument panel not work? A massive problem in our auto industry
The search for possible reasons why the VAZ 2114 instrument panel does not work periodically worries one or another owner of cars of this model. It’s clear that if you don’t see a single parameter on the dashboard, you can only drive, as they say, by touch. True, there are certain specialists who still managed to somehow crawl to the base without all the evidence, but somehow I don’t want to follow their example. And is it necessary to create additional troubles and the risk of accidents on the road? So the majority of those to whom this incident happened still get to work (or wherever they were going) by public transport in order to return to solving the problem in the evening on their own or with the help of a familiar mechanic.
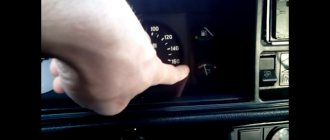
Diagnostics of speedometer operation at fourteenth
Troubleshooting begins by disconnecting the wiring block from the speed sensor harness and checking them using a test light.
To make a control light bulb, you need any car lamp that can operate at a voltage of 12 V, and two wires about 1 meter long each. One of the wires is attached to the positive terminal, the second - to the negative terminal of the lamp. The resulting device also includes a Krona battery.
To carry out the test, one wire of the warning lamp is attached to the ground of the body or battery, and the second is made with short, frequent touches to the middle contact of the DC connector. If there are no faults in the connector-speedometer section, the speedometer needle will slightly tremble or rise. If the needle shakes, the answer to the question why the speedometer does not work can be considered found - the speed sensor requires replacement.
In cases where the needle’s response to tapping on the central contact of the block cannot be detected, it is necessary to “test” the speedometer power circuit. The procedure is carried out using a multimeter (multitester), or by using the same light bulb - a control.
If the tester in the “continuity” mode indicates a violation of the integrity of the circuit, further troubleshooting is carried out in this direction. It is necessary to check the fuses, the connection points of the wires, and their integrity inside the insulating braid.
The search area can be reduced by gradually “ringing” individual sections of the circuit. On model 2114 and other VAZ products, the cause of speedometer failure is often oxidation of the “mass” contacts attached to the car body.
In cases where the speedometer needle does not work, but there is no evidence of malfunctions in the electrical supply circuit, a logical conclusion is drawn about the malfunction of the device itself. Additional testing can be done by temporarily installing a known good instrument panel.
- Posts: 1
- From: Klintsy
- VAZ 2114 1.6i 8 valves
February 5, 2022, 00:48 #1 123
Hi all. This is the problem: I start the engine, warm it up, everything is fine with the tidy. I start moving and the speedometer needle spontaneously begins to rise to 5 km/h, then to 60, then to 80, to 120, sometimes higher and even climbs onto the odometer and freezes, then during acceleration it begins to rise as expected, but from the place where stopped (5.60 km/h, etc.) That is, according to the speedometer 100 km/h, in fact 40 km/h. In this case, the odometer shows the actual mileage in km. I do a dashboard test, the needle only drops to 50-60 km/h. I remove the “-” terminal, put it on and the arrow drops to 0, but this does not help for long, soon it repeats again, and the arrow always hangs at a different mark. I changed the speed sensor, it didn't help. The connector wires are not broken, everything is fine. It happens that if I skid in the snow (with the arrow at 0), it begins to rise, but it does not rise smoothly and constantly, but in segments. That is, it will rise to 40, then to 70, etc., always differently. And it will continue to rise until I stop the car, then the needle will freeze in the last position and when it starts moving, thinking that it is at zero, it will rise in accordance with the increase in speed. In short, he lives his own life. I'm sinning on the speedometer needle mechanism itself. Please tell me what is the secret of this problem of this miracle of technology of the Russian automobile industry?
PS I forgot to write. Before the problem started, I removed the tidy, because not all the lights illuminated it, so I decided to change everything to LED ones. That is, without fanaticism, I removed the bases and installed diode ones instead of the usual ones.
- Posts: 548
- From: Kursk
- Lada 2115
February 5, 2022, 10:33 pm #2 123
try removing all the backlight bulbs, how will the tidy behave?
well, or drive without dimensions, until you turn on their power, the backlight will not work, I changed the usual ones to LEDs - the flight is normal, without glitches.
Maybe the device is dying, maybe some tendril broke off from the lamp and lies between the tracks creating a short circuit in the circuit
The most common breakdown
Before digging into the inside of the car, check how securely the ground wire leading to the front panel is secured. A restless passenger in front often simply pulls him out of his place with his feet. To prevent the situation from repeating itself, after fastening it is worth insulating the wire from reach.
The situation is a little more complicated
Its signs are very characteristic:
- All indicators do not work:
speedometer, tachometer, odometer, fuel level recorder, coolant temperature sensor; - The rest of the equipment - optics, radio, even the panel backlight - turn on normally and do not act up;
- The ignition works properly, the car does not refuse to start;
- Fuse F3 is
almost 100% . It is located in the mounting block and will have to be changed. But first you need to find out why it was covered, otherwise the new one installed will suffer the same fate. In most cases, a short circuit is to blame for burnout. On well-used VAZ-2114, the fuse often blows after each wash. Instead of carrying a spare one, you need to figure out where moisture is getting into it.
If the fuse is intact, this is not a reason to immediately leave it alone. It would be a good idea to remove it and check the contacts: if the fuse is live, but the terminals are oxidized, the circuit will be interrupted, and the device will stop showing any signs of life.
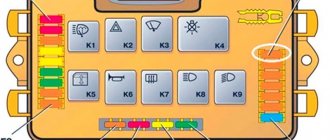
VAZ 2115 fuse diagram: even a child can figure it out
Much has been said about the importance of such a small component of automotive wiring as a fuse. Indeed, the smallest part made of fusible metal, which melts and breaks the circuit when the permissible values are exceeded, can protect the car from short circuits, local power surges, and even fire
And besides, even a small child can actually figure out the VAZ 2115 fuse diagram
And besides, even a small child can actually figure out the VAZ 2115 fuse diagram.
What does a car enthusiast do if his beloved “iron horse” suddenly stops responding to individual orders? The windshield wipers or power windows suddenly stop working. What to do? Change the motor, and maybe the entire element, so to speak, as a whole? In fact, the first thing you should check is the fuses. It may well be that the whole problem is a spare part, the cost of which is comparable to a ticket for a city regular bus.
Location of relays and fuses in the mounting block: K1 – relay for turning on the headlight cleaners; K2 – relay-interrupter for direction indicators and hazard warning lights; K3 – Windshield wiper relay; K4 – lamp health monitoring relay; K5 – power window relay; K6 – relay for turning on sound signals; K7 – relay for turning on the heated rear window; K8 – headlight high beam relay; K9 – relay for low beam headlights; F1-F20 – fuses
Of course, replacing fuses only takes a professional a couple of minutes. However, you still need to get to a specialist. What if the ignition doesn't work? Order a tow truck? Expenses, expenses. But often it is enough to check the functionality of the fuses responsible for a particular block and spend the same five minutes replacing them. And your car will be like new again, and a visit to the service station can be postponed until there are really serious breakdowns.
The fuse box in the VAZ 2115 is hidden under the hood, on the driver's side. By opening the cover (it is secured with two simple latches), you get access to the fuses themselves and special tweezers, which are stored right there in the mounting block. It is very easy to decipher the designations of the relays and fuses located in the mounting block, especially if you have a diagram at hand. Relays are designated by the letter “K”, fuses by the letter “F”, the number allows you to determine the area of responsibility of a given fuse or relay; the value in “A” (amps) means the maximum voltage level for this fuse. So, next to fuse F2, which is responsible for the turn signals and the operation of the hazard warning lights, a level of 10A is indicated, that is, this is the load the fuse can withstand. Excessive voltage will damage the fuse, but will preserve the integrity of the system itself.
Electrical diagram of VAZ-2115-20 cars (left half): 1 – headlights; 2 – fog lights; 3 – air temperature sensor; 4 – electric motor of the engine cooling system fan; 5 – blocks connected to the wiring harness of the ignition system; 6 – engine compartment lamp switch; 7 – block for connection to a single-wire type audio signal; 8 – sound signal; 9 – washer fluid level sensor; 10 – front brake pad wear sensors; 11 – oil level sensor; 12 – generator; 13 – engine compartment lamp; 14 – coolant temperature indicator sensor; 15 – starter; 16 – battery; 17 – relay for turning on fog lights; 18 – coolant level sensor; 19 – brake fluid level sensor; 20 – reverse light switch; 21 – windshield wiper gearmotor; 22 – oil pressure warning lamp sensor; 23 – block for connecting to the rear window washer electric motor; 24 – electric motor for windshield washer; 25 – instrument cluster; 26 – mounting block. Conventional numbering of plugs in the blocks: A - block headlights; B — electric fuel pump block; C — blocks of the mounting block, ignition switch, windshield wiper gearmotor; D — interior lamp
Hard case
Until now, situations have been sorted out when the torpedo still showed some signs of life. If non-working power windows, turn signals, and windshield wipers have been added to the devices, the issue is no longer a matter of relays and fuses.
There may be 2 options:
. In principle, after installing the relay (even on the VAZ-2109 version), this problem rarely arises. However, the possibility remains. The lock is removed, the contacts are checked and, if necessary, cleaned;
. There may be burnt tracks on its board. The only thing that will save you is replacing it with a new one. However, the cost is by no means astronomical, and the installation is available as a standalone option.
Private situations
General signs do not always indicate specific breakdowns. There may be exceptions.
If individual devices refuse to work, it is quite possible that this is their personal problem. You'll have to parse the specific pointer. It may have a cracked gear that needs to be replaced.
Also, why doesn’t the instrument panel of the VAZ 2114 work? If the fuel gauge and tachometer are capricious (either they function, or they don’t react at all), the contacts and the mounting block are normal - you need to do a small check.
Reset is pressed and held, and the ignition is turned on at the same time. Raised arrows indicate the need for further searches. Lifeless - that microcracks have appeared in the shield itself. You will have to remove it and examine all soldering and traces under a magnifying glass. In principle, these are all the main options. If calling all the listed components and parts did not lead to the revival of the instrument panel, your case is individual, and you will have to determine the situation in the company of an experienced auto mechanic.
Signs of a malfunctioning speed sensor
During the operation of a car with an electronic on-board device, many motorists have encountered a situation where one or another signal lights up in the error block; it often happens that after turning off the engine and restarting this signal does not appear again, so Russian drivers sometimes develop distrust in readings from this ECU. However, every driver should know what errors indicating problems with the DS light up on the on-board computer display.
- P0500 - lack of speed sensor signal.
- P0503 - intermittent speed sensor signal.
Indeed, quite often the cause of the appearance of such signals is problems in loose contacts or even broken DC wires. It is necessary to take into account where the speed sensor is located on the VAZ 2114
The manual transmission experiences strong vibration during operation, so special attention must be paid to the preventive inspection of this sensor.
In addition to the appearance of error signals on the BC display, other signs of a malfunction of the DS may appear; experts include these signs:
- Unstable, “wandering” idle speed, spontaneous shutdown of the internal combustion engine is possible when the gas pedal is not pressed.
- The speedometer on the VAZ 2114 is unstable or does not work at all.
- Fuel consumption increases significantly.
- Engine power decreases.
Of course, this is not a definite diagnosis for DS; there may be other reasons, for example, problems with the fuel system. However, you should check the functionality of the DS. And the first thing to do is to ring the circuits and make sure the wiring is in good condition. Make sure there is grounding and a 12 V signal is supplied to the contacts.
There are several ways to check the performance of the DS:
- remove the problematic sensor. Using a voltmeter, measure the output voltage and signal frequency. To do this, put plastic tubes on the sensor axis and spin the housing to a speed of 3-5 km/h. The faster the sensor rotates, the higher the voltage and frequency;
- the second method does not require removing the sensor.
Raise the front wheel on a jack so that it can be spun. Connect a voltmeter to the sensor contacts. Spin the wheel and take readings from the device; if the voltage and frequency increase adequately to the spin, then everything is fine with the sensor.
The third method involves checking using a “control” or a light bulb.
Raise the front wheel on a jack so that you can spin it. First, you need to disconnect the pulse wire from the sensor. Turn on the ignition. Use the “control” to find “plus” and “minus”. Connect the “control” to the “Signal” wire and spin the wheel. When the sensor is working normally, the “minus” light should light up. If you don’t have a control tool, you can use a light bulb. To do this, you need to connect wires to it.
Connect one wire to the battery positive, and the second to the “Signal” connector output. Spin the wheel. If the light blinks, then the sensor is working.
Car enthusiasts have worked out a technique for checking the DS drive.
To do this, you need to jack up one wheel and remove the speed sensor. Feel for the sensor drive and rotate the wheel. When the drive is working normally, you can feel it rotating with your fingers. And if there are no jams, then the drive is in order.
If, as a result of the test, it is determined that the speed sensor does not work, then it is necessary to remove it and replace it with a new one. This spare part is not in short supply, so you can easily find out how much the speed sensor on a VAZ 2114 costs.
Reasons for turning off the dashboard on the VAZ 2114
Turning off the dashboard lights does not bode well for either the driver or the car. Because this malfunction is usually followed by others. Therefore, the backlight should be repaired immediately.
You should also understand that if the lights on the dashboard go out, then the problem must be looked for somewhere in the on-board electrical system. This means you can’t do without a multimeter, a soldering iron and electrical tape. Here are the main reasons for turning off the backlight:
- fuse burned out;
- the light bulbs have burned out (or LEDs - in later VAZ 2114 models the panel is illuminated by them);
- the wiring in the on-board electrical network is damaged;
- The common contact board of the instrument panel burned out.
Let's consider these points in more detail.
Burnt fuse
80% of cases when the backlight turns off is due to a blown fuse. It is located in a safety block installed under the steering column of the car. Usually the fuse indicated in the documentation as F10 is lit.
It is he who is responsible for the dashboard lighting, side lights and license plate lighting. On early VAZ 2114 models, fuse F10 was brown or red.
On later cars they started putting green ones. It is not difficult to understand that the fuse has blown. It's enough just to inspect it. The housing of a blown fuse may be slightly blackened or melted, and the conductor inside the housing may be severed. The faulty fuse is replaced with a new one. Typically this solves the problem.
Burnt out light bulbs
Dashboard lights operate under less than ideal conditions. They are regularly exposed to shaking, power surges in the car's electrical network and temperature changes. All this significantly reduces their service life. Especially if these are not LEDs, but ordinary incandescent lamps, which were equipped with the first VAZ 2114 models. There are a total of 19 lamps (but this number also varies depending on the year of manufacture of the car, and the number of lamps should be specified in the technical documentation for the car).
Another reason for light bulbs to burn out is their improper installation. This is most often observed on early VAZ 2114 models, where drivers decide to independently replace obsolete incandescent lamps with new LEDs, making some changes to the electrical circuit. Without proper qualifications, this operation is not so easy to perform. Here's what the sequence for replacing light bulbs looks like.
- The steering column is lowered to the bottom position until it stops. Above it is the dashboard cover with four mounting screws. They are unscrewed with a Phillips screwdriver.
Video: changing light bulbs in the dashboard of a VAZ 2114
Wiring damage
Problems with electrical wiring are the worst case. To figure this out on your own, the driver needs to have serious knowledge of electrical engineering. In particular, he must be able to read automotive electrical circuits well. Not all car enthusiasts can boast of such skills. It is for this reason that it is better to entrust the search for a damaged section of on-board electrical wiring to a qualified auto electrician.
His actions boil down to the following: he determines the key sections of the circuit and sequentially “rings” them using a multimeter until he finds a broken section of the wiring. Completing this work may take several minutes or several hours - it all depends on where exactly the circuit break occurred.
Panel contact board problems
If all of the above measures do not lead to anything, the last option remains: damage to the contact board in the dashboard. This part is a combination of several microcircuits. It is not possible to repair it in a garage without special diagnostic equipment. So the car owner has only one option - to replace the entire board. You can purchase it at any auto parts store. It costs about 400 rubles. Let us list the stages of its replacement.
- First, all the steps mentioned above in the paragraph on replacing light bulbs are performed.
- But instead of unscrewing the bulbs, you should unscrew the four bolts at the corners of the rear wall of the dashboard.
- The back wall is carefully removed along with the board, which is attached to the wall with plastic latches.
So, the owner of a VAZ 2114 can solve most problems with the dashboard lighting on his own. All that is required is the ability to use a screwdriver. The exception is the case of damaged wiring. It is strongly recommended that you contact an electrician to identify the damaged area. This will save a lot of time and nerves, which, as we know, are not restored.
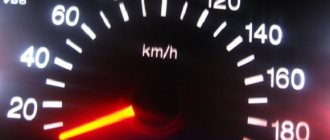
Why does the speedometer needle twitch?
This phenomenon is far from uncommon, especially when it comes to domestic cars. However, when talking about cars whose production is established abroad, many owners panic and estimate the cost of an approximate replacement of the dashboard along with the speedometer.
This decision is extremely rational. And in order not to spend extra money on unnecessary actions, you need to understand how the speedometer needle generally works and what problems may arise with it.
As they say, forewarned is forearmed.
If the arrow twitches, this indicates a specific list of faults:
Loosening the cable
Sensor failure
Wiring problems
Of the three points above, the first applies only to cars that have a mechanical speedometer. These are cars from the nineties, as well as earlier years of production, and domestic cars of the classic family, as well as early 2108 and 2109.
The mechanical cable connecting to the speedometer tends to wear out. As a result, the speedometer needle may jump and give inaccurate readings.
{chronoforms5}fora2{/chronoforms5}
The problem can be solved quite simply by replacing the failed cable with a new one. In some cases, of course, you can simply tighten it, but this will not solve the problem for a long time.
If the speedometer is not mechanical, then the main problem will be with the car's wiring. As a rule, the speed measurement sensor itself fails.
This may be due to many reasons. For example, on some types of cars such sensors last no more than 5 years, and after this time they require replacement.
Also, depending on the position in the engine compartment, such a sensor may fail due to mechanical damage.
And the last variant of the problem associated with the failure of the speed measurement sensor is its oxidation. In any case, the sensor must be replaced.
If none of the options work, and replacing the sensor did not lead to anything, then perhaps the problem should be looked for in the wiring itself. According to statistics, wiring in a car is changed quite rarely, and due attention is not paid to it.
In this regard, due to improper care, it can become unusable, which entails a huge number of problems for the car owner.
Our company deals with all problems related to the speedometer!
Call and entrust the repair to the best specialists in the region!
Why did the instrument panel illumination disappear on the VAZ-2114: does it not work and does not light up?
The dashboard is the driver’s first indicator of the car’s health, as well as a way to control various on-board systems. During the day, by and large, the instrument lighting is not needed, but at night it is a necessary component for safe driving. Thus, a malfunction of the backlight can even lead to an accident, so if a malfunction occurs, it must be eliminated as soon as possible.
The instrument panel backlight has disappeared, what should I do?
The dashboard going out is a nightmare for any driver, since with the disappearance of the light, other malfunctions may follow, such as non-functioning speedometer and other indicators.
Therefore, it is worth understanding that if the instrument panel does not light up, then this problem must be eliminated immediately , but not all car enthusiasts are capable of this.
It is worth understanding that if the backlight disappears, then the problem lies somewhere in the electrical circuits. This is where you need to look for the problem. This will require design knowledge of the vehicle's on-board circuit, a tester and related tools, such as electrical tape, a soldering iron or more. Of course, it is not always possible to eliminate the problem locally, and faulty products have to be replaced completely.
Causes of malfunction
Where does the problem lie? As mentioned earlier, it is worth looking for problems in electrical circuits. Let's look at the main locations where problems may be hiding:
- Fuse.
- Backlight bulbs and their electrical circuit.
- Wiring.
- There is a fault in the fuse box.
- Damage to the board.
Solutions
So, when all the main reasons are, so to speak, “in the face,” you can try to determine the exact location of the breakdown, and also fix it yourself. As always, it is worth noting that if a motorist does not know the design of the car or is not confident in his abilities, then it is recommended to contact a specialist car service center.
Fuse
General view of a blown fuse
Probably the first cause of all electrical circuit malfunctions is the notorious fuse.
This is where you should start troubleshooting. To find out which fuse is responsible for the instrument lighting, as well as its location in the mounting block, you should refer to the technical documentation. Also, on the fuse cover it is written which element should be checked. If the fuse is found and replaced, but the problem does not go away, then you should look for the source in another place.
How to fix problems
Prepare for work a set of screwdrivers (straight and curved), keys 8 and 21, special plastic tweezers for removing fuses and a tester. Next, disassembly should be carried out according to the instructions:
- Disassembly begins with removing the cover. To do this, you need to unscrew 3 screws. There is a protrusion under it that needs to be removed from the body bracket.
- To remove the screen you need to unscrew 5 screws, they are located in the console lining on the right.
- Remove the terminal from the battery (usually the negative terminal is recommended) to disconnect the power to the car. Only after this, disconnect the wiring harness block from the cigarette lighter.
- Remove the handle from the lever. Disconnect the fastening of the electric fan located on the heating unit.
- After this, remove the bolts on the steering block brackets. Remove the light guide, lamp sockets and decorative insert of the instrument panel.
- Using a 21 key, remove the hydraulic corrector illumination lamp.
- Remove the screws from the bottom and top so that you can remove the dashboard.
It is important that the electrical circuit is in a place safe from dust and moisture. Cover it with a cloth or thick film to prevent the entry of aggressive substances.
Test the light bulbs first. If they fail, they must be replaced with new ones; in most cases, this is enough to restore the panel’s functionality. However, do not exclude other causes, for example, check connections and conductors for the presence of oxide. Carbon deposits often form on lamp sockets, which also leads to a lack of panel illumination.
If only the instrument panel stopped working, but all the lamps showed operability during testing, then the reason is hidden in the fuse block. In this case, check each fuse and replace the ones that are broken. When purchasing components, you must be guided by the marking of the failed fuse. You should not replace it with homemade products or components with higher current strength.
If the fault lies in damage to the board itself, which is extremely rare, then you simply need to replace this element.
Let's look at the problem: the backlight of the VAZ 2114 instrument panel does not light up
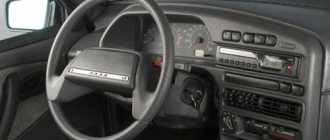
An element such as the dashboard is very important for the driver - because it is thanks to it that he can control the most important parameters of his car while driving. And that is why a serviceable instrument panel ensures not only comfortable driving, but also the safety of the motorist and his passengers.
For a clearer perception of instrument readings on the panel, especially at night, it has a built-in backlight. True, situations often occur when the backlight of the VAZ 2114 fails. We’ll talk about why this happens and how to restore its functionality with your own hands below.
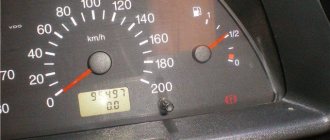
The speedometer needle jumps and twitches
In this situation, the diagnostic adapter will once again help us. It costs a penny, but with the right approach it often helps out.
How can the adapter help us?
The bottom line is that on cars with an engine management system, the signal from the speed sensor is supplied in parallel to the instrument panel and to the engine control unit (ECU). And in some cases, to the ECU, and from the ECU to the instrument panel.
Here I drew it in red for clarity
And as I always say, when we connect the adapter to the diagnostic connector, we begin to see everything “through the eyes of the computer.”
Therefore, it is no longer difficult to guess how to determine the direction of searching for the cause of the jumping speedometer needle.
A man is driving and watching the speedometer. I sit next to you and monitor the speed readings in the diagnostic program.
If the speedometer needle jumps, but the speed graph in the program is smooth, then the problem is in the direction of the instrument panel.
And if the arrow twitches, and the graph also has “dips,” then the problem is in the direction of the speed sensor and its drive.
This is exactly what happened in our case. These dips mean an unstable signal from the speed sensor.
This means that there is no point in going into the instrument panel. You need to move towards the speed sensor.
Causes of malfunctions
There are a number of reasons why the instrument lighting of the VAZ 2114 may stop working correctly.
The most common of them are:
- light bulbs have burned out or diodes have failed (with LED backlighting);
- contacts and connectors have oxidized;
- fuses are blown;
- damage has occurred in the wiring itself;
- the integrity of the common contact board has been compromised;
- Lost contact with the “mass”.
In order to find out the exact cause, you will have to perform dismantling work and carry out diagnostics. You don’t need any complicated tools for this—it’s enough to have a simple tester (multimeter) or voltmeter.
Light bulbs
By bulbs we mean LED lights, which are often connected incorrectly, which is the reason for the dimming of the light on the dashboard. In this case, all contacts in the backlight are checked.
If we talk about incandescent lamps, then even the breakage of one element leads to the fact that the backlight stops functioning. The test is carried out with a tester, ringing the entire circuit.
To summarize, we can say that the main reason for the lack of backlight on the dashboard is often a short circuit. It will not be difficult to inspect and, if necessary, repair yourself. But you can also contact a car service center, where such work will be carried out more professionally.
Diagnostic procedure
In order to remove the instrument panel, you will need a set of screwdrivers and two wrenches - 8 and 21.
The entire procedure is performed in the following order:
- Unscrew the three screws and remove the trim.
- Unscrew the five screws on the right side of the console and remove the screen.
- Disconnect the negative cable from the battery.
- Disconnect the wiring harness that goes to the cigarette lighter.
- Disconnect the heater fan mount.
- Unscrew the bolts responsible for fixing the steering block brackets.
- Remove the light bulb sockets, light guide and decorative insert.
- Remove the lamp responsible for illuminating the hydraulic corrector.
- Unscrew the screws of the top and bottom rows of the panel and completely dismantle it.
At this point, dismantling the panel can be considered complete. Now you can move on to finding the reasons why the instrument panel of the VAZ 2114 does not light up.
Once the panel is completely removed, you should cover the electrical circuit of the wires with protective material to prevent dirt and debris from getting on it.
Checking the electrical panel backlight system is performed as follows. First, all light bulbs are checked for functionality. If they are in good condition, all connector contacts are cleaned of oxides (they can be treated with kerosene or WD-40). After this, the serviceability of the wiring itself is checked - to do this, it is necessary to “test” it using a multimeter.
If the test results show that all elements of the system are operational, but the backlight still does not work, then the problem lies in the fuse box - it should be checked and replaced with a new one (if necessary).
The fuse block is replaced only with a similar factory-made block. Using instead blocks designed for a different amperage, as well as various homemade spacers, is strictly prohibited. This can not only cause the failure of all electronics, but also lead to a fire.
It is also worth noting that replacing the fuse box should be done very carefully, without jerking, using special dielectric tweezers.
Solutions
First of all, you need to check the backlight bulb; if it does not work, it needs to be replaced. Also, the reason why the instrument panel in the VAZ 2114 does not light up may be a violation of the integrity of the wiring. You should call her. A damaged fuse and electrical circuit, as a rule, cannot be repaired - they only need to be replaced. Let's look at quick ways to solve these problems.
One or more light bulbs do not light up
One of the most common reasons why the dashboard lighting on a VAZ 2114 has stopped working is burnt out light bulbs. The electrical circuit of this model is designed in such a way that if one light source fails, they all stop working. To accurately determine the broken element, you will need to ring the entire system using a tester. Another reason for the lack of lighting may be the independent installation of LEDs instead of standard incandescent lamps. In this case, errors are often made in power distribution or the electrical parameters of LED elements are calculated incorrectly.
Wiring
Damage and cable breaks in the on-board power system are not uncommon on a VAZ 2114 car. To detect the break point, it is necessary to check all possible wires, which can only be found in the environment of the dashboard lighting. Also, the light bulbs may not light due to oxide deposits formed on the linings. To fix the problem, you need to take it apart and clean the entire pin group.
Fuse
Before you start calling a VAZ 2114 electrician, you need to disassemble the fuse box. Otherwise, the diagnostics will be incomplete and will not reveal the complete picture of faults in the instrument cluster lighting system. The cause of the breakdown should be sought both inside the wiring system and outside - in the seat. If during the inspection it turns out that the module is faulty, it should be replaced with a new one, since such equipment simply cannot be repaired.
The board is damaged
Violation of the connection diagram of the instrument panel system board on a VAZ 2114 is a more serious problem than the above. Despite the fact that many radio amateurs still repair and eliminate such a defect, in practice it is better to immediately replace it with a new one. The main reason why the backlight does not turn on in this case is a previous short circuit in the circuit. External signs of this will be as follows:
- If the light source is an incandescent lamp, the wiring to the board will be black.
- If LED elements are installed, a darkened place where they connect to the base will indicate the destruction of the microcircuit.
Important! After removing the panel, ensure that the surrounding area is as clean as possible to prevent moisture, dust, and debris from entering the electrical circuit.
Panel backlight upgrade
If the original dashboard lighting of the VAZ 2114 does not suit you, you can always modify it, thus improving its functionality and making it more pleasing to the eye. The first thing you need to do is purchase a new set of light bulbs. It is best to opt for LED ones - they have lower power consumption, have a higher light output, and also make instrument readings more readable.
True, you should first calculate the required number of LEDs to illuminate each device and alarm icon (there are 13 regular light bulbs in the dashboard, but more LEDs may be required. In case the replacement is made not with individual LEDs, but with LED blocks (lamps) , then their number will also be 13).
The process of upgrading the panel backlight is performed in the following order:
- dismantle the block;
- unscrew (counterclockwise) the original sockets, install the sockets for the LED backlight;
- install resistors and lamps in special sockets;
- bring the wires from the backlight to the common board and fix it on it;
- check the functionality of the new backlight;
- If everything works, reassemble it.
During such tuning, you should definitely monitor the condition of the instrument needles - they are a rather fragile element and, if handled carelessly, can easily bend, break or deform, as a result of which instrument readings may be incorrect. In addition, upon completion of the entire process, you should check whether the arrows are set to “zero” and, if necessary, adjust their readings.
Also, immediately after completing the installation of the new backlight, you should check the functionality of all electronic devices and components using the on-board computer. If all identifiers work correctly, then you can reinstall the instrument panel (proceeding in the same order as its dismantling (see above), but in reverse order).
Diagnostics of the speed sensor and the entire circuit
Checking for broken wiring
So, to find the cause of the malfunction, it is necessary to check both the speed sensor and the entire circuit as a whole. To do this, disconnect the block with 3 wires from the sensor and visually inspect it. A block with three wires - power, signal and ground. If all the wires are in order, we proceed to further inspection.
Checking the sensor drive
Next, we check the sensor drive that comes out of the gearbox. Let's jack up any front wheel of the car and start turning it, while looking at the sensor drive itself. It should spin easily without jamming or crunching. You can touch it with your finger to determine whether it is spinning or not. If everything is in order with the drive, we move on to further diagnostics. If not, the drive will need to be replaced.
Checking for an open circuit
Now, using a tester or a multimeter, let’s check whether power is supplied to the sensor block. We check with a screwdriver with an indicator. We hook one end to the + battery with the other into connector No. 3, turn on the ignition, look, the light should be on. Then we check the power supply, one end to the (-) battery, the other to connector No. 1, turn on the ignition, look, the light should be on. We put the sensor in place, check the signal one, connect one end to the battery power supply, the other to the signal one on sensor No. 2, spin the wheel, preferably quickly, the light should blink.
If after all diagnostic procedures no problems are identified, there is no open circuit, the sensor drive on the box is normal, then the sensor should be replaced.
The VAZ 2114 speed sensor is a measuring device, the main functional purpose of which is to determine the speed of the crankshaft and transmit information about it to the electronic on-board control of the VAZ 2114.
Speed sensor
From this article you will learn the principle of operation of a speed sensor, a method for checking its functionality and a technology for replacing the sensor with your own hands, which will allow you to significantly save on service station services in the future.
Additional recommendations
If the dashboard on a VAZ 2114 does not light up, then the reasons for this are most often quite simple. In most cases, this is caused by oxidation of the contacts, and a little less often - by burnt-out light bulbs. Damage to wires and electronic components is quite rare.
That is why, before checking the entire electrical circuit of the dashboard, you must first clean all the contacts, even if they do not seem oxidized, and also test replace the light bulbs with new ones.
Sometimes the problem may be the wear of the cartridges themselves, in which case they will need to be replaced as well.
Fuse
The side lights are located in the main headlights, but many owners modify the lighting and install additional diodes in the turn signals. In each case, the design contains a fuse that protects the electrical circuit. Its failure means a malfunction of the entire circuit. If the rear left indicator does not light up, check the condition of the indicator under the F10 marking.
The fuses for the left and right side of the side lights on the 4 are located in the mounting block. Fuses marked F10 and F11 protect the left and right sides of the lamps, respectively. The photo shows the location of each of the fuses in the mounting block of the new model.
The fuse marked F10 is responsible for the left side of the dimensions, and F11 for the right.
The simultaneous cessation of lighting in the listed places indicates a malfunction of fuse F10, whose task is the left side of the light bulbs on the machine. When considering the reasons why the dimensions on the VAZ 2114 do not work, do not be lazy to check the condition of other fuses for integrity. Normal operation of electrical appliances simplifies the operation of the machine.