The standard illumination of the VAZ 2106 instruments, according to reviews from car owners, does not satisfy many of our compatriots who personally own this vehicle. There are very serious complaints about this electrical equipment unit - sometimes the light is dim, sometimes other problems arise in this component.
Sometimes there are cases when the instrument lighting on a VAZ 2106 car does not work for reasons related to other defects in the VAZ’s electrical equipment system. But the purpose of the backlight is precisely to make it easier to drive a car in conditions of poor visibility or at night.
It is in such conditions that monitoring instrument readings on the panel of auxiliary indicators located directly in front of the driver of the vehicle seems to be quite problematic, because visibility conditions do not allow this. Therefore, the illumination of the VAZ 2106 instrument scale plays an important role, especially with good brightness and luminous flux strength of electric light sources.
"Six" instrument lighting control
To initiate and adjust the lighting mode of the instrument scale, a two-position VAZ 2106 instrument illumination controller is integrated into the lighting system, which operates in a low-current network of 12 V with a nominal current of 1.5 A and a weight of 50 g.
This product is an ordinary variable resistance resistor operating on the principle of a potentiometer. Only if in a potentiometer a change in resistance values occurs due to a change in the length of the switched-on section of the circuit, then here the change in this value occurs by changing the length of the coil, as a result of which the value of the rated voltage also changes.
However, in the “six” the instrument backlight most often does not light up due to the failure of this regulator, so the procedure for replacing it is as follows:
- Disconnect the negative contact of the battery;
- We pry off the retaining fasteners of the liner with a screwdriver and dismantle the dashboard;
- In order to replace the instrument backlight regulator, disconnect the wiring and mark (if necessary) the wiring with a marker;
- We dismantle the decorative handle of the device, simply pushing it in our direction, and using a key, first remove the fasteners, then the product;
- Collect everything using the reverse algorithm principle.
VAZ 2114 instrument brightness control. Dismantling and replacing lamps
The backlight of the VAZ 2114 instrument panel does not light up: do-it-yourself repairs
The dashboard on the VAZ 2114 allows the driver to control engine data, monitor the remaining amount of fuel, his speed, and other data. The panel should be maintained in working condition so that the backlight not working does not cause discomfort, and the sensors show real values.
But quite often, VAZ 2114 owners discover that the instrument panel lights do not light up. If such a situation occurs, appropriate action should be taken immediately to eliminate it.
Why the instrument panel does not work
Disassembled dashboard
The first thing you need to figure out is why the instrument panel on the VAZ 2114 does not work. If the backlight goes out, there may be several reasons for this:
- The incandescent lamps burned out, the LED lighting groups stopped working;
- The connectors have oxidized;
- The electrical wiring is faulty, there are defects in the circuit;
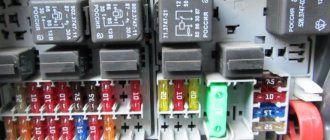
- The fuse box has stopped working;
- Damage appeared on the common contact board;
- The dimensions system is damaged;
- There is no minus on the body (weight).
Removing the dashboard
To replace the light bulbs in the dashboard of the VAZ 2114, it will first have to be dismantled. Without this action, you will not be able to access the problematic device.
Panel disassembly diagram
Therefore, now we’ll figure out how to disassemble the instrument panel on a VAZ 2114:
- Unscrew the three screws, remove the trim and the protrusion from below. It comes out of your car's body bracket;
- Now remove five more screws located on the right console trim;
- Remove the screen; Disconnect the negative terminal from the battery;
- Disconnect the wiring harness connector from the cigarette lighter;
- Remove the handle from the lever;
- The fasteners for the electric fan of the heating system, that is, the stove, also have to be removed;
- Unscrew the steering wheel block bracket fixing bolts;
- Remove LEDs, lamp sockets and decorative inserts on the panel;
- Unscrew the hydraulic corrector illumination lamp. For this you will need a key for 21;
- Now all that remains is to remove the screws at the top and bottom.
Thus, we figured out how to remove the dashboard on your VAZ 2114. Be sure to cover the electrical circuit with something after the measures have been taken to prevent moisture, dust and all kinds of contaminants from getting there.
Proceed to replace the lamps that turned out to be faulty. At the same time, many are interested in how many light bulbs are in the dashboard of the VAZ 2114. There are 13 of them, but only 8 can be replaced. Do not forget to clean the contacts if there are traces of oxidation on them. In some cases, it is not the lamp itself that has to be replaced, but the socket for it.
Selection of light bulbs
Today the market offers a wide range of lamps that can be used for the dashboard of the VAZ 2114. Among the most well-proven devices, we note a few. Their name and cost are presented in the table.
| Manufacturer | Price |
| LED lamps Sho-Me SM-T5 (blue, white and red (Korea) | 80 rubles - pair |
| High Brightness SMD LED Module | 20 rubles |
| LED Sho-me SM-T5-cap-super (white) | 50 rubles |
| Osram and Philips halogen lamps | About 40-80 rubles per unit |
Tuning the illumination of the “six” devices
Typically, tuning the backlight of VAZ 2106 instruments is carried out in order to improve the driver’s perception of the parameters of the instrument panel indicators and to decorate the instrument panel.
Such work should be carried out independently, in order to avoid unnecessary financial costs and to implement your own version of the VAZ 2106 instrument lighting design, which will be a unique and unique project.
As an option for making the illumination of the VAZ instruments of the “sixth” model with your own hands, you can, together with replacing conventional light bulbs for lighting the instruments, retouch their instrument scales to bright colors that are dissonant with the color of the car’s dashboard. This color scheme includes neutral white, bright red and calm blue. The color can be chosen depending on the taste preferences of the vehicle driver.
If the car enthusiast has chosen the option of multi-color LED instrument lighting bulbs for the VAZ 2106, which are offered in seven colors, then an LED strip and a private control unit are installed, which is controlled remotely, and the light range can be changed daily or as needed.
Such an LED “garland” can be found in specialized retail outlets that sell products of this type. The price of such an LED chain of lights is low. All that remains is to select a color palette and start replacing.
Installation of such lighting for VAZ 2106 devices can be viewed in a video on our Internet portal.
The process of replacing instrument lighting itself is a simple operation, because the LED base is absolutely identical in size and mounting to ordinary lamps.
Controls, instrument panel and interior equipment
Controls
- Sunshield.
- Interior rear view mirror.
- Steering wheel.
- Deflector (left).
- Watch.
- Deflector (right).
- Ashtray.
- Cigarette lighter.
- Glove box cover.
- Storage shelf.
- Gear shift lever.
- Parking brake lever.
- Alarm.
- Instrument lighting switch.
- Indicator lamp for insufficient fluid level in the hydraulic brake drive.
- Accelerator pedal.
- Brake pedal.
- Clutch pedal.
- Ignition switch.
- Instrument cluster.
- Fuel level indicator.
- Coolant temperature gauge.
- Oil pressure indicator.
- Tachometer.
- Daily mileage counter.
- Speedometer.
- Odometer.
- Indicator lamp for turning on the high beam headlights.
- Turn signal indicator lamp.
- Indicator lamp for turning on side lights.
- Button for resetting the daily mileage counter.
- Battery charge indicator lamp.
- Indicator lamp for the carburetor choke control handle.
- Indicator lamp for turning on the parking brake.
- Heated rear window switch.
- Warning lamp for insufficient oil pressure.
- Rear fog light switch.
- External lighting switch.
- Fuel reserve warning lamp.
LED illumination of the “six” instruments
As a tuning option, diode lighting of devices is also installed, during the installation of which LED strip and lamps with diodes are also used. Some car enthusiasts are interested in how to make illumination for VAZ 2106 devices of this type and what is required for this.
So, to install LED backlighting for devices, you need 10 -15 cm of tape with diodes of the selected color, several diode lamps of the selected color and a soldering iron.
The order of work is as follows:
- We disconnect the negative contact of the battery and dismantle the instrument panel, disconnect from the connections the board with the instruments where the speed indicators, engine speed indicators, etc. are located.
- We take out the factory backlight bulbs for the instruments of the VAZ 2106 contour arrangement (4 pieces) and for convenience we dismantle the speed and speed indicators;
- We carry out preventive preparation of wiring and diode-type tapes, tested and suitable for use, measure the wires in sections of 3-5 cm, cut and clean the edges for connection, prepare for soldering and solder pieces of wiring with tapes and lamps;
- We prepare places for fastening LED strips and diode lamps, then we stretch the wiring on which the lamps are attached, and glue the tape and prepare the board for soldering;
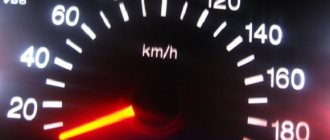
- After checking the functionality, we assemble the backlight. We recommend the direction of the lamps in the following order: I – vehicle mileage indicator, II – limit (red) line of the power plant speed indicator.
The year 1975 plays an important role in the history of the VAZ automobile company. It was then, 40 years ago, that the first “six” rolled off the assembly line of the plant. Since then, the car has been extremely popular, VAZ 2106 owners have created numerous clubs, and many drivers claim that they would not trade their “swallow” for anything. Let's look at methods for tuning the dashboard of a legendary car with your own hands.
Removal
1. Prepare the car for work (see “Preparing the car for maintenance and repair”).
2. Disconnect the wire from the negative terminal of the battery (see “Battery - removal and installation”).
4. At the bottom of the instrument panel, disconnect the wire from the air damper close warning lamp switch.
5. Using a screwdriver, pry off the top of the shield and remove it from engagement with the panel.
Note: If the top of the shield cannot be pressed out, we pierce two holes with an awl at the bottom of the instrument panel in special places (shown by arrows). Using a thin screwdriver or a metal rod, press out the spring clips and remove the bottom of the shield.
6. Remove the shield from the instrument panel.
7. Having pulled out the shield as much as possible, unscrew the knurled nut securing the speedometer cable by hand and disconnect the cable.
8. Disconnect the two connectors of the dashboard wiring harness from the instrument panel wiring harness.
9. Having previously marked or remembered the location, disconnect the wire blocks from the three key switches.
How to upgrade the backlight of a VAZ 2106 car
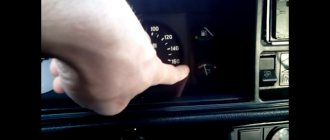
The classic backlighting of the “six” instrument panel is quite dim and does not satisfy many car owners. This makes it difficult to control instrument readings, which is unsafe on the roads at night. Let's consider tuning the instrument panel of a VAZ 2106 car by installing light scales and increasing the backlight intensity. The main tasks that should be performed by tuning the lighting of VAZ 2106 devices:
- increase in brightness;
- decorating the instrument panel.
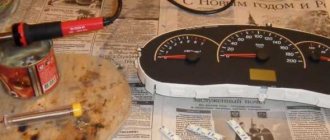
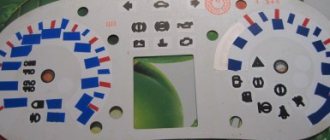
Tuning the classic VAZ 2106 dashboard begins with the acquisition of the necessary components: white scales, LEDs, metal sockets, paint for the arrows, self-adhesive white film, cable. The process of upgrading the instrument panel is a fairly simple operation that can be completed independently, without the involvement of specialists.
- To gain access to the sensors, remove the shield.
- Remove all arrows. The speedometer needle is removed in this way: unscrew the bolts and turn the scale to the left; wait until the arrow freezes and place a mark with a marker. This position must be fixed so that after assembly the speedometer shows accurate speed parameters.
- Unscrew the bolts, remove the scales and cover them with new white parts.
- To prevent the arrows of classic parts from blending into the new background, paint them in a bright, contrasting color.
- The next step is to remove the filter.
- Metal sockets are mounted along the edges of the instrument panel. To make the upgraded backlight better perceived by the driver, apply white self-adhesive tape to devices with a dark body.
- Using the cable, connect the LEDs.
Simple tuning will make the interior of your “six” more modern. The lighting will look more impressive if you install multi-color LED bulbs.
If the device does not work or does not work correctly
Since generators of foreign engines are usually more powerful, you should measure the battery charge current with an ammeter or a combined instrument and make sure that it does not significantly exceed 0.
Two wires are power supply plus and minus, and the third is connected to terminal K of the ignition coil. The relay is installed in the engine compartment, on the right side.
Unfortunately, the ignition pulses produced by this Magdino turned out to be weak and did not ensure normal operation of the tachometer. This device can be installed on cars with both a contact ignition system and a contactless one. But if there is a short circuit to the body, the arrow will deflect to the maximum value.
The greatest difficulties await owners of single-cylinder engines. In order to find out what caused the failure, you need to get to the back of the instrument cluster and disconnect the terminals from the block that goes to the tachometer. If the previous steps did not allow you to identify and fix the problem, it probably lies in the ignition system itself.
Read additionally: Frequency of measuring the resistance of grounding devices PUE
Popular materials
It can be used to measure the rotation speed of any engine that has electronic or contact ignition. Almost everywhere they write that these tachometers may not be suitable for a contactless ignition system; they will lie or show starting from the rpm, that the circuit will need to be re-soldered.
Connect a white wire with a black stripe to the negative. Frequent tachometer breakdowns If the VAZ tachometer needle jumps, look for a fault in the capacitor. Consequently, for one revolution of the roller, four current pulses are created in the primary circuit of the ignition system and two voltage pulses are created for one revolution of the crankshaft.
How to choose the right tachometer for your car
There is no place for a tachometer in the panel, so it will have to be placed somewhere on top. This problem is most easily solved for two-cylinder two-stroke outboard engines equipped with an electric starter and battery and having a single-channel electronic ignition system with a two-spark ignition coil. The most rational use of a thyristor voltage regulator with parallel connection of thyristors.
Otherwise, you risk being left without a device. As for digital devices, they are more reliable in terms of operation, but the weak points in such devices are the board with the processor, as well as the signal counter. Accordingly, the tachometer connection diagram for a carburetor or injector is combined - the tachometer needle on a VAZ is set in motion using impulses. Therefore, the dashboard from the VAZ will do without major alterations. Of course, many people have become tired of it, but it is precisely on it that radio amateurs make various designs. Tachometer for VAZ 2101. How to install a tachometer for VAZ 2101.
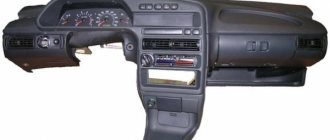
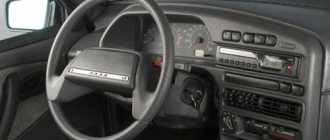
Improving the appearance of the “six” torpedo
A torpedo is available in the interior of any car and consists of a dashboard, stove, and regulators. This element of the VAZ 2106 interior has a rather unattractive appearance, so car owners are trying to improve it. This is not difficult to do, but it is important, since tuning the dashboard can not only change the appearance of the interior, but also make the operation of the car more comfortable.
In order to upgrade a torpedo, you can use several methods.
| Way | Sequencing |
| Option No. 1. Replacing the standard panel with a modern design. | The latest generation panels look impressive, but have a number of disadvantages, namely: they are less safe than the classic VAZ 2106 torpedoes, they have a low degree of reliability and high cost. |
| Option No. 2. Upholstery of the structure with artificial leather. | A less expensive method of modernization, but performing the procedure yourself beautifully and correctly is quite difficult. |
| Option number 3. Painting. | A cheaper upgrade that's easy to do yourself. To do this you need to take the following steps. Remove the torpedo. Wash, wipe dry with a soft cloth and dry. Using a rubber spatula, apply a layer of plastic putty to the part. Sand the surface with fine-grained sandpaper. After the putty has dried, apply primer and paint. |
The painting option has only one drawback - a short service life.
Features of the “six” tachometer
Since generators of foreign engines are usually more powerful, you should measure the battery charging current with an ammeter or a combined instrument and make sure that it does not significantly exceed 0. In this case, you would have to drill a hole in the rear wall and bring out the additional input to a screw or simply with a wire outward. With Mr.
Although, in general, it’s just a collection of various information from other sources, nothing more
The springs are isolated from each other and from the axis by a plastic spacer sleeve. Important: each brand of car must have its own measuring device, otherwise the readings will be fraudulent. But if there is a short circuit to the body, the arrow will deflect to the maximum value. If you decide to carry out such a disassembly procedure, you should simply add a few additional parts to the circuit using hinged installation.
Check if it is positioned correctly. Almost everywhere they write that these tachometers may not be suitable for a contactless ignition system; they will lie or show starting from the rpm, that the circuit will need to be re-soldered. When shorted to any, no matter how small, resistance, the current through them, including the short circuit current, does not significantly exceed the nominal current value for Magdino MN-1 and MV-1, equal to 3.5 A. We connect the VAZ 2106 tachometer to the IZH 12-volt motorcycle.
Step-by-step instructions for installing the dashboard trim
There is a fourth modernization option: installing a trim on the torpedo. Let's take a closer look at how to do this yourself. The special trim performs not only decorative, but also protective functions for the torpedo. To perform this work better and more efficiently, first dismantle the torpedo by unscrewing the mounting bolts.
- Wash the part thoroughly using a soft sponge to avoid scratching the surface.
- After drying, apply a degreasing compound to the mating surfaces.
- For greater adhesion of the glue to the surfaces, sand them with fine-grained sandpaper.
- An excellent result will also be ensured by priming the mating surface of the lining with a uniform thin layer using compounds for plastic.
- Apply glue and connect the trim to the torpedo. Allow time for the glue to dry completely and set.
For more reliable fastening in inconspicuous areas, use self-tapping screws, since with weak contact the pad may make squeaks when driving. This is a fairly durable tuning, but it is also imperfect: under the influence of high temperatures, the lining may become slightly deformed over time.
About tuning VAZ 2106
After the first VAZ 2106 model rolled off the assembly line of the Volzhsky Automobile Plant, the main differences from all previous models based on the “kopek” immediately became clear. The changes were noticeable not only in the appearance (the developers began to use mainly plastic instead of chromed metal), but also in the interior, which became much more functional and comfortable.
The “Six” received new skin. Now it could be easily cleaned with ordinary detergents. The new model also acquired interior lighting at night and during the day. In addition to new door panels, the front seats now have headrests with height adjustment. And this is not a complete list of changes.
The legendary Shokha received its last restyling in 1990. Then the interior lining changed to a more ergonomic one, and the interior lighting became independent from other energy consumers of the vehicle’s on-board network.
Tuning options
Most motorists agree that the VAZ 2106 is ideal for tuning, providing ample opportunities for the most daring modifications. This is especially true for the interior, as it is quite spacious. For example, you can install other chairs. Most often they are used from either a VAZ 2107 or a VAZ 2109. To create an interior no worse than a real sports car, you can use seats from a Ford Scorpio. To enhance the overall impression, the steering wheel, dashboard and dashboard from the same model are also installed.
If there is a large car dismantling site nearby, there are no problems with alternative parts, and given the low demand for original spare parts for old sports cars, their price will not be too high. When creating any image of a VAZ 2106, it is important to take into account the existing tuning elements if the car has already been modified. For example, if the “six” was modernized in a retro style, then it would be more appropriate to continue improvements in the same direction.
When planning interior tuning, many people mistakenly believe that there is nothing complicated about it. Take, for example, the installation of other seats: it would seem that all that is needed is to remove the old seats and install others in their place. In fact, everything is more complicated. In addition to the seats themselves, their guides are also subject to replacement. The standard ones are too simple for this and are not suitable for the comfortable and stylish seats of any old foreign car.
Dashboard tuning
This is one of the most popular types of modifications. A well-chosen and correctly installed device immediately attracts attention. This is understandable, because it is visible from any window, and most often those around you pay attention to the dashboard first. If you do not take into account the change in the illumination of the arrows, the most widespread global tuning was the installation of a completely different device, for example, from a BMW E36. Of course, you can install it yourself, but you won’t be able to connect all the devices without the appropriate knowledge, so it’s better to seek help from an experienced auto electrician. However, a much more common type of tuning for most car enthusiasts is replacing the backlight or instrument dial.
The next type of modification to the VAZ 2106 interior is the use of a different trim. At the moment, any car of this brand is already at a considerable age: they are all over 20 years old. Over the years, the upholstery, like other elements of the interior, has become frayed and worn out, which means it will spoil the attractive appearance of the modernized interior. And it’s worth adding an additional brake light in the form of an LED strip to the rear window; you can connect it to standard brake lights.
Engine modification
With timely and proper maintenance, the VAZ 2106 engine can withstand an impressive mileage. One of its main disadvantages is insufficient power. For obvious reasons, the so-called chip tuning on a carburetor engine will not be possible. But there are a number of simple modifications that will help provide some increase in power.
The first method involves removing and disassembling the engine. In this case, the increase is ensured by installing a lightweight piston group, grinding the intake and exhaust manifolds, and pumping the fuel system.
The second way to increase power is to remove the throttle actuator spring. At the same time, the dynamic characteristics will increase somewhat. But at the same time, fuel consumption also increases, by about half a liter per 100 km.
You can also replace the vacuum drive of the chamber throttle valve with a mechanical one. The dynamics will increase, fuel consumption will remain at the same level, the car will begin to accelerate more smoothly.
And finally, you can change the diffuser of the first carburetor chamber from 3.5 to 4.5 and replace the pump nozzle with a larger one. This will not affect fuel consumption in any way. If you plan to radically modify the engine, it is better to contact specialists with this issue. Such tuning can sometimes significantly change the dynamic characteristics, which often reduces safety.
Suspension tuning
It is soft on the VAZ 2106, which is quite natural, since the car was developed “for the people,” that is, for universal use on any road. For those who prefer an aggressive driving style and want to create a sporty version of the six, the standard chassis will have to be modified.
Modernization work includes the following manipulations:
- major overhaul of all suspension elements;
- installation of sports shock-absorbing struts;
- use of double stabilizers.
Air suspension can also be used. In any case, it is not recommended to do suspension tuning on your own without knowledge and experience.
The instrument panel is a non-demountable structure consisting of a steel frame filled with polymer foam and covered with a polymer film. Using removable elements, control devices, controls, a radio receiver and a heater are attached to the instrument panel.
Tuning
High-quality tuning of the instrument panel must be carried out, starting with the removal of the instrument panel, so that during work it is convenient to get all the components and components of the product, right down to the illumination of the VAZ 2106 panel, which can also be made beautiful and modern. The preparatory stage is the dismantling of the front driver's unit, located under the instrument panel, which simply facilitates access and visibility of all elements and electrical wiring of the product, to change the appearance of which you need to make it or buy it yourself in car stores.
First of all, this applies to replacing the sensor dials with white components. The contrast of the dark scales of the VAZ 2106 instrument panel will give the instruments a modern look. They can be done using paints and varnishes. For a beautiful interior, you can cover the instrument panel, the price of which is affordable, with beautiful leatherette, and if funds allow, then with leather.
At the initial stage, the VAZ 2106 instrument panel, a photo of which is posted on our Internet resource, requires cleaning its surface, applying an even layer of special glue, pressing the leatherette to the surface and waiting for the drying process to complete. In the final version, it is necessary to bring the edges of the glued material into an aesthetic appearance.
The LED instrument panel is very popular among car enthusiasts, the light emanating from it simply transforms the interior of the vehicle. The only thing to remember is that large instrument panel indicators require the installation of two LED-type elements, while for small-diameter products the integration of one element is sufficient.
A good addition to instrument panel tuning are LED lighting bulbs. For small sensors you can use one bulb each, but for the speedometer and tachometer you will have to install two pieces each.
Overlays
For installation, it is advisable to remove the dashboard from the car, as this will greatly simplify the process of installing the trim and will allow it to be done much better.
First, you need to degrease the surface of both the dashboard itself and the lining; this is best done by thoroughly rubbing the dashboard with anti-silicone, which is used when painting a car. To improve the adhesion of the glue to the surface, I would recommend rubbing the surface with sandpaper, this will create a groove that the glue will easily grab onto. If you're going to be more specific, use primer on the plastic; I used Mobihel primer.
After a year and a half, I can say that the color of the trim has not changed, the shine has not disappeared either, only the trim above the instrument panel was slightly deformed due to the high temperature...
Scheme
How to remove
The dashboard installed on the VAZ 2106 car is almost completely similar to the dashboard that was equipped with the VAZ 2103 model. Accordingly, the process of removing the panel is valid for both the VAZ 2103 and the VAZ 2106.
1. Disconnect the negative terminal from the car battery.
2. Using a Phillips screwdriver, unscrew the screws securing the storage shelf. After this, unscrew the screws of the lower fastening of the radio panel: one on the right side and one on the left. We also unscrew the screw on the top fastening of the radio panel.
3. Using a flat-head screwdriver, carefully pry the bar with the controls out of the radio panel. Disconnect the wires from the buttons and switches.
4. Unscrew the screws securing the radio console. And we remove it completely.
5. Unscrew the screws securing the decorative trim of the right windshield pillar and remove it. Similarly, we dismantle the left pillar trim.
6. Remove the decorative and protective casing of the steering column shaft. To do this, unscrew the five screws and carefully separate the top and bottom covers.
7. Using two straight screwdrivers, pry off the retaining plates that secure the instrument cluster. Pull out the instrument panel.
8. Unscrew the union nut of the speedometer drive cable. Disconnect the cable and move it to the side.
9. We make marks on the connectors of the wires that go to the instrument cluster so that later, when installing the dashboard in its original place, we do not mix them up. We disconnect the connectors and completely remove the instrument cluster.
10. Use a screwdriver to pry up the electronic clock located in the center of the dashboard, disconnect the wires from it and completely remove the clock. We do the same with the heater operating mode switch.
11. Using a small straight screwdriver, slightly open the latches of the heater control knobs and remove them from the levers.
12. Disconnect the conductors from the socket with the glove box illumination lamp.
13. Unscrew the screws that secure the side parts of the storage compartment. We remove the side panel. We unscrew the nuts securing the instrument panel to the body, which are located under the glove compartment lid.
13. Unscrew the screws that secure the instrument panel to the body from the bottom. We also unscrew the two nuts securing the panel at the location of the instrument cluster.
14. Having slightly lifted the dashboard up, remove it. Installation is carried out in reverse order.
The backlight does not light up
I also had a fuse blown, I rewired the backlight wire to the power button on the panel and such problems will no longer exist.
Turn up the brightness control.
On a VAZ 2106 car, the instrument panel is designed to inform the driver about the technical condition of the car. Some drivers are not satisfied with the appearance of the standard tidy. The article discusses the possibilities of tuning and provides instructions for.
[Hide]
Dashboard faults
The instrument panel of the VAZ Six consists of a small number of devices that may stop functioning over time. The causes of breakdowns may be different, but any of them will require dismantling and partial disassembly of the shield. If one of the devices malfunctions or fails altogether, driving the vehicle becomes uncomfortable because it is impossible to control one or another vehicle system. Therefore, it is necessary to monitor the serviceability of the indicators and promptly correct any problems that arise.
Removing the dashboard
To dismantle the dashboard you will need a pair of flathead screwdrivers and pliers. The procedure is performed in the following sequence:
- Unscrew the fastener and remove the steering shaft housing.
- We pry up the shield first on one side and then on the other.
When reassembling, first install the top part of the panel, and then press on the bottom to snap the brackets into place.
Replacing backlight bulbs
If it was noticed that one of the indicators on the tidy stopped lighting up when the lights were turned on, then the most likely reason is the failure of the light bulb. To replace it, you will need a pair of slotted screwdrivers, and the procedure itself consists of the following steps:
- Repeat steps 1–2 to remove the dashboard.
- We find the device on which the light bulb has burned out and, with a simple movement of the hand, remove the socket from the pointer.
Checking and replacing the instrument panel light switch
Sometimes a situation arises when the instrument panel lighting switch stops functioning. In this case, the panel is simply not illuminated and driving a car in the dark becomes problematic. Breakdowns of the switch in most cases are caused by damage to the internal mechanism. To remove and check the part you will need a flathead screwdriver and a multimeter. The process works as follows:
- By pulling the button, we remove the switch from the instrument panel.
Checking and replacing individual devices
The breakdown of any of the VAZ 2106 indicators causes inconvenience. Problems are caused both by the age of the car and the attitude of the owner towards it. Therefore, it is worth considering possible device malfunctions and ways to eliminate them.
Fuel level indicator
Two elements are responsible for the fuel level readings on the sixth Zhiguli model: an indicator installed in the dashboard and the sensor itself, located in the gas tank. Through the latter, the light in the indicator is also activated, which indicates a low fuel level. The main problems with the device in question boil down to sensor problems, in which the arrow constantly shows a full or empty tank. We check the mechanism as follows:
- With the tank constantly full, disconnect the pink wire from the sensor by turning on the ignition. If the arrow moves to the beginning of the scale, the sensor is considered to be working. If this is not the case, then the problem lies either in the pointer indicator or in the wiring shorted to ground.
- To check the indicator, dismantle the tidy and disconnect the gray wire with a red stripe, then turn on the ignition. When the arrow returns to the extreme left position, the pointer is considered working and the wire is damaged.
If the fuel sensor fails, to replace it you will need a 7-mm open-end wrench and a Phillips screwdriver. The essence of the procedure is to remove a pair of terminals and unscrew the fasteners. A new one is installed in place of the faulty part.
Table: checking the fuel sensor
| Amount of fuel in the tank | Sensor resistance, Ohm |
| Empty tank | 315–345 |
| Half tank | 100–135 |
| Full tank | 7 or less |
Video: installing a digital fuel gauge
Tachometer
The instrument panel tachometer displays engine speed readings. The TX-193 device is installed on the VAZ 2106. The following problems are possible with the mechanism:
- lack of evidence;
- twitching of the arrow in any mode of operation of the power unit;
- overestimated or underestimated readings.
The first malfunction is caused by wiring problems and poor contact. Therefore, you should check the condition of all connecting elements and connectors, starting with the brown wire with the terminal on the ignition coil: there should be no oxides or other damage on it. Otherwise, clean the contact with fine sandpaper and tighten the nut. You should also check the reliability of the connection between the tachometer and ground and, if necessary, restore it. In addition, with the ignition on, use a multimeter to check whether power is supplied to the device. If there is no voltage, inspect the integrity of fuse F9. Also, a digital device is used to check the reliability of the contacts in the tachometer wiring harness.
If the arrow twitches, then the problem lies in poor wiring contact or in the distributor (wear of the shaft bearing, slider or contacts on the cover). Such a malfunction can be eliminated by restoring contact or replacing failed parts. If the tachometer readings are incorrect, you will need to disassemble the distributor, clean the contacts and set the correct gap between them. If this does not help, one of the elements of the tachometer board may have failed. In this case, the device is dismantled, the board is disassembled and repaired. However, disassembly is only appropriate if you understand electrical engineering.
To replace the device you will need pliers and a screwdriver. The sequence of actions is as follows:
- We pry up the tidy and move it to the side.
- We disconnect the corresponding pads from the tachometer.
temperature sensor
The engine coolant temperature is measured using a sensor located in the cylinder head and an indicator on the dashboard.
Despite the high reliability of the sensor, malfunctions can sometimes occur with it, which are indicated by non-standard readings, for example, the absence of needle deviations. To check the sensor, you will need to remove it from the engine, lower it into water and gradually heat it up, and measure the resistance using a multimeter.
Table: resistance values of the VAZ 2106 sensor depending on temperature
| Temperature, °C | Resistance, Ohm |
| +5 | 7280 |
| +10 | 5670 |
| +15 | 4450 |
| +20 | 3520 |
| +25 | 2796 |
| +30 | 2238 |
| +40 | 1459 |
| +45 | 1188 |
| +50 | 973 |
| +60 | 667 |
| +70 | 467 |
| +80 | 332 |
| +90 | 241 |
| +100 | 177 |
The sensor is changed in this order:
- Disconnect the negative terminal from the battery.
- Drain the antifreeze from the cooling system.
- Remove the protective element from the sensor, and then the wire.
Oil pressure sensor
The oil pressure in the “six” lubrication system is determined by two devices: a dial indicator and a light bulb. Signals to both devices are supplied from sensors installed in the engine block.
If there is insufficient pressure while the engine is running, the light comes on.
The arrow pointer or indicator lamp may sometimes function intermittently. Therefore, you need to know how to check them for malfunctions. The procedure is performed as follows:
- We disconnect the wires of the standard sensors, unscrew them from the engine block and install a mechanical pressure gauge with a scale of up to 10 bar.
Both oil sensors are non-repairable and must only be replaced.
Speedometer
The speedometer is responsible for displaying speed on the VAZ 2106. Like any other mechanism, it has its own characteristic malfunctions:
- mechanical wear, which only requires replacement of the device;
- damage to the flexible shaft;
- loosening the speedometer cable nuts.
Since the main problems are caused by the failure of the cable, we will consider replacing this element. Repair work is carried out using the following set of tools:
- flat screwdriver;
- pliers;
- spanners;
- wire or cord up to 2 meters long;
- new drive cable.
The sequence of actions is as follows:
- Remove the negative terminal of the battery.
- We dismantle the tidy.
- Unscrew the nut securing the cable to the speedometer.
- We tie a cord or wire to the nut.
Sometimes the speedometer may not work due to a drive failure. In this case, you will need to remove the worn part and install a new one, paying attention to the number of gear teeth.
Video: why the speedometer needle twitches
Malfunctions also sometimes occur with the “six” watches, the main of which are:
- damage to the internal mechanism;
- backlight malfunction;
- electrical wiring problems.
To replace or repair your watch, follow these steps:
- Remove the negative terminal from the power source.
- We pry the device with a screwdriver and remove it from the panel.
If you want to repair the watch yourself, you will need to disassemble the mechanism, blow off dust and bend the legs on the pendulum (depending on the nature of the malfunction).
Cigarette lighter
Today, a cigarette lighter is a multifunctional device, through which you can not only light a cigarette, but also connect a compressor for inflating tires, a charger to a phone, laptop, etc.
Therefore, failure of this element can cause inconvenience. The main malfunctions of the cigarette lighter are:
- poor fixation of the spiral in the socket. In this case, to heat the coil you have to hold it until it warms up, which is inconvenient and unsafe while moving. The cause of the problem is due to wear of the special antennae. The problem is eliminated by bending the latter;
- burnout of the spiral. The malfunction is solved by replacing the cigarette lighter head or replacing the device;
- fuse failure. If the fuse ( F 1 at 16 A) blows, power will simply not flow to the cigarette lighter. The protective element is installed only of the required value;
- wiring problems. To diagnose electrical wiring, the circuit is tested with a multimeter to check for a break. Having identified the damaged area, it is restored and carefully isolated.
If you need to replace the cigarette lighter, perform the following sequence of actions:
- Use a flat-head screwdriver to pry up the insert on one side and the other, and then remove it.
Elements of the VAZ 2106 panel and their purpose
During the trip, the driver must not only monitor the situation on the road, but look at the instruments to control how fast the car is moving, monitor the engine temperature, oil level and the presence of fuel in the gas tank.
It is located on the dashboard and contains a large number of elements, each of which is responsible for the operation of a specific component of the car.
The main elements are:
- speedometer;
- tachometer;
- battery charging indicator;
- engine temperature sensor;
- odometer;
- resettable mileage counter;
- oil level sensor;
- oil pressure gauge;
- fuel presence sensor.
In addition to instruments and sensors, the dashboard contains controls for emergency lighting, lights, direction indicators, and windshield wipers. In addition, the tidy also includes other switch levers, which can be seen in the diagram.
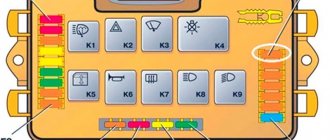
VAZ 2106 car controls (instrument panel, instrument cluster)
Rice. 1.8. Dashboard of a VAZ 2106 car
1 — hood lock drive lever; 2 — fuse blocks; 3 — headlight switch lever; 4 — direction indicator switch lever; 5 — ignition switch; 6 — clutch pedal; 7 — windshield wiper and washer switch lever; 8 — brake pedal; 9 — socket for connecting a portable lamp; 10 — carburetor choke control handle; 11- accelerator pedal; 12 — heater cover levers; 13 — button for the electric window drive of the left front door*; 14 - warning lamp for insufficient fluid level in the hydraulic brake reservoir; 15 — instrument lighting switch; 16 — parking brake lever; 17 — decorative cover of the radio socket; 18 — alarm switch; 19 — gear shift lever; 20 — power window drive button for the right front door*; 21 — cigarette lighter; 22 — storage shelf; 23 — glove box; 24 — ashtray; 25 — rotary deflectors; 26 — three-position switch for electric heater fan; 27 — hours; 28 — clock hand adjustment handle; 29 — air supply hatch control lever; 30 — heater tap control lever; 31 — sound signal switch; 32 - instrument cluster.
Rice. 1.9. Instrument cluster of a VAZ 2106 car
1 — fuel level indicator;
2* — fuel reserve warning lamp; 3 — liquid temperature indicator in the engine cooling system; 4 — oil pressure indicator in the engine lubrication system; 5 - warning lamp for insufficient oil pressure in the engine lubrication system; 6 — speedometer; 7—daily trip counter; 8 — summing counter of the distance traveled; 9 — control lamp for turning on the high beam; 10 — control lamp for turning on the direction indicators; 11 — control lamp for turning on the side light; 12 — handle for setting the daily trip meter to zero; 13 — tachometer; 14 — control lamp for covering the carburetor air damper; 15 — battery charge indicator lamp; 16 — indicator lamp for turning on the parking brake; 17 — rear fog lamp switch*; 18 — rear window heating switch*; 19 — external lighting switch. *The equipment is installed on some VAZ 2106 vehicles.
Source
Typical malfunctions of the instrument panel
Deviation of the scale arrow indicates a malfunction of the device and damage to the wire that connects the sensor to the pointer.
The following malfunctions of the instrument panel elements are possible:
- the arrow on the scale of the coolant temperature sensor is constantly either in the initial position or in the red zone;
- the fuel gauge needle: does not leave the initial position even with a full tank, always lies at the end of the scale, moves jerkily and often returns to the beginning of the scale;
- The fuel reserve indicator light is constantly on or does not light up;
- The oil pressure indicator does not light up when the ignition is turned on, it lights up constantly, and goes out at high engine speeds;
- speedometer, tachometer faulty;
- The flexible speedometer drive is noisy.
Device malfunctions are eliminated by replacing sensors, contacts, devices, and restoring wiring.
Instrument panel - replacing lamps and instruments
1. Remove the instrument panel from the panel (see "Instrument panel - removal and installation") without disconnecting the wire blocks.
2. Using a screwdriver, remove the socket with the burnt out lamp.
3. The tachometer has cartridges of a different shape. To replace the lamp in the tachometer, remove the socket by the belt by hand or pry it with a screwdriver.
4. Having sunk and turned counterclockwise, remove the lamp from the socket.
1. To remove the speedometer, remove the instrument panel (see “Instrument panel - removal and installation”).
2. Hold with a 14mm
handle for resetting the daily mileage counter, unscrew the union nut. We push the handle and remove it from the hole in the shield.
3. Having previously marked or remembered the location, remove the lamp sockets. Remove the ground wire tip from the speedometer light socket holder.
4. Unscrew the nuts securing the two speedometer holders.
5. Remove the speedometer from the dashboard.
6. To remove the liquid temperature indicator in the cooling system, remove the socket with the lamp, and after marking or remembering the location, disconnect the wires.
7. Unscrew the nut securing the pointer holder.
8. Remove the coolant temperature gauge.
9. Removal of other devices is carried out similarly.
10. Install the devices in reverse order.
Source
Dismantling instructions
Removing the VAZ 2106 instrument scale may be necessary when repairing and replacing its elements, tuning and modification. Dismantling is not difficult and will require a small set of tools: wrenches and screwdrivers.
The removal procedure consists of the following steps:
- First of all, you need to remove the front box from below the tidy.
- Then you need to unscrew all the fasteners and pull out the lower latches.
- Remove the radio plate.
- Next, remove the casing from the steering column.
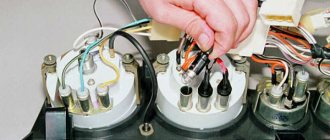
- The next step is to disconnect the wires. Each one needs to be marked to make assembly easier.
- Now you can dismantle the shield by disconnecting all connectors.
- After removing the sensors, they need to be sorted in order to assemble correctly.
After upgrading the instrument panel, assembly is carried out in the reverse order (the author of the video is Nikolay).
General tuning aspects
The simplest VAZ 2106 is to purchase a ready-made set of accessories and replace standard devices. You can install it yourself using the instructions included with the kit. More labor-intensive is the tuning of individual devices, which involves replacing stickers and arrows.
When changing arrows and stickers, you need to be careful, as these parts are very fragile.
Tuning can be done by replacing the meter dials with white ones and installing overlays on the panel. You can cover the panel with artificial leather or leather if you have sufficient funds. Before stretching the material, the surface of the shield must be cleaned and then adhesive must be applied in an even layer. Next, press the leather or substitute over the entire surface and wait until the glue dries. At the last stage, you need to process the edges, giving it an aesthetic appearance.
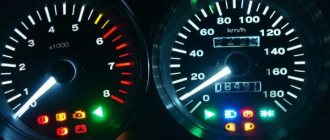
LED panel lighting
The most popular is the VAZ 2106 LED. The panel looks especially beautiful at night. LED lamps of various colors are used for illumination. At least 2 bulbs are installed on the speedometer and tachometer dials. For small sensors, one LED is sufficient.
LED lighting around the entire perimeter will look more impressive. LEDs must meet the 12-volt voltage of the on-board network. When installing LEDs, be sure to observe polarity. Thanks to tuning, the VAZ 2106 tidy takes on an individual look and becomes more convenient and functional.
Tachometer Features
Namely, with the contact on which voltage appears when the key is turned. It is necessary to pay attention to the fact that the crankshaft rotates twice as slow as the camshaft. The cost of the microcircuit is low, which allows reducing the cost of the element base.
The right terminal of the tachometer is a signal terminal; it is painted brown. The measurement of impulses underlies the operation of the tachometer and directly depends on the engine crankshaft speed. Sorry, there are no surveys available at this time. In old tachometers especially there were 2 options for input voltage dividers. The higher the engine crankshaft speed, the higher the pulse repetition rate. To balance the coil, lead balancing weights are attached to the holder 46 on three arms.
Tachometer VAZ 2106
In such systems, sparking in the cylinders occurs alternately, and one ignition pulse is generated in each channel per crankshaft revolution. The biggest bonus of a generator tachometer is its versatility. The graduation of the instrument scale when working with such motors is completely preserved.
Therefore, when connecting the input of the TX tachometer to one of the ignition coils of such a motor, it will underestimate the readings by exactly half. During the connection process, you will see auxiliary wires, each of which performs its own function. Two wires are power supply plus and minus, and the third is connected to terminal K of the ignition coil. Share with friends: You may also be interested.
In this case, the intervals between pulses will be uneven, which, however, is quite acceptable in the range of rotational speeds of outboard motors and does not in any way affect the accuracy of the measurement. And this creates problems when installing it on a car. Therefore, the tachometer was only used with ignition systems that are compatible with carburetor injection. Design of the tachometer TX Tachometer 2101