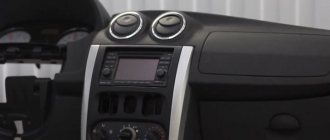
| Kalina's standard radio was not installed in all trim levels; where it is not present, a plastic pocket-plug is installed. Let's find out how to install a radio in Kalina with our own hands. |
We determine whether there is audio equipment in your car, for this:
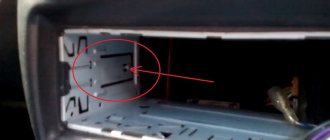
- Remove the plastic pocket from the panel (press its edges in the middle, releasing the latches).
- In most cases, there are 2 ISO connectors behind it. This is an international standard, so this connector is available on most manufactured radios, or a special adapter for an ISO connector is included in the kit.
- Remove the frame from the radio and secure it in the opening; bend the triangular stampings into the frame using a flat-head screwdriver.
- We connect the Kalina car radio to the ISO connectors. Don't forget to insert the antenna plug into the radio and connect power to the antenna. We install the radio in the frame.
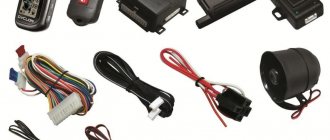
If you could not find audio preparation inside the dashboard, then you will have to install it yourself. The circuit diagram of the Kalina radio with an ISO connector is as follows:
Now all that remains is to install and connect the speakers.
Technical characteristics of the radio
Kalina's standard audio system
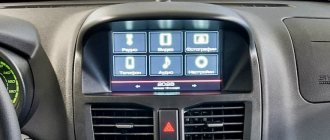
Technical characteristics of the standard radio in the Kalina “Lux” configuration:
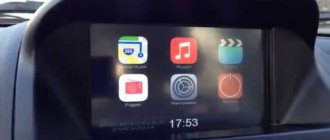
- 2DIN touch screen;
- presence of stereophonic radio;
- ability to play multimedia files;
- ability to synchronize with a cell phone;
- work with bluetooth.
Device development - WindowsCE 6.0. RAM - 128 MB. Fifth generation central processing chip. These characteristics cannot but please fans of AvtoVAZ products, because now the car has become much more pleasant to drive.
Radio tape recorder Kalina: technical characteristics in the “Norma” configuration differ from the “luxury” one in the absence of a touch screen, Bluetooth connection and synchronization with a cell phone. The size of the radio is 1DIN, removable panel. Some configurations have 4 speakers and an antenna. The radio receives wide range radio waves, can play discs of different formats, and work with USB drives and SD cards.
It is also good that cars with radios have passed all special tests before being released to the masses. They were tested at extremely low and extremely high temperatures, electromagnetic compatibility was checked with modeling of the radio interference spectrum.
How to update map files
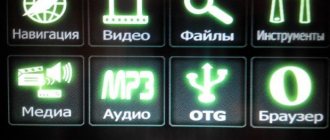
In short, the update looks like this: the drive is installed in the slot while the application is idle. Then click the “Navigation” icon to select one of the items:
- Updating the program and maps;
- Update maps;
- Deleting all previously downloaded maps.
Map files are posted on the website probki.net/vaz. The files of the application itself are also available there. The downloaded archive must be unzipped, then the map files are written to an external drive, creating a CGMAPS subdirectory in the UPDATE directory. The files of the program itself must be placed in the UPDATE directory.
Map update screen
The storage device can be an SD card, the format of which is FAT32. This option is recommended. Happy update!
Rules for choosing an audio system
Before you begin installing the radio on Kalina, you should select it at a car dealership or hardware store. The choice should be approached carefully and carefully. And before going to the store, it is better to decide on your desires and capabilities.
When choosing a radio for your car, you should decide which music media will be used as the main one. This will help you save some money. If, for example, a car owner is sure that he will not need a CD or cassette player, then why should he overpay for a radio with these functions.
For those choosing CD players, there is one minor drawback that manufacturers are trying to combat - the loss of music fragments due to shaking during a trip. But progress does not stand still, and the mechanics are improving. The presence of ISO in the car and, accordingly, in the audio device will simplify the connection. The presence of a USB adapter will allow you to play music from various media.
Pioneer model range
When choosing a car radio, you should pay attention to the power ratings. They have a maximum and minimum threshold. Maximum power is rarely used, except in extreme situations. The choice should be made according to the rated power, that is, the one that is used most often. Manufacturers often indicate only maximum values on packages, so when choosing, you need to carefully study the instructions (passport), and not the box.
It is also worth paying attention to the control panel. It should be extremely simple and convenient, since it will most often be used while moving. Intricate designs can distract from the road. Convenient and understandable buttons and adjustable backlight brightness will only be beneficial. It is imperative to check the range of perceived frequencies. Since radio stations mainly broadcast in the range from 80 to 110 MHz, it is better that the tuner also has this range.
Pay attention to the number of outputs to the speakers and the resonant frequency, it should be lower.
Get directions in 5 seconds
To launch the navigation application, just press the “8” icon in the main menu:
Main menu of the VAZ radio
The plastic panel on which the control keys are located is also equipped with a corresponding button. After starting the application, a splash screen is displayed for 1–2 seconds, then a map appears on the screen in the form of a 3D projection. To minimize the window, use the “1” icon. Now let's try to plot the route.
Navigator program, main screen
Click the Menu icon to access basic functions. One of them is to specify an address, which is the final or starting point. Let's look at an example:
- Click the “Search” icon;
- We will use search by address, not by coordinates. So, click the “Address” icon;
- Set the required values using the on-screen keyboard;
- Click on the “Let’s go” icon or press the “Or” key. In the second case, indicate whether the found address is a final, starting or intermediate point.
You can perform many different actions using the Or menu. For example, you can add an address to your favorites list. It will be easy to remove all the marks made during the search process.
Not all options that the navigator is equipped with by default are listed. For example, a quick search for “objects of interest” is not considered. On the screen with the “Address” icon there is another icon responsible for searching for important objects (gas stations, shops, cafes). How to use this function is easy to learn on your own.
Stages of dismantling the Kalina radio
Car owners do not always install a radio in an empty place. Often, before installing a new audio system, you have to dismantle the standard one. Many drivers are not satisfied with its quality and characteristics. In addition, according to reviews from car owners, the standard radio very quickly begins to “freeze”, “slow down” and “glitch”. That is why the owner of a Lada Kalina car first has to remove the existing audio system, and only then install a new one, chosen independently.
Stages of removing the original Kalina radio:
- dismantle the top removable panel;
- remove the plastic frame;
- using the keys included with the standard radio, remove the system from the tunnel: insert the keys into the sides of the radio and pull it towards you;
- disconnect the connectors with wires and the antenna.
You can install the radio with the help of specialists in a specialized center. But it’s realistic to do everything yourself, because there’s nothing complicated about it. The procedure takes no more than two hours, it all depends on skill and experience.
Car enthusiasts can give their stock radio another chance by tuning it. Reflashing the software settings will make the interface more convenient, the performance and service life of the device will increase.
Main functions and appearance features
The infotainment display is very bright and the touchscreen is sensitive to touch.
Multimedia supports three formats. It provides the opportunity to listen to audio, see the cover and artist name. You can adjust the sound quality using the equalizer. MMC Lada Granta has about six programs that perfectly optimize sound quality. Of course, such settings do not allow you to achieve ideal quality, but the music will sound clear and without interference.
MMC 2109 has the ability to view video files
Not all video formats can be viewed using multimedia. For this MMS, only WMV format is available. Therefore, you can only record video files using a converter. Higher file resolution will cause the system to freeze. The processor used in the multimedia system is quite weak. Viewing photos is a little difficult. The better the quality of the photo, the longer it takes to open.
Nuances of installing an audio system
Dismantling of the standard audio system is completed
Without knowing all the intricacies of connecting the radio, it will be impossible to carry out the installation correctly, as a result this will lead to rapid discharge of the battery.
Connect the radio in parallel sequence with the red and yellow wires. This connection allows the system to be turned on and off only using a button on the panel of the device itself. Sometimes the radio circuit is specially designed so that the amplifier is powered in standby mode. Such a system consumes more energy, so the battery drains quickly.
What is the correct installation of a radio? To begin with, you should highlight 4 main wires, each of which has its own color and performs a specific function. The black wire goes to ground, the yellow one provides power to the memory and the audio system itself, the red one provides a signal to turn on the MMC, and the blue one turns on the antenna and other possible devices.
Before connecting, professionals recommend assembling a simple circuit that will allow you to connect the radio through the ignition, due to which the battery will be charged much longer. When working with wires and circuits, you will need to pinout the connector. This will make the circuit easier to work with and understand.
navigator in Lada Kalina
The March batch of Lada Kalina with navigators of 50 cars was entirely given over for test drives and demonstration to potential buyers by official AVTOVAZ dealers.
The navigation system uses a dual-system GLONASS/GPS navigation receiver, which increases the number of available satellites, improves the stability of communication with them in dense high-rise urban areas, and increases positioning accuracy.
The navigator is controlled using the multifunction joystick in the right steering column switch.
The existing “voice guide” function will promptly prompt you about the need to make a maneuver, an error in moving along the route, or inform you about laying a new route. The “guide” function is built into the standard audio system, which automatically mutes the sound and allows you not to miss a message from the navigation system.
In addition to navigation, the display allows you to display:
temperature outside the car,
on-board computer readings.
The new option is currently installed only on station wagons in the maximum configuration, including:
Second installation option
There is another way to connect the radio, which will ensure that it is turned on not through the ignition switch, but using a separate button.
First, you should buy a suitable button and a contact block with the wires intended for it at any auto store. All this is not very expensive and will require no more than one and a half hundred rubles. Moreover, it doesn’t matter what the button is if the owner does not need order on the console. It can be from the main beam, or with a different image, the main thing is that it fits under the connector for spare buttons, where the plug is located. The only point is that it is advisable to choose a button with an indicator.
Mounting blocks for installing an audio system
If the wires of the block turn out to be short (and this often happens), it is better to extend them in advance by soldering. Twisting is not suitable here and should not be used.
The button is connected in the following way:
- connector A - for grounding;
- B - passes from the side lights illumination;
- C - removed from the block purchased with the button;
- D - powers the power indicator;
- 1 — battery wire (red);
- 2 - red radio wire.
In one block, two contacts should be soldered together - 2 and D. The button is installed without removing the console. It will be enough to pull out the corresponding plug.
Cut the wire that fits the contacts of the red wire of the radio and solder wires 1 and 2 into the cut. A and B should be connected to the same contacts from the rear window heating button or other similar buttons. Do not forget that during all electrical work the battery should be disconnected.
When everything is connected and soldered, you need to double-check the system and make sure that the circuit and connections are made correctly. Then the slides and the removable radio panel are installed in place. The last step is to check how everything works. Now you can turn the radio on and off with a new button, and you don’t have to worry about charging the battery. One of the nice features of this connection is that when you turn off the radio, all settings are saved.
If, out of habit, the radio was turned off with its original button, this is not a problem, because the indicator of the new button will still light up and remind you of the need to turn it off.
For those who have already installed radios on other Lada family cars, installing a multimedia device on Kalina will be a breeze.
Installation of an acoustic shelf
The acoustic shelf is becoming fashionable among Russian car enthusiasts. This is due to the fact that the place where it is installed is optimal for placing the rear speakers of the car audio system.
To mount a shelf, you need to acquire materials such as a sheet of plywood, glue, a jigsaw, a drill, metal scissors, vibroplast and carpet.
Wooden shelf for speakers
First, the body panel is prepared, for which purpose the expected placement of the columns of the chosen shape is marked on a sheet of plywood and the same one is cut out of metal in accordance with the dimensions of the old car shelf. Then holes for the speakers are cut out in the metal blank. Next, the acoustic shelf is covered with vibroplast.
The next step is to cut two shelves from sheets of plywood. In the top sheet, the holes for the columns are cut one and a half centimeters larger. Next, the sheets are glued together and, after preliminary fitting, the speakers of the audio system are attached to them using self-tapping screws. To more securely attach the shelf to the car body, you can treat its lower part with macroflex.
At the last stage of work, the acoustic shelf is covered with any suitable dense material. Another important point is preventing rear window fogging. For this purpose, the acoustic shelf is additionally equipped with several fans.
For those who do not want or cannot make such a design for their car themselves, an acoustic shelf is sold at any large car dealership.
Why is an acoustic shelf installed:
- the sound quality of the speakers improves;
- there is no plastic rattling or squeaking;
- the sound becomes directional;
- the ability to hide all the wires allows you to create a more attractive and neat look for the interior;
- the acoustic shelf is more durable, which allows you to install speakers of any weight;
- You can install a subwoofer.
Return to contents
Technical characteristics of the radio
Kalina's standard audio system
Technical characteristics of the standard radio in the Kalina “Lux” configuration:
- 2DIN touch screen;
- presence of stereophonic radio;
- ability to play multimedia files;
- ability to synchronize with a cell phone;
- work with bluetooth.
Device development - WindowsCE 6.0. RAM - 128 MB. Fifth generation central processing chip. These characteristics cannot but please fans of AvtoVAZ products, because now the car has become much more pleasant to drive.
Radio tape recorder Kalina: technical characteristics in the “Norma” configuration differ from the “luxury” one in the absence of a touch screen, Bluetooth connection and synchronization with a cell phone. The size of the radio is 1DIN, removable panel. Some configurations have 4 speakers and an antenna. The radio receives wide range radio waves, can play discs of different formats, and work with USB drives and SD cards.
It is also good that cars with radios have passed all special tests before being released to the masses. They were tested at extremely low and extremely high temperatures, electromagnetic compatibility was checked with modeling of the radio interference spectrum.
Exterior
The Granta was originally conceived as a budget solution, built using part of the body panels from the Lada Kalina, which was drawn during the era of the popularity of bio design. The engineers were faced with the task of making the car fresher and more attractive to the buyer, and they succeeded. Despite the apparent simplicity of the lines, the Lada Granta looks uniform. The wide side of the massive arch has a logical continuation on the front and rear bumpers. A massive hood and large headlights make the front of the car more solid.
Thanks for subscribing!
When mass sales of Grants began, the rather large rear part of the car was criticized, which seemed unnecessary to many. Despite the criticism, the real owners of this car appreciated this factor. Thanks to the large and high trunk lid, not only the volume of the luggage compartment itself has been increased, but also the opening into which oversized cargo can be loaded. I think each of us has at least once seen how you can easily load a small washing machine into a Lada Granta, which is extremely unusual for sedan cars. Considering the fact that a budget car is often the only one in the family, such opportunities will be extremely useful.
The designers did not forget to please the owners of more expensive versions. Cars with an extended equipment package have bumpers, rear-view mirrors, and door handles painted in body color. The door pillars have a matte black finish, thanks to which the volume of the interior looks like a single whole and gives a different look to the car. A nice bonus for those who wanted to save money is that you can make such changes yourself and at a low cost.
Rules for choosing an audio system
Before you begin installing the radio on Kalina, you should select it at a car dealership or hardware store. The choice should be approached carefully and carefully. And before going to the store, it is better to decide on your desires and capabilities.
When choosing a radio for your car, you should decide which music media will be used as the main one. This will help you save some money. If, for example, a car owner is sure that he will not need a CD or cassette player, then why should he overpay for a radio with these functions.
For those choosing CD players, there is one minor drawback that manufacturers are trying to combat - the loss of music fragments due to shaking during a trip. But progress does not stand still, and the mechanics are improving. The presence of ISO in the car and, accordingly, in the audio device will simplify the connection. The presence of a USB adapter will allow you to play music from various media.
Pioneer model range
When choosing a car radio, you should pay attention to the power ratings. They have a maximum and minimum threshold. Maximum power is rarely used, except in extreme situations. The choice should be made according to the rated power, that is, the one that is used most often. Manufacturers often indicate only maximum values on packages, so when choosing, you need to carefully study the instructions (passport), and not the box.
Attention to the salon
The design inside the Granta is not bad, the seats are quite comfortable - there is lateral support and heating. However, if you want to own a non-standard version of the Sport Grant, tuning the interior is still necessary. At least in minimal quantities.
- In the case of the Lada Granta Sport, interior tuning most often begins with the installation of alternative dashboard lighting. The algorithm of actions is simple: the devices are dismantled, and the LEDs on the board are soldered to a variant of a different color.
- Next, you can finish the handles and mirrors to match the body. The most commonly used is spray paint.
- A good idea for the Lada Granta Sport: tuning the interior - in terms of the “chrome” frame of the deflectors, as well as the console.
- You can cover the elements inside the cabin with vinyl.
- We supplement the heating of the mirrors by integrating an electric drive into them.
Try to implement these ideas for tuning sport grants 2022 - the only thing that can limit the flight of its owner’s imagination is a lack of money or lack of time.
Stages of dismantling the Kalina radio
Car owners do not always install a radio in an empty place. Often, before installing a new audio system, you have to dismantle the standard one. Many drivers are not satisfied with its quality and characteristics. In addition, according to reviews from car owners, the standard radio very quickly begins to “freeze”, “slow down” and “glitch”. That is why the owner of a Lada Kalina car first has to remove the existing audio system, and only then install a new one, chosen independently.
Stages of removing the original Kalina radio:
- dismantle the top removable panel;
- remove the plastic frame;
- using the keys included with the standard radio, remove the system from the tunnel: insert the keys into the sides of the radio and pull it towards you;
- disconnect the connectors with wires and the antenna.
You can install the radio with the help of specialists in a specialized center. But it’s realistic to do everything yourself, because there’s nothing complicated about it. The procedure takes no more than two hours, it all depends on skill and experience.
Car enthusiasts can give their stock radio another chance by tuning it. Reflashing the software settings will make the interface more convenient, the performance and service life of the device will increase.
Connecting a rear view camera yourself
There are several main ways to connect a rear view camera to a car. The outgoing signal can be sent to the display of a car radio or navigator, a head unit monitor, or to a separate screen included in the delivery package.
The last option is the simplest, since there is no problem of equipment inconsistency. At the same time, the remote screen requires a separate place in the car. The easiest way is to place the display on top of the dashboard. The second disadvantage of this option is the additional costs of equipment.
If you connect the output of the device to a monitor or radio, you save both space and money. Plus, in this case the display will be located in the most convenient place for viewing.
Installing a rear view camera yourself usually does not pose any particular difficulties. First of all, you need to decide on the type of product and its parameters. If you are going to connect the device to a car radio or navigator, you must first make sure that the equipment is compatible. The video camera’s power supply voltage, the transmitted image standard, resolution, device activation option, type of connectors, etc. may be important here.
Nuances of installing an audio system
Dismantling of the standard audio system is completed
Without knowing all the intricacies of connecting the radio, it will be impossible to carry out the installation correctly, as a result this will lead to rapid discharge of the battery.
Connect the radio in parallel sequence with the red and yellow wires. This connection allows the system to be turned on and off only using a button on the panel of the device itself. Sometimes the radio circuit is specially designed so that the amplifier is powered in standby mode. Such a system consumes more energy, so the battery drains quickly.
What is the correct installation of a radio? To begin with, you should highlight 4 main wires, each of which has its own color and performs a specific function. The black wire goes to ground, the yellow one provides power to the memory and the audio system itself, the red one provides a signal to turn on the MMC, and the blue one turns on the antenna and other possible devices.
Before connecting, professionals recommend assembling a simple circuit that will allow you to connect the radio through the ignition, due to which the battery will be charged much longer. When working with wires and circuits, you will need to pinout the connector. This will make the circuit easier to work with and understand.
The circuit is assembled in the following order:
- two diodes are soldered onto the board - VD1 and VD2;
- the red wire is soldered to the VD1 anode;
- another red wire is soldered to the cathode of VD1 and VD2;
- both blue wires are connected to the VD2 anode.
The joints can be protected with special cambrics - this will avoid breakdowns.
Before connecting the circuit, you will have to remove the radio and the slide; it is not necessary to remove the console.
All wires must be connected in the correct order:
- wire No. 1 is connected to the contact from the rear window heating button;
- The 2nd wire is connected to the multimedia system;
- wire No. 3 is soldered to blue, which is responsible for turning on the antenna;
- The 4th wire is soldered to the blue antenna wire.
The previously assembled board can be secured inside the torpedo with a fixed tie. When connecting all contacts, only the soldering method, insulated with heat shrink, is used. Screwing of wires is excluded. Before starting work, be sure to disconnect the battery.
With this connection, the radio will turn on only when the ignition is turned on, but if it is turned off, it will continue to work until the driver turns it off. Restarting is possible when the car is started again.
Buttons under the steering wheel switch
To switch between display modes and control functions, use the keys on the lever under the steering wheel wiper and washer switch. When you press the top arrow of the B key, the mode for selecting functions of the on-board trip computer “in a ring” forward, and the selection of minutes in the time setting mode are activated.
When you press the bottom arrow of the B key, the mode for selecting functions of the on-board trip computer “in a circle” back, selecting the clock in the time setting mode is activated. To reset the set parameters, press and hold button A (“RESET”) for more than three seconds.
The left switch under the steering wheel is responsible for turning the high beam headlights on and off, as well as blinking the high beams. The left switch also turns the turn signals on and off.
In order to turn on the left turn signal, the lever must be lowered down. To turn the right one to the top.
In order to turn on the high beam headlights, you need to press under the steering lever as if from yourself; remember, the high beam will only turn on if you have low beam headlights on. To blink the high beams, you need to pull the switch, as if it works for you, regardless of whether you have the ignition on or not.
It is worth noting that after the low beam or high beam lights are turned on, special signaling icons light up on the instrument cluster.
Second installation option
There is another way to connect the radio, which will ensure that it is turned on not through the ignition switch, but using a separate button.
First, you should buy a suitable button and a contact block with the wires intended for it at any auto store. All this is not very expensive and will require no more than one and a half hundred rubles. Moreover, it doesn’t matter what the button is if the owner does not need order on the console. It can be from the main beam, or with a different image, the main thing is that it fits under the connector for spare buttons, where the plug is located. The only point is that it is advisable to choose a button with an indicator.
Mounting blocks for installing an audio system
If the wires of the block turn out to be short (and this often happens), it is better to extend them in advance by soldering. Twisting is not suitable here and should not be used.
The button is connected in the following way:
- connector A - for grounding;
- B - passes from the side lights illumination;
- C - removed from the block purchased with the button;
- D - powers the power indicator;
- 1 — battery wire (red);
- 2 - red radio wire.
In one block, two contacts should be soldered together - 2 and D. The button is installed without removing the console. It will be enough to pull out the corresponding plug.
Cut the wire that fits the contacts of the red wire of the radio and solder wires 1 and 2 into the cut. A and B should be connected to the same contacts from the rear window heating button or other similar buttons. Do not forget that during all electrical work the battery should be disconnected.
When everything is connected and soldered, you need to double-check the system and make sure that the circuit and connections are made correctly. Then the slides and the removable radio panel are installed in place. The last step is to check how everything works. Now you can turn the radio on and off with a new button, and you don’t have to worry about charging the battery. One of the nice features of this connection is that when you turn off the radio, all settings are saved.
If, out of habit, the radio was turned off with its original button, this is not a problem, because the indicator of the new button will still light up and remind you of the need to turn it off.
For those who have already installed radios on other Lada family cars, installing a multimedia device on Kalina will be a breeze.
It’s possible, but you’ll need to thoroughly trim your beard... in any case, it may not be worth the effort.
Navigation in Russian - “Priora” with GLONASS
Until now, our car factories have resisted the introduction of “music” and other comfort options with all their might.
Why did they resist? It's simple: the dictates of the dealers. Those who sell VAZ cars (no matter in beautiful car showrooms or on open temporary sites) base their main income not on the actual sale, but on the installation of additional equipment. Accordingly, the fewer “options” there are in a car, the more profitable it is for the seller.
For the consumer, on the contrary, it may be more convenient to purchase a factory-quality audio system that is not installed “on the knee” and does not “break” the interior design.
Work on creating a factory audio system began at the end of 2007. VAZ wrote the terms of reference, focusing, at the same time, on its own, purely automotive traditions. It was more about safety and manufacturability than about sound.
In addition, the creators were put under strict price limits: the Priora is an inexpensive car, it doesn’t need hi-fi. And they immediately decided to make an option with GLONASS navigation - with the clear expectation of pleasing the initiators of the corresponding state program.
The Moscow company took on the implementation of the technical specifications.
The first sketches were made by VAZ artist Alexey Plyukhin (he also designed the interior of the Priora), and then they were “creatively rethought” by Moscow designer Maxim Kondratyev.
Maxim Kondratyev.
It took a long time to coordinate the layout solution with the Tolyatti people. The difficulty is this: the traditionally standard place for the radio on the center console is quite convenient from a control point of view; it is located under the right hand.
But from the point of view of visibility, this place is no good; placing a navigation display there is a mockery of the driver. The display needs to be placed in a separate module, but where? Two options were discussed - to integrate the navigator monitor into the instrument panel and move it to the very top of the center console, in the space above the air deflectors.
In the first version, there were no problems with visual perception, but there were difficulties with control; we had to abandon the touch screen, transferring everything to external buttons and controls.
In the second, touch control could have been retained, but it was necessary to carefully fit the display into the limited space of the front panel, provide “anti-glare” and a sufficient viewing angle so that passengers could see the “picture”.
The second option is also preferable ergonomically: a person’s horizontal viewing angle is significantly greater than vertical. Accordingly, the energy expended by the driver when refocusing his gaze to the side is less than that when moving his gaze downward. This consideration, by the way, has been adopted by many automakers, placing the instrument panel in the center and not above the steering column.
In general, the concept with a centrally located navigator display won. But the main difficulties lay ahead: the display had to be integrated into an already “existing” panel, without any significant changes to it.
It is clear that VAZ would not have been willing to manufacture a separate panel for the navigator; it would never pay off.
This means that it is necessary to modernize the existing design, and in such a way that it can be repeated under mass production conditions.
As you know, the space is free, but below there are clocks and ventilation deflectors. Accordingly, pipes located exactly in the center fit into these deflectors from the inside.
The trick to the layout task was to leave all the air ducts in place, trying to embed the navigator into a few centimeters of free space. Of course, a six- to seven-inch display would be optimal, but such a display cannot be installed in the Priora without major modifications to the ventilation system.
The largest we could fit was 4.3 inches. In essence, this is a ready-made navigator, right in a standard case, covered with a plastic plug. Among other things, it also forms a small shelf in front of the display, where you can put a pack of cigarettes or a mobile phone.
Navigation control is assigned to two buttons on the sides of the display - on/off and zoom. Everything else is touch screen, just like in PND.
But even such a simple installation required a whole range of tests and approvals. The fact is that VAZ, as an automaker, is captive to a great many GOSTs and standards that are little known or completely unknown to the general public.
Let's say, according to safety standards, there should be no strict rectangular transitions in the cabin at all, roundings are required.
They are clearly standardized and there is a whole method for testing them - with a special ball, which should roll smoothly, without sudden “falls” and “bounces”.
There are even more requirements for ergonomics and visual perception of information - using the navigator should be convenient for people of any reasonable height and build. In general, having started work at the end of 2007, the first samples that suited everyone were only made at the beginning of 2009.
Virtual test for injury safety, according to UNEC Regulation 21.
Ergonomic test and calculation of viewing angles from the driver's seat.
Just then there was a surge of interest in GLONASS, they talked about it, it was proposed to introduce it (and this process even began!) on public and official transport throughout Russia.
Of course, not using GLONASS in the navigator for Priora would mean silent sabotage of the state program! But, alas, there were no ready-made PNDs of the required size with GLONASS, so we had to add an external receiver.
NAVSTAR/GLONASS chips did not exist then; KB Navis promises to make the first such combined receiver only in the middle of this year. And domestic receivers, assembled in bulk, were quite expensive, $130-170 apiece.
And this is comparable to the cost of the navigator itself! The creators managed to find a certain Chinese receiver, which, with a large order, could be made for $30. This is a Russian development, only produced in China. GLONASS requires an external antenna, but it will be hidden inside the dashboard, near the edge of the windshield.
This is what the navigator looks like with a panel overlay.
Things weren't going smoothly with the head unit either. Standardly, the Priora has space for 1DIN, plus a shelf under it, which allows, if necessary, to expand the installation space for 2DIN.
But to take a ready-made “double-din” GU and pass it off as a factory one, even by attaching a LADA nameplate to it, would be too simple.
The task was precisely to make the control unit non-standard, suitable only for this car - this almost eliminates criminal interest in it and allows you to “play” with the design of the console.
(We use the phrase “head unit” as a well-established term in professional circles, meaning that the common folk “radio tape recorder” does not reflect the functional essence and, strictly speaking, should not be used in this context. A radio tape recorder is a combination of a tape recorder/player and a radio, There is no tape recorder in the device described.
It would be more correct to call it a CD receiver, but this probably sounds unnecessarily cumbersome to many. Unfortunately, the word “radio tape recorder” as a definition of all head units has become entrenched in everyday life, but we would not like to cultivate this error.
This is a substitution of concepts, and this way you can go quite far, agreeing, as in Voinovich’s famous novel, to call black white... Let there be a “head unit” or even a “radio tape recorder” - but in quotes. OK?)
We had to choose one of two GI concepts - with a large display or with a large encoder (knob).
The display covering the entire area of the GU looks impressive and modern, but if you have a separate monitor-navigator, it is not really needed, especially in a place that is obviously not the best for viewing.
In addition, the display is not a cheap thing, and the Priora is, to put it mildly, not a luxury car; raising its price even by 10-20 dollars is very undesirable. In general, we chose the concept with an encoder.
For a conveyor installation, the number of installation operations is very important, so we had to develop an intermediate container in which the GU simply snaps into place in one movement.
The panel itself is assembled in advance, the container is rigidly attached to the frame - and the GI itself is installed at the last moment.
The time standard for installing a GI on a conveyor is 51 seconds! We even carried out four crash tests to ensure the strength of the fasteners and to refine them.
A few words about the radio of the “normal Kalina-2”
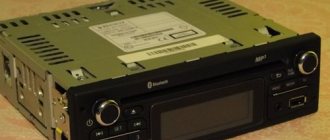
When looking at the “device”, which AvtoVAZ designates with the numbers 2190-7900010-40, it immediately becomes clear that installing such a device in a standard 1DIN compartment will not work. VAZ cars in the “Norma” configuration come from the factory with an empty compartment (its height is 1DIN), and in the “Norma+” radio tape recorder occupies the entire central part of the console. That is, the owner has the following choice: you can install a standard VAZ radio, but then the easy-to-use shelf will disappear, or you can look for and install a unit of standard height. The VAZ radio does not fit into the 1DIN high compartment. There is no touch screen on it, but under the “twist” there is a whole array of plastic buttons.
VAZ push-button radio for Kalina-2
Such a radio, as we see in the photo, can be found in the only configuration of the Kalina Cross. The “device” in question differs from the Granta radio in the presence of a frame with holes. There were rumors about the release of specific units intended only for crossovers, but in the end everything turned out to be simpler - VAZ always ordered radio tape recorders from Itelma, and this tradition was continued. What exactly is offered as part of the “budget” head unit? Let's try to figure it out.
First of all, let's say that the main task of a built-in radio is to play music. To do this, it provides two hardware ports (USB, SD) located on the front panel. Radio stations can be switched using the lower buttons, and the device can also perform the functions of a Bluetooth headset - it’s not for nothing that there are “Receive” and “End End” buttons. The amplifier power is standard, the number of channels is four.
Standard audio preparation
Using my station wagon as an example, I would like to write a little about the standard audio preparation of the Lada Kalina. As far as I know now, all cars, starting with the “norm” configuration, have audio preparation, which includes:
- Plugs for connecting the radio
- Wires for front speakers
- Wires for rear speakers
Now I will describe everything with photographs and in more detail below. So, the plugs for connecting the radio are located under the plug below the heater control unit. If you remove this plug, there will be two gray and brown connectors.
The radio is connected very simply, gray color is up, brown color is down. As for the wires in the front doors, to get to them you need to remove the front door trim. The example below shows the conclusions already in the door trim cut under the column:
But at first we had to search a little for the rear ones; on the left side the wire was quickly found, since it was located near the trunk light:
And the right one is located under the trunk trim, glued with tape to the metal of the rear arch, so you will first have to look for it with your hand under the trim or remove it altogether. Here is an example of the already routed wires:
Many potassium growers wrote that they don’t have any wires even at the “normal” level, but I was convinced of the opposite. For example, my 2011 Kalina Station Wagon. I tried to connect the rear wires to the speaker, everything works fine, the music flows. So installing music with standard audio preparation is as easy as shelling pears.
Source
Advice for future and current owners of VAZ push-button radios
The release of standard VAZ “devices”, devoid of an expensive “sensor”, has been expected for a long time. Back in the first half of the year, we were told that such a unit should appear in the fall. As you can see, VAZ was embarrassed to build a graphic display into the radio, and all information on the screen is displayed in standard symbols. The only available backlight color is emerald (there will be more of these colors in crossovers). The device is a “turn on and listen” device, and in standby mode the display displays the time.
The fact that the manufacturer placed the USB port right on the face of the radio is not bad. Now owners have the opportunity to quickly connect a USB drive, or use the standard port as a power source. It will be easy to connect a smartphone or tablet and place it on the dashboard. This is cool! It is recommended to immediately install a short USB flash drive into the USB port to protect it from dust. And it’s also advisable to occupy the port intended for SD cards with something.
All radios produced by Itelma LLC are well aware of a file system such as FAT32. This means that you need to format flash drives in it, onto which audio files in MP3 and WAV format will then be recorded. The signal to the speakers standardly installed in the doors comes without distortion, and the power of the built-in amplifiers is unlikely to seem insufficient to anyone. Enjoy it for your health.
We can state the fact that the new head unit developed by AvtoVAZ turned out to be more than twice cheaper than the touch media center. So, there is no need to succumb to the persuasion of sellers to buy a 7900010-40 radio for 10, 8 or 6 thousand rubles. However, we will leave the choice to the owner.
In fact, VAZ acted very unusually by releasing another “device” in a non-standard form factor. Car dealers should not have any problems with the availability of one or another radio, since the car plant has been working on pre-orders since September. True, it will be difficult to purchase the “device” in question separately from the car, unlike luxury media. The main thing is that two requirements are now met at once: the owner does not overpay for unnecessary options, and at the same time uses only standard VAZ equipment. It would have been like this a long time ago... Let's say if the radio was 1DIN high, it would be equipped with a removable muzzle, but what's good about that?
