First steps when repairing a car. instructions on how to remove the standard radio on a Lada Kalina
To change the standard radio on a Lada Kalina you need
Remove the removable top panel from the radio;
Remove the plastic frame;
We take two keys that come with the car. We insert them on the sides of the radio between the radio itself and the tunnel. We lift them up and pull them towards us;
Thus, we take out the radio from the tunnel;
Next, disconnect the two connectors with wires and the antenna connector;
At this point, you have completely removed the Lada Kalina radio and can replace it with a better one.
When choosing a new radio, there are several factors to consider. To begin, select a radio of the appropriate size. For all VAZ cars this is a 1DIN radio. The connector is supposed to be standard ISO. The standard number of connected speakers for a cheap radio is 4 pcs. In terms of functionality, you can choose any radio to suit your taste. Currently, radios that read CDs have begun to lose popularity. At the moment, it is absolutely enough to have a USB connector or a slot for an SD memory card. In addition, there will also be an FM receiver as standard. For owners of mobile phones with Bluetooth, it would be useful to have such a module in the radio for making hands-free calls or listening to music from the phone. The presence of an AUX jack is also starting to fall out of favor.
Next, you need to pay attention to the output power of the amplifier of such a radio. Typically, for a 1DIN radio, the manufacturer claims a power of about 50 watts per channel. Those who believed in this figure will be upset, because the real power of such an amplifier is from 15 to 22 watts per channel. To make sure of this, read the specification of the power amplifier chip installed in the radio.
If the speakers installed in your car are powerful enough (usually this can be said about all speakers, not counting the standard ones), in other words, it makes sense to install a separate power amplifier. Then it seems like it makes sense to install a subwoofer as well. And by the way, when choosing a radio, pay attention to the presence of an output for connecting a subwoofer. If you decide to install it in the future, you will not have to change the radio a second time.
Fortune on the roads and all the best.
What kinds of mounts are there for radio tape recorders?
Different manufacturers use different types of fasteners:
- Using fixing elements on the side of the device;
- Using elastic latches;
- Using bolts or screws.
With clamps, a frame is used that is inserted into the “shaft”. The side walls of the car radio have special recesses, and there are tongues on the frame.
To dismantle the head unit you need keys. With them you can easily straighten the tabs or bend them. But this type of fastening has a drawback - the frame can become deformed.
The second type of fastening is more reliable - it involves the use of elastic latches. They can be seen on the side and top walls. These latches fit into special seats in the frame, the simplest and most reliable way to mount the radio.
In some car models, in order to ensure reliable fastening of the multimedia system and to eliminate the risk of failure due to vibrations, installation is carried out to the dashboard, or rather to the power elements. The dashboard is held on the pipe using metal corners. Such fasteners are used in premium cars Mazda and Toyota.
The option of installing a radio in this way is considered additional, but car audio installers often remove the corners, and installation is carried out without fixing elements. This option is not reliable.
Single- or double-din radios are mounted in the dashboard tunnel without any additional fixation. It is customary to mount the device on the center console.
The media system is latched with ordinary plastic latches. This is a screwless fitting - you can see this even on the Lacetti.
With this installation, the radio simply hangs and is not able to withstand even minor shock loads. There are holes on the sides of the device, but most motorists do not know what they are for.
It turns out that these holes are made for reliable installation of the device to the dashboard using corners.
This is a factory fastener that complements the standard fastener.
Rules for choosing an audio system
Before you begin installing the radio on Kalina, you should select it at a car dealership or hardware store. The choice should be approached carefully and carefully. And before going to the store, it is better to decide on your desires and capabilities.
When choosing a radio for your car, you should decide which music media will be used as the main one. This will help you save some money. If, for example, a car owner is sure that he will not need a CD or cassette player, then why should he overpay for a radio with these functions.
For those choosing CD players, there is one minor drawback that manufacturers are trying to combat - the loss of music fragments due to shaking during a trip. But progress does not stand still, and the mechanics are improving. The presence of ISO in the car and, accordingly, in the audio device will simplify the connection. The presence of a USB adapter will allow you to play music from various media.
Pioneer model range
When choosing a car radio, you should pay attention to the power ratings. They have a maximum and minimum threshold. Maximum power is rarely used, except in extreme situations. The choice should be made according to the rated power, that is, the one that is used most often. Manufacturers often indicate only maximum values on packages, so when choosing, you need to carefully study the instructions (passport), and not the box.
Removing the device using standard keys according to the instructions
So, there is a radio and standard keys. But that's not all, you will need an additional tool in the process.
Required Tools
To work you will need:
- Keys for dismantling. Depending on the specific model and key manufacturer, there may be 2 or 4;
- Knife.
Sequence of removing the car radio from the niche
First of all, remove the front panel, and if necessary, then the decorative parts. On older models, this frame covers the key connectors. This is no longer the case with the new ones.
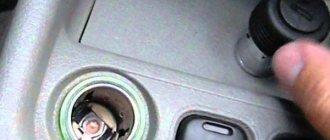
Then the holes for the keys become visible and easy access to them is provided. The holes can be seen on the side walls of the head unit.
Then the keys are inserted into special grooves - they need to be inserted until they click. In some cases, it may be necessary to force or rock the fixture from side to side. If a click occurs. You can safely pull the radio out of the mine.
If the head unit cannot be removed, it can be screwed to the panel with an additional pin. In this case, it is necessary to remove the dashboard to access the device from the back side.
Video
The video shows in detail the entire process of dismantling the car radio using standard keys.
Types and individualities of software configurations
By their types, operating systems control the computer brain (Brain is defined as the physical and biological matter contained within the skull and responsible for basic electrochemical neural processes)
Any accessory can be divided into two groups:
- Regular (stock) software (that is, software - a set of programs for computers and computing devices)
, manufactured for a certain type of device by a company that develops computer programs. And established in industrial conditions by the car radio manufacturer under a license agreement. - Custom or, more simply put, homemade. Made by a programmer independent of large companies/
Based on the worldview of people involved in the development and implementation of computer innovations, every program contains at least one error. It is precisely for this reason that during the operation of electrical equipment there is a need to improve it. This is what leads to the emergence of new versions - firmware, a regular operating system.
Before we continue on the topic - firmware for the standard radio of the Lada Kalina 2, I would like to warn the owners of any brand of car about the consequences of the decision to reinstall the standard software.
Independent configurations in the technical device and OS of the car radio automatically deprive you of the right to warranty service provided by the manufacturer when purchasing their equipment!
How to remove a radio without keys
A popular option for dismantling standard radios is keys to other devices. You can also remove using plates, rods, mounting tape.
What tools will you need?
To work, you will need two pieces of steel strip 30 cm long and 1 cm wide. You should also use protective gloves. You may need a knife.
Removal process
In case of using steel plates, the steps will be as follows:
- First of all, insert the first plate into the key slot on the radio;
- Next, insert the second plate;
- Two plates are brought towards the center of the device and pull the car radio towards you.
It often happens that an inexperienced car owner cannot pick up the latches the first time. If it doesn’t work, then the procedure should be repeated.
Another popular method is removal with incomplete keys from other devices.
This is done as follows:
- They take keys from other devices;
- Push it into the hole until it stops;
- Move the keys in different directions;
- Calmly take out the device.
If you couldn’t find the plates or keys, you can use fountain pen refills—you need four refills.
This method is well suited for foreign cars:
- Look for four ballpoint pen refills;
- They are inserted around the perimeter of the head unit;
- After this manipulation, the radio can be pulled out.
The rods are installed one by one, but the most important thing is that the rods need to be inserted not into the gaps between the dashboard and the device, but into special holes.
It is in these holes that there are latches that will work when you insert any object into them.
You can try the original technology. This method is more applicable for radios with navigators:
- Two strips are cut from the mounting tape - width 8 mm, length 10 mm. Tape thickness – no more than 1 mm;
- The strips are inserted into the holes until they stop;
- Carefully move apart and release the fastening clips;
- They take out the radio from their mine, but they can’t let it go.
Important points
Any actions, especially with the use of steel strips and other non-standard tools, should be carried out as carefully as possible.
If the radio is encoded, then there is no need to disconnect the battery terminals before work. When removing a device, it is important not only to get it out, but also not to damage the connectors.
Video
In the video, the author shows popular methods for removing radio tape recorders without special tools. You can see in detail how this is done.
Second installation option
There is another way to connect the radio, which will ensure that it is turned on not through the ignition switch, but using a separate button.
First, you should buy a suitable button and a contact block with the wires intended for it at any auto store. All this is not very expensive and will require no more than one and a half hundred rubles. Moreover, it doesn’t matter what the button is if the owner does not need order on the console. It can be from the main beam, or with a different image, the main thing is that it fits under the connector for spare buttons, where the plug is located. The only point is that it is advisable to choose a button with an indicator.
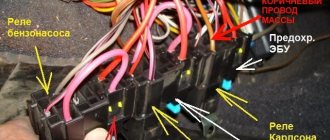
Mounting blocks for installing an audio system
If the wires of the block turn out to be short (and this often happens), it is better to extend them in advance by soldering. Twisting is not suitable here and should not be used.
The button is connected in the following way:
- connector A - for grounding;
- B - passes from the side lights illumination;
- C - removed from the block purchased with the button;
- D - powers the power indicator;
- 1 — battery wire (red);
- 2 - red radio wire.
Decoding problems
Some manufacturers equip their head units with special protective mechanisms. They operate approximately 10 minutes after the voltage in the on-board network is lost. This is a protective measure designed to protect the radio from being used after theft.
The next time you turn it on, the device will ask the user for a code. If the kit includes a card with a code, then it can be easily entered; if there is no documentation, then decoding is possible using software for a computer or mobile devices. The serial number will be useful for this.
Dismantling a standard music center
Often, standard head units (aka radios) are removed using the method described above, since they are attached to 2 or 4 clips. For example, the factory player on a Lada Priora car is held on by two latches, and to unlock them, thin steel strips must be inserted between pairs of radio channel switching buttons “2” - “3” and “5” - “6”.
Advice. Before you start disassembling the factory radio, find out about the method of its fastening, so as not to poke the pieces of hardware at random if you do not find technological openings.
In Priora, stripes must be inserted between the buttons
To remove car radios that are fastened with screws, you need to prepare a simple set of tools:
- thin flat screwdriver or knife;
- Phillips screwdriver;
- set of small sockets (from 6 to 10 mm).
With this mounting option, the factory turntable must be unscrewed using the heads
On different brands of cars, standard players can be mounted in different ways, but the principle is approximately the same: the device is screwed to brackets that are covered from the outside with a plastic lining. As an example, we propose to consider removing the radio on a Korean Hyundai Solaris car, performed in the following order:
- Use a flat-head screwdriver or knife to pry up the lower corner of the plastic decorative panel framing the stereo. Pull the edge and grab it with your hand.
- Gently pull it towards you and release the first latch, and then move around and unlock the rest.
- Holding the panel with both hands, remove it and, if necessary, disconnect the connectors located at the bottom.
- Unscrew the 4 mounting screws with a Phillips screwdriver and pull out the radio.
Factory car radio Hyundai Solaris
Advice. When dismantling any player, do not rush to disconnect the battery from the on-board network, since the device will power down in 10-15 minutes. It may be blocked and the next time you turn it on, it will require you to enter a security code that you do not have.
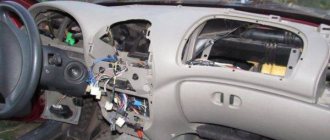
How to remove the center console on Kalina-2
VAZ offers Kalina-2 cars with two interior trim options. The first is used in luxury trim levels (where a media center is installed), the second is an integral part of the “Norma” and “Standard” trim levels. We will talk about what methods exist for dismantling the climate control module panel and the radio panel. Moreover, one of the considered options is suitable for the “Lux” configuration, the other – for more affordable versions (Norma, Standard). The dismantling methods in the two indicated cases are noticeably different. Let's start looking.
How to remove the center console in a luxury package
Let's say it was decided to dismantle the panels located on the center console. You can see that there are two of them. One is the front panel of the air conditioner, the second protects the radio and contains air duct grilles in its design. These two parts are not connected to each other. However, it will not be possible to remove the radio panel unless you first remove the climate control panel. Below it are metric screws (A, B) that secure the media center shield from below.
Central console of Kalina-2, Luxury package
The question arises, why are we even talking about how to dismantle the center console, since after this the car can be removed from warranty? Usually the shield is removed to install additional equipment (for example, a rear view camera). But connecting any equipment, the use of which has not been agreed upon with the dealer, will void the vehicle warranty. If you haven't changed your mind yet, continue reading.
The climate control shield is held in place by 4 clips, which are located on the bottom and top sides of the part closer to the corners. Having disconnected even two clips (1, 2 or 3, 4), you can try to pull the panel towards you to dismantle it. But if you have no experience working with such a mount, it is better not to try - you may scratch the outer surface of the shield. In fact, all you need to do is use a flathead screwdriver (some people use a thin-bladed knife and a screwdriver).
To dismantle the climate control panel, you do not need to first remove the control knobs located on it, if we are talking about the “Lux” package. The same applies to the “Norma with climate control” package. In all other versions, a stove control unit is used, the design of which does not allow removing the shield without first dismantling the handles. Be careful.
If the climate control panel is removed, all that remains is to unscrew two bolts and just as carefully remove the media center panel. Additionally, this part is secured with nine clips:
- Two clips are located at the level of the border of the air duct grille;
- Three clips on each side board are located at equal distances;
- Three more clips can be found on the top side (the windows they fit into are circled in the photo).
Based on the information listed above, you can try to dismantle it yourself, but it is still better to entrust this work to a specialist. It is advisable not to use a hammer, chisel, or grinder when performing any actions, as shown in this video. However, here we are talking about the “Norma” configuration, which we will talk about further.
Advantages of the latest technologies
MMC Lada Kalina 2 is characterized by a lightweight control system. Now all the necessary functions can be obtained with 1-2 taps on the screen. The system is equipped with the most multifunctional resistive screen. Unlike the standard Kalina radio with a capacitive version, the resistant screen has improved performance features. The device is able to operate without failures in all temperature conditions.
Lada owners often complained that in sunny weather it became impossible to use the car radio. This is due to countless glares that make characters on capacitive screens virtually unreadable. The designers, when developing the 2nd version of the radio, took this shortcoming into account.
If desired, the car owner can choose a model with a mini-visor that protects from glare.
The largest area of the MMC Kalina 2 monitor is 7 inches. It is based on the Windows CE 6 operating system. The version developed specifically for radio tape recorders has close to good properties. It takes a few seconds to turn on the device. The RAM size ranges from 128 to 256 MB. Firmware for the Kalina 2 radio has significantly improved the technical capabilities of the equipment. Now they are the following:
- support for wav, wma, mp3 formats;
- 6 programmed colors for playing music;
- the Lada Kalina 2 radio monitor displays information about the song and album during playback;
- it is possible to play video in wmv format;
- the multimedia system supports the highest video resolution at 320*240 pixels;
- it is possible to play video files of other formats, but for this you will have to use a convector;
- availability of FM radio;
- micro SD card support;
- Lada radio firmware makes it possible to view images saved in bmp, gif, jpe, jpg, jpeg formats;
- The largest photo size is not limited, but if it exceeds 2 MB, then the Kalina multimedia firmware will open it from 2 to 10 seconds.
Dismantling the console containing the stove control unit
As you know, some trim levels of the Kalina-2 car do not have climate control. Here the driver can only control the operation of the stove. The stove control panel is held in place by 4 clips. In general, the mount used here is the same as in versions with climate control, but you won’t be able to remove the control unit panel unless you first remove the three control knobs.
Let's say we managed to dismantle the stove control unit panel. Then, all that remains is to remove the top flap, which is adjacent to the air ducts. This part itself needs to be pulled towards you from below, but first you need to unscrew two screws (they are circled in the figure). You won’t be able to simply grab and pull out the panel; you need to tighten the side clips with a screwdriver. In fact, the entire process is shown in the video we've posted below.
Any device of standard size 1 DIN can be installed in the compartment intended for the radio. You don't need to dismantle anything to do this. It is difficult to imagine a situation in which it is really necessary to remove the center console panels, if we consider the “Normal” or “Standard” equipment. However, you can use the information provided here. Remember that the owner performs all actions at his own peril and risk.
What do we need?
Before you get to work, you need to prepare well:
- Get a set of keys of different types that can be used to remove factory equipment.
- You will also need a set of screwdrivers that are equipped with tips in the shape of stars and hexagons.
- An ordinary stationery knife will also come in handy.
- You will need a flat object to remove some components. A plastic card copes with this task perfectly.
- Well, don’t forget to find tweezers that are suitable for removing cladding in some cases.
If you want to remove the radio yourself, then you need to be aware of some tricks, which we will talk about. Let's start with the fact that in each car the tape recorder has its own configuration, but most often it has four round holes and two rectangular ones.
Don’t forget that different devices need to be removed in different ways, but if you have a full set of keys and screwdrivers at hand, which should come with the equipment, then there’s definitely nothing to be afraid of.
Important! It often happens that you need to somehow improve the equipment in your own car. Accordingly, it is worth understanding some of the subtleties that will help you set up the necessary equipment without the help of specialists, for example.
Multimedia 7″ system on Kalina 2.
On Novaya Kalina there is a new multimedia system with a touch screen and a separate control unit. We first encountered it in the luxury version of the Lada Granta. There it is located a little differently, but has the same screen and functionality. In the second Kalina, the system was equipped with a sun visor. The control unit is located slightly lower, under the air duct deflectors:
Below is a brief guide to the main points of working with this system.
Specifications
Touch Screen Resolution:
800×480
Supported music formats:
MP3, WMA, WAV. If there is accompanying information in the audio file (logo, description), it is also displayed on the screen.
Supported video formats:
WMV with a resolution of 240x320 px. To convert your video files, you can use any available converter. When using an alternative player under WinCE 6.0 (for example, TCMP), it is possible to play common formats, for example *.avi up to HD quality.
Supported photo resolutions:
*.JPEG, *.JPG, *.JPE, *.BMP, *.GIF, *.PNG.
Supported storage media:
SD and SDHC (up to 32GB), USB (up to version 3.0, up to 64GB) with FAT16 or FAT 32 file systems.
Advice for future and current owners of VAZ push-button radios
The release of standard VAZ “devices”, devoid of an expensive “sensor”, has been expected for a long time. Back in the first half of the year, we were told that such a unit should appear in the fall. As you can see, VAZ was embarrassed to build a graphic display into the radio, and all information on the screen is displayed in standard symbols.
The fact that the manufacturer placed the USB port right on the face of the radio is not bad. Now owners have the opportunity to quickly connect a USB drive, or use the standard port as a power source. It will be easy to connect a smartphone or tablet and place it on the dashboard. This is cool!
All radios produced by Itelma LLC are well aware of a file system such as FAT32. This means that you need to format flash drives in it, onto which audio files in MP3 and WAV format will then be recorded. The signal to the speakers standardly installed in the doors comes without distortion, and the power of the built-in amplifiers is unlikely to seem insufficient to anyone. Enjoy it for your health.
We can state the fact that the new head unit developed by AvtoVAZ turned out to be more than twice cheaper than the touch media center. So, there is no need to succumb to the persuasion of sellers to buy a 7900010-40 radio for 10, 8 or 6 thousand rubles. However, we will leave the choice to the owner.
In fact, VAZ acted very unusually by releasing another “device” in a non-standard form factor. Car dealers should not have any problems with the availability of one or another radio, since the car plant has been working on pre-orders since September. True, it will be difficult to purchase the “device” in question separately from the car, unlike luxury media.
The main thing is that two requirements are now met at once: the owner does not overpay for unnecessary options, and at the same time uses only standard VAZ equipment. It would have been like this a long time ago... Let's say if the radio was 1DIN high, it would be equipped with a removable muzzle, but what's good about that?
How to remove the center console (panel trim)
The photo shows the general diagram of the fastenings of the central panel trim of the new Kalina. in red are clips that simply snap off under force. Blue - fastening screws that should be removed with a screwdriver.
- Remove the control unit for the heater and air conditioner by unsnapping the 4 clips around the perimeter;
- Remove 2 screws securing the top cover;
- Remove the top panel trim by snapping 3 clips on each side;
- We remove the overlay from the upper engagement with the panel.
The process of removing the plastic dashboard trim is also shown in the video:
How to remove the radio on Lada Kalina 2
To remove the MMC of the new Kalina, first remove the plastic panel trim (see above), and then remove the fastening screws.
Now you can familiarize yourself with the sticker on which the radio model is indicated, and based on this, select the appropriate firmware. You can also disassemble the MMC to replace the standard amplifier chip with a more powerful analogue. Don't forget that you can connect a rear view camera or amplifier to the standard radio.
Tools:
- Small flat screwdriver
- Driver for socket attachment
- Knob attachment 10 mm
Parts and consumables:
- USB car radio Hyundai H-CCR8086
Notes:
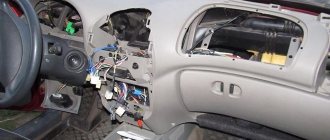
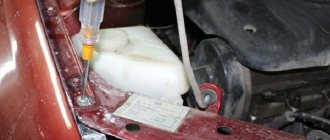
The standard radio of the Lada Kalina was not installed in all car configurations. Where there is none, there is a plastic plug pocket (box for things). Connectors with power wires and speaker wires, as well as an antenna wire plug are connected to the box. Below we describe how to install a Lada Kalina car radio with your own hands.
1. Disconnect the wire from the negative terminal of the battery.
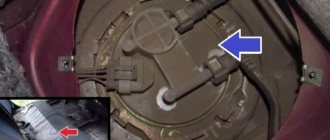
2. Using a screwdriver, carefully remove the storage box from the mounting hole.
3. Disconnect the wiring harness connectors and antenna connector from the storage box.
4. Connect the wiring harness connectors and the antenna connector (if provided) to the car radio.
5. Insert the radio into the storage box (until it clicks). Next, on the Lada Kalina, the installation of the radio and its configuration are carried out in accordance with the instructions supplied with it.
The article is missing:
- Photo of the instrument
- High-quality photos of repairs
Good day, dear Drayvovites! I’m not the only one who is interested in the topic of installing double-din radios in LK2, so, by popular demand, I’m posting a manual on how and why. Photo attached)
So, the other day I finally decided to pick apart the center console. I’ll tell you right away! The plastic, although it seems hard, is actually scratched very well by the tool, and with great effort it is dented! Fortunately, I have an insulated instrument, the insulation softened the load and made it more uniform! So I don’t advise you to pick this whole thing with simple “knives” and screwdrivers with bare “stings”, thank God, I did everything in such a way that there wasn’t even a scratch left, there is one, but it’s behind a plug, in general, little things))
Nuances of installing an audio system
Dismantling of the standard audio system is completed
Without knowing all the intricacies of connecting the radio, it will be impossible to carry out the installation correctly, as a result this will lead to rapid discharge of the battery.
Connect the radio in parallel sequence with the red and yellow wires. This connection allows the system to be turned on and off only using a button on the panel of the device itself. Sometimes the radio circuit is specially designed so that the amplifier is powered in standby mode. Such a system consumes more energy, so the battery drains quickly.
What is the correct installation of a radio? To begin with, you should highlight 4 main wires, each of which has its own color and performs a specific function. The black wire goes to ground, the yellow one provides power to the memory and the audio system itself, the red one provides a signal to turn on the MMC, and the blue one turns on the antenna and other possible devices.
Before connecting, professionals recommend assembling a simple circuit that will allow you to connect the radio through the ignition, due to which the battery will be charged much longer. When working with wires and circuits, you will need to pinout the connector. This will make the circuit easier to work with and understand.
The circuit is assembled in the following order:
- two diodes are soldered onto the board - VD1 and VD2;
- the red wire is soldered to the VD1 anode;
- another red wire is soldered to the cathode of VD1 and VD2;
- both blue wires are connected to the VD2 anode.
The joints can be protected with special cambrics - this will avoid breakdowns.
Before connecting the circuit, you will have to remove the radio and the slide; it is not necessary to remove the console.
All wires must be connected in the correct order:
- wire No. 1 is connected to the contact from the rear window heating button;
- The 2nd wire is connected to the multimedia system;
- wire No. 3 is soldered to blue, which is responsible for turning on the antenna;
- The 4th wire is soldered to the blue antenna wire.
The previously assembled board can be secured inside the torpedo with a fixed tie. When connecting all contacts, only the soldering method, insulated with heat shrink, is used. Screwing of wires is excluded. Before starting work, be sure to disconnect the battery.
With this connection, the radio will turn on only when the ignition is turned on, but if it is turned off, it will continue to work until the driver turns it off. Restarting is possible when the car is started again.