Print this article Font size 16
It's no secret that you can't get far in a car without gasoline. Therefore, for the engine to operate, it is simply necessary that the entire fuel system functions in optimal mode.
In many ways, the fuel pump is responsible for supplying fuel to the engine, which the VAZ 2114 model is not without, of course. To solve a problem with a faulty fuel pump, you need to make sure it is at fault.
Replacing the fuel pump mesh on VAZ 2113, VAZ 2114, VAZ 2115
Welcome! The fuel pump mesh - it acts as a filter as such, that is, when the fuel in the gas tank is pumped into the car engine, it first passes through this very mesh, which in turn is the fuel, or, more simply, cleans the gasoline from dirt and small specks that are very harmful will affect if it gets into the car engine, but this mesh needs to be changed from time to time, because when it is clogged, fuel does not pump into the engine as it should, that is, it passes very poorly through the clogged mesh and therefore the car drives jerkily and sometimes even doesn't start well.
Note! To replace the mesh that is located in the fuel pump, you will need to stock up on: A basic set of wrenches, as well as screwdrivers; for convenience, you can also stock up on a tubular wrench and gasoline, but you only need to stock up on them if you are not going to replace the fuel pump mesh , but just rinse and put the old one in its place!
Summary:
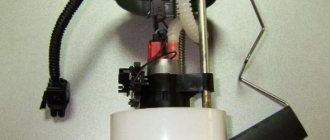
What causes the fuel pump screen to become clogged? One of the main reasons is the poor quality of the fuel poured into the car, because if you have already read the text that was written earlier (Above), then you understood from it that the mesh serves to clean gasoline from various contaminants and thus it is, as it were, serves as a filter, which, if clogged, will need to be replaced with a new one, but this filter, that is, the mesh is clogged only from one thing, from low-quality fuel in which there are particles of debris, various kinds of deposits, etc. This is why this mesh gets clogged. Where is the fuel pump screen located? It is located right in it, that is, it is located at the bottom of the pump, so that you can see it in more detail, then in this case, remove this pump from the car and look at its very bottom part, this is where this mesh will be installed on it, For more details, see the photo below:
When do you need to change the fuel pump grid? It needs to be replaced if your car starts to run worse, it starts to drive in some jerks, and especially if the grid is clogged, if you immediately get into the car and start it right away, then most likely it will not start at all, because the grid is clogged and the fuel it goes through it very poorly.
Note! In fact, if you immediately turn the key and start the car without waiting for the gas pump to pump gasoline, it will be very incorrect, and even most likely the pump with a new mesh may not start the car the first time either!
Lada 2115 Queen NeFertiti › Logbook › Inspection of the gas tank and pump mesh... + AGAIN the air leak is buggy...(((
Hi all! Having gathered my strength, I decided to climb into the gas tank to inspect and establish the reasons for the strange behavior of the car... the reasons are here... Previously I wanted to compare the pressure before and after the replacement... BUT none of my friends had a device for measuring... pIchal... I thought about it and bought it for myself so that it would be ...maybe come in handy on the farm))) (600rub)
I took measurements before replacing the mesh... in the end we have...
This was followed by disassembly and removal of the module and mesh... in the tank I expected to see a worse picture, but what I saw was also not pleasing...
You scooped up all the gasoline from the tank with a glass... it turned out to be about 9 liters... I started again... (read about this below...)
I wiped off the residue in the tank with gauze...
I fill in 5 liters and again a little rust flows out of some cracks... We repeat the scooping and again the gauze is used...)))
The second time, nothing else seemed to float up (settle) at the bottom...
We fill up with gasoline (9 liters), rock the car and see that the tank is clean and so is the gasoline...
We put everything back together and connect it, start the car... I forgot to take a photo, but I’ll say this... The pressure at XX has not changed, but with the gas boost it reaches 3.0 and that’s it... the regulator resets the excess...))) cool)))) at least I achieved something after this procedures…)))
(previously it did not rise above 2.7)
By “+” I can note that the speed has stabilized, the car does not jerk when starting from a cold place, and it seems like dynamics have appeared...
Finally, to this part of the post, I’ll show you what the mesh on the pump looks like after 30,000 miles... I think it was the reason for the dullness when accelerating because the pump stupidly overheated and could not provide the required amount of fuel...
Now I’m wondering how long it will take to change it? it's not business to drive like that(((
Next we move on to the second part of the recording and to those mysterious 9 liters that I scooped out of the tank... and here’s the thing...
Before getting into the tank, I tried to look for gasoline as much as possible so that I had to scoop less... at the time of disassembling the system in the tank there was: -according to the BC 4.6 liters...
-according to the tidy, the needle was already at zero and lit up at 5 liters according to the BC
... strange... not true ? because as we know, the light bulb seems to light up when there are 6-7 liters of residue... Who will solve the riddle.
In fact, there were about 9 liters of fuel in the tank. neither one nor the other guessed or gave the necessary testimony...
After I filled and assembled everything in place, I filled the required amount of fuel into the BC... BUT the needle never came to life...(((
I think I should try filling the tank full and see... maybe it’s caught on something?
I look forward to your thoughts and comments...
Thank you for your attention! All the best, smooth roads and clean gasoline. )))
How to replace the fuel pump mesh, also known as the fuel pump, on a VAZ 2113-VAZ 2115?
Note! Before we start a few words about this mesh, in fact, you don’t have to replace it with a new one, but you can first remove it and then wash it in gasoline; some dirt from such washing will come off the mesh and fall off, but still not all the dirt will fall off, so the best option, of course, would be to replace this mesh with a new one, and besides, it only costs around 50-130 rubles.
But still, if you find yourself in a situation where your mesh is very clogged and the car is moving jerkily, and you don’t have this mesh at hand, then you can really remove the clogged mesh and wash it in gasoline, and after all that it would be good to blow it out compressed air under pressure, for example a compressor, pump, etc.
Removal: 1) At the very beginning of the operation, remove the fuel pump itself from the car. (For information on how to remove the fuel pump, see the article: “Replacing the fuel pump on a VAZ”)
2) Then, when you remove the pump, take it in your hands or continue to hold it in your hand (Depending on the situation), and then turn the pump over so that it is directed from the bottom to the top, in general, so that the mesh is in front of your eyes, and after that, grab this mesh with your hand and simply pull it up, thereby it will move away and disengage, that is, it will be removed from the fuel pump.
Installation: The new mesh is installed in the same way as it is removed, but only in the reverse order, that is, you take the new mesh in your hands and simply put it on the place where the old mesh stood, but only put it on until it completely fits and rests, and when it is put on, check whether it sits well on the fuel pump or whether it is wobbly, and after checking, install the fuel pump in its place.
Note! When everything is in place, check how the fuel pump works with a new mesh, to do this, start it first, it should start perfectly (First time), but only if the engine is working properly, and after it starts, drive a little on it, when driving, pay attention to how the car moves, that is, it should not twitch and its movement should be smooth!
Additional video clip: You can see in more detail about how to replace the mesh on a fuel pump using the example of replacing the same mesh on a VAZ 2110 car, they are replaced there absolutely identically, so watch the video and you’ll understand everything right away:
Source
Frequency of procedures
There is no set time frame for cleaning this part.
Some are forced to clean the mesh every 50,000 kilometers, while others have to do this no earlier than the car has traveled 150,000 kilometers. However, there are cases when the manual for using a particular car indicates a specific number of thousands of kilometers, after which it is worth changing this part. However, even before this point it may also be necessary to clean the fuel pump mesh. It is not difficult to make it yourself.
Step-by-step instruction
Working with the mesh takes no more than half an hour, since the driver does not need to disassemble half of the VAZ 2114 car to get to this unit. To work, you will need a standard set of screwdrivers and wrenches. As additional materials, you may need WD-40, which will help unscrew stuck bolts, as well as rags for wiping the body of the VAZ 2114. If you plan to completely replace the pump, then you need to completely drain the gasoline from the fuel tank. It is not recommended to work with fuel in the tank. Replacement proceeds as follows:
- The negative terminal is removed from the battery. This is done in order to de-energize the car.
- Under the rear row of passengers, you need to unscrew the plastic protection, as shown in the photo below.
You need to remove the fuel pump carefully, since the float that determines the fuel level is very fragile.
If desired, you can find a supported pump. To determine whether replacement is needed or not, the unit must be thoroughly inspected. But checking the fuel pump yourself is quite problematic, so before changing it, you can take the car to a car service center and check the pressure in the fuel rail.
What to do if the fuel pump does not work
Before deciding anything regarding the repair or replacement of this device, it is worth remembering that the function of the gas pump is to create a certain pressure in the fuel system of the car. Accordingly, the first step is to measure the fuel pressure, quite possibly in order to accurately diagnose the failure of the fuel pump.
Measuring pressure in the fuel system
Normal atmospheric parameters in the VAZ-2114/2115 fuel system are as follows:
- at idle - 2.5;
- after turning on the ignition - from 3;
- without pressure regulator tube - 3.3;
- with pinched drain - 7;
- after pressing the gas pedal - from 3 to 4.5.
You will need to measure the pressure in five operating states of the fuel system at once in order to obtain accurate data. There is a pressure fitting under the hood of the car; you will need to unscrew the cap from it and attach a pressure gauge with a hose. By turning on the ignition, holding the drain, pressing the gas, it is necessary to take all five pressure measurements.
Using a pressure gauge, you can measure the fuel pressure and, based on this indicator, look for a malfunction
Wiring check
If the pressure readings are almost identical to normal, you will need to check the wiring for a short circuit. It is quite possible that the fuel pump itself is in working order, only the contacts that go to it have been damaged.
It is necessary to check the fuel pump wiring for short circuits.
You need to know that the wiring system, which goes directly to the fuel pump itself, has three wires: positive, negative and an indicator of the fuel level in the tank. You will need to take a regular light bulb with a power of no more than 12 V and attach its wires to the “+” and “-” contacts on the external connector of the pump. After starting the engine, if the lamp blinks, then there is contact.
If there is a flaw in the wire circuit, the light bulb will not light up. The internal contacts of the fuel pump are checked as follows:
- one by one, the light bulb wiring is connected to the “+” and “-” connectors of the fuel pump, then to its ground and relay;
- if the lamp blinks when connected to the negative contact, then the fuel pump contact is considered not working, and if it does not blink, then the “+” contact is not working.
After this, you will need to first check the relay and fuse: if they are normal, then the wiring is damaged somewhere between the pump and the relay.
Replacing the fuel filter VAZ 2114 video instructions
Probably everyone knows that proper care of the VAZ-2114 1.6 car, inspection of its technical condition and timely replacement of worn parts reduce the likelihood of breakdowns.
In vehicles, all parts and systems are important, but the fuel system is considered the most capricious, since any malfunction can damage the entire operation of the engine. Its main component is the filter. Its purpose is to eliminate any impurities or rust that may be observed in low-quality fuel. Cleaning is carried out thanks to the presence of special filter paper; as a result, high-quality gasoline that does not contain any impurities enters the car engine. For normal operation of the high-pressure fuel pump, only clean fuel is required so that it does not fail for a long time.
Due to prolonged use, an important component can become heavily contaminated, so a quick replacement of the VAZ-2114 fuel filter will be required. It is worth noting that an injector requires higher quality gasoline than a carburetor, so the fuel filters of an injection engine must be changed more often.
What may indicate a clogged element?
Since cleaning paper allows many impurities to pass through, its cells become clogged over time, which will certainly affect the operation of the motor. A car enthusiast will be able to understand for himself when it is necessary to replace the fuel filter based on the following signs:
- the car began to consume more oil;
- the engine starts to stall if idle speed is selected;
- interruptions in engine operation are observed if the speed increases;
- Difficulties arise when starting the engine;
- engine power is greatly reduced;
- the car may start to slow down even if the brake pedal is not pressed;
- When driving uphill, the engine starts to stall.
The above signs are the main ones, so if they are detected, you should replace the clogged fuel filter as quickly as possible. This process is not very difficult, so the car enthusiast can make the replacement himself.
What tools need to be prepared for this operation?
To replace the filter in the VAZ-2114 yourself, you should prepare the following tools:
- New high quality gasoline filter.
- O-rings that fit the fuel pipes.
- Keys for 19, 10 and 17.
- Containers in duplicate; they will be needed to drain fuel and water.
The first container that will be used to drain gasoline must be clean and completely dry.
Step-by-step replacement of fuel purifier
Replacing a clogged filter is quite simple if you do the manipulations step by step, following the recommendations of specialists:
- all terminals from the car battery are removed to completely cut off the power to the vehicle;
- on the latches of the bolts fixing the bracket, the fixation should be slightly loosened;
- the mount holding the filter should be carefully treated with a special lubricant to simplify the process of removing the part;
- Using two keys, the fitting element is removed. To do this, you need to use a number 19 key to secure the cleaner itself, and use number 17 to unscrew the fitting element related to the fuel supply line. Slowly, so as not to spill, drain any remaining fuel that may remain in the gas line into a dry container;
- the same manipulation must be carried out on the other side of the fuel purifier;
- the fuel wire tubes are disconnected from the base;
- using a 10mm wrench, slightly unscrew the clamp;
- carefully remove the fuel filter. You should not rush through this process so as not to damage other elements of the car’s fuel system.
Assembling the parts is carried out in the reverse order; it is recommended to replace all ring-shaped seals when installing a new filter. If gasoline drops are visible on the new part, they should be carefully removed with a clean rag. Otherwise, the service life of the updated element can be shortened.
Popular breakdowns
Problems with the fuel pump can occur for several reasons. Therefore, your first priority is to determine the source of the problem. These may be:
If one of these elements fails, it can stop the normal functionality of the entire module.
Let us consider the situations with each of the specified elements of the fuel module in more detail.
Pressure
What exactly is a fuel pump? This is an element of the fuel system that allows fuel to pass through due to pressure. Therefore, if you take pressure measurements, you can get answers to many questions.
Let's give an example of normal pressure readings when checking in certain modes.
Replacing the fuel pump and coarse filter on VAZ 2113, 2114, 2115 cars
The fuel pump and coarse filter are changed in the same way as described in the article on all VAZ cars with an engine capacity of 1.5 liters.
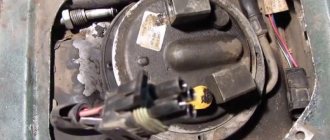
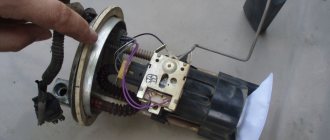
The fuel pump is located in the tank on all VAZ cars. It is installed in the housing, along with a mesh (coarse filter) and a fuel level indicator. It's easy to get to - just remove the back seat and find the hatch. Having unscrewed the fastening, under it there will be a pump housing with all the auxiliary units.
The pump is changed after diagnostics. It is described in more detail here: checking the pressure in the fuel rail on a VAZ car. It is not recommended to change based on “feelings” and mileage, since without diagnostics it is impossible to understand whether the problem has arisen with the pump or with the mesh (except in cases of complete pump failure). It is also difficult to determine service life. For the most part, it depends on the quality of gasoline. If you are a fan of driving “in steam”, when the tank is almost empty, the pump will have to be changed more often. This is due to air entering the fuel intake, as a result of which the pump begins to operate at high speeds and ceases to be cooled by gasoline. With this driving style, do not be surprised that you will have to change the pump every year (15 thousand kilometers).
If the diagnostics reveal a pump malfunction, then it is advisable to change the coarse filter. It is installed in the pump housing. If problems are found only with the mesh, then the pump does not need to be changed.
To replace, we will need - from the main tool:
- Key "7". Better head "7"
- Key "17"
- Key "19"
- Pliers
- Flat head screwdriver
- crosshead screwdriver
From the additional tool:
- WD-40 (or similar fluid)
- Rags
- Wheel inflation pump
- Pump and mesh (or just mesh)
- Rubber O-ring
- Fuel supply hose from the pump to the fitting (not necessary, but preferable if it has not been removed for a long time)
So, the procedure for replacing the pump and coarse filter.
1. It is better to carry out all work with a practically empty tank. It is prohibited to carry out work on a tank filled “under the neck”!
2. First, relieve the pressure in the fuel line. In this case, it is better to do this by disconnecting the terminal from the pump. Remove the seat and unscrew the hatch:
4. Start the car and let it run until it stalls.
5. Unscrew the fittings with a 17mm wrench (new tubes go to 14mm). It is better to pre-fill all connections with WD-40.
6. Apply WD-40 to the pump housing mounting nuts. Then unscrew the 8 nuts with a “7” wrench
Please note that the pump ground is screwed onto one of them:
7. Remove the metal clamping ring.
8. Pull out the pump housing. Be careful! It has a fuel level sensor installed. When removing the pump, do not bend the pointer. Otherwise the readings will be incorrect.
9. Remove the rubber seal:
10. Disconnect the lower glass. It just snaps off. Typically there will be a lot of dirt in it. We remove it with a rag and wash it. Sometimes this glass cannot be pulled out through the hole along with the pump housing. It just falls into the tank. There is nothing wrong with this (if the tank is not filled to capacity). It can be easily reached by hand and pulled out after dismantling the rubber seal.
11. Remove the coarse filter. We just pull it up. If the task is to change only the mesh, then we put it back together.
12. Remove the locking pin from the guide. We pull it out with pliers:
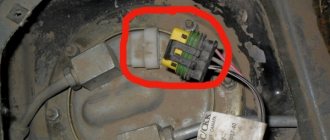
13. Disconnect the fuel pump and fuel level terminal:
14. Remove the pump housing with the level sensor from the guides.
15. Disconnect the hose from the fuel pump:
16. If the operation has not been performed for a long time, the rubber will lose its elasticity. You can heat it with a hair dryer, but it is better to change the tube. To quickly remove it, cut it off with a knife from the fitting in the upper part:
17. Unscrew the fuel level sensor with a Phillips screwdriver (2 screws). Remove it from the pump housing:
18. Remove the terminal from the fuel pump:
19. Disassemble the fuel pump housing. To do this, press on the 3 latches on the side wall:
20. We take out the fuel pump and replace it with a new one. If necessary, change the tube:
21. Reassemble in reverse order.
Fuel filter VAZ 2114. Where is it located and how to replace it
This article is simultaneously relevant for the following VAZ models: 2108i, 2109i, 21099i, 2114i, 2115i, 2110, 2112, 2111, Kalina, Priora. On each of these models there are two fuel filters, one for coarse cleaning (fuel pump mesh) located in the fuel module . Another fine filter is located under the car between the gas tank and the spare wheel niche (trough).
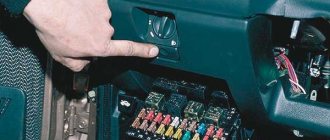
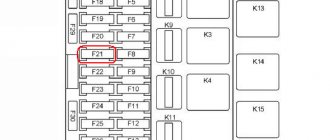
Before replacing filters, you first need to relieve the pressure in the system. There are several ways to do this. The first is to remove the fuel pump fuse (f1), located in the fuse box behind the center console.
To access it, you need to unscrew several screws securing the cover at the passenger's feet.
On Kalina, the fuse for the fuel pump is located under a plastic cover in the center console.
Or disconnect the fuel pump power supply, having first unscrewed the screws securing the hatch to access the fuel pump under the rear seat.
After this, start the car, and when it stalls, turn the starter a little.
A simpler option for relieving pressure would be to remove the protective cap from the end of the fuel rail and press the spool. It is better to place some small container under it, because... A small amount of gasoline will leak out.
The coarse filter (fuel pump mesh) is changed as needed, the fine filter every 30,000 miles.
To replace the coarse filter, you will need to unscrew the fuel pipes coming to the pump, and then unscrew the pump mounting nuts (head 10) and remove the pump from the tank. Remove the plastic flask at the bottom of the pump and remove the screen by moving downwards.
To replace the fine filter, you will need to unscrew the nut securing the filter to the car body, and then disconnect the fuel pipes from the filter.
There are two types of fastening of fuel pipes to the filter: classic threaded and snap-on. The first option will need to be unscrewed using two keys, one holding the nut on the filter, the other tightening the fuel pipe nut.
The second option simply snaps off by pressing the bracket.
Don't forget about the rubber O-rings at the ends of the fuel pipes. It would be better to buy at least 4 pieces in advance, and even better, instead of rubber rings, use copper washers.
Assembly is carried out in reverse order.
A coarse filter (fuel pump mesh) and a fine filter depend on the engine size. For the 1.5 engine there is a coarse filter with article number 2112-1139200, for 1.6 there is a filter with article number 1118-1139010. The fine filter for 1.5 (before 2005-2006 onwards) comes with threaded connections, for 1.6 (after 2005 onwards) with fittings for latches, but before replacing it is better to separately look at the connections of the fuel pipes to the filter. The catalog number of the original filter on nut connections is 2112-1117010-82, and the filter on snap connections is 2123-1117010-82
Where are the purifiers located?
The location of fuel filters on VAZ models depends on the engine. On injection and carburetor systems they are located in different places.
Filter location on carburetor internal combustion engines
On carburetor VAZs, the fuel purifier is located under the hood. It is installed under the brake reservoir (main), secured with 2 clamps.
The filter for carburetor VAZs is located under the brake cylinder
Location of the cleaner on the injector
On a VAZ with an injection system, the FTO is installed under the car, at the rear near the muffler. It is mounted in the form of a cartridge in the fuel line. To inspect or dismantle it, you have to lift the car onto an overpass or pit.
How to replace the fuel pump mesh, also known as the fuel pump, on a VAZ 2113-VAZ 2115
How to change the fuel pump grid on a VAZ 2114.
For now, let’s start with a few words about this mesh, practically you don’t have to replace it with a new one, you can first remove it and later wash it in gasoline; some dirt from such washing will lag behind the mesh and disappear, but still not all the dirt will disappear, so the leading option will obviously be Replacement of this mesh for the newest one, besides, it costs only around 50-130 rubles.
As annoying as this may sound, if you find yourself in a situation where your grid is very clogged and the car is moving jerkily, and you don’t have this grid next to it, then although there is an option to remove the clogged grid and wash it in gasoline and finally It is best to blow it out with compressed air under pressure, for example a compressor, pump, etc.
Removal: 1) First of all, remove the fuel pump itself from the car. (For information on how to remove the fuel pump, see the text of the article: “Replacing the fuel pump on a VAZ”)
2) Then, when you remove the pump, take it in your hands, in other words, continue to hold it in your hand (Based on the situation), and then turn the pump over so that one of its parts is directed to the top, so that the mesh is in your field of vision, and then grab this mesh with your hand and simply pull it up, then it will move away and disengage, then it will be removed from the fuel pump.
Installation: The new mesh is installed in the same way as it is removed, but only in the reverse order, then you take the new mesh in your hands and simply put it on where the old mesh stood, as annoying as it may sound, just put it on until a proper installation is completed it will not go in one hundred percent, it will not stick, and when it is put on, check whether it fits perfectly on the fuel pump or whether it is wobbly, and after checking, install the fuel pump in its place.
Note! When everything is in place, check how the fuel pump works with the latest network, for this purpose, start it all for you, it should start perfectly (The first time), but only in the circumstances that the engine is working properly, and when it starts, drive a little here, When driving, pay attention to how the car moves, in other words, it should not twitch and its movement should be smooth!
Additional video: You can see exactly how to change the mesh on a fuel pump using the example of replacing the same mesh on a VAZ 2110 car, they are replaced there completely identically, so watch the video and you’ll understand everything right away:
Article: 21082-1101138, additional articles: 21082-1101138Р
Order code: 023299
- Buy with this product
- show more
- Passenger cars / VAZ / VAZ-21081 drawing
- » href=»/catalog/vaz-3/legkovye_avtomobili-30/vaz_2108-18/bak_toplivnyiy-79/#part27994″>GasketPower system / Fuel tank
Passenger cars / VAZ / VAZ-21111 drawing
» href=»/catalog/vaz-3/legkovye_avtomobili-30/vaz_2111-11/bak_toplivnyiy-114/#part44927″>Gasket Power system / Fuel tank
Passenger cars / VAZ / VAZ-21151 drawing
» href=»/catalog/vaz-3/legkovye_avtomobili-30/vaz_2115-65/bak_toplivnyiy-79/#part53067″>GasketPower system / Fuel tank Passenger
cars / VAZ / VAZ-2110, 2111, 21121 drawing
» href=»/ catalog/vaz-3/legkovye_avtomobili-30/vaz_2110__2111__2112-415/bak_toplivnyiy-124/#part1302975″>Gasket Power system / Fuel tank
Passenger cars / VAZ / VAZ-21131 drawing
» href=»/catalog/vaz-3/legkovye_avtomobili-30 /vaz_2113-648/bak_toplivnyiy-16/#part1669107″>GasketPower system / Fuel tank
Passenger cars / VAZ / VAZ-21101 drawing
» href=»/catalog/vaz-3/legkovye_avtomobili-30/vaz_2110-10/bak_toplivnyiy-114/ #part40619″>GasketPower system / Fuel tank
Passenger cars / VAZ / VAZ-21121 drawing
» href=”/catalog/vaz-3/legkovye_avtomobili-30/vaz_2112-12/bak_toplivnyiy-114/#part49235″>GasketPower system / Fuel tank
Passenger cars / VAZ / VAZ-2120 “Nadezhda”1 drawing
» href=”/catalog/vaz-3/legkovye_avtomobili-30/vaz_2120__nadejda_-245/bak_toplivnyiy-70/#part55816″>GasketPower system / Fuel tank
Passenger cars / VAZ / VAZ-21141 drawing
» href=»/catalog/vaz-3/legkovye_avtomobili-30/vaz_2114-647/bak_toplivnyiy-16/#part1669107″>Gasket Power system / Fuel tank Passenger
cars / VAZ / VAZ-21091 drawing
» href=»/ catalog/vaz-3/legkovye_avtomobili-30/vaz_2109-701/bak_toplivnyiy-17/#part1929931″>GasketPower system / Fuel tank
- There are no reviews for this product yet.
How to change a fuel pump
- We open the back seat, getting to the gas tank flap.
- Open the hatch and clean the surface from dirt.
- Disconnect the tubes and wires from the bulb.
- Unscrew and pull out the fuel flask.
- We disassemble it on the table, changing the fuel pump
- Let's put everything back together.
Further in our photo report there are more detailed instructions.
The fuel pump on this vehicle is located in the tank. To replace it, we will crawl under the back seat.
To recline the seat, you need to pull the part of the seat that is located on the side of the seat back.
The hatch for access to the fuel tank is located in the direction of the arrow. There are cuts in the silencer for free access to the tank.
We move the silencer aside and use a screwdriver to unscrew the two screws securing the gas tank flap cover.
Now we need to remove all the dirt around the fuel flask. We used air from the compressor and blew it out under low pressure, trying not to create dust in the car interior.
Now we can disconnect the fuel pipes and electrical connector. The tubes are removed by pressing on the plastic clips on the sides.
Unscrew the eight nuts securing the fuel flask.
We take the wires and tubes aside and pull out the fuel flask. It is necessary to prepare a cut canister or other similar container in advance, since the fuel flask will be filled with gasoline.
Now on the table we begin to disassemble the fuel flask and replace the fuel pump. First of all, use a screwdriver to pry up and remove the retaining ring shown in the photo.
We simultaneously press the three latches shown in the photo. and pull the top of the flask trying to disconnect it.
Disconnect all wires and electrical connectors shown in the photo. and pull out the inner part in which the fuel pump is located.
Now that the flask is disconnected we have access to the pump. Use a screwdriver to pry up and disconnect the coarse filter.
We bend the two fuel pump clamps with our hands and pull them out of the plastic.
To replace the pump, we need to disconnect the hose indicated by the arrow. To make removing the hose easier, you can use a hairdryer, heat the hose, softening it, and then use a screwdriver to pry and remove the hose.
Compare the removed pump with the new one.
We put the hose on the pump and secure it with a regular clamp. For better crimping of the clamp, we also recommend using a hair dryer.
We put a plastic casing and filter on the new pump.
Before reassembling, it is necessary to clean the housing from dirt, wash it with gasoline and blow out all debris with air.
We assemble the flask in the reverse order of disassembly.
Don't forget to reinstall the retaining ring.
We lower the assembled fuel flask into the tank.
In order not to confuse the correct position for installation, there is a special flag on the body of the flask that must fall into place.
We install the pressure plate and tighten all the fastening nuts, not forgetting to connect the ground wires.
Reconnect the tubes and connector.
Close the hatch and lower the seat.
