Print this article Font size 16
Despite their small size, valve stem seals play a big role in the operation of the VAZ 2109 engine.
The task of these elements is to reliably seal and protect against oil ingress into the contact areas of the guide bushings and valves.
Appearance of elements
Over time, the caps wear out because they are constantly exposed to a fairly aggressive environment, which is engine oil. The temperature changes regularly, exhaust gases affect it, and overheating occurs.
In other words, there are more than enough reasons for the caps to wear out. Your task is to identify the problem in time and replace the elements.
What are valve stem seals and where are they located?
Oil seals for the VAZ 2109 car
These caps are located directly on the engine valves, in the cylinder head. Another name for these caps is valve seals. Their main task is to prevent excess oil from entering the engine. These caps are made of special rubber. And rubber, even special ones, deteriorate over time and oil begins to flow directly into the combustion chamber of the engine. In this case, it is worth changing these parts.
Injection engine
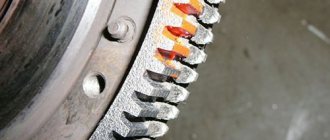
The next step is to rotate the crankshaft to match the marks on the gears and remove the timing belt. The crankshaft can, of course, be turned through the camshaft gear mounting bolt, but I advise turning it by the generator pulley mounting bolt, so as not to grind off the edges on the camshaft bolt. When the marks are set, use a 17 key to loosen the tension roller and remove the belt. To unscrew the camshaft gear, to the left of it you can see a pin on which we put a small tube through the holes in the gear so that it does not turn. And with the same key we unscrew the bolt and carefully remove the gear so that the key is not lost. Although it often fits well in place, it still happens when it falls out, so it is better to remove it and put it separately.
In the place where the tube was put to stop the gear, there is a bolt that needs to be unscrewed and the metal timing protection slightly bent so that the camshaft can be pulled out.
Using a 10mm socket or open-end wrench, unscrew the bolts securing the camshaft bearing caps, and then remove the camshaft itself. When removing the camshaft, try not to damage the oil seal, but the best thing to do is simply replace it with a new one.
Using a regular syringe, you should pump out the remaining oil and unscrew the spark plugs. Since the crankshaft is aligned according to the marks, the pistons in the first and fourth cylinders are at top dead center, so you need to start replacing the oil seals from the first cylinder, and then from the fourth, so as not to get confused. And then it will be possible to make another revolution of the crankshaft, during which the pistons in the second and third cylinders will simultaneously be at TDC and replace the seals in them. To begin with, the pushers are removed from the intake and exhaust valves and, using a special device for depressuring the valves, the intake and exhaust valves of the first cylinder are decompressed.
To do this, the device is installed on the cylinder head, a special heel rests against the spring, using a handle, the spring is pressed and the crackers are removed with tweezers. The springs with crackers are removed, and most importantly, during assembly, do not confuse the springs, crackers and pushers; for convenience, arrange them on the table in the order of disassembly.
When you get to the oil seal itself, use a puller to press it out, or if there is no puller, you can do this with suitable pliers. Just do this carefully so as not to leave burrs on the valve stem, otherwise even with a new oil seal, oil will leak.
All that remains is to put on the new oil seal and, using a mandrel in the form of a metal tube suitable for the diameter of the oil seal, press it into place with a hammer. By tapping the mandrel with a hammer, the oil seal will shrink and the sound will become duller, as evidenced by the fact that the oil seal is pressed in completely. The main thing is not to overdo it, so as not to spoil it, and during pressing, make sure that the oil seal is not distorted.
Next, rotate the crankshaft so that the pistons in the second and third cylinders are at TDC and replace the seals in the same way. Before assembly, screw the spark plugs into place to prevent debris from getting into the cylinders, and clean the seat of the valve cover and accessory drive housing from any remaining old sealant. I recommend replacing the camshaft oil seal and gaskets under the valve cover and the housing of auxiliary units with new ones, after first applying sealant to their seats. Upon completion of work, assembly is carried out in the reverse order of removal.
How to know when it's time to change
Worn caps of a VAZ 2109 car
It’s simple: if thick bluish smoke comes from the exhaust pipe of the car, then it’s time to change the caps . As a rule, this smoke appears only when the engine starts and when it stops. But if the caps are very worn, thick smoke constantly comes out of the chimney. However, smoke is not the only sign that the caps need to be urgently replaced. Sometimes smoke is practically not visible, but oil consumption in the car increases several times, while no external oil leaks (through various oil seals and gaskets) are observed. All this also suggests that it’s time to change the caps.
Replacement methods
There are a few basic options you have if the caps stop working properly.
| Option | Peculiarities |
| Let it be as it is | The most unfortunate decision, which can lead to serious consequences, engine breakdowns and huge restoration costs. Do not choose it under any circumstances |
| Contact a garage service station | There are many service stations created on the basis of a simple garage in an auto cooperative. Many people use their services, but we do not recommend that you do so. The prices are not as high as at a good car service center, but the quality of services is appropriate, there are no clear deadlines. Once you give the car away, you may not see it soon |
| Verified car service | A good option for those who do not want to do their own repairs and have enough money for high-quality car maintenance. There is only one disadvantage to this method of repair - high cost. |
| Do it yourself | The option preferred by most domestic car owners. Expenses will only be required for materials. With the right approach, you will make a replacement no worse than any good service station |
When choosing the option to replace the caps yourself, make sure you have sufficient experience and skills. Otherwise, doing the repairs yourself is strictly not recommended.
Sequencing
- There is a striker on the collet. You need to hit it accurately with a hammer. This will cause the cap to crumple and it will be possible to remove it from the collet with pliers.
The oil seal is removed from the guide bushing using a collet - Once the crackers are removed, the valve plate and its spring are removed.
When the spring is fixed, the valve nuts are removed using medical tweezers - After this, a tool is installed to decompress the valves and, with its help, the valve spring is pressed.
- After the piston reaches the dead center, the spark plug is unscrewed from the cylinder, and a tin rod with a diameter of 8 mm is inserted into the opened hole. The tip of the rod should be between the valve and the bottom of the piston.
- Now the crankshaft must be turned so that the piston in the cylinder where the caps are planned to be replaced reaches top dead center.
The camshaft is removed, then the oil seal is removed - First of all, you need to remove the wires from the battery.
- The timing belt is removed.
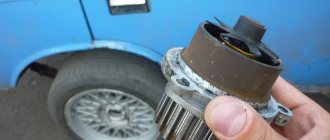
- The pulley with teeth is removed from the camshaft.
- The wires are removed from the first fastening, and the nuts are unscrewed from the third fastening.
- Four nuts are unscrewed from the front cover, then the nuts from the rear cover are unscrewed (there are six of them).
- Both covers are removed.
- The camshaft is removed.
- The oil seal is removed from the camshaft.
The valve spring is pressed firmly using a collet - After pressing the valve spring, the crackers can be removed using tweezers.
First, the valve plate is removed, and then the spring underneath it is removed. - Now, using a collet, you need to remove the oil seal from the guide sleeve.
By hitting the handle with a hammer, the cap is compressed in the collet and removed - The new cap is pressed into the valve plate, then a spring is installed on it.
- Similar operations are performed with all caps that need replacement.
- After replacement, the cylinder head is reassembled.
DIY video on replacing valve seals on a VAZ 2109
Important points
- After removing the worn cap, you should carefully inspect the walls of the guide sleeve, since any scratch on this wall left by the collet can lead to renewed oil leakage into the combustion chamber and will negate all efforts to replace the cap.
- Before installing new caps, you must remember to remove the springs from them.
- Before pressing in the new cap, the installation site is generously lubricated with oil. This helps to place the cap in place more accurately, without putting extra effort into it.
This is interesting: Polishing car headlights
As can be seen from the article, it is quite possible to replace valve stem seals on a VAZ 2109 with your own hands. The main thing is to be patient, follow the sequence of operations and not make much effort when pressing the new caps into place.
Copywriter with five years of experience.
Recommendations for troubleshooting
If, when starting the engine, the indicator of too low engine oil level in the crankcase comes on in your car (it is only present in cars with a high front panel; in cars with a low one, the indicator only has an emergency oil pressure sensor), you must first turn off the engine immediately. Then you need to inspect the power unit for leaks. If they are not there, then after 20 minutes you need to check the lubricant level in the crankcase using a dipstick. If the level is normal (between the min and max marks), you should check the oil level sensor. It is located next to the oil filter. It is always much easier and cheaper to replace a faulty sensor than to disassemble the power unit due to an imaginary breakdown.
To replace the caps you will need the following tools:
- a device used to press the caps (mandrel);
- device for compressing valve springs;
- pliers;
- tweezers;
- a tin rod with a diameter of approximately 8 mm and a length of at least 20 cm.
In addition, a standard set of keys will come in handy.
Functional purpose, causes and signs of wear
Oil seals are an important part that ensures productive engine operation. Valve seals serve to lubricate the gas distribution mechanism. They prevent oil from leaking and entering the combustion chamber. The caps remove oil from the moving valve.
Valve seals separate two working areas of the engine: the cylinder head and the combustion chamber. The upper part of the cap is constantly in the area of intense movement of lubricant of the VAZ 2109 engine. The lower part is in contact with the combustible fuel mixture and gas waste. Therefore, the caps are subject to intense loads.
The rubber elements of the seals lose their elasticity and delaminate. As a result, oil flows through the valve into the combustion chamber and onto the spark plugs. The wear of oil seals accelerates when they are made of low-quality materials.
It is impossible to visually verify the working condition of the VAZ 2109 oil seals. These parts are hidden and are not easy to get to. Indirect signs indicate that there are problems with the seals:
- excess oil consumption; thick bluish-blue smoke from the exhaust pipe; oily coating on candles.
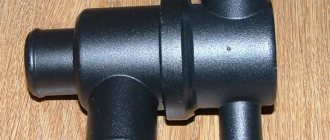
Device
Oil seals are a modern version of valve seals, which are equipped with a powerful steel sleeve inside and an expander spring. Springs are used to secure the edges of the caps and valve stems.
Actual size of the caps
Gaskets are made primarily of rubber, which becomes harder over time and wear occurs, so the element ceases to properly perform its functions. As a result, oil ends up inside the combustion chamber.
There is only one sign of wear on the valve stem seals - thick blue smoke begins to actively pour out of the exhaust pipe, plus oil consumption increases.
There is only one solution to this situation - replacement.
What valve stem seals should I put on a VAZ 2109?
Original number 21080100702686, average price 221 rubles. You can buy an analogue of Trialli CV 537 for 181 rubles.
Tool necessary for replacing oil scraper valves.
Remove the crankcase ventilation hoses and the supply hose from the valve cover fittings. Using a 10mm wrench, unscrew the two nuts securing the valve cover and remove it.
Using a 10mm wrench, unscrew the two nuts securing the throttle drive cable bracket to the receiver and remove it.
Using a 10mm wrench, unscrew the bolts of the front timing cover: two on the side and one in the center. Remove the timing cover.
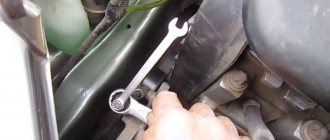
Using a 17mm wrench, loosen the nut securing the tension roller.
Using a 17mm wrench, unscrew the camshaft pulley.
Using a 10mm wrench, unscrew the nut securing the protective casing.
And bend the casing.
Using a 10mm wrench, unscrew two nuts and one bolt securing the plug. We remove the plug.
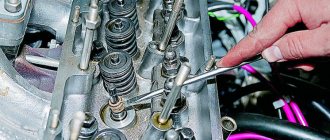
Using a “13” wrench, evenly, in several approaches (until the pressure of the valve springs is relieved), unscrew the ten nuts securing the camshaft bearing housings.
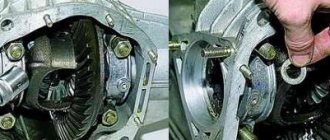
Remove the front and rear camshaft bearing housings from the studs.
Remove the camshaft.
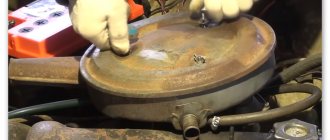
Using a syringe, pump out the oil from the camshaft block.
We remove the pusher with the adjusting washer from the cylinder head socket.
We install the desiccant rail. Set the crankshaft to the TDC position of the pistons of the 1st and 4th cylinders. In the same position of the shaft, we change the oil seals of the valves of the 1st and 4th cylinders.
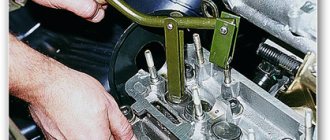
We install the valve depressurizer. We rest the desiccant thrust bearing against the valve plate, and place the hooking lever behind the rail. We compress the springs and remove the crackers with tweezers.
We take out the valve spring and the upper “plate”. Please note that there will be two valve springs - internal and upper. Both of them need to be removed.
We install the collet of the device for removing oil seals onto the cap, and then the device itself.
We set the striker and sharply hit it on the sleeve of the device, and then on the striker of the handle, thereby pressing the oil seal off the sleeve.
Remove the oil seal from the collet of the device.
We perform the same operations on the adjacent valve.
Lubricate the new oil seals with engine oil and place them on the valve guides.
Using a mandrel, press each cap onto the guide sleeve. We assemble the valve mechanism of the 1st cylinder in the reverse order. Then we repeat this work for the 4th cylinder. Then, turning the crankshaft 180° (TDC of the pistons of the 2nd and 3rd cylinders), similarly change the oil seals of the valves of the 2nd and 3rd cylinders.
We put the camshaft in place. We install the camshaft bearing housings, put washers on the studs and screw in the nuts securing them in two stages in the order indicated.