Reasons for the release
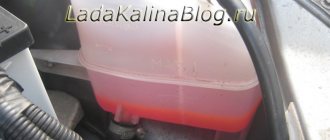
The first step is to figure out why the coolant is being thrown out of the expansion tank.
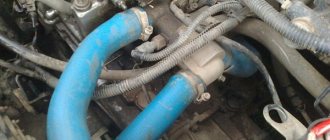
- Wear of CO elements. In particular, we are talking about pipes and connecting hoses. They are constantly exposed to high pressure and temperatures. Therefore, over time, their wear and tear is a completely natural phenomenon. As a result, antifreeze begins to be thrown out.
- Low quality components. If natural wear and tear is typical for used cars and cooling systems that have been in operation for quite a long time, then when using low-quality components, even on a completely new or updated cooling system, serious problems can arise. An example is simple burrs on the neck of the expansion tank. Because of them, the lid does not fit tightly enough, which leads to a gap and the release of antifreeze.
- Expansion tank. Alas, the quality of the plastic from which expansion tanks for the VAZ 2109 are made today leaves much to be desired. Because of it, the plastic simply bursts under high pressure.
- Faulty engine. If the engine itself is not working correctly, the coolant may boil. This leads to damage to the thermostat, radiator, and pump.
From this we can conclude that the quality of the CO directly depends on the technical condition of the car and the quality of the components used.
Signs of coolant emission
It is important to understand that coolant can be thrown out not only through the expansion tank cap, but also inside the system. It is important to monitor the condition of the CO and identify signs of a leak in time.
Antifreeze evaporates very quickly, so traces of it are not always visible.
- If coolant is released through the reservoir, puddles immediately form under the car.
- If liquid enters the cabin due to a malfunction of the CO, this can be determined by the smell. It has a sweetish tint.
- Antifreeze also often leaks into the engine system. Such a breakdown is determined by white smoke emanating through the exhaust pipe.
- The most unpleasant and dangerous situation is the release of antifreeze into the engine crankcase. If this happens, a white emulsion will appear on the surface of the oil filler cap.
- Periodically checking the space under the timing belt cover will determine whether the pump has failed. If yes, then you will find high humidity there.
Signs of boiling
If there are problems with the engine, antifreeze may simply boil in the CO. There is nothing good about this, so it is important to detect the malfunction in time. There are five main signs of coolant boiling:
- The temperature gauge jumps to 130 degrees;
- White foam appears at the filler neck;
- The engine stops working properly;
- The coolant level in the expansion tank rises sharply;
- White smoke comes out of the exhaust pipe.
Replacing pipes
The entire process of replacing pipes is divided into two stages:
Let's start with dismantling work.
- Unscrew the expansion tank cap to allow air into the system.
- Open the heater tap inside the passenger compartment by turning the control all the way to the right.
- Remove the crankcase protection by unscrewing all the mounting bolts.
- Prepare a container where you will drain the old coolant. It must be made of plastic with a volume of at least 10 liters. Choose a clean container if you want to refill this antifreeze.
- Clean the surfaces near the drain plug on the cylinder block and radiator. This will prevent dirt from getting into the coolant drain container.
- Place the container under the radiator drain, unscrew the cap and wait until the antifreeze comes out.
- Drain the fluid from the cylinder block in the same way.
- Wait until all the coolant has come out, then tighten the plugs.
- Start working on the interior by unscrewing the dashboard fasteners and moving them to the side. Move the front seats as far back as possible. This way you will provide yourself with more or less comfortable conditions.
- Unscrew the clamps from the coolant supply and return pipes from the heater tap. You will find it in the partition between the passenger compartment and the engine compartment.
- Remove the rubber pipes. If they are difficult to remove, you can pull them to the sides or cut them with a knife. They are still being replaced. Due to the hot coolant, the rubber sticks to the metal fittings, which complicates their dismantling.
- Be careful and careful, do not pull the tubes too hard. Otherwise, you risk damaging the connections of the fittings. And this will entail much more expensive repairs.
- Use a flathead screwdriver to remove the valve from the engine compartment.
- Using pliers or pliers, disconnect the holder from the heater tap drive rod.
- Clean the faucet and blow out the inside of it with compressed air.
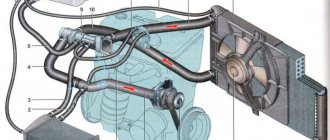
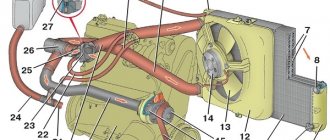
- Sequentially remove all remaining pipes from the radiator and engine. Be sure to remember the sequence of their location so that there are no problems with reassembly.
Replacement process
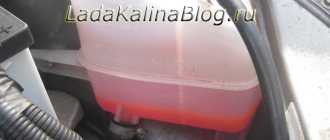
It's puddles like these that make drivers scratch their heads and wonder what action to take. Not every VAZ-2108 car owner knows how to replace a cracked pipe. We hasten to assure you that the replacement process itself is unlikely to seem like one that requires the use of great physical force. However, along with this, you need to prepare yourself for the fact that you will have to lose some time, since getting to the problem pipe will not be so easy. You will need to unscrew and remove some other devices that prevent access to the pipes.
Stove VAZ 2109
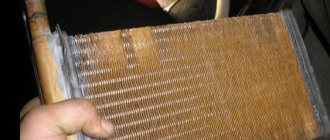
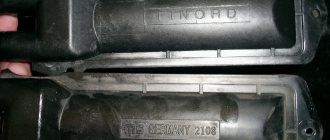
The design of a car heater is not as complicated as it might seem at first glance. The base consists of two plastic casings connected by brackets. They have a heating radiator installed. Air is supplied through the radiator to the car interior by a fan.
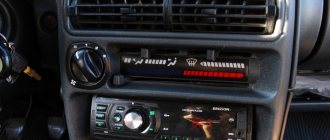
The electric motor is attached to the fan casings. The coolant passes through the heater core thanks to a pump. A faucet is also connected to the cooling system. Its connection occurs through rubber hoses. There are two more pairs of pipes in the housing. The faucet valve has a hole through which coolant flows. A special valve lever controls air heating. Three knobs on the instrument panel control the heater. With their help, the faucet and the stove damper are opened or closed. If the tap is open, heated coolant circulates in the heating system. Closed - cold air blows.
. WINTER COLD - INSTRUCTIONS FOR REPAIRING OVEN 2109
. WINTER COLD - INSTRUCTIONS FOR REPAIRING OVEN 2109
The cold weather has arrived, and most owners of the VAZ 2109 are once again faced with a problem: from the nozzles of the heater pipes at the operating temperature of the coolant (about 90 degrees), barely warm, and often completely cold air is blowing into the cabin; in short, the heater does not heat well. In this state of affairs, in severe frost, even frosty side windows in the cabin “do not come off.”
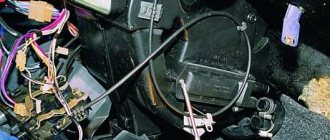
The simplest solution to this problem is as follows. It is necessary to tighten the heater damper control cable. To do this, you can make one or two turns of this cable on the damper control lever. This lever is located on the body of the VAZ 2109 stove, next to the gas pedal (see photo).
All the joints of the air ducts and the edges of the stove damper are covered with foam rubber, which is difficult to fully compress using the damper control lever. This leaves a gap of several millimeters. In this case, the damper directing the flow of air either from the street directly or through the heater radiator does not close completely. It closes “up”, while air flows into the front nozzles through the heater radiator, and into the top and side nozzles from the street, through those same millimeters. When the heater fan is running, and the car is moving, these millimeters are quite enough.
You can even get to this damper lever on the driver's side and try to tighten this lever with your hand while the heater fan is on. In this case, the left ear will be in the area of the air duct nozzle, and you can hear how the sound and temperature of the air leaving the nozzle changes. Also, the reasons discussed below may be the reason for the ineffective operation of the Samara interior heating system:
Incomplete opening of the heater tap
This problem occurs in most front-wheel drive VAZ cars. You can check this by comparing the temperature of the inlet and outlet pipes of the heater radiator; if it is different, most likely the valve is not fully open. The solution is to tighten the control cable for this valve and adjust the valve control lever to the maximum open position. In this case, it is possible that now the valve will not close completely, but as they say, the heat does not break the bones. But here lies another problem. It is known that this valve in Samar is a weak point, and after a certain number of “open-close” operations, the valve at the location of the axis connecting the control lever and the valve itself inside the valve loses its tightness and begins to leak. Some owners simply set the “heat-cold” lever to a certain position and leave it out of harm’s way. In this case, attempting to move the heater tap valve will most likely cause it to leak. If this happens, you can wrap a strip of fabric soaked in sealant around the leak site and fix it all with “cold welding”; this can also be done in the field if the necessary materials are available.
Self-replacement
Like most repairs, this procedure is carried out on an overpass. Replacement requires the following tools:
- Container for draining coolant;
- Classic set of wrenches and screwdrivers;
- Sealant;
- WD – 40;
- New faucet with a set of rubber gaskets.
- 1. Display the VAZ 2109 car;
- 2. Place the prepared empty container under the motor and, opening the drain hole, allow the coolant to drain;
- 3. Next, you need to unscrew the pipes running from the engine to the heater. To do this, just loosen the fastening clamps. It happens that they do not give in, then it makes sense to use a “bucket” and clean the threads of the crane bolts;
- 4. Remove the pipes and drain the remaining antifreeze;
- 5. Remove the side trim of the dashboard in the car interior. Here, too, unscrew the pipes;
- 6. Then, using a 10mm wrench, loosen and unscrew the faucet fastening nuts. It's under the car. Continue working inside the car again and tighten the tap on the passenger seat side. Then remove the clamp. Disconnect the control cable;
- 7. The next stage is the installation of a new tap. First of all, it must be connected to the control cable. Now put the spring clip in place. Tighten the fasteners. When installing pipes, use sealant.
Having finished installing the new heater part, you need to pour coolant into the system and check how the replacement went as a whole.
Choosing a new radiator
The first sign of a high-quality radiator is its packaging and warranty service card. Counterfeits are usually sold in simple plastic bags. Proven radiators that you can safely buy and install on your car are products (Kraft).
Low panel
Before you start disassembling the dashboard to get to the radiator, you will need to drain the coolant. If it is still good, then after replacement it can be filled back in or replaced with a new one, otherwise. You will need:
- socket head 10;
- ratchet handle;
- extension cord more than 10 centimeters;
- deep head 10.
The heating system radiator is located at the passenger's feet. To remove it, unscrew the hoses that are held on the clamps and unhook them from the radiator. But be careful, as residual coolant may leak and ruin the interior. Therefore, prepare a container and a rag for the cooler in advance to avoid unpleasant consequences.
Then unscrew the 3 screws that hold the radiator to the heater body and the cable that regulates the windshield defroster. Then take it out and replace it with a new one.
Reassemble everything in reverse order and fill with coolant. Check the operation of the heater; if there is no heat after switching on, then most likely the system is airy and excess air needs to be released. To do this, remove the cap from the expansion tank and compress the cooling system pipes.
There is another interesting way to release excess air. To do this, place the car at the foot of the hill, but with the front of the car slightly raised, and apply the gas.
High panel
Removing the radiator on a VAZ-2109 with a high panel is done differently than with a low one. To do this, of course, you can disassemble the dashboard, but it is not necessary. Here's how to change it yourself:
- Open the hood and remove the heater casing. Unscrew the two screws that hold it in place.
- Lower the driver's seat all the way, you can also remove the steering wheel, but some people manage not to do this.
- Lie down on the driver's seat and open the positive block under the steering wheel and unscrew the nut that holds the heater ground wire.
- Then remove the radiator from under the hood. To make it easier for yourself, move the left corner a little.
- Installing a new radiator is done in the reverse order.
Modernization of the VAZ 2109 heater
Those who like to “tinker” with cars and experiment can carry out a small modernization of the crane in the old “old-fashioned” way. This will require a ball valve with an angled handle. The sequence of actions will be as follows:
- 1. Drain the coolant;
- 2. Unscrew the plug in the tap and pull out the valve. It won't be useful anymore.
- 3. A 3-kopeck USSR coin will be suitable as a new plug. It will need to be inserted into the “glass”;
- 4. Screw in the plug;
- 5. Under the hood, cut off the heater pipe and install a water tap;
- 6. Tighten the clamps on both sides;
- 7. Pour in antifreeze;
- 8. Check the system.
Article: 2108-81012, additional articles: 06-81-109bM, 2108-8101200-20
Order code: 160259
- Buy with this product
- show more
- Buy analogues
- Passenger cars / VAZ / VAZ-21092 drawings
- » href=»/catalog/vaz-3/legkovye_avtomobili-30/vaz_2109-9/sistema_ventilyacii_i_otopleniya-56/#part31617″>Rear supply hoseVentilation and heating / Ventilation and heating system
- » href=»/catalog/vaz-3/legkovye_avtomobili-30/vaz_2109-9/sistema_ventilyacii_i_otopleniya-55/#part31589″>Rear supply hoseVentilation and heating / Ventilation and heating system
- Passenger cars / VAZ / VAZ-21152 drawings
- » href=»/catalog/vaz-3/legkovye_avtomobili-30/vaz_2115-65/sistema_ventilyacii_i_otopleniya-45/#part52314″>Rear supply hoseVentilation and heating / Ventilation and heating system
- » href=»/catalog/vaz-3/legkovye_avtomobili-30/vaz_2115-65/sistema_ventilyacii_i_otopleniya-44/#part52292″>Rear supply hoseVentilation and heating / Ventilation and heating system
- Passenger cars / VAZ / VAZ-21136 drawings
- » href=»/catalog/vaz-3/legkovye_avtomobili-30/vaz_2113-648/otopitel__11__13__15_-121/#part1668600″>Heater outlet hose frontVentilation and heating / Heater (11, 13, 15)
- » href=»/catalog/vaz-3/legkovye_avtomobili-30/vaz_2113-648/otopitel-120/#part1668571″>Front supply hoseVentilation and heating / Heater
- » href=»/catalog/vaz-3/legkovye_avtomobili-30/vaz_2113-648/otopitel-120/#part1668569″>Heater outlet hose frontVentilation and heating / Heater
- » href=»/catalog/vaz-3/legkovye_avtomobili-30/vaz_2113-648/sistema_ventilyacii_i_otopleniya__11__13__15_-116/#part1668497″>Rear supply hoseVentilation and heating / Ventilation and heating system (11, 13, 15)
- » href=»/catalog/vaz-3/legkovye_avtomobili-30/vaz_2113-648/otopitel__11__13__15_-121/#part1668602″>Front supply hoseVentilation and heating / Heater (11, 13, 15)
- » href=»/catalog/vaz-3/legkovye_avtomobili-30/vaz_2113-648/sistema_ventilyacii_i_otopleniya-115/#part1668463″>Rear supply hoseVentilation and heating / Ventilation and heating system
- Passenger cars / VAZ / VAZ-21082 drawings
- » href=»/catalog/vaz-3/legkovye_avtomobili-30/vaz_2108-18/sistema_ventilyacii_i_otopleniya-41/#part27126″>Rear supply hoseVentilation and heating / Ventilation and heating system
- » href=»/catalog/vaz-3/legkovye_avtomobili-30/vaz_2108-18/sistema_ventilyacii_i_otopleniya-40/#part27104″>Rear supply hoseVentilation and heating / Ventilation and heating system
- Passenger cars / VAZ / VAZ-210992 drawings
- » href=»/catalog/vaz-3/legkovye_avtomobili-30/vaz_21099-79/sistema_ventilyacii_i_otopleniya-56/#part35556″>Rear supply hoseVentilation and heating / Ventilation and heating system
- » href=»/catalog/vaz-3/legkovye_avtomobili-30/vaz_21099-79/sistema_ventilyacii_i_otopleniya-55/#part35528″>Rear supply hoseVentilation and heating / Ventilation and heating system
- Passenger cars / VAZ / VAZ-21146 drawings
- » href=»/catalog/vaz-3/legkovye_avtomobili-30/vaz_2114-647/sistema_ventilyacii_i_otopleniya__11__13__15_-116/#part1668497″>Rear supply hoseVentilation and heating / Ventilation and heating system (11, 13, 15)
- » href=»/catalog/vaz-3/legkovye_avtomobili-30/vaz_2114-647/otopitel__11__13__15_-121/#part1668602″>Front supply hoseVentilation and heating / Heater (11, 13, 15)
- » href=»/catalog/vaz-3/legkovye_avtomobili-30/vaz_2114-647/sistema_ventilyacii_i_otopleniya-115/#part1668463″>Rear supply hoseVentilation and heating / Ventilation and heating system
- » href=»/catalog/vaz-3/legkovye_avtomobili-30/vaz_2114-647/otopitel__11__13__15_-121/#part1668600″>Heater outlet hose frontVentilation and heating / Heater (11, 13, 15)
- » href=»/catalog/vaz-3/legkovye_avtomobili-30/vaz_2114-647/otopitel-120/#part1668571″>Front supply hoseVentilation and heating / Heater
- » href=»/catalog/vaz-3/legkovye_avtomobili-30/vaz_2114-647/otopitel-120/#part1668569″>Heater outlet hose frontVentilation and heating / Heater
- Passenger cars / VAZ / VAZ-2120 “Nadezhda”1 drawing
- » href=»/catalog/vaz-3/legkovye_avtomobili-30/vaz_2120__nadejda_-245/otopitel-42/#part55345″>Heater outlet hose frontVentilation and heating / Heater
There are no reviews for this product yet.
Examination
If there is no inspection hole in the garage, then the car must be placed on an overpass. In bad weather conditions, it is still better to drive it into the garage. Raise it higher with a jack and place reliable supports under each part of the machine.
Note: Never leave your vehicle on a jack for long periods of time.
To work you will need:
- tool set;
- a lamp with a protective cap - in case of a fall or impact, the lamp will not break, and the fragments will not cause injury;
- antifreeze for topping up.
- First you need to disconnect the negative terminal from the battery.
- Lay a sheet of plywood or thick cardboard on the floor.
- It is necessary to start the inspection from the engine compartment and first make sure that the temperature of the cooling radiator and the engine has reached the ambient temperature.
- Check the connections of the pipes on the outlet and inlet fittings of the radiator.
- The connections to the thermostat at the expansion tank are also carefully checked.
Note: check with the palm of your hand, running at the bottom of the connections. You need to determine whether liquid is accumulating.
- Tighten the clamps, but do not tighten them too much, as you can damage the pipe itself if you overtighten the clamp.
- Then lie down on the prepared cardboard at the bottom of the car under the engine and check the pipe, as well as the suitable pipe of the water pump.
Note. Don’t forget to check the pipes that go to the interior heating system.
- Then continue checking under the hood.
- Rubber tubes suitable for the carburetor are carefully checked.
- Don’t forget to check the tightness of the radiator drain plug and coolant temperature sensor.
- After completing the inspection, make sure that all inspected connections are tight.
- Make a conclusion about the condition of the pipes.
"Folk" way
Folk craftsmen - these are brave and very desperate craftsmen - offer a much less labor-intensive method. The bottom line is that replacing the stove pipes (and the stove itself) is done without draining the coolant and without dismantling the instrument panel. The tools you will need are a set of screwdrivers, rags and a container (small) to drain the liquid from the pipes. In this case, replacing the heater radiator pipes is carried out according to the following scheme:
- Removing the terminals from the battery
- Close the heater tap
- We remove the right front seat (to make it easier to do the work)
- We unscrew the two screws securing the dashboard on the right side, and one screw located in the glove compartment, then, pulling the dashboard towards you, we place a wooden block
- Now there is a gap on the side of the passenger seat and you can get to the pipes and to the heater radiator itself
- Lay a rag on the floor of the cabin and prepare a container to collect the coolant
- Which will spill from the radiator and pipes
- We loosen the clamps of the pipes (photo above) and carefully, one by one, remove them from the radiator, replacing the container. 200 - 300 grams of coolant will drain into it
- Replace the pipes with new ones, and change the clamps, just in case.
- If necessary, unscrew the three bolts that secure the radiator to the stove and pull it down to the right
- We install the pipes and the new radiator in the reverse order.
Replacement
If at least one of the pipes is in doubt, the entire cooling system set must be replaced.
Dismantling
- First of all, you need to open the cap from the expansion tank. This must be done so that the cooling system has access to air.
- Open the interior heating valve, turn the lever to the right until it stops.
- Remove the crankcase protection, first unscrew the fastening bolts.
Note. To drain antifreeze from the radiator and engine, you need to prepare a container. It must be plastic or metal. It is better to use an old 10 liter plastic canister. To do this, cut off the top with a sharp knife. With such a container it will then be easier to backfill the radiator.
- Clean the area near the radiator drain plug and cylinder block well so that dirty residues do not get into the drained antifreeze.
- First place the prepared container under the radiator drain plug.
- Open it and wait for everything to drain.
- Do the same work under the cylinder block.
- Wait for the antifreeze to drain completely, then tighten both plugs - on the radiator and the block.
Note. The replacement must begin from the interior. To make repairs easier, you need to unscrew the instrument panel fastenings and move them to the side. The front seats - passenger, driver, must be moved to the farthest position towards the rear seats.
- Unscrew the clamps securing the antifreeze supply and return pipes from the heating tap. It is located in the partition between the engine compartment and the passenger compartment.
- Remove the rubber pipes if they are difficult to turn a little in different directions. Since they will be replaced, then you need to cut them lengthwise with a sharp knife. During operation, hot antifreeze causes the pipes to stick to the metal fittings. Therefore, it can be difficult to remove them, even with great effort.
Note. If you pull too hard, you can damage the metal connections of the fittings, which will lead to unpredictable consequences. Therefore, this work requires patience and attention. The same work of removing the pipes must be done under the hood. Unscrew the nuts that secure the heating valve.
- Using a flathead screwdriver, remove the valve from the engine compartment.
- Use pliers to disconnect the holder from the heating tap drive rod.
- The tap needs to be cleaned and the inside needs to be blown out with a pump.
- Consistently remove all other pipes from the engine and radiator.
Note. You should remember the sequence of their removal so that you can easily install new pipes later.
Installation
Before installing them you should:
- Clean all connections. To do this, carefully brush all surfaces around the circumference of each fitting with a metal brush. Wipe with a rag after cleaning. Make sure it is clean, as small particles remaining can cause blockages in the cooling system.
Note: go through all the edges of the clamps with a small file, since when tightening the rubber pipes with clamps, the sharp edges can cut through them.
- Before installation, place the clamps on the pipes in a free position. If the pipes do not fit well onto the fittings, then lubricate the edges of the fitting with liquid soap.
- Carefully pull the pipe, try to be even in diameter, without distortions.
- After installing the pipe in place, make sure that it fits tightly to the installation sites. Only after this should the clamps be tightened.
Classic way
It is worth noting right away that it is quite labor-intensive and will take quite a lot of time. You will need a lot of patience and care (as mentioned above). The most difficult part is removing the instrument panel and installing it, as it is much more difficult to get the instrument panel into place correctly.
Tool
- Coolant drain container
- Screwdriver Set
- Head with a wrench to unscrew the steering wheel
Let's start in order:
- Removing the terminals from the battery
- With the heater tap open, drain the coolant by unscrewing the drain plugs located on the radiator and cylinder block (into a substitute container)
- Removing the decorative trim from the steering wheel
- We unscrew the nut securing the steering wheel so that its end is flush with the end of the steering column shaft.
- The steering wheel is seated very tightly on the shaft splines, so for safety reasons it is not recommended to completely unscrew the nut securing the steering wheel: with a sharp impact, it will jump off the splines and can cause injury
- Be sure to mark the location of the steering wheel in relation to the shaft
- Knock the steering wheel off the shaft splines with sharp blows of your hand.
- Now you can finally unscrew the nut and remove the steering wheel
- Unscrew the six screws securing the lower steering column casing
- Remove the lower casing from the steering column, as well as the lining of the ignition switch (lock)
- Then remove the upper casing from the steering column
- Loosen the bolt securing the base under the steering switches
- We remove the base from the shaft, disconnect the blocks with wires (there are two of them) from the contacts of the car horn
- Now we disconnect the block with wiring from the windshield wiper and washer switch lever
- It is recommended to mark the terminals with wiring before disconnecting. This will help you avoid confusion during assembly and save time.
- Disconnect the block with wiring from the headlight and turn signal switch lever
- Pull the carburetor choke control handle (aka “choke”) towards you so that the draft comes out, remove the handle from it
- Unscrew the two screws securing the dashboard console trim
- Removing the cover from the console
- Remove the cigarette lighter from the socket
- We take out the ashtray from the nest by pressing on the plate to extinguish cigarettes
- Remove the handle that switches the heater fan
- Then we remove the three knobs that control the stove and hook them with a screwdriver
- Disconnect the block with wiring from the heater fan switch, located under the heater control panel
- Disconnect two wires from the contacts of the lamp illuminating the heater control panel
- Remove the headlight direction adjustment handle, just pull it towards you
- Now remove the instrument cluster lighting switch knob
- Unscrew the nut securing the instrument lighting switch
- Unscrew the nut securing the headlight hydraulic corrector
- We push the hydraulic corrector for headlights and the instrument lighting switch inside the panel
- Remove the side nozzles located on both sides of the dashboard using a screwdriver
- Unscrew one screw securing the trim on both sides of the dashboard
- Using a screwdriver, use a screwdriver to remove the exterior lighting switch.
- Disconnect the block with wires from the switch. Push the block inside the dashboard
- We use a screwdriver and remove the socket intended for radio equipment. If you have radio equipment installed on your VAZ 2109, remove it first
- We remove radio equipment according to the manufacturer’s instructions
- Then unscrew the screw securing the trim to the dashboard
- We insert two screwdrivers so that we can bend the plastic latches
- Raising the dashboard trim
- Disconnect the wiring harness from the cigarette lighter
- Disconnect the block with wiring from the block for lighting the cigarette lighter
- Disconnect the block with wiring from the lamp illuminating the hazard warning switch
- We disconnect the block with wiring from the hazard warning switch, and finally remove the dashboard trim
- Gently press down and remove the speaker cover located on the left side of the dashboard. Be careful - latches break easily
- Disconnect the block with wiring from the heated glass switch
- Remove the block from the rear fog lamp switch
- Unscrew the two screws securing the instrument cluster
- We take out the instrument cluster from the dashboard, unscrew the nut securing the cable from the speedometer and disconnect it
- Disconnect the red block from the instrument cluster
- Then disconnect the block from the control system
- Disconnect the white block from the instrument cluster
- Disconnect the ignition switch block from the ignition relay
- Disconnect the ground wire of the ignition relay
- Disconnect the control lamp block for opening the air damper
- Unscrew one screw from the lower mounting of the dashboard on both sides
- Disconnect the drawer light lamp block
- Unscrew the two screws securing the heater control panel and lower it down
- Unscrew the two screws securing the air damper guide rod to the dashboard
- Unscrew two screws from the upper mounting of the dashboard on both sides
- We use a screwdriver and remove one plug at a time from both sides of the dashboard.
- Unscrew one screw from the side mounting of the dashboard on both sides
- Unscrew the screw of the central fastening of the instrument panel
- Remove the dashboard
- After replacing the pipes or the heater radiator itself, we assemble the panel in the reverse order
- After installing the panel, we check the operation of the switches and all devices to ensure they are connected correctly
Let's return to the heater radiator pipes; we have already removed the panel:
- We disconnect the plastic clamp located on the right side of the heater, which holds the damper rod that heats the windshield
- Loosen the clamps and disconnect both pipes from the heater tap from inside the car under the dashboard
Loosen the clamps and remove the pipes
- Then loosen the clamps and disconnect both pipes from the heater valve located in the engine compartment (if you are going to remove the heater valve, otherwise skip it)
Disconnect the pipes in the engine compartment
- We replace the pipes with new ones, it’s better to replace the clamps right away, even if they are still suitable, it’s better not to risk it
- If necessary, you can unscrew the three screws securing the radiator to the stove
- And, raising the rod, pull out the heater radiator to check its condition and replace it
This is exactly how craftsmen are required to replace the VAZ 2109 stove pipes (replacement pipes) in service centers and auto repair shops. For owners who decide to do this work with their own hands, it is necessary to take into account that it will take 4-6 hours
Folk craftsmen - these are brave and very desperate craftsmen - offer a much less labor-intensive method. The bottom line is that replacing the stove pipes (and the stove itself) is done without draining the coolant and without dismantling the instrument panel. The tools you will need are a set of screwdrivers, rags and a container (small) to drain the liquid from the pipes. In this case, replacing the heater radiator pipes is carried out according to the following scheme:
- Removing the terminals from the battery
- Close the heater tap
- We remove the right front seat (to make it easier to do the work)
- We unscrew the two screws securing the dashboard on the right side, and one screw located in the glove compartment, then, pulling the dashboard towards you, we place a wooden block
- Now there is a gap on the side of the passenger seat and you can get to the pipes and to the heater radiator itself
- Lay a rag on the floor of the cabin and prepare a container to collect the coolant
- Which will spill from the radiator and pipes
- We loosen the clamps of the pipes (photo above) and carefully, one by one, remove them from the radiator, replacing the container. 200 - 300 grams of coolant will drain into it
- Replace the pipes with new ones, and change the clamps, just in case.
- If necessary, unscrew the three bolts that secure the radiator to the stove and pull it down to the right
- We install the pipes and the new radiator in the reverse order.
Here are both methods, choose the one that suits you, and also watch a video on this topic.
How to check the condition of the VAZ-2109 pipes
Ideally, an inspection hole is needed to inspect the machine. In a garage this is not always possible, so craftsmen came up with another way out of the situation - they installed the VAZ-2109 on an overpass. You will also need a powerful jack; the car is placed on reliable supports.
To inspect the condition of the VAZ-2109 cooling system, stock up on the following tools:
- a lighting fixture with a protective cap that prevents injury from fragments of a broken lamp in case it falls;
- antifreeze to top up the fluid in the expansion tank to the maximum level.
Follow the step-by-step instructions and the test will be completed without any difficulties:
- Disconnect the negative terminal from the battery.
- Lay plywood or a thick sheet of cardboard on the flooring.
- First inspect the engine compartment, it is important to understand that the temperature of the cooling radiator and engine is equal to the air temperature.
- Evaluate the tightness of the connections of the pipes on the fittings that approach and extend from the radiator.
- The fit of the expansion component to the thermostat must also be carefully checked and felt by running your palm along the bottom of the connections. If the tightness leaves much to be desired, liquid is released.
- Tighten the clamps properly, but do not over-tighten, otherwise you may damage the pipe.
- Lie down on the cardboard placed under the VAZ-2109 and inspect the pipe along with the incoming pipe of the water pump. The hoses responsible for the interior heating system are also important.
- Pay attention to the pipes under the hood.
- Do not go past the rubber channels adjacent to the carburetor.
- Tighten the radiator drain plug and antifreeze temperature gauge securely.
Dismantling the worn-out cooling system of the VAZ-2109
If the coolant hoses are not in perfect condition, you will have to replace not only one worn component, but the entire system.
To install new parts, you need to dismantle the old ones.
Do-it-yourself dismantling of the cooling system consists of the following steps:
- Remove the cap from the expansion tank.
- Unscrew the heating valve inside the VAZ-2109, rotate the lever clockwise until it hits the end point.
- Remove the crankcase protective part by carefully unscrewing the fasteners.
- The coolant is drained into a prepared container with a volume of up to 8 liters. To do this, it is convenient to use a metal canister - it is easiest to drain antifreeze from it back into the VAZ-2109. Clean the area near the radiator drain plug and cylinder block, making sure that no dirt gets into the antifreeze. Place the container under the radiator.
- When the antifreeze is drained, tighten the plugs located on the radiator and housing.
- Replacing cooling pipes in a VAZ-2109 also involves dismantling work inside the cabin. Unscrew the bolts securing the instrument panel, get rid of the passenger and driver's seats - you can move them as far back as possible.
- Disconnect the clamps connecting the transmission tubes and provided for filling new antifreeze from the heater tap. It is located between the engine compartment and the passenger compartment.
- If they are pulled out, remove the rubber pipes by turning them on different sides. The parts have to be replaced, so they need to be trimmed with a sharp knife. Do not pull with force, otherwise you may damage the metal fixation of the fittings.
- Using a flathead screwdriver, remove the valve located in the engine compartment.
- Using pliers, release the holder from the heater tap drive rod.
- Clean the faucet and blow out the inside with a pump.
- Remove the pipes gradually, you need to dismantle everything coming from the engine and radiator. Remember how they were fixed - at the stage of installing new components, this will help to install them back quickly and correctly.
Removing the pipes
When the liquid has been drained, we proceed to directly removing the old pipes of the system; they are secured with clamps; a screwdriver is required. We loosen the clamps and remove the rubber pipes, some are difficult to remove, you should not tear them off, you can damage the fitting. Rock the hoses from side to side, with little force, while pulling towards you. You can make a cut with a knife along the hose, this will allow you to remove them without making titanic efforts.
Carry out dismantling sequentially, and remember what you removed for what, in the future this will help to avoid the puzzle of installing new products. Make sure to disconnect all pipes from the engine and radiator.
Next, we clean the joints of the hoses and fittings. During operation, the system becomes clogged with debris; there will be salt deposits if low-quality coolant was used, or even ordinary water. Metal fittings are cleaned with a brush and wiped with a rag. Debris that gets inside leads to breakdowns.
Instructions for self-replacement of VAZ-2109 cooling pipes
Installation of new hoses for the VAZ-2109 cooling system is divided into the following stages:
- Use a wire brush to go over the joints, and then polish the surfaces with a clean cloth. Any small speck can cause a blockage in the cooling system.
- Treat the clamps with a fine abrasive file, because when tightening the rubber pipes with clamps, they can easily be damaged by sharp corners.
- Place the treated clamps on the pipes; if the pipes do not give in, wash the edges of the fitting with a liquid soap solution.
- You should tighten the pipe carefully, try to avoid distortions. The fit must be 100%, exactly in diameter.
- Retighten all elements, connections and plugs.
- Fill the expansion tank with antifreeze and tighten the cap.
Video instructions for replacing VAZ-2109 cooling hoses can be viewed below:
