Print this article Font size 16
If the thermostat fails, the engine will take a very long time to heat up to the required operating temperature, and while driving, the engine temperature will drop sharply. This is especially felt in winter due to a poorly heating stove.
To quickly check the condition of the thermostat, it is not necessary to remove it. To do this, start the cold engine and touch the lower radiator hose. In the normal state of the element, it will first be cold for a short time, but then quickly begin to heat up. This indicates that the coolant is moving along a large contour.
Appearance of the device
Replacing pipes
And when it’s time to change the heater radiator pipes on your VAZ 2109, don’t be afraid to do the replacement yourself. First of all, it is important to know where the stove radiator and its pipes are located. So, the heater radiator is located on the right heater casing (that is, to the right of the panel of heater control levers), direct access is blocked by the dashboard console. The price of the pipes themselves is a pittance, but for replacement at a service station they will demand a tidy sum, why? Now you will see for yourself. There are two ways to replace pipes (the methods are also suitable for replacing a stove radiator):
- The first - (the so-called classic) is carried out in accordance with the instructions (manual) for the operation, maintenance and repair of the VAZ2109.
- It involves removing the dashboard and draining the fluid from the engine cooling system.
- The second is simpler (folk), does not require complex manipulations
- In our article we will consider both methods so that you can choose the most convenient one for you.
How can you restore the functionality of a car heater?
In most cases, disruption of functionality occurs due to deflectors, which can still be dealt with. In this situation, insufficiently warm air blows onto the car window. The main task is to configure the functionality of the VAZ-2109 stove.
At the very beginning, you should remove the front dashboard to ensure access to the flap that cuts off cold air. In this case, you need to check its functionality. To do this, it is recommended to check the tight fit of the element to the casing through which air flows are transmitted.
Most often, a large gap is formed between the closing element and the walls of the gutter. Forcibly lifting the damper upward should reduce the existing gap. To do this, use regular pliers. Initially, you need to find the fastening cable located on the right side of the gas pedal, and then carefully bend the wire. This will ensure maximum protection against cold air flow.
Completing all of the above tasks will prevent material costs. Moreover, there will be a good opportunity for successful adjustment of the stove.
Classic way
It is worth noting right away that it is quite labor-intensive and will take quite a lot of time. You will need a lot of patience and care (as mentioned above). The most difficult part is removing the instrument panel and installing it, as it is much more difficult to get the instrument panel into place correctly.
Tool
- Coolant drain container
- Screwdriver Set
- Head with a wrench to unscrew the steering wheel
Let's start in order:
- Removing the terminals from the battery
- With the heater tap open, drain the coolant by unscrewing the drain plugs located on the radiator and cylinder block (into a substitute container)
- Removing the decorative trim from the steering wheel
- We unscrew the nut securing the steering wheel so that its end is flush with the end of the steering column shaft.
- The steering wheel is seated very tightly on the shaft splines, so for safety reasons it is not recommended to completely unscrew the nut securing the steering wheel: with a sharp impact, it will jump off the splines and can cause injury
- Be sure to mark the location of the steering wheel in relation to the shaft
- Knock the steering wheel off the shaft splines with sharp blows of your hand.
- Now you can finally unscrew the nut and remove the steering wheel
- Unscrew the six screws securing the lower steering column casing
- Remove the lower casing from the steering column, as well as the lining of the ignition switch (lock)
- Then remove the upper casing from the steering column
- Loosen the bolt securing the base under the steering switches
- We remove the base from the shaft, disconnect the blocks with wires (there are two of them) from the contacts of the car horn
- Now we disconnect the block with wiring from the windshield wiper and washer switch lever
- It is recommended to mark the terminals with wiring before disconnecting. This will help you avoid confusion during assembly and save time.
- Disconnect the block with wiring from the headlight and turn signal switch lever
- Pull the carburetor choke control handle (aka “choke”) towards you so that the draft comes out, remove the handle from it
- Unscrew the two screws securing the dashboard console trim
- Removing the cover from the console
- Remove the cigarette lighter from the socket
- We take out the ashtray from the nest by pressing on the plate to extinguish cigarettes
- Remove the handle that switches the heater fan
- Then we remove the three knobs that control the stove and hook them with a screwdriver
- Disconnect the block with wiring from the heater fan switch, located under the heater control panel
- Disconnect two wires from the contacts of the lamp illuminating the heater control panel
- Remove the headlight direction adjustment handle, just pull it towards you
- Now remove the instrument cluster lighting switch knob
- Unscrew the nut securing the instrument lighting switch
- Unscrew the nut securing the headlight hydraulic corrector
- We push the hydraulic corrector for headlights and the instrument lighting switch inside the panel
- Remove the side nozzles located on both sides of the dashboard using a screwdriver
- Unscrew one screw securing the trim on both sides of the dashboard
- Using a screwdriver, use a screwdriver to remove the exterior lighting switch.
- Disconnect the block with wires from the switch. Push the block inside the dashboard
- We use a screwdriver and remove the socket intended for radio equipment. If you have radio equipment installed on your VAZ 2109, remove it first
- We remove radio equipment according to the manufacturer’s instructions
- Then unscrew the screw securing the trim to the dashboard
- We insert two screwdrivers so that we can bend the plastic latches
- Raising the dashboard trim
- Disconnect the wiring harness from the cigarette lighter
- Disconnect the block with wiring from the block for lighting the cigarette lighter
- Disconnect the block with wiring from the lamp illuminating the hazard warning switch
- We disconnect the block with wiring from the hazard warning switch, and finally remove the dashboard trim
- Gently press down and remove the speaker cover located on the left side of the dashboard. Be careful - latches break easily
- Disconnect the block with wiring from the heated glass switch
- Remove the block from the rear fog lamp switch
- Unscrew the two screws securing the instrument cluster
- We take out the instrument cluster from the dashboard, unscrew the nut securing the cable from the speedometer and disconnect it
"Folk" way
Folk craftsmen - these are brave and very desperate craftsmen - offer a much less labor-intensive method. The bottom line is that replacing the stove pipes (and the stove itself) is done without draining the coolant and without dismantling the instrument panel. The tools you will need are a set of screwdrivers, rags and a container (small) to drain the liquid from the pipes. In this case, replacing the heater radiator pipes is carried out according to the following scheme:
- Removing the terminals from the battery
- Close the heater tap
- We remove the right front seat (to make it easier to do the work)
- We unscrew the two screws securing the dashboard on the right side, and one screw located in the glove compartment, then, pulling the dashboard towards you, we place a wooden block
- Now there is a gap on the side of the passenger seat and you can get to the pipes and to the heater radiator itself
- Lay a rag on the floor of the cabin and prepare a container to collect the coolant
- Which will spill from the radiator and pipes
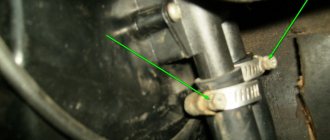
- We loosen the clamps of the pipes (photo above) and carefully, one by one, remove them from the radiator, replacing the container. 200 - 300 grams of coolant will drain into it
- Replace the pipes with new ones, and change the clamps, just in case.
- If necessary, unscrew the three bolts that secure the radiator to the stove and pull it down to the right
- We install the pipes and the new radiator in the reverse order.
Here are both methods, choose the one that suits you, and also watch a video on this topic.
Fast and high-quality replacement the VAZ-2109 heater radiator
Owners of VAZ Samara family know firsthand that one of the most vulnerable parts of the cooling system is the heater radiator. It very often fails, or rather, leaks. And the metal from which the radiator is made seems fine, and the heat exchange is good, but that’s all it leaks. Fortunately, the prices for this spare part are applicable, which allows for replacement as needed. Yes, and here everything is not so smooth. The fact is that replacing the VAZ- 2109 requires disassembling and removing the control panel. At least, this is what is indicated in the user manual for this car. We will tell you how to quickly replace the heater radiator of a VAZ-2109 without disassembling the dashboard.
Progress of work on replacing stove cables
Scheme of the VAZ-2109 stove
The first thing you need to do is turn off the power to the car. To do this, simply remove the negative terminal from the battery. Remove the panel trim in the area of the ashtray, radio and the mounting of the heater control levers - to do this, unscrew the 4 fastening bolts. Disconnect the wires from all switches: lights, foglights, radio, etc. Move the front seats all the way back or, in general, remove them so that they are not in the way. Remove the seat belt anchors on the floor. Also remove the plastic trim that holds the gear lever boot.
From under this casing you will need to remove the lower air duct. Very carefully disconnect the clamps from the faucet, and then the cables themselves. To make it convenient, first disconnect the leg heating flap rod (3), then the windshield heated flap rod (14), then the rod that controls the valve (19) and the rod that controls the flap (20). On the back of the heater, disconnect the wires that control the fan speed and the fastenings of the wires, backlights and levers. Not quickly, so as not to damage it, lower the heater control lever diagonally down. Now you can remove the cable and replace it with a new one.
Usually all the cables to the lever that controls the heater are included in the kit. You can’t buy them separately, but the set itself is not expensive, about 200 rubles.
After replacing the cables of the VAZ-2109 stove, the heating system should be assembled in the reverse order.
If you are not confident in your abilities and are afraid that you will not cope with the task, contact a car service. But keep in mind that the cost of replacement work will be decent, since replacing such a small part as a cable requires complete disassembly of the dashboard and quite a lot of time.
Symptoms of malfunction
In most cases, the stove announces its own dilemma with the onset of cold weather. Most drivers turn off the heater tap during the summer, stopping the flow of cooling water into the radiator. As the temperature drops, car owners begin to use the heater intensively, and often encounter wet spots of unknown origin on the carpet under the glove compartment on the front passenger side. This is the first sign that the heater radiator is leaking.
From time to time it happens that a leak cannot be visually found. Coolant can simply leak into the heater body, and from there, evaporating under the influence of warm air, enters the cabin through the deflectors of the ventilation and heating system.
In both cases, a specific smell inherent in antifreeze or antifreeze will linger in the cabin. In addition, a leak of cooling water into the car interior may be accompanied by the formation of a snow-white oily coating on the inside of the windshield.
If the listed symptoms appear, it will be necessary to replace the radiator of the VAZ-2109 heater, but before doing this, you should make sure that it is it that is leaking, and not the heater tap.
See:
Installing a New Thermostat
Before installing a working device, it is necessary to clean its location from dirt and rust. Apply a thin, even layer of any neutral sealant to the degreased surface. You should wait at least 10 minutes for it to dry slightly. After this, a new node is installed.
In the end, all that remains is to pour the required amount of coolant into the system, making sure that no air pockets form.
To make sure that everything is functioning normally, you need to start the power plant and inspect all connections for leaks. If detected, the latter are eliminated by tightening the fastening clamps.
In the vast majority of cases, after replacing the old thermostat, all unpleasant symptoms disappear for a long time.
The video below shows the replacement process in detail:
Source
Necessary tools and tools
After conducting a preliminary inspection of the heating system and making an accurate diagnosis, you can begin to prepare for repairs. You should start by purchasing a new heater core. Today you can find two types of these spare parts on sale: copper and aluminum. The former are reliable and, with proper operation, can last an average of five years. Of course, they cost more (1500-2000 rubles). Aluminum radiators are a little cheaper (about 1000 rubles), but they last half as long. There is another type of heat exchanger made of the same material (non-original), which is better not to buy, especially if you are making a car for yourself. It’s unclear where they are produced, but they cost about 600 rubles.
How to replace the radiator of a VAZ 21099 stove
The video shows how to replace the interior heater radiator of a VAZ 2109
with a high instrument panel.
How to replace the heater (stove) radiator of a VAZ 2109
How to remove the panel -.
In addition, independent replacement of the VAZ-2109 heater radiator involves the use of the following tools and means:
- set of wrenches;
- Phillips and slotted screwdriver;
- container with a volume of about 5 liters (for draining coolant);
- clean rag.
It is also desirable to have a male assistant present, who will help both physically and morally, because the upcoming procedure is not particularly exciting.
How is the check carried out?
First of all, it is worth pointing out that on a VAZ-2109 (with an 8-valve engine, as well as a 16-valve engine) you do not need to drain the coolant to check. The procedure is:
- start the engine;
- check the temperature of the lower pipe leaving the radiator.
Normally, it should remain cold, since the liquid circulates only in a small circuit. It heats up gradually. As the coolant reaches a temperature ranging from 87 to 92 degrees and the wax in the thermostat melts, the damper opens and a large circle begins to operate. If this does not happen, then the thermostat will have to be changed.
Before buying a new one, check whether the old one is really damaged. This is not difficult to do, just put the device in a pan of water (on a rag) and heat it to 87-90 degrees. A working device will open the main valve.
Preparing the car
Before you begin repairs, the car must be properly prepared for it. First you need to drain the coolant from the system. Warm up the engine to operating temperature and place the machine on an inspection pit or on an overpass. Carefully open the radiator cap and expansion tank cap. This is necessary so that the coolant drains faster. Now place a previously prepared container under the drain plug, and only then unscrew it with a key. It may take 7-10 minutes for all the coolant to leave the system.
Then you can proceed directly to the repair.
Dismantling
If it becomes necessary to remove the thermostat, then it will not be possible to do without draining the coolant. Some craftsmen claim that they were able to avoid the above procedure, but in reality it turns out that this option requires much more labor and still leads to the loss of 3 out of 5 liters of liquid. Therefore, it is better not to suffer and do everything as it should be. To do this, unscrew the plug located at the bottom of the radiator and drain the coolant into a suitable container. Then:
- remove the air filter;
- loosen the clamps holding the hoses;
- disconnect the mass from the thermostat;
- Unscrew the nut and pin holding the device.
Replacing the heater radiator on a VAZ-2109: instructions
We will bypass the method of replacing the heater, which involves dismantling the control panel. Although it is considered correct and is even written in the manual, it can take up a lot of not only your time, but also your nerves. Let's dwell on the folk method, invented and repeatedly used in our garages.
See:
The first step is to remove the front passenger seat, as it will interfere with our process. Next, turn off the heater valve and begin unscrewing the screws securing the control panel to the body on the right side. Don't forget to remove the glove compartment. Then unscrew the screws securing the panel on the right to the floor.
Check that all screws are unscrewed. To do this, try lifting the panel and pulling it towards you. If something interferes with this, it means that something is not unscrewed somewhere. If the panel moves, place any object (a block, a log, a bottle) between it and the body that would hold it in a raised state.
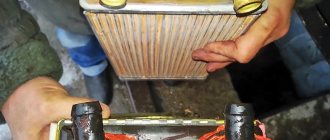
Replacing the VAZ-2109 heater begins with disconnecting the hoses from the pipes. To do this, just use a screwdriver to loosen the clamps and pull the hoses towards you. Be prepared for coolant to start leaking from the radiator. A clean rag should always be at hand. After this, you can dismantle the radiator itself. We unscrew the three screws on its cover, securing it to the body. The radiator can now be removed from the heater housing. The new part is installed in the reverse order.
But that is not all. Replacing the heater radiator yourself without removing the VAZ- 2109 should end with a thorough check of the tightness of the connections. When the radiator is installed, do not rush to screw the panel. Pour coolant into the system, remembering to tighten the drain plug, start the engine and warm it up. Having moved into the cabin, inspect the connections of the hoses and pipes, as well as the heater valve. If there are no leaks, you can assemble the panel.
Causes of overheating
The cause of overheating may be a malfunction of one or more elements of the cooling system. Common causes are a lack of coolant in the tank or a faulty thermostat. Many motorists simply forget to check these little things. Often, leaks can be found in the nine, due to which antifreeze or antifreeze constantly decreases. The VAZ 21093 model also suffers from similar phenomena as a result of long-term use.
Particles accumulate in the thermostat, which do not allow the moving element of the device to move; it jams.
- Replacing the pipes and thermostat solves the problem of overheating. But if overheating occurs for these reasons, then most likely the service life of one or another element has simply expired. Another thing is incorrect operation.
- The motor is not designed to operate under overload, for example, when towing or idling. In such cases, heating occurs so quickly that the temperature rises intensely above normal. The cooling system resource is insufficient, resulting in the engine overheating.
- Incorrect adjustment of the injection and ignition system at the factory or after repair leads to disruption of the combustion process of the combustible mixture. The exhaust gases at the outlet are hotter than necessary, as a result of which the temperature of the unit increases. Not only the engine suffers, but also the carburetor.
Too hot gases leaving the combustion chamber cause the exhaust valve to burn out, which also leads to overheating.
Some useful tips
Finally, here are some tips to ensure that your car heater serves you for as long as possible.
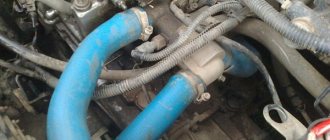
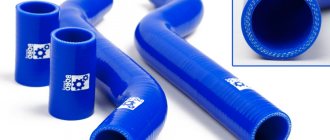
If the condition of the cooling system in the VAZ-2109 leaves much to be desired, the motorist needs to know how to properly replace the cooling pipes. Experts generally recommend checking every 15,000 km, regardless of whether the engine cooling system is working properly or not.
Do not despair if the test result is disappointing - even a beginner can cope with replacing the pipes in a VAZ-2109 with his own hands.
Heating system elements
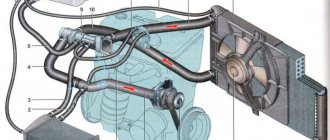
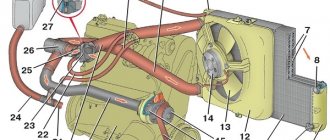
The stove diagram clearly shows the location of its main functional elements. It should be noted that the design of the stove on the VAZ-2108, 2109 and 21099 models is the same. Many car owners know that the heater in these models is not fully developed. As a result, the interior is not heated properly, so a decision is made to modify the stove with your own hands. Just in this case, it is important to know the design of the heater so as not to confuse anything.
The design of the stove of the VAZ-2109 car, whether it is a high panel or a low one, is absolutely identical. Therefore, the information presented will be useful to owners of this model with any instrument console.
Knowing the main points and what is located where, you can already try to independently deal with the problems that arise and fix the malfunctions that appear, while saving money and time on trips to the service station.
How to check the condition of the VAZ-2109 pipes
Ideally, an inspection hole is needed to inspect the machine. In a garage this is not always possible, so craftsmen came up with another way out of the situation - they installed the VAZ-2109 on an overpass. You will also need a powerful jack; the car is placed on reliable supports.
To inspect the condition of the VAZ-2109 cooling system, stock up on the following tools:
- a lighting fixture with a protective cap that prevents injury from fragments of a broken lamp in case it falls;
- antifreeze to top up the fluid in the expansion tank to the maximum level.
Follow the step-by-step instructions and the test will be completed without any difficulties:
- Disconnect the negative terminal from the battery.
- Lay plywood or a thick sheet of cardboard on the flooring.
- First inspect the engine compartment, it is important to understand that the temperature of the cooling radiator and engine is equal to the air temperature.
- Evaluate the tightness of the connections of the pipes on the fittings that approach and extend from the radiator.
- The fit of the expansion component to the thermostat must also be carefully checked and felt by running your palm along the bottom of the connections. If the tightness leaves much to be desired, liquid is released.
- Tighten the clamps properly, but do not over-tighten, otherwise you may damage the pipe.
- Lie down on the cardboard placed under the VAZ-2109 and inspect the pipe along with the incoming pipe of the water pump. The hoses responsible for the interior heating system are also important.
- Pay attention to the pipes under the hood.
- Do not go past the rubber channels adjacent to the carburetor.
- Tighten the radiator drain plug and antifreeze temperature gauge securely.
Dismantling the worn-out cooling system of the VAZ-2109
If the coolant hoses are not in perfect condition, you will have to replace not only one worn component, but the entire system.
To install new parts, you need to dismantle the old ones.
Do-it-yourself dismantling of the cooling system consists of the following steps:
- Remove the cap from the expansion tank.
- Unscrew the heating valve inside the VAZ-2109, rotate the lever clockwise until it hits the end point.
- Remove the crankcase protective part by carefully unscrewing the fasteners.
- The coolant is drained into a prepared container with a volume of up to 8 liters. To do this, it is convenient to use a metal canister - it is easiest to drain antifreeze from it back into the VAZ-2109. Clean the area near the radiator drain plug and cylinder block, making sure that no dirt gets into the antifreeze. Place the container under the radiator.
- When the antifreeze is drained, tighten the plugs located on the radiator and housing.
- Replacing cooling pipes in a VAZ-2109 also involves dismantling work inside the cabin. Unscrew the bolts securing the instrument panel, get rid of the passenger and driver's seats - you can move them as far back as possible.
- Disconnect the clamps connecting the transmission tubes and provided for filling new antifreeze from the heater tap. It is located between the engine compartment and the passenger compartment.
- If they are pulled out, remove the rubber pipes by turning them on different sides. The parts have to be replaced, so they need to be trimmed with a sharp knife. Do not pull with force, otherwise you may damage the metal fixation of the fittings.
- Using a flathead screwdriver, remove the valve located in the engine compartment.
- Using pliers, release the holder from the heater tap drive rod.
- Clean the faucet and blow out the inside with a pump.
- Remove the pipes gradually, you need to dismantle everything coming from the engine and radiator. Remember how they were fixed - at the stage of installing new components, this will help to install them back quickly and correctly.
Scheme and design
In order to promptly determine the malfunction, check or replace the thermostat, you must first understand its circuit and design elements.
The scheme presented above is deciphered as follows.
Item number
| 1. | Inlet pipe coming from the radiator |
| 2. | Rubber insert |
| 3. | Heat sensitive solid filler |
| 4. | Bypass valve spring |
| 5. | Inlet pipe coming from the engine |
| 6. | Bypass valve |
| 7. | Outlet pipe going to the pump |
| 8. | Main valve spring |
| 9. | Main valve |
| 10. | Pipe coming from the expansion tank |
| 11. | Piston |
Instructions for self-replacement of VAZ-2109 cooling pipes
Installation of new hoses for the VAZ-2109 cooling system is divided into the following stages:
- Use a wire brush to go over the joints, and then polish the surfaces with a clean cloth. Any small speck can cause a blockage in the cooling system.
- Treat the clamps with a fine abrasive file, because when tightening the rubber pipes with clamps, they can easily be damaged by sharp corners.
- Place the treated clamps on the pipes; if the pipes do not give in, wash the edges of the fitting with a liquid soap solution.
- You should tighten the pipe carefully, try to avoid distortions. The fit must be 100%, exactly in diameter.
- Retighten all elements, connections and plugs.
- Fill the expansion tank with antifreeze and tighten the cap.
Video instructions for replacing VAZ-2109 cooling hoses can be viewed below:
