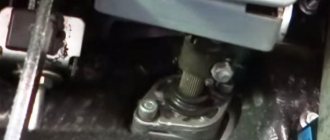
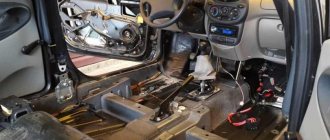
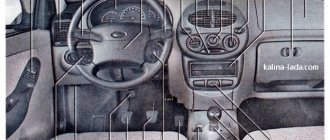
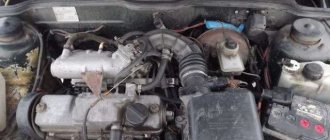
In the Lada Kalina, the electronic control unit is placed thoughtlessly, since it can easily be flooded and the brains will be blown out. The designers did not think that our people could place glasses of drinks near the ECU and thereby put it at risk. But, many car enthusiasts use the technique of moving the block to a safer place.
Video on transferring an electronic control unit (ECU)
The video contains a plot and recommendations for moving the electronic control unit of the Lada Kalina to a safe place where it will not be accessible to accidental contact with liquids.
Replacing the Lada Kalina ECU controller - step-by-step instructions
Greetings, dear friends and readers of our site. In today’s article I would like to talk to you about the ECU controllers for Lada Kalina 1 and 2. Well, if you look into the very structure of this post, we will talk about where the ECU controller is located, how to dismantle it yourself, and of course interchangeability controllers.
Location, purpose and device
The speed controller in the Lada Kalina car is a device made in a plastic case in the form of a cylinder. Inside the body there is a sensitive component that determines the speed of movement. As you can understand, the main purpose of the device is to accurately determine the speed limit.
As for where the sensor is located, it is located on the car's gearbox, on top. To access it, you need to open the hood - in the engine compartment, an air hose connects the throttle to the air filter. If you remove this pipe, you will be able to see the controller directly below it, on the top of the transmission.
Where is the ECU controller located on the Lada Kalina
So, the Kalina engine control unit is located at the very bottom of the console, between the floor and the heating radiator. It is accessible from the passenger's feet.
To do this, you need to remove the plastic cover, which is attached with one screw. We unscrew it and move the lining forward along the direction of the car, after which it should completely disengage. We remove the cover to the side. Below it we see the following picture.
Location of the ECU controller on Lada Kalina
Share link:
Similar articles
- Immobilizer APS-6.1 and electrical package control system Lada Kalina Lux. Device and operating procedure.
- Electrical circuit diagram of the Lada Granta mounting block.
- Location of relays and fuses in the Lada Granta mounting block.
- VAZ cars - electrical equipment (2002).
- Access control system Lada Vesta. Device and fault diagnosis.
- Diagram of direction indicators and hazard warning lights for Lada Largus.
- Electrical connection diagram for the wiring harness of the front left door of the Lada Granta.
- Electrical connection diagram for the rear door wiring harness of the Lada Granta.
- Electrical connection diagram for the wiring harness of the Lada Granta license plate lights.
- Diagram of the Lada Largus central locking system.
- Diagram of cleaners and washers for the windshield and tailgate glass of the Lada Largus.
- Electrical connection diagram for the Lada Granta air intake box wiring harness.
- Electrical heating diagram for the rear window of Lada Largus.
- Lada Largus sound signal connection diagram.
- Wiring diagram for rear view mirrors Lada Largus.
Why the ECU on the Lada Kalina does not work - the main reasons
One of the most common problems that Lada Kalina owners encounter is ECU failure. Let's look at the main reasons for controller failure:
- Failure due to a short circuit in the on-board network. Here, you can get by with little effort and solder the main resistors, or it will lead to complete combustion of the element.
- If liquid gets on the unit panel, which will lead to complete failure. Usually the ECU is filled with antifreeze.
- Illegal actions of third parties that will lead to ECU failure.
- Other reasons not previously stated.
All these reasons will serve as a reason for diagnosing and dismantling the car control unit.
Technical inaccuracy
Due to the fact that a rather serious mistake was made in the design of the car, drivers are faced with the problem of failure of the control unit. Replacing the ECU may be necessary after the interior heating furnace has been running for a very long time. Why is that?
The control unit of the Lada Kalina is located exactly under the stove, which is why it suffers very often. Fluid from the stove often floods everything underneath it, including the ECU. All Kalina owners face this problem, and everyone solves it in their own way.
There are 3 options to solve the problem:
- send the car to a car service center to replace the ECU;
- transfer the ECU yourself;
- Insulate the installation location of the control unit and do not move it.
The difficulty of the first option is that even at a car service center there are very rarely blocks for Kalina in stock. If you need the machine in working order as quickly as possible, this option is not suitable at all, since replacement takes place within a few weeks.
The second option is risky, but is often the best solution to this problem. Moving the ECU to another location will take some time, but within a few hours the job will be done on its own.
The third option is fast, cheap, but impractical. You can place the unit in a kind of protective case, but such protection will not be enough for a long time.
How to remove the ECU on a Lada Kalina - step-by-step instructions
In order to remove the ECU unit on a Lada Kalina, you must perform the following procedure:
- First you need to unscrew 2 screws, the location of the first is shown by the arrow. The second is at the same level on the engine side. Before doing this, you must remember to remove the terminal from the battery. After unscrewing the screws, do you need to pull the block towards the passenger door? and he must leave from there along the guides. Sometimes it happens that the wires rest against the carpet. Then they need to be corrected.
- In order to remove the connector and disconnect the unit from the wires, you first need to: pull the connector lock to the side. The latch is a bracket. I think you can easily find it on the connector.
We flash the Itelma M74 (Lada Granta) ECU with our own hands
In order to independently flash the Itelma M74 ECU, which, as we already know, is installed on the Lada Grant, you need to perform the following procedure:
- Disconnect the battery mass.
- Remove the ECU block. The connectors are disconnected like this:
- Let’s make a “spider” like this (I recommend signing the wires)
- We connect the connectors: Connector 1 (large) J1 - switchable voltage (K15) (12V) - second switch B2 - programming permission (12V) - first switch A4 - programming permission (12V) - first switch Connector 2 (Small) G2;G3; G4 - Ground (can be connected to any) H1; H2 - non-switchable voltage (K30) F2 - switchable voltage (K15) (12V) - second switch D2 - K-Line
- here's EL. diagram (many people write that they are flashing, but there is no diagram anywhere)
6. It is not recommended to apply voltage to all wires at the same time! It is necessary step by step through a double switch.
7. 4-And so the whole circuit is assembled and the KKL VAG-COM cord is inserted into the USB PC. Here is the voltage supply sequence
- Apply voltage (+12 V) to H1; H2 (throw the hooks onto the battery)
- Turn on the first switch (programming permission) B2 A4
- We launch the WinFlashECU program (-Select M74, -select the port number on which KKL VAG-COM hangs -it’s better to set the speed to the minimum)
- Next, turn on the second switch (which is on the “switch-off voltage”) F2 J1
- Communication with the ECU should appear (this is an indicator that the circuit is assembled correctly)
- Then we save copies of your “firmware and immo” on your computer, click
- Reading EEPROM and Reading ECU just in case (at the same time we check how everything works)
- code copying finished
- click ECU programming, look for the required firmware on your computer and download
The ECU on Kalina is filled with antifreeze - what to do?
After the block filled with antifreeze has been removed, its initial inspection should be carried out. For these purposes, it is necessary to remove 4 screws using a star screwdriver. Then you should slowly remove the control board for a visual inspection. The most common failure is the burnout of the ignition coil output switch. In this case, repair will not help.
As a result of such a malfunction, the Lada Kalina starts working on only 2 cylinders, and sometimes refuses to start at all. You can cope with a similar problem in a stationary workshop. There they will remove the damaged element, wash and dry it. The second most common problem is board burnout. It is not difficult to detect such a defect: the characteristic blackening of the board will leave no doubt.
Is it possible to repair the ECU in this case? The answer to this question can only be given by a service center, but experience shows that repairs will not help here. A complete replacement is required. It happens that sometimes the brain circuitry is slightly damaged. If this happens, then the car owner can get off easy. To restore the car to working order, you will need some minor repairs:
- wipe the block with a dry cloth;
- rinse with WD-40 several times and blow it out with a compressor;
- rinse several times in alcohol and blow again with a compressor;
- dry well, otherwise the Lada Kalina will not move;
- drying takes at least 1-2 hours.
How to independently diagnose the unit?
At first glance, it may seem that diagnosing an ECU is a difficult task that not everyone can handle. Indeed, checking your block is not so easy, but having theoretical knowledge, it is quite possible to apply it in practice.
Required tools and equipment
To check the functionality of the module yourself, you will need to perform a number of steps to connect to the ECU.
To perform the test you will need the following devices and elements:
- Oscilloscope. It’s clear that not every car enthusiast has such a device, so if you don’t have one, you can use a computer with the necessary diagnostic software pre-installed on it.
- Cable for connecting to the device. You need to select an adapter that supports the KWP2000 protocol.
- Software. Finding diagnostic software today is not a problem. To do this, just monitor the network and find a program that is suitable for your vehicle. The program is selected taking into account the car, since different control units are installed on different cars.
1. Laptop for testing
2. Adapter for connection
3. KWP_D diagnostic software
Algorithm of actions
The diagnostic procedure for the electronic control system is discussed below using the Bosch M 7.9.7 module as an example. This control unit model is one of the most common not only in domestic VAZ cars, but also in foreign-made cars. It should also be noted that the verification process is described using the example of using the KWP-D software.
So, how to check the ECU at home:
First of all, the adapter used must be connected to a computer or laptop, as well as the ECM itself. To do this, connect one end of the cable to the output on the unit, and the other to the USB output on the computer. Next, you need to turn the key in the car's ignition, but you do not need to start the engine. By turning on the ignition, you can launch the diagnostic utility on your computer. After completing these steps, a window with a message should pop up on the computer screen, which confirms the successful start of diagnosing malfunctions in the controller. If for some reason the message does not appear, you need to make sure that the computer successfully connected to the controller
Check the quality of the connection and connection of the cable to the unit and laptop. Then a table should be displayed on the laptop display, which will indicate the main technical characteristics and operating parameters of the vehicle. At the next stage, you need to pay attention to the DTC section (it may be called differently in different programs). This section will present all the faults with which the power unit operates
All errors will be displayed on the screen in the form of encrypted combinations of letters and numbers. To decipher them, you need to go to another section, which is usually called Codes, or use the technical documentation for your car. If there are no errors in this section, then you now don’t have to worry, since the vehicle’s engine is working perfectly (the author of the video about ECU repair at home is the AUTO REZ channel).
But this verification option is most relevant if the computer sees the block. If you have problems connecting to it, then you will need an electrical diagram of the device, as well as a multimeter. The tester or multimeter itself can be purchased at any specialty store, and the electrical circuit diagram of the ECM should be in the service manual. The diagram itself needs to be studied most carefully; this will be required for verification.
In the event that the ECM points to a specific block, and does not show erratic data, then in accordance with the diagram it needs to be found and called. If there is no accurate information, then the only way out is to diagnose the entire system; as we said above, breakdowns are considered one of the main faults.
After the breakdown is found, it is necessary to check the resistance and determine exactly where the cable is fixed. You will need to solder the corresponding new wire parallel to the old one; if the reason lies in the breakdown, then these actions will eliminate the problem. In all other cases, only qualified specialists can solve the problem.
ECU interchangeability on Lada Kalina
I will give a table of interchangeability of Kalina ECU
. This data was not verified by me personally, but by one authoritative master. The interchangeability of these blocks applies only to blocks with factory firmware (that is, after installation there is no need to reflash the block for your engine and sensors). So, in each line there is a block marking, firmware version and toxicity class.
- Bosch 21114-1411020-40 with software B104CR01(02) Euro3 (in my cases it was this one) can be replaced with:
- Bosch 21114-1411020-40 with software B102СQ05(CR06) Euro3;
- Bosch 11183-1411020-02 with software B101CR01(02) Euro2.
There is one peculiarity here. If your car has an air conditioner, then the firmware version must be B104CR02 and no other, otherwise the engine will not compensate for the load from the air conditioner. But since in this article we are talking about a car without it, you can ignore the last 2 digits of the firmware.
All of the above Bosch blocks can be replaced with domestic Janvr7.2 and 7.2+ blocks.
Domestic blocks are all Euro 2, with the exception of M73 blocks - they are Euro3. January 7.2 and 7.2+ blocks manufactured by Avtel or Itelma (Euro2) for Kalina 1.6l 8V: 7.2 11183-1411020-21(22) with software A(I) 201CO56(57)(58); 7.2+ 11183-1411020-21(22) with software A(I)201CP57. These blocks do not support air conditioning, as I understand it. And, in fact, the M73 blocks, which are suitable for Kalina. These units are all Euro 3: M73 21114-1411020-41 with software A303CE05(CF06) Euro3 (support air conditioning); M73 21114-1411020-42 with software I303CE05(CF06) Euro3 (support air conditioning).
ECU control units for VAZ cars of the 2022 model year
Currently, in cars of the Granta, Kalina-2, Priora families, control units of the ME17.9.7 BOSCH and M74 brands are used.
In 100% of cases, Prioras have a BOSCH controller programmed to control the dashboard via the CAN bus. The M74, which is now installed in Grant cars (version 11186-1411020-12), has the same property.
Speaking of the configuration with the 21127 engine, behind the glove compartment of the Kalina-2 you can find a control unit called “M74”. It should be noted that the ME17.9.7 and M74 blocks are built on different hardware platforms. In this connection, the software in them is different and incompatible, although it performs the same functions. Simply replacing the controller by installing a BOSCH unit instead of M74 (M74CAN) will not work. Improvement will be required not only at the “software” level.
Itelm also has new developments of its own. For example, the "M75" block, which was first released in 2022. Using the ME17.9 block, the Priora 21126 engine complies with the Euro-4 standard. It is assumed that after installing another ECU, the engine can go into the Euro-5 category. For these purposes, the M75 was developed. Moreover, this device is completely interchangeable with BOSCH ME17.9.7.
The history of ECU units produced by NPP Itelma goes back more than 14 years. The first options were intended for engines that meet Euro-2 standards, and any controller produced today controls a motor that meets the requirements of Euro-4 and higher.
Replacing the controller (ECU) and transferring it to Kalina
Welcome! Controller - popularly it is simply called the brain, but scientifically it is briefly called the ECU, that is, the Electronic Engine Control Unit, it performs all electronic functions in the car, starting from instrument readings (Thanks to it, you understand how many revolutions it gives to the engine at one time or another, and you also understand the speed, it is only with the help of it that it is recognized, but also the sensor itself, which transmits this information to the controller) and ending with the very operation of the engine, and therefore if it fails, then all the instruments first of all stop giving readings to you and the car also won’t start, but by changing it to a new one, the car will come back to life again and will drive as if nothing had happened, but it’s best to change it to exactly the same one as it was before, it’s just that all the controllers are configured for certain sensors and for certain engines, but still, if you want, you can install a different model, but you need to make sure that the connector for the wire block in it is exactly the same as on the old one and it is desirable that it has the same dimensions, in addition, you will either have to calibrate it online, or upload a ready-made program (at your discretion and according to your financial capabilities), people also call calibration firmware so that you immediately understand what we are talking about.
Note! To carry out the work of replacing the controller on a car, you will need to stock up on: Screwdrivers, or to be more precise, you will need a Phillips screwdriver with which you will need to unscrew the screw securing the right facing, as well as a wrench you will need with which you can remove the minus terminal from the battery!
Summary:
Where is the controller (ECU) located? On all cars it is installed differently and even on Kalina cars, depending on the year of manufacture, it can be in different places, for example on Kalina 2 (We are not considering those in this article) it is located under the carpet and, unlike the first Kalina, completely in another place, on the first Kalinas, unfortunately, the controller is so poorly located that when the stove faucet fails (When it starts to leak), it begins to flood, in connection with this, all its electronics quickly perish and therefore, in a very short time, the controller becomes unusable and must be replaced, for clarity, where it is located on the first Kalinas, you can see in the photo below, the arrow indicates the right facing of the floor tunnel and if you remove it, you will see the controller before your eyes.
Note! Let us give you some advice: when buying your first Kalina, we recommend that the first thing you do is take care of the controller, namely, move it from one place to another, otherwise if the stove faucet starts to flood it, then you will have to look for money somewhere for a new one, and a new controller costs a lot money and therefore you need to take care of the one you have so that you don’t have to replace it with a new one (In this article we will also touch on the topic of transferring this part, so read everything carefully)!
When do you need to change the controller (ECU)? In fact, it’s not so easy to come across a broken controller, because they actually live almost their entire life while the car itself is driving, but it can still either burn out or, due to an unfortunate location, be completely filled with water, coolant, etc. ., maybe, like with the first Kalinas, this happens (on them the controller is located very poorly from the factory), the symptoms of its failure are the loss of communication with the ECU (That is, you connect to it and the computer simply does not see it), as well as incorrect operation of the engine, incorrect operation includes engine tripping, misfires in the ignition system, incorrect operation of fuel injectors (They can either pour and fill the engine in connection with this, or they simply turn off and will not work) and the car may not start, but after these symptoms appear on the ECU, you should think about it last, especially if you have moved it to a place where there is no moisture, just as we have already said, these control units are eternal and almost never fail.
Note! The best way to understand whether the control unit is working or has failed is to install exactly the same unit from a known-good car; unfortunately, it is very difficult to determine its condition simply by looking at it; in addition, the unit can even communicate and show that it is in the car does not have any errors, although it will not start the car itself, or it will, but the car will not work correctly and will not develop its full potential and power!
Main malfunctions and their causes
- The device often fails due to mechanical damage. For example, the device received a strong blow or prolonged vibrations were observed, which caused cracks to appear on the soldered contacts and in other places.
- The controller overheats due to strong temperature changes. For example, in winter, some motorists start the engine at high speeds, trying to ensure it starts, which results in overheating of the ECM.
- Corrosion. Oddly enough, rust appears on the module due to frequent changes in air temperature and, as a result, the occurrence of large amounts of condensation.
- Depressurization. For this reason, moisture gets inside, which leads to failure of the device.
- Lack of communication with the control unit. Occurs after interference in the control system from the outside. This often happens when they try to “smoke” another car with a dead battery from one car. It is possible that while the engine is running the battery terminals are reset or the polarity is incorrect when connecting (the terminals are reversed). Less often, lack of communication occurs due to the starter starting without connecting power to it.
If the device is not working correctly or there is no connection at all, then you can notice this by the following signs:
- If there are obvious malfunctions, the Check Engine icon on the instrument panel does not light up or flashes intermittently at varying frequencies. You must first make sure that the light bulb is working properly and that it has power, and only then can you diagnose the ECU module.
- When connecting a diagnostic scanner to the connector, the latter produces incorrect data that raises serious doubts. Simply put, the data is completely different from what it should be. If the controller fails, the scanner may not connect at all.
- Engine malfunctions, tripping, the car does not start or starts with difficulty. However, there are no objective reasons for such phenomena.
- Misfires when the ignition system is in good condition.
- The fan in front of the radiator turns on spontaneously.
- For no apparent reason, fuses burn out, and different ones. Usually fuses blow due to voltage surges in the on-board network or a short circuit in the circuit, but if the diagnostics do not reveal such problems, then the problem is with the ECM.
- Pulses from the sensors do not arrive or arrive, but unevenly.
- Incorrect operation of the gas pedal. This is especially true for the electronic pedal: when the driver presses it, it either does not respond or does so late.
- Damage to the device body or contacts, for example, traces of burning on the terminal blocks.
How to replace and transfer the controller (ECU) to a VAZ 1117-VAZ 1119?
Note! When the ECU is removed, inspect it; there should be no cracks; if necessary, disassemble it by removing the cover from it (there you will need to unscrew the side screws) and when the cover is removed and the board itself is in front of your eyes, then the first thing inspect it and there should be no moisture on it and it should be in normal condition and there shouldn’t be anything torn from it either!
Removal: 1) First, turn off the power to the entire on-board network, otherwise if water gets on the controller or on the wire block when you disconnect it, it will immediately disable it, or the wires will burn out, but even without water the wires can close , so still protect yourself by removing the minus terminal from the battery for this (For how to do this, read “in this article” in paragraph 1), then from the side of the passenger seat, or to be more precise, in the place where passengers put their feet climb up and there will be a side lining of the floor tunnel on the side, it is fastened with one screw, you unscrew it and then remove the lining as shown in the small photo in the example of the left lining.
2) As soon as the right facing is removed, look for the control unit at the very bottom, it is attached with one screw to the heater body (This screw is indicated by an arrow in photo 1), you unscrew this screw and then remove the controller along the guides when it is removed , disconnect the block of wires from it, to do this, pull out the lock that secures the block to the control unit (see photo 2) and after that the block can be disconnected from the controller and thus you will have it completely removed.
Installation: The new controller is installed in the reverse order of removal, but there are some nuances during installation, firstly, the immobilizer (This only applies to the new control unit, so if you don’t change it, you don’t need to do anything) unless you have it disabled you will have to retrain (For information on how to do this, read the article: “Training the immobilizer on a VAZ”), and secondly, if you are going to install the controller in the same place (Which we do not advise you to do), then make sure that the controller brackets fit in ( The brackets are indicated by red arrows; in the photo, by the way, the heater has been removed from the car for clarity) exactly into the guides of the heater housing.
Additional video: Be sure to check out the video below, it tells you why you need to move the control unit from its regular place, and also shows where it can be secured and how all this is done.
Dismantling and installation of the block
Most drivers who searched for a location mainly used the glove compartment as a new location for the part. There are 2 mounting options: under the glove compartment or inside the bend of this compartment. In the first case, you will need a corner and several screws.
The procedure for obtaining the ECU:
- Armed with a Phillips screwdriver, you need to remove the panel from the front passenger seat.
- Remove the driver's side plastic panel. The block itself should now be visible.
- To remove the part, you will need to unscrew the mounting screws. Using the same screwdriver, unscrew the fasteners.
- After unscrewing the fasteners, you need to pull out the part. Pull it towards you; if it doesn’t give in, you need to move the block a little from side to side and try again. You can push it from the other side.
After the block has been removed, you can begin installing it in a new location.
Now it’s time to move on to the new installation location. The first option is quite simple:
- You will need to make a hole in the left wall of the glove compartment for a self-tapping screw.
- To mount the ECU you will need a self-tapping screw and a corner. The corner is attached to the part and secured with a bolt, screw or self-tapping screw through the glove compartment.
- On the other hand, it does not need to be secured, since it rests against the wall. The option is quite good and can be completed without unnecessary alterations within 40-50 minutes.
The second option is to store it in the glove compartment. Not the most convenient placement, but still usable. There is a small space under the glove compartment, the entire ECU can fit there.
After this, the block can be placed in a secluded corner away. You can reach this place only with a strong desire and on purpose, so the block is out of danger.
Where is the ECU located on the Lada Kalina?
In the Lada Kalina, the electronic control unit is placed thoughtlessly, since it can easily be flooded and the brains will be blown out. The designers did not think that our people could place glasses of drinks near the ECU and thereby put it at risk. But, many car enthusiasts use the technique of moving the block to a safer place.
Video on transferring an electronic control unit (ECU)
The video contains a plot and recommendations for moving the electronic control unit of the Lada Kalina to a safe place where it will not be accessible to accidental contact with liquids.
Removing the controller
To quickly remove the electronic control unit, follow these steps:
Location of the controller in the interior of cars of the LADA 4x4 family
- Turn off the ignition.
- Disconnect the wire from the negative terminal of the battery (spanner “10”).
- Unscrew the fastening screws and remove the right screen of the instrument panel console (using a Phillips screwdriver). For the LADA 4x4 family, remove the left front upholstery.
- Disconnect the wiring harness connectors from the controller.
- For the LADA PRIORA family, unscrew the two nuts securing the controller and remove the controller assembly with bracket from the car (wrench “8”). Unscrew the four screws and disconnect the bracket from the controller (using a Phillips screwdriver).
For the LADA KALINA family, unscrew the screw securing the controller and remove the controller assembly with bracket from the car (a Phillips screwdriver). Unscrew the four screws and disconnect the bracket from the controller (using a Phillips screwdriver).
New Lada: Scheme of Lada Kalina VAZ-1117, VAZ-1118, VAZ-1119 | 2 Schemes
For the LADA 4x4 family, unscrew the four nuts and remove the controller (wrench “8”).
If the controller malfunctions, a “clean” controller must be used for replacement.
Reasons for the need for dismantling
Engine control unit (ECU) Lada Kalina
What reasons could cause the electronic control unit to be dismantled:
- Failure due to a short circuit in the on-board network. Here, you can get by with little effort and solder the main resistors, or it will lead to complete combustion of the element.
- If liquid gets on the unit panel, which will lead to complete failure. Usually the ECU is filled with antifreeze.
- Illegal actions of third parties that will lead to ECU failure.
- Other reasons not previously stated.
All these reasons will serve as a reason to dismantle the car control unit.
We dismantle the console and take out the ECU
In order to directly get to the car control unit, you will need to remove the central tunnel. Let's consider the sequence of operations for dismantling the ECU:
- Unscrew the screws of the handbrake handle trim.
- Remove the cover from the gearshift lever. The facing panel will also have to be removed.
- Near the pedals, unscrew the fastening screws and remove the trim.
Kalina ECU fasteners
So, it turned out to be quite easy to dismantle the Kalina ECU. The location is convenient and accessible.
Checking the functionality of the controller
After replacing the controller or resetting the controller using a scan tool, you must perform the Throttle Zero Adaptation procedure and the Misfire Diagnostic Adaptation procedure.
The procedure for adapting the throttle zero of Priora, Kalina: with the car standing, you must turn on the ignition, wait 30 s, turn off the ignition, wait until the main relay turns off.
Adaptation will be interrupted if:
- the engine turns over;
- the car is moving;
- the accelerator pedal is pressed;
- engine temperature is below 5 °C or above 100 °C;
- Ambient temperature is below 5 °C.
The procedure for adapting the misfire diagnostic function of Priora, Kalina:
- warm up the engine to operating temperature (controlled parameter TMOT_W = 60...90 °C);
- accelerate the car in 2nd gear until higher crankshaft speeds are reached (NMOT-W = 4000 min-1) and perform engine braking (NMOT-W = 1000 min-1);
- Perform engine braking six times in one trip.
It is recommended to replace the control unit with a new model with the immobilizer function not activated. This way the ECU will not prevent the engine from starting. To activate the anti-theft system, you need to teach the immobilizer new keys.
Also watch a useful video on disassembling and repairing the ECU:
Disassembly and repair of ECU on Priora
Conclusion
As can be seen from the article, the Lada Kalina ECU is located in an accessible place. The only and serious problem remains that an accidental spill of water can lead to tragic consequences, namely the purchase of a new spare part. The cost of the part is about 4000-5000 rubles.
Everything is shown in quite detail. As a newbie in this business, everything is clear and understandable to me. Now I'll try to figure out my technique myself.
Chip tuning to reduce fuel consumption is not really chip tuning. The chip is just a chip, like a USB connection, and everything on the chip has one firmware or another. And there is no chip there, there are controllers and there is no chip there. Rewritable controllers. They chip differently. A chip is something that cannot be faked; it is something that stays with you and is not sold or distributed. The chip necessarily contains data about the owner of the car and other parameters. Give him a fulcrum and let him move this car? The chip is not a support, but it has more meaning than a support. It protects the pupil of the driver's eye.
It’s all described in a hand-cooked way. In Kalina everything is completely different. You explained the cars in the description and write that they are easy. Did the woman rewrite something for you?
Installing the controller
1) For the LADA PRIORA family, attach the bracket to the controller and secure it with screws. Screw tightening torque 1.2…1.6 Nm (Phillips screwdriver, Phillips head, torque screwdriver). Install the controller on the car and secure it with nuts. The tightening torque of the nuts is 1.9…4.5 Nm (spanner 8, interchangeable head “8”, torque wrench).
For the LADA KALINA family, attach the bracket to the controller and secure it with screws. Screw tightening torque 1.2…1.6 Nm (Phillips screwdriver, Phillips head, torque screwdriver). Install the controller on the car and secure it with a screw. The tightening torque of the screw is 1.7…3.5 Nm (Phillips screwdriver, Phillips head, torque screwdriver).
For the LADA 4x4 family, install the controller on the car and secure it with nuts. The tightening torque of the nuts is 1.9…4.5 Nm (spanner “8”, interchangeable head “8”, torque wrench).
2) Connect the wiring harness connectors to the controller.
3) Install the instrument panel console screen into place (using a Phillips screwdriver). For the LADA 4x4 family, install the left front upholstery.
4) Connect the wire to the negative terminal of the battery (spanner “10”).
Why does the Lada Kalina ECU not work?
Sooner or later, every owner of a Lada car is faced with a serious problem - damage to the Kalina electronic control unit (ECU) by antifreeze. Even the most careful and prudent driver cannot avoid such a problem. The reason for this is the not very good location of the electronic control unit, which is mounted directly under the heater radiator.
Types of ECU
Three types of control units can be responsible for continuous data processing: EPROM, RAM and EPROM.
The EPROM contains programmable firmware that controls the operation of the engine. This type of memory can be retained even when the power is turned off. To change the data, you need to reprogram the firmware.
RAM operates on the same principle as a standard computer - it temporarily stores data for one session. Without voltage, the RAM does not work.
ERPZU is part of the standard anti-theft system. When the engine starts, the immobilizer sends signals to the ECU, where, using codes, the system decides whether to start the engine or not. The EPROM also remembers changes in engine operation.
Bosch ECU for Priora and Kalina
Primary localization of the problem
If any malfunctions occur in the radiator, then antifreeze dripping directly onto the body of the Lada Kalina ECU becomes the cause of lengthy repairs. It can take a long time from the start of a leak to the first signs of a malfunction. Depending on the intensity of the leak, the Lada Kalina will react differently.
In most cases, the driver sees a constant light on indicating an engine error. After a few weeks, the failure of the brains on Kalina will cause the vehicle to stop. If antifreeze leaks quickly, smoke may come out from under the car's dashboard. Regardless of the reason, the car owner needs to react quickly.
If the ECU is flooded, it is necessary to immediately carry out a visual inspection. It is located at the bottom of the instrument console. If you can’t find it the first time, then you can use the area between the floor and the heating radiator as a guide.
The best way to get to the ECU is from the side where the passenger's feet are located. Before this, it is necessary to remove the plastic cover secured with one self-tapping screw.
After unscrewing, it must be moved in the direction of travel of the vehicle. If everything is done correctly, then it completely disengages. To carry out further work, the unit itself must be dismantled. The procedure here is as follows:
- be sure to remove the terminal from the battery;
- Carefully unscrew 2 screws (one of them is located on the Kalina 2 engine side);
- slowly pull the block towards the passenger door;
- if this does not work, you need to temporarily remove the carpet from the car;
- Removal of the wires is carried out using a slight pulling movement of the connector latches to the side.
Dismantling and disassembling the electric amplifier
Before removing the amplifier, you need to remove all the steering column switches. Remove the steering rack cover and dismantle the devices, remembering to disconnect the connectors from the power supply.
How to remove the EUR with your own hands:
- After removing the switches, you will need to dismantle the lower cross member of the dashboard. To do this, you need to press the fasteners that secure the connector with wires, and then disconnect the wiring from the control module. Once these steps are completed, you can disconnect the connector from the switches.
- The system bracket is secured with nuts; you will need to unscrew them with a wrench.
- After this, the steering rack will need to be carefully lowered down. To do this, you will need to find the bolt that secures the driveshaft to the booster shaft. This bolt must be unscrewed, but when unscrewing, you will need to fix the nut, this will prevent it from turning. When the bolt is removed, the fastening will need to be loosened, after which the intermediate shaft will be carefully removed. At this stage, we recommend marking the position of the shaft and gears; you can use a marker for this. This step is very important because doing it will prevent possible installation problems in the future. If the marks on the shafts do not match, this may cause problems with the amplifier. When dismantling, be careful not to damage the wiring, as this will also lead to the inoperability of the ESD.
- When the unit is dismantled, it will need to be disassembled and the failed elements replaced. Further editing is done in reverse order (the author of the video is Murzik Bely).
Functions
The electrical package control unit is designed to perform the following functions:
- Alarm. If the car's anti-theft system detects a break-in attempt, thanks to the CBKE, it will transmit information about this to the car owner's control panel.
- Windshield wiper system control. Moreover, we are talking about both manual and automatic control (if the car is equipped with an electrical package control unit marked 21900-3840080-20).
- The device performs the function of controlling the windshield and rear window heating systems. This unit also controls the heating elements of the side rear-view mirrors.
- The electrical control unit also monitors the performance of the optics, both in manual and automatic control modes. In particular, we are talking about low-beam headlamps, side lights, and DRLs.
- Separately, we should highlight the function of ensuring the functionality of the high-range lighting.
- Turning lights, as well as light signaling.
- Vehicle interior lighting.
- The device monitors the performance and energy saving of devices belonging to the category of internal lighting of the car.
- Monitoring the state of the central lock, as well as performing the functions of locking and unlocking the locks themselves from the key, from buttons installed in the car interior, as well as in the doors.
- Another option is to open the luggage compartment lid using a button installed in the cabin.
- An equally important function is the control of electric drives, in particular, we are talking about power windows, as well as side rear-view mirrors.
- Heating system for driver and passenger seats.
- Luggage compartment lighting unit (video author - Vladimir Kostyuchenkov).
Controller functions
Location of the controller in the interior of cars of the LADA PRIОRA family: 1 - controller
The controller controls actuators such as the fuel injectors, electric throttle body, ignition coil, oxygen sensor heater, canister purge valve and various relays.
The unit controls the switching on and off of the main relay (ignition relay), through which power supply voltage from the battery is supplied to the system elements (except for the electric fuel pump, electric fan, control unit and APS status indicator). The controller turns on the main relay when the ignition is turned on.
Location of the controller in the interior of cars of the LADA KALINA family: 1 - controller
When the ignition is turned on, the ECU, in addition to performing the functions mentioned above, exchanges information with the car's anti-theft system (if the immobilization function is enabled). If the exchange determines that access to the vehicle is permitted, the unit continues to perform engine control functions. Otherwise, engine operation is blocked.
New Lada: Engine management system Lada Kalina
The controller also performs a system diagnostic function. It detects the presence of malfunctions in system elements, turns on the alarm and stores codes in its memory that indicate the nature of the malfunction and help the mechanic carry out repairs.
During operation and maintenance of the vehicle, disassembling the controller is prohibited.
To monitor the voltage of the controller output signals, a digital voltmeter with an internal resistance of at least 10 MOhm is required.
To prevent damage to the controller when disconnecting the wire from the negative terminal of the battery or the wiring harness from the controller, the ignition must be turned off.


