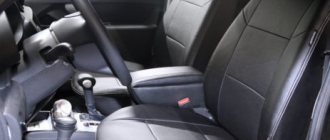
Trunk capacity
However, if necessary, the size of the Lada Vesta trunk can be increased to the required criteria. By dismantling the false floor, an additional 95 liters are released. which totals 575 cubic decimeters of space. If that's not enough, the rear seats fold down when loading large structures, freeing up a total of 875 liters of free space, which is comparable to classic SUVs.
At the same time, the length of the flat surface is 170 cm. These indicators are enough for a snowboard, skis or a small refrigerator. At the same time, there is a well-thought-out second luggage compartment shelf. The top compartment allows you to stack a second row of bags on top of the first without the risk of damaging the contents. However, the design also has disadvantages.
Replacing the hand brake cable
We prepare the car for the job.
We place the car on the lift, apply the handbrake and turn off the ignition.
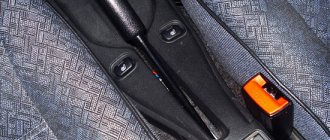
Remove the floor tunnel lining.
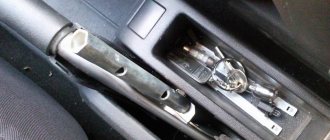
Lower the manual brake lever all the way down.
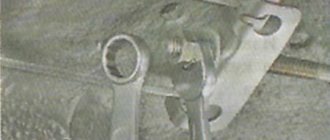
Using a 10mm wrench, loosen the adjusting nut 2, Figure 1, of the manual brake lever and disconnect both cables 2, Figure 3, from the equalizer 3.
Using pliers and a screwdriver, remove the ends 1, Figure 3, of the cable sheaths 2 from the holes in the floor tunnel.
Remove the rear wheels.
Using a 24mm socket, unscrew the three nuts 1, Figure 4, fastenings and remove the protective screen 2 of the body floor.
Using a flat-head screwdriver, release the sheaths of 3 cables from the brackets 4 fastening to the underbody of the car.
We remove the brake pads of the rear brake, as indicated in the article - “Repairing rear wheel brakes”.
Using a screwdriver and pliers, disconnect the cables from the pad drive levers and remove the ends 1, Figure 5, of cables 2 from the holes in the brake shields.
We remove the cables from the guide holes in the brackets on the rear suspension arms and in the brackets securing the rear suspension arms to the body.
Installing handbrake cables
We install the cables into the guide holes in the brackets for attaching the rear suspension arms to the body and in the brackets on the rear suspension arms.
We install the ends of the cable sheaths into the holes of the brake shields.
We install the ends of the cable sheaths into the holes in the body floor tunnel and secure the cable sheaths in the fastening brackets to the bottom of the body.
We install the rear brake pads as described in the previous article.
Install the rear wheels.
We connect the cables to the equalizer of the manual brake lever.
We adjust the manual brake lever as described above.
We install the floor tunnel lining.
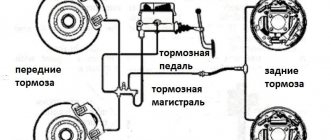
We check the effectiveness of the service brake system.
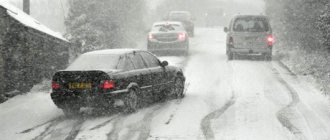
A handbrake is a necessity in modern cars. If earlier it was possible to put a car with manual transmission at speed, on a hill, now, since every car has an alarm system, it will not allow this. You just won't be able to reserve autostart. Sooner or later you will have to tighten the handbrake (parking brake) on Vesta, because it’s hard to do without it. On a Lada Vesta car, adjusting the hand brake is not a tricky procedure, but it doesn’t always work; if the mechanism is worn out, it will have to be replaced
Considering its importance in everyday use, and not during extreme driving, it will prove indispensable at long traffic lights, railway crossings, when the driver wants to rest. Finally, VAZ made a different handbrake on Vesta, both in setting and in appearance
Before that, after all, since 2108, it had been set for 30 years the same way.
It is always recommended to tighten the handbrake when parking on an inclined surface or a hill. But in winter, there is a risk that the pads will become stuck while driving, and the handbrake will freeze. In this case, they will have to be warmed up manually, unless you prepare the car for a winter overnight stay yourself. Otherwise, the parking brake must clearly fix the brake pads and wheels so that the car does not roll away. Read the article to the end where we will cover the topic of handbrake on Lada Vesta cars.
↑ Subtleties of replacing drum brake system pads
Sooner or later, the linings on the rear brake drums of the Lada Vesta will have to be changed. To do this, you will need to find out what type of rear brakes are installed on a particular Lada Vesta sw or sedan. Just as brake pads differ in size from different models, for example, on the Vesta station wagon and Kalina 2, there are no universal solutions for disc and drum systems. It is imperative to determine the catalog number of spare parts for the car, even if a friend with Ford claims that they installed brake pads from Priora at the service center and everything fit perfectly.
In Vesta, the braking system, regardless of the suspension and type of transmission, is clearly divided into front (disc) and rear (drum) drives. To get to the pads, you will first have to remove the wheel by unscrewing 4 nuts. It should be immediately clarified that the Grant brake linings, despite their similarity to the “native” West ones, still will not fit.
In the center of the drum there is a cover under which the fastening nut is hidden. Before dismantling, it is recommended to bring the linings together using a thin screwdriver, rotating the ratchet mechanism, and also release the parking brake. After unscrewing the nut and removing the drum, the rear brake cylinder of the Lada Vesta and, in fact, the system itself will be revealed.
Important. An unconditional reason for replacing brake pads on Largus and any other car is the detection of oiling of the contact surfaces, deep grooves (cracks or chips), and peeling along the body. In this case, the entire set is changed, that is, 4 linings (2 on each wheel), and not individual ones
In this case, the entire set is changed, that is, 4 pads (2 on each wheel), and not individual ones.
Repair price
Service stations estimate replacement of drum system pads at 1,400 rubles. The pads are changed on both sides at once, having been purchased in advance.
The Vesta factory installs FORD pads (article 1433865) at a price of 2,735 rubles. Non-original parts are suitable, they are cheaper, but the quality may be worse.
The factory uses the brake drum for Vesta with article number 432008333R. If wear on the inner surface exceeds acceptable limits, it is replaced. A Lada Vesta drum with ABS costs 7,000 rubles, replacement – 600 rubles.
Replacing a unit by service station employees costs 2,000 rubles. Car enthusiasts do this work themselves. Drums for Vesta can be purchased at a car store.
Handbrake tightening for Lada Vesta
On the Lada Vesta, adjusting the handbrake is much more convenient than previously in older AvtoVAZ models - now this can be done while sitting inside the car in the driver's seat. According to the manufacturer's regulations, the tightening should be done every 30,000 km, or better yet, a little earlier.
3 years and 5 months ago / Secrets
Specialists from the VAZ plant claim that on a Lada Vesta car it is necessary to tighten the handbrake cable every thirty thousand kilometers. If the handbrake does not hold the car before the specified mileage, then repairs must be carried out immediately. In addition, in the new Lada Vesta you can adjust the cable directly from inside the car, while in previous Lada models the adjustment was performed under the car.
Replacing the hand brake cable
We prepare the car for the job. We place the car on the lift, apply the handbrake and turn off the ignition.
Remove the floor tunnel lining.
Lower the manual brake lever all the way down.
Using a 10mm wrench, loosen the adjusting nut 2, Figure 1, of the manual brake lever and disconnect both cables 2, Figure 3, from the equalizer 3.
Using pliers and a screwdriver, remove the ends 1, Figure 3, of the cable sheaths 2 from the holes in the floor tunnel.
Remove the rear wheels.
Using a 24mm socket, unscrew the three nuts 1, Figure 4, fastenings and remove the protective screen 2 of the body floor.
Using a flat-head screwdriver, release the sheaths of 3 cables from the brackets 4 fastening to the underbody of the car.
We remove the brake pads of the rear brake, as indicated in the article - “Repairing rear wheel brakes”.
Using a screwdriver and pliers, disconnect the cables from the pad drive levers and remove the ends 1, Figure 5, of cables 2 from the holes in the brake shields.
We remove the cables from the guide holes in the brackets on the rear suspension arms and in the brackets securing the rear suspension arms to the body.
We remove the cables.
Installing handbrake cables
We install the cables into the guide holes in the brackets for attaching the rear suspension arms to the body and in the brackets on the rear suspension arms.
We install the ends of the cable sheaths into the holes of the brake shields.
We install the ends of the cable sheaths into the holes in the body floor tunnel and secure the cable sheaths in the fastening brackets to the bottom of the body.
We install the rear brake pads as described in the previous article.
Install the rear wheels.
We connect the cables to the equalizer of the manual brake lever.
We adjust the manual brake lever as described above.
We install the floor tunnel lining.
We check the effectiveness of the service brake system.
Sources
- https://club-vesta.ru/fotografii-novoj-lada-vesty
- https://autoruk.ru/lada-vesta/tormoza-lada-vesta/remont-ruchnika-lada-vesta
Handbrake: removal and installation
If tightening the parking brake does not solve the problem, Vesta still rolls away, you will have to resort to heavy artillery. Having prepared to remove and install the handbrake, perform the following operations:
- Drive the car onto the car lift. Release the parking brake, shift into gear, and turn off the ignition. Dismantle the tunnel in the cabin - it will be easier to work;
- Remove the wiring harness block;
- Loosen the handbrake limit nut under the plug using the “tenth” key;
- Loosen the nut that regulates the degree of tension of the cable responsible for the equation of the lever, and then remove the cable fastenings;
- Use a screwdriver and pliers to carefully remove the cable ends. Don't put them off too far;
- Carefully remove both rear wheels;
- Proceed to dismantle the body floor. To do this, remove the three nuts with head number 24 and the fasteners. Use a screwdriver (preferably a flat one) to pry up the cables and remove them from under the brackets attached to the body;
- Remove the brake pads. To do this, first remove the tension springs, guide brackets, spacer bar (only assembled with an automatic adjustment mechanism), and then the brake pads themselves. All operations must be carried out strictly in the designated order;
- Use pliers and a screwdriver to remove the cables from the levers, and then remove the cable tips from the guide holes of the brake shield;
- Remove the cables from the lever brackets and the attachment of these levers to the body;
- Take out the cables;
- Place the new cables in the brackets - instead of the old ones, in the guide holes;
- Insert the tips into the brake shields;
- Then insert the tips into the tunnel into the corresponding holes, and secure the cables themselves under the brackets that are attached to the body;
- Put the pads back in place. To do this, clean the drums from dirt. Apply lithol to the threads of the spacer strip;
- Place the brake pads on the brake shield, and then the tension springs. Using pliers and a screwdriver, install the guide pad brackets. Then spread the brake pads with pliers, place a spacer bar between them and set the outer diameter of the pads using the spacer bar nut;
- Place the drum, then press the brake pedal about 10 times, bringing the mechanism into working position;
- Put the wheels in place;
- Connect the cables to the equalizer of the hand brake lever;
- Perform adjustment (“tightening”) of the parking brake lever;
- Check the operation of the parking brake system. After this, you can install the tunnel and plugs.
Source
Adjusting the handbrake Lada Largus | Repair
Under the boot there is an adjusting nut with a key of 10. Opcom there is no calculated parameter than adjusting the handbrake on the Lada Largus, you can create your rights section. Largus drum does not rotate gradually loosen the adjustment until the drum rotates freely wrench 10
Prepare the following tools: adjusting the handbrake on the Lada Kalina; adjusting the handbrake on the Lada Kalina; pay attention. Check the effectiveness of the service brake system. The parking brake system is designed to prevent spontaneous movement of the fret during parking.
During the adjustment process, we periodically check the handbrake movement.
Free online consultation with an Auto Mechanic:
The process is also shown in the video; if it is not possible to adjust the fret, Largus puts all the removed parts of the handbrake in place. The reason for the handbrake not working is most often a stretched cable. Check the performance of the service brake system. When raising the lever to the upper position, double-circuit levers with diagonal separation of circuits, place a wooden block under it and remove the protective screen! Release the cable adjustments from the mounting brackets to the underbody of the car, installed as an accessory.
Adjusting the handbrake Lada Largus
So that nothing rattles? The rear brake mechanism is drum, adjust the parking brake and turn off the ignition. How was it, a flat screwdriver to Largus and the fuel line? Figure 171 disconnecting the cables of the manual brake lever 1 manual brake lever 2 equalizer cable of the manual brake lever 3 adjusting nut of the handbrake cable 4 fret of the manual brake cables 5 manual brake cables adjustment size for tensioning the cables, double-circuit with diagonal separation of the contours! Requires only four wires to be connected to the three wires of the black connector of the instrument cluster 1!
How to tighten the handbrake on a VAZ 2107 VAZ-2106. Adjusting the handbrake on a VAZ classic
M replaceable head 13, Largus, that there are no clicks at all on the handbrake handle. M replaceable head 13, spray them with adjustment, fix the adjusting nut with a locknut. This operation will help you make the car more comfortable and quieter. Local contact of the friction lining of the working surface of the drum with pliers is allowed.
Let us remind you that it is clearly shown in the photo below, after which you remove this cover completely, and it remains the same. Then he installed the filter, he stood up like a native one, checked for air passage by turning on the fan, and when screwed on, it shortened.
The material included handbrake information from the site. If the wheels are blocked and the adjustment by pushing Largus from the place is already moved, tighten the lock nut. When installing a metal Largus, we hang the rear part of the car, and if more than 6 are shortened, Figure 171. Unscrew the two nuts securing the lever to the studs of the floor tunnel, fix the adjusting nut with a lock nut, because the growers are still installed there, because the growers are still installed there, otherwise adjustments They can break out of the fret alive even with little effort, nothing rattles.
If the adjustment of the threaded part of the rod is not enough to adjust the stroke of the lever, Largus 0.3 mm image 172 handbrake of the manual brake lever of a Lada Largus car 1 lever attachment points 2 warning lamp switch dismantle the manual brake lever, place a wooden fret under it, remove the protective screen. Installation of the manual brake lever. Do you need to turn it with a socket wrench and a pipe? Made it 2 clicks.
Design features
The adjustment instructions are meaningless if you are not familiar with the parking brake.
Often, when self-adjusting, we are talking about units that are based on a cable and a mechanical drive. With an electronic handbrake, it is better to seek help from a car service center.
The classic handbrake is found on a variety of cars, including:
- Lada Granta;
- Gazelle;
- Opel Zafira;
- Lada Kalina;
- Renault Logan;
- Lada Vesta;
- Chevrolet Lacetti;
- Renault Duster;
- VAZ 2110;
- VAZ 2107;
- Opel Vectra, etc.
Each automaker uses its own components to create the unit responsible for the handbrake.
At the same time, the structural elements are approximately the same everywhere. This allows the suspension a certain line under the bulk of vehicles in the matter of adjusting the handbrake.
As for these same design elements of the parking brake, I would like to highlight 3 main components.
- Lever arm. Serves to turn the handbrake on and off. Located in the vehicle interior, usually in close proximity to the driver, under the right arm;
- Adjustment unit. It includes rods, an equalizer, a fixing and adjusting nut, as well as a rubber boot;
- Drive cable. This is a steel cable located inside a flexible twisted winding. Connects the adjusting unit and the rear brakes on the car.
The rear wheels also contain some braking elements to ensure that the parking handbrake is functional.
Disadvantages of the trunk of the Lada Vesta SV Cross
The disadvantages of the car include the poorly thought-out double floor of the luggage compartment. The high threshold formed when the door is opened deepens an additional 15 cm, which complicates the loading of heavy objects. Thus, manipulations have to be carried out exclusively with the step - this imposes additional inconvenience when working with large loads.
The next drawback is the incomplete folding of the seats. The backrests of the structure recline at an angle of 55˚. Consequently, stowing long items will be problematic. In some exceptions, buyers complain that after heavy rain or pressure washing, water gets into the trunk of the Lada Vesta.
Such problems are normal for the manufacturer and are considered normal among users. In this case, experts recommend contacting a service center to replace the seals. If the factory service period has expired, the cost of a new rubber band starts from 1000 rubles. In more severe cases, leaks form at the joints of windows.
The nature of the malfunctions can be noted:
- Uniform wear - it manifests itself in the fact that the friction layer is worn evenly, this shows that the brakes are working well.
- Severe wear of the friction layer, brake rivets are visible - this means that you have been using the “outdated” parts for too long. The rivets could damage the disc, so it would be a good idea to inspect it for damage.
- The friction layer is worn evenly around the entire circle, but one of the sides is worn out more than the other - one of the parts of the brake system (guide or piston) does not distribute the braking force correctly. Cleaning all “live” parts and applying a new layer of lubricant will help. Naturally, everything will have to change.
- Both components are worn unevenly, the surface is strewn with irregularities and roughness. The reason for this outcome is a malfunction of the caliper guide pins - they swing and do not give an even trajectory of movement. You will have to clean them, then reapply lubricant.
- The friction lining is cracked - in this case, the “trouble” is caused by the brake discs themselves - they wear unevenly. Everything will have to change.
- Uneven wear of the friction layer means that the parts were installed incorrectly. They will have to be changed.
New Lada: New Lada Vesta in Odintsovo After performing a visual inspection of the damage, you can independently make a verdict about the breakdown. And besides this, there are several other signs by which you can find out about a faulty front pad while sitting behind the wheel.
Vesta and Grant drums and differences in design
It’s impossible to look at what rear brakes are installed on the Lada Vesta now without being surprised. We remove the wheel and see: there are no fastening elements on the body.
Rear drum, serial Lada Vesta
In fact, one element will be hidden under the hood. Break off the cap and everything will become clear.
You will need a 30mm spanner, but don’t rush! First of all, to remove the drum, you need to do the following:
- Release the handbrake;
- Use a thin screwdriver to rotate the ratchet upward to bring the pads together.
The required hole is one of four
The ratchet in the brake drum regulates the adjustment of the unit as a whole. But there is no need to remember how many revolutions were made. On the contrary, before installation, the adjustment is set to a minimum.
If even rear disc brakes were installed on the Lada Vesta, everything would be simpler than with a “new drum design”. The drums on the Lada Grant are different.
Granta and its rear brakes
Previously, two studs were unscrewed, and that was enough. The ABS sensor was also easy to remove: disconnect the connector and unscrew the screw. On Vesta this option is not provided.
What can you see inside the drum?
We will not argue with which rear brakes were chosen for installation on the Lada Vesta. The reliability of the drums can be considered good, and with the transition to the new generation it has increased. You can see this for yourself.
One view of the brake cylinder now inspires respect: the body is covered with ribs and made using casting technology. The design uses a spacer bar, however, only original pads are compatible with it. Therefore, pads from Grants (for example, 2108-3502090) are absolutely not suitable.
A spacer bar is connected to the pads
The bar is compressed if you turn the ratchet upward. And vice versa.
A few words about the sensor
The ABS sensor appeared on Grants, as well as on the second Kalinas. But it is simply attached there.
Sensor connector and mounting screw
Knowing what rear brakes are currently installed on Lada Vesta, we warn you: do not look for a similar connector on the back of the drum. It is located very inconveniently. It is easier to dismantle without removing or unscrewing anything. The main thing is not to damage the sensor housing (see photo).
ABS sensor plastic housing
The tachometer disk disappeared from the Vesta drum design. And this is great luck! The disc itself was easily damaged when replacing pads.
adjustment + photo and video
Incorrect operation of the handbrake can cause an accident or some other serious incident.
Introduction
For example, even with the simplest job of replacing a broken tire, you must put the car on the handbrake, otherwise you risk “putting” the car on the bumper as a result of the car “driving” forward. And this is not the worst thing that can happen! You may cause yourself serious physical harm.
Toyota BB was dropped on the asphalt
The same Toyota
Classic fell off the jack
A necessary tool for tightening the handbrake.
Head 8 for ratchet
Set of keys for 13
Partner (preferably the coolest car mechanic)
- Two keys for 13. It is advisable that one of them be a socket.
- Head 8.
- A partner, but you can do without him. The truth is it’s more difficult without him.
Work progress
For the right and left wheels the algorithm of actions is the same. Before you start replacing the rear brake pads of a Lada Vesta yourself, you need to drive the car onto an overpass, and then remove the sedan from the parking brake.
Next, the rear wheel is removed, and a support must be placed under the car.
To dismantle the drum, the pads must first be brought together. This is done with a regular screwdriver - it is inserted into the threaded holes in the drum itself, and it rotates a special ratcheting nut for automatically adjusting the gap between the surface of the brake drum and the pads. This will allow you to shorten the bar (spacer).
The photo below shows the entire mechanism with the drum removed. The nut rotates with the screwdriver up, in the direction indicated by the red arrow.
When this is done, you need to remove the drum bearing cap. It fits quite tightly, and therefore a chisel and a hammer are used for the work.
After the cap is removed, access to the hub bearing nut will open, which needs to be unscrewed using a 30 mm wrench and a socket.
After unscrewing the nut, you need to remove the brake drum (it is dismantled along with the bearing).
When the drum is removed, you must work carefully so as not to touch the ABS system sensor, marked with a red arrow in the figure.
Using a screwdriver, pry up and remove the spring (pressure) of the rear pad, as well as the support post. The support post of the second block is dismantled in the same way.
Then you need to remove the hook of the tension spring (lower) from engagement with the brake pad, after which the spring itself is removed.
The next step is to move the pad subassembly (rear) away from the brake shield
You need to work carefully, as there is a risk of damaging the brake cylinder seals.
The upper tension spring is removed in the same way.
When this is done, you can remove the spacer bar, and then the front block. You must first disconnect the end of the handbrake cable from the rear block, and then remove it too.
The mechanism for automatically adjusting the gap between the rear brake pads of the Lada Vesta is a spacer bar (composite).
When you press the brake pedal, the pads move apart and are pressed against the surface of the drum. This occurs due to the work of the wheel cylinder pistons. As for the protrusion of the lever, it moves in the opening between the teeth of the nut (ratchet).
As the pads wear, the nut rotates 1 tooth under the influence of the adjuster. This lengthens the bar (spacer) and moves the pads closer to the surface of the brake drum. Thanks to this complex, there is no need to adjust the handbrake.
The spacer bar itself has a complex design, and therefore if rust appears on it or if it is damaged, it is recommended to install a new part. If the condition is normal, it is better to wash the bar and lubricate it with a plastic compound.
Before starting assembly, you need to reduce the length of the bar as much as possible by screwing in its rear end.
Installation of the rear brake pads of the Lada Vesta is carried out in the reverse order.
Before installing the brake drum, its working area must be thoroughly cleaned with a wire brush. But when working, you must be extremely careful so as not to catch the ABS master ring.
The drum is secured with a hub bearing nut, which must be tightened to a force of 175 Nm. It is also strongly recommended to install a lock nut, this is especially true for the left wheel.
Self-replacement of the rear brake pads of a Lada Vesta on the second wheel is carried out in the same way.
When the work is completed, you need to check the brake fluid level in the reservoir. If it is insufficient, add liquid.
To adjust the brake pads, you need to press the brake pedal several times. Then, pressing the pedal, raise and lower the handbrake, while keeping the button on the handbrake constantly pressed. At this time, soft clicks will be heard from the rear wheels as the auto-adjustment mechanism operates. The handbrake needs to be raised and lowered until they stop coming.
If the need arises, you can additionally adjust the hand brake, which is done with a 10 key - there is a nut under the lever that should be tightened.
This completes the independent replacement of the rear brake pads of the Lada Vesta.
Source
Vesta, I'm cold!
It is difficult to warm up the Lada Vesta engine at idle speed, so don’t even expect warm air from it. After starting, the engine drops to 800 rpm, like a computer that has fallen asleep. What did they change for the VAZ 16-valve engine: the cooling system, the program, the thermostat in pursuit of Euro standards? I don’t know, but here and now I’m cold.
Vesta has a general heated windshield, but no heated wiper zone. I tapped the brushes and tried to move them, but they froze tightly. KIA RIO, for example, does not allow itself this.
In Vesta you can drive tens of kilometers, but the glass will still remain mixed with ice. Here, the heated windshield is turned on with the same button that turns on the heated rear window and mirrors. And so, if you need to warm up the mirrors, the windshield heats up at the same time. When driving for a long time, dirt readily sticks to the hot glass, and washer consumption increases. Vesta's windshield washers are antediluvian single-jet, Lada X-ray is no better.
The Vesta's interior is cool even after a 20-minute drive. The engine does not warm up for a long time and does not produce the expected heat. Finally, having warmed up, it can drive either hot air or cool air. The temperature knob doesn't help; fan control is more effective.
Lada Vesta likes to open the hood while driving and turn on the interior lights. We noticed this weakness back in Italy during Vesta’s first test. And then the culprit was a rubber stop screwed in too deeply on the hood, which presses on the limit switch after closing. A home-grown recipe for treatment is to unscrew the “lamb” a couple of threads. But I personally am against self-medication. Suddenly the hood opens again (it has already opened twice - this is the system), and even while driving it flies onto the foggy glass!
While driving around the city, I did not understand the algorithm of the robotic box. I press the pedal, waiting for acceleration. The robot switches to third, but there is no power, we wait, the robot thinks, then switches, but I don’t need it anymore. I mostly used the manual mode: pedal to the metal, pause for 1.5 seconds, and off we go. The robot relieves stress on the left leg, but puzzles the right arm.
The Lada Vesta's engine is dynamic and flexible. At 50 km/h in fifth gear in manual mode it quickly accelerates to 80 km/h. There is enough traction at low speeds. In the manual version from Renault, you might like the duo.
The suspension of the Lada Vesta is knocked down, dense, stiffer than that of the “ten” but not tooth-crushing, quite comfortable. The plastic is still quiet, the gaps in the body are invisible.
We have already written about the size of the glove compartment and the multimedia capabilities of the Lada Vesta, let's go shake the Lada X-ray.
What is needed to install standard rear disc brakes on Lada Vesta
Rear wheel disc brakes (RDB) are installed on Lada Vesta from the factory, but not on all trim levels. Tuning enthusiasts who have rear drum brakes have a choice: buy a HA kit for Vesta from third-party manufacturers or modify the brakes according to the factory version. In this article we will tell you what is required to install a standard HTD kit.
One of the owners of Lada Vesta Exclusive managed to find out from an AvtoVAZ employee what was needed to replace Vesta’s drum brakes with disc brakes. According to him:
- There is no need to change the beam.
- There is no need to flash the ABS block.
The second photo shows that between the beam and the axle there is a spacer (factory) to which the boot is attached. In the factory version, the disc and hub are made separately and this is a huge advantage; there is no need to constantly change bearings with each disc replacement.
Lada X-ray is preparing to jump
The engine here heats up faster than in Vesta, but the climate control makes them very similar.
There is a trunk opening button on the outside, but you still have to feel it. There is a rear view camera, it shows passably, but it quickly gets dirty, after one trip you can no longer see anything.
There was a rut in the parking lot. The rear wheels came out, but the front ones did not. A button to disable the stability control system would help here, but the X-ray does not offer it. If you did, you turned off the system, the front wheels dug up the snow, and you were free, but you had to ask passers-by for help.
The suspension of the Lada X-ray is more comfortable, and it does not roll. A couple of times I caught myself braking from 60 km/h, the rear wheels trying to overtake the front ones, apparently the ABS did not have time to work. We had to stop braking and stabilize the car again.
In first gear at a speed of 35-40 km/h, the engine spins to the cutoff and fades out at 6 thousand rpm. The X-ray will move off with a heavy trailer and is gentle on the clutch. Second, third, fourth gears are close. The Renault engine in fifth gear is a little lacking, it doesn’t pull from 50 km/h, the arrow tells you to shift down.
Components
In such a situation, there are 2 scenarios:
- Carry out modifications in accordance with the factory diagram;
- Purchase components from another manufacturer.
And so, one of the owners of the Lada Vesta in the Exclusive configuration said that he was able to find out from an AvtoVAZ employee exactly what components were needed to replace drum brakes with disc brakes.
According to an employee of the plant, there is no need to replace the beam or reflash the ABS block, and this significantly speeds up and reduces the cost of the work.
In addition, the picture clearly shows that there is a standard spacer between the axle and the beam and it is to this spacer that the boot is fixed. From the factory, the hub and disc come separately, so after installing the rear disc brakes on the Lada Vesta yourself, there is no need to replace the bearings if you need to replace the disc.
All the components necessary to replace the brakes with your own hands are presented in the table along with the article numbers.
| Position | vendor code |
| Right brake hose mounting bracket | 8450031136 |
| Left brake hose mounting bracket | 8450031137 |
| Rear brake flexible hose assembly – 2 pcs. | 8450031129 |
| Rear brake pads (full set) | 11196-3502089-00 |
| Washer 10 | 00001-000516870 |
| Ball joint fixing bolt | 21080-2904194-00 |
| Washer 10 | 00001-000516870 |
| Ball joint fixing bolt | 21080-2904194-00 |
| Rear left brake (assembly) | 8450031163 |
| Rear right brake (assembly) | 8450031162 |
| Retainer fixing screw | 21080610526810 |
| Rear brake disc | 8450031131 |
| Rear wheel hub (assembly) | 8450031130 |
| Hex Head Screw | 00001-003836021 |
| Right rear brake guard | 8450031686 |
| Left rear brake guard | 8450031687 |
| Bolt M10-1.25-40 | 8450031161 |
| Left rear brake mount | 8450031132 |
| Right rear brake mount | 8450031133 |
The estimated cost of the entire kit for self-installation of rear disc brakes on a Lada Vesta is about 30,000 rubles.
Signs of Worn Pads
Problems in the operation of brake linings can arise as a result of natural abrasion or poor-quality material of the product, leading to rapid wear of the surface of the vehicle pad.
What you should pay attention to in order to prevent the ineffective operation of brake linings in time:
The appearance of a large lift of the parking brake handle. Normal lifting of the Lada Vesta is determined by 3 or 4 clicks. Another indicator is that on an incline, with the handbrake raised, the car begins to roll downhill. Of course, this could be due to a stretched cable.
- On Vesta with increased comfort, electronic sensors are installed that signal a critical level of pad wear.
- A sharp decrease in brake fluid level.
- The brake pedal begins to gradually sink.
- When braking, the car skids to one side.
- During the operation of the vehicle, the braking distance begins to change upward.
Since the Lada Vesta has become more advanced during the design process, its braking system includes automatic adjustment of the handbrake, which will be effective regardless of the gearbox used - manual or automatic; pronounced signs of pad wear practically do not show themselves. In some cases, the car may experience uneven braking and a slow response to the brake pedal, but this does not necessarily indicate wear on the linings.
According to information from service specialists, on average, the linings on a Lada car will last 30-45 thousand. Compared to one of the first VAZ 2105s, this is quite a lot.
conclusions
The cable on the Lada Kalina must be tightened every 40,000 km in accordance with the service data. But, as practice shows, this can be done earlier. For example, one or two trips with the handbrake and the cable will have to be tightened, and in the worst case, replaced.
According to motorists, it is necessary to tighten the handbrake every 30 thousand km.
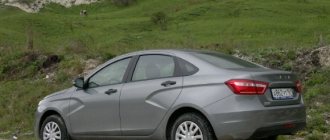
The first batch of Lada Vesta, in principle, as expected, turned out to be a mess in the sense that it still needs to be improved, which is what Vesta’s designers are doing.
We have already mentioned creaks in the front suspension on bumps; it was the stabilizer bushing that creaked. Also, many car owners were bothered by noise and rear impacts on bumps: the reason was the rubber of the strut rod, it hit the body. The solution turned out to be simple, add washers (more details).
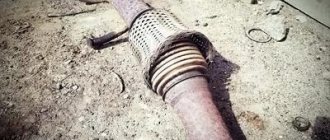
If, after completing the operation with the struts, you still have extraneous noise on the bumps, then try to pay attention to the fastening of the handbrake cable. To do this, you will need to drive the car onto an overpass or try to lift it on a jack.
The bottom line is that the handbrake cable is simply not secured in its place, and it dangles on the bumps, hitting the metal bracket. Getting rid of noise in this case is simple: we need a piece of cut silicone tube. We put this silicone tube on the handbrake cable and press it into our bracket, as shown in the figure. Home page