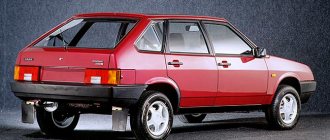
How to replace the flywheel crown of a VAZ 2109 with your own hands
Often, after a long period of use, the engine begins to experience unidentifiable knocking or squeaking noises. Perhaps the reason for this is a failed flywheel crown .
The cost of a new crown is about 200 rubles, which is cheaper than assembling a flywheel in detail. Next we will talk about replacing the flywheel crown on VAZ 2109 cars yourself.
To replace the flywheel crown, you need to dismantle the clutch basket, gearbox, and the flywheel itself.
Replacing the flywheel crown of a VAZ 2109 with your own hands
- I decided to cheat a little and remove the transmission in a more convenient and simpler way - without draining the oil or disconnecting the drives. To do this, you need to completely remove both trailing arms, which are more often called “sabers”.
- Next, remove the starter and disconnect the rocker, both gearbox supports and the reverse sensor ground wires.
- When the levers are removed, the transverse travel of the struts is sufficient to disconnect the box from the engine.
- Place the removed gearbox on the floor, you should now have full access to the flywheel and clutch.
- To unscrew the flywheel bolts, you need to secure the flywheel itself well. There is a special clamp for this; if you don’t have one, you can make something similar. I made a homemade analogue for myself from a guide, which was taken from a server rack, with holes made in it. Afterwards, the guide was screwed to the flywheel using the basket mounting bolts. Use this improvised device to hold the flywheel from turning.
- Before removing the flywheel, be sure to mark the relative positions of the flywheel and crankshaft.
- Knock down the old crown using a drift and hammer.
- Replacing the flywheel crown of a VAZ 2109 is carried out as follows. Take a new flywheel crown and heat it up. I personally used paper for this, wrapped it around the flywheel and set it on fire.
- After it has warmed up sufficiently, carefully place the crown on the flywheel, with the inner chamfer facing the flywheel. Tap it lightly to seat it in place. Everything takes no more than 20 minutes.
- Assembly is no different from disassembly, the only thing is that it is done in the reverse order. The flywheel bolts should be tightened to a torque of 62 - 89 N*m. The basket bolts are tightened with a torque of 19 - 31 N*m. To avoid distortion, the bolts are tightened in a staggered manner.
- To center the driven disk, use a 1/4 extension, with a layer of electrical tape wound up to a diameter of 15 mm and 20 mm.
- The stabilizer and wishbone mounting bolts are tightened after the machine is lowered to the ground, that is, under load.
That's all for me, the replacement of the VAZ 2109 flywheel crown is completed, the engine and the new flywheel crown are ready for use.
Current:
- Replacing the driveshaft crosspiece on a VAZ 2101 with your own hands
- Replacing the camshaft of VAZ 2107, VAZ 2106 with your own hands
- Replacing the VAZ 2110 timing belt and tension pulley with your own hands
Flywheel VAZ 2110 dimensions
FOR TENS ENGINES
DO NOT CONFUSE PARTS FOR TENS ENGINES
How do the engines of the VAZ 2110 family differ from the old friend VAZ 21083? It turns out, many. Read more about the differences between engines in the article by the head of the design bureau of the VAZ engine design department.
As readers already know, a new family of engines was developed for the VAZ 2110 and its modifications. It includes three basic designs: an eight-valve carburetor with the index 2110, an eight-valve with distributed injection (labeled 2111) and a 16-valve with injection (labeled 2112). All three engines are assembled on one automatic line, so they are unified in such basic parts as the crankshaft, connecting rod, piston pin, and flywheel. The need to develop new basic parts is dictated by the features of the 16-valve 2112 engine, which has significantly higher power and torque indicators compared to the 21083 engine. It has original pistons, cylinder heads and camshafts that are not unified with parts of eight-valve engines. In addition, increased demands are placed on engine reliability. The technical specifications for cars of the 2110 family established a 90 percent service life of basic engine parts with a mileage of at least 150,000 km, instead of 125,000 km for other VAZ engines.
Below we will mainly talk about the eight-valve engines 2110, 2111 and the differences between their basic parts and the parts of the 21083 engine.
Crankshaft 2112–1005015 (photo 2). In order to improve balance compared to shaft 2108 (photo 1), the counterweights have been increased. They are machined both on the side surfaces and in diameter. This allows the shaft to withstand increased loads. The shafts are unified in terms of seats, so it is possible to replace shaft 2112 with shaft 2108.
Connecting rod 2110–1004045 (photo 3) differs from connecting rod 2108 in having a more rigid lower head. The forging is original, made of material with improved mechanical properties. In the upper head there is a steel-bronze bushing (photo 4), since a floating pin is used - it can move both in the connecting rod and in the piston bosses. (Remember that in the 2108 connecting rod the piston pin is pressed into the upper head.)
Piston 2110–1004015. It differs from piston 21083 only in the presence of grooves for retaining rings in the bosses for the piston pin. Retaining rings are used from engine 21213.
The piston pin differs from the 2108 engine part in that it is reduced in length from 61 to 60.5 mm and has an internal diameter reduced from 15 to 13.5 mm.
On the engine, it is possible to completely replace all four pistons with connecting rods assemblies - 2110 to 21083 and vice versa.
Flywheel 2110–1005115 (photo 5). To transmit increased torque, the diameter of the clutch surface has been increased from 196 to 208 mm. The shape of the teeth on the flywheel ring has been changed. To reduce uneven rotation of the crankshaft, the moment of inertia of the flywheel has been increased by increasing the rim width from 20.9 to 27.5 mm. Replacing the flywheel 2110 with a 2108 is in principle possible, but at the same time you will need to install a gearbox with a starter 2108.
Cylinder block 2110–1002011. The casting is unified with block 21083; the differences are in the processing of the mounting holes. Block 2110 has additional threaded holes for the generator bracket, knock sensor and ignition module (the latter applies to an eight-valve injection engine). The cylinder block for a 16-valve engine is additionally distinguished by threaded holes for attaching the cylinder head: the thread diameter has been changed from M12 to M10.
Flywheel in a VAZ 2109 transmission
The VAZ 2109 flywheel is part of the transmission of this car. It is located between the engine and the clutch. This unit is the output point of the internal combustion engine (ICE) and the input point of the car drive; it is connected to the drive shaft of the gearbox (Gearbox). In a car, the flywheel performs three functions:
- Increases the uniformity of rotation of the engine crankshaft, smoothes out fluctuations in the amount of torque transmitted from the pistons of the combustion chambers through the crank mechanism to the crankshaft of the internal combustion engine. The fact is that with each revolution of the crankshaft, two explosive acts of combustion of the fuel-air mixture take place in the car’s cylinders, and if not for the flywheel, the crankshaft would twitch violently twice for each revolution. The flywheel smoothes out these pulsations, accumulating and releasing kinetic energy of rotational motion.
- Provides transmission of torque from the engine to the gearbox. This unit is the primary, driving disk of the clutch mechanism. When the clutch pedal is released, the driven disk is pressed against the flywheel, ensures rotation of the gearbox output shaft and causes the driving front wheels of the VAZ 2109 to rotate.
- When starting a car, the flywheel transmits torque from the starter to the engine crankshaft. When the ignition key is turned to the “starter” position, the starter gear engages with the ring teeth, thus spinning the flywheel and crankshaft. An ignition spark is supplied to the cylinders and the engine starts. The ignition key returns to the “ignition” position and the starter gear disengages from the ring gear.
From the point of view of operation, it is the crown that is the most vulnerable point. The most common failure is wear of its teeth. If wear reaches a critical level, the starter gear does not engage with the ring gear and starting the engine from the battery becomes impossible. You have to start it with a push.
Flywheel for VAZ 2108-099, 2113-2115, Kalina
- Manufacturer: AvtoVAZ
- 0 reviews
- Description
- Characteristics
- Video
- Reviews 0 ? '(' + product.reviewsCount +')' : »>>
Dear customers, in order to avoid errors when sending a flywheel, please indicate the model and year of manufacture of your car in the “Comment” line.
If we consider the structure and principle of operation of the internal combustion engine, we will have to deal with such a product as the flywheel. In terms of its design, it is not anything complicated, but the functions it performs are extremely important, and it is impossible to do without it.
The engine flywheel is a component of several independent systems. Its functions include:
— reduction of vibrations when rotating the engine crankshaft. In this case, the flywheel acts as part of the engine;
— transmission of torque to the gearbox from the power unit. The flywheel is, among other things, the primary clutch disc;
— transmission of torque to the crankshaft from the starter. Through the flywheel crown, torque is supplied from the starter to spin the crankshaft and start the engine.
As an element of an internal combustion engine, this is its very first application.
1 – connecting rod journal, 2 – counterweight, 3 – flywheel with crown 4 – main journal, 5 – crankshaft.
The operation of a four-stroke internal combustion engine implies that the energy from fuel combustion appears unevenly due to the fact that this process occurs at different times in different cylinders. This supply causes a time-varying moment on the internal combustion engine shaft. To smooth out these pulsations, as well as any unevenness during crankshaft rotation, the use of a flywheel is provided, which acts as a kind of accumulator of kinetic energy.
The resulting torque is transmitted to the wheels. The flywheel is used as the clutch input shaft.
1 – flywheel, 2 – clutch assembly.
From the flywheel, the clutch receives the torque produced by the internal combustion engine, and then transmits it further to the gearbox. The flywheel plays a dual role - as the final element of the internal combustion engine, which receives the developed torque, and as part of the clutch, which receives this torque.
Flywheel when starting the internal combustion engine.
When you turn the ignition key, the relay engages the flywheel crown and the gear on the starter shaft. The starter begins to spin, the torque it creates spins the flywheel and, accordingly, the engine crankshaft. It starts, after which the flywheel crown and the starter are separated.
The most common is the solid flywheel. In fact, it is an ordinary metal disk with a crown on the end.
Other article numbers of the product and its analogues in catalogues: 21090100511501.
VAZ 2108, VAZ 2109-099, VAZ 2113-2115, VAZ 1117-1119.
Any breakdown is not the end of the world, but a completely solvable problem!
How to independently replace the VAZ 2109 flywheel on a VAZ family car.
With the AvtoAzbuka online store, repair costs will be minimal.
Just COMPARE and BE SURE.
Don't forget to share the information you find with your friends and acquaintances, because they may also need it - just click one of the social networking buttons located above.
Replacing the flywheel crown. The instructions are universal, can be applied to VAZ
The flywheel is one of the most important parts of any car, be it a truck or a passenger car. But often it can wear out, either from time and high mileage, or from a low-quality spare part, or rather a part called the “crown”. The problem may manifest itself as follows: you turn the key, but instead of starting, the car makes a metallic grinding noise and does not start...
Maybe by the way, try to grab it, but somehow “slip”! That is, “intermittent” startup. Many car owners begin to delve into this malfunction, and the first thing they look at is the starter, its gear and bendix.
Secondly, look at the flywheel itself . To be honest, this toothed disc has a simple design. Essentially, this is a large metal disk on which a special crown is placed; these are the teeth that engage with the starter.
Do-it-yourself partial repairs
All flywheels, regardless of design, have a crown in the form of teeth, which is involved in transmitting force from the starter when starting the engine. It is made of steel and is structurally pressed onto the body of a cast iron flywheel. If the teeth wear out or cracks appear, the crown must be replaced. This operation is justified by the fact that the price of a new product is 5-6 times higher than the cost of the crown. The process of self-replacement is quite complex and consists of the following steps:
1. The removed flywheel is placed on a reliable base, and uniform blows are applied along the entire perimeter. In most cases, the crown moves and falls off. If this cannot be done with a chisel, the part is preheated.
2. Heating the flywheel crown to increase its diameter due to thermal expansion. To do this, the part is placed for 25-30 minutes in an oven with a temperature of about 250 o C, or if it is not available, 3-4 supports are prepared, a crown is placed on them, a rag soaked in solarium is hung along the diameter and set on fire. When heating, it is unacceptable to heat the crown red-hot, and it is also undesirable to expose it to direct fire from a fire or gas stove.
3. After warming up, quickly, but without fuss, transfer the part to the flywheel, on which it should immediately sit. If necessary, alignment accuracy is achieved by using a hammer.
4. After complete cooling, the repaired flywheel is ready for installation on the engine.
If the front part of the ring is worn by the starter teeth and there is no other damage, there is no need to replace the entire ring. It is enough to turn it over to the other side.
Replacing the flywheel crown
will be carried out in case of wear and tear, usually during engine repairs or in emergency conditions. The flywheel crown serves to rotate the crankshaft during starter operation.
When the starter is turned on, its drive gear engages with the teeth of the flywheel ring, rigidly mounted on the crankshaft and sets it in motion.
The teeth on the starter drive are beveled to fit easily between the flywheel ring teeth. When the bevel of the tooth on the starter gear is clogged, the gear cannot get into the teeth of the flywheel and, while rotating, begins to cause nicks on the crown and there comes a moment when the teeth cannot engage at all, since the teeth on the flywheel crown have reached their maximum wear.
This is easy to verify if you remove the starter and look at the flywheel crown, where you can see worn teeth when turning. On some models (VAZ -2108 and their modifications), wear can be seen through the window used for setting marks.
Removal, installation and troubleshooting of the flywheel on VAZ 2108, VAZ 2109, VAZ 21099 cars
First remove the gearbox and clutch from the VAZ 2108, VAZ 2109, VAZ 21099 (see section 5 “Transmission”).
1. Remove the six flywheel mounting bolts. At the same time, use a screwdriver to hold the flywheel from turning, having first screwed in one of the gearbox mounting bolts.
2. Together with the last bolt, holding the flywheel, remove the bolt locking plate.
3. Remove the flywheel from the crankshaft flange.
4. Check the condition of the flywheel rim teeth and, if damaged, replace the flywheel.
5. Replace or repair the flywheel if the contact surfaces of the clutch driven disc or...
6.... risks and scuff marks were found on the crankshaft flange. The flywheel can be checked and repaired in a workshop that has special equipment. The non-flatness of surface 3 (Fig. 4.4) of the contact of the clutch driven disc should not exceed 0.06 mm. The non-parallelism of the contact surfaces of the driven clutch disk and surface 2 for fastening the clutch should not exceed 0.1 mm. The flywheel runout on surfaces 3 and 1 should not exceed 0.1 mm. To remove deep marks and burrs, the surface 3 of the flywheel can be machined, and the layer of metal removed should not exceed 1 mm. Simultaneously with surface 3, it is necessary to grind surface 2, maintaining the size between them (0.5+0.1) mm. When grooving, maintain the parallelism of surfaces 3 and 1.
Rice. 4.4. Flywheel VAZ 2108, VAZ 2109, VAZ 21099 1 - surface adjacent to the crankshaft flange; 2 - place to check the surface for attaching the clutch; 3 - place to check the runout of the supporting surface of the clutch driven disc NOTE Before installing the flywheel on a VAZ 2108, VAZ 2109, VAZ 21099, apply sealant to the threads of the bolts for its fastening, having previously degreased the bolts and threaded holes for them.
Install the flywheel on a VAZ 2108, VAZ 2109, VAZ 21099 car in the reverse order of removal, aligning the holes on the flywheel and the crankshaft flange (they are located asymmetrically).
Source
Installation of transmission elements
Installation of units on a vehicle is carried out in the reverse order of dismantling. Place the flywheel with a new ring in its regular place on the crankshaft, using the marks made when disassembling the unit. Secure it with mounting bolts. It is recommended to tighten the bolts with a torque wrench. The tightening torque should be approximately 75 Nm. The tightening pattern is staggered, this will avoid distortions.
After installing the repaired unit, return the clutch to its place. Center the driven disk. Install the remaining transmission components. If you are using a lift, please note that the stabilizer and wishbone mounts must be tightened after the vehicle is lowered to the ground. These structural elements should be supported under the working load. Install the starter, connect the reverse sensor.
Everything is ready - hit the road with the hope that your veteran will not let you down on the road. Try not to put too much stress on an already quite old car. Remember that the last “nine” rolled off the AvtoVAZ assembly line a decade and a half ago.
Do not give in to the temptation to use tuning gadgets, such as a lightweight flywheel on the VAZ 2109. With increased vibration loads, it will destroy your engine and transmission. It's not worth experimenting with a car of this age.
If we consider the design and principle of operation of an internal combustion engine, then sooner or later you will have to deal with such a product as a flywheel. In terms of its design, it is not anything complicated, but the functions it performs are extremely important, and it is not clear how one can do without it.
Self-replacement of the VAZ 2109 flywheel crown
Often, after a long period of use, the engine begins to experience unidentifiable knocking or squeaking noises. Perhaps the reason for this is a failed flywheel crown .
The cost of a new crown is about 200 rubles, which is cheaper than assembling a flywheel in detail. Next we will talk about replacing the flywheel crown on VAZ 2109 cars yourself.
To replace the flywheel crown, you need to dismantle the clutch basket, gearbox, and the flywheel itself.
Signs of a VAZ 2114 flywheel malfunction
- The clutch engages jerkily. The reason for this may be scoring on the surface of the flywheel.
- The starter works, but the crankshaft does not turn. This problem may be caused by worn flywheel teeth.
- Increased engine vibration. If the flywheel is damaged due to an accident (an extremely rare occurrence), its balance may be disrupted, causing the engine to vibrate during operation.
In these cases, the VAZ 2114 flywheel needs to be replaced.
There is another reason why owners of the “fourteenth” change the engine flywheel - tuning. In this case, to improve the dynamic characteristics of the machine, a lightweight one is installed instead of the standard engine flywheel.
How many teeth are there on the flywheel of a VAZ 2109
They differ in the number of teeth on the crown of the VAZ 2101 - 129 teeth, on the crown of the VAZ 2110 - 128 teeth.
Crown 2101-1005115 VAZ 2101-2107 Weight - 0.62 kg Outer diameter - 277.5 mm Landing diameter - 256.795 mm Width - 12 mm Number of teeth - 129 Module - 2.1166
Crown 2112-1005115 VAZ 2110-2170 Weight - 0.672 kg Outer diameter - 278.5 mm Landing diameter - 256.795 -0.07 mm Width - 12 mm Number of teeth - 128 Module - 2.1166 Flywheel weight - 6.5 kg
Crown 2108-1005115 VAZ 2108 - 2115 Weight - 0.556 kg Outer diameter - 273.9 mm Landing diameter - 254.795 +0.725 Width - 12 mm Number of teeth - 128 Module - 2.1166
Typically, the VAZ 2109 flywheel lasts a long time and rarely breaks. The exception is wear on the teeth of the crown of this unit. Quite often, this breakdown occurs due to poor-quality crown material, in which case the part must be replaced.
Also check out
- Self-replacement of the VAZ 2110 CV joint
- Algorithm for replacing silent blocks of the front suspension of a VAZ 2109
- Instructions for changing the oil in a VAZ 2108 box
- Before removing the flywheel, marks must be made to show the relative positions of the flywheel and the crankshaft.
- Use a punch and a hammer to knock off the old crown.
- Install a new crown of the VAZ 2109 flywheel. To do this, the new crown needs to be heated (alternatively, wrap the flywheel in paper and set it on fire).
- After warming up, carefully put the crown on the flywheel (it is necessary to install it with an internal chamfer towards the flywheel). Then you need to install the part in place.
How to replace the flywheel crown of a VAZ 2109 with your own hands
- Assembly must be performed in reverse order. The bolts should be tightened with a torque of 62-89 N*m, and the basket bolts should be tightened with a torque of 19-31 N*m. To avoid skewing the tightening, you need to do it in a checkerboard pattern.
How to replace the flywheel crown of a VAZ 2109 with your own hands
- To center the driven disk, you need to use a 1/4 extension with a layer of electrical tape, bringing it to a diameter of 15 and 20 millimeters.
Does it make sense to install a lightweight flywheel on a car?
To understand what a flywheel is used for, you need to understand what it is. Essentially, it is a massive rotating wheel that serves as a kinetic energy storage device.
Benefits of installing the device:
- firstly, in order to start a light flywheel, it does not require a lot of energy and, accordingly, the amount of fuel burned;
- secondly, when the moment of inertia of the flywheel decreases, the load on the crankshaft, as well as on the transmission elements, decreases;
- thirdly, since the engine spins up more easily, a certain reserve of power remains, making the car more dynamic and reliable. As calculations show, when installing a flywheel weighing 1.5 kg less than the standard, there is an increase in power by 2%
The effect of installing a lightweight flywheel largely depends on the car itself. For example, when installed on a VAZ, it can cause completely negative consequences, affecting the dynamics of acceleration. Experts recommend installing lightweight flywheels on high-speed engines. The weight of the part has a big influence. Lightening it to less than 4.5–5 kg in most cases does not make sense, and sometimes it is unsafe. It is impossible not to take into account the fact that the efficiency of the flywheel also depends on the professional qualities of the driver, since the desired effect can be achieved only by keeping the engine speed within the maximum power.
Lightweight flywheel for VAZ
Naturally, when deciding to install the device, it is necessary to turn to the experience of car enthusiasts who have dealt with it. Those who have installed lightweight flywheels on their cars note:
- Intensive acceleration;
- Excellent response of the car to pressing the gas pedal, regardless of the gear;
- Smooth and comfortable transition from high to low gears without jerking;
- The ease of operation of the engine is felt, the speed is gained quite quickly and briskly;
- Less fuel consumption.
It should be noted that such a part can be of great help to fans of drag racing, cross-country racing, and rallying, but it is absolutely not suitable for cars designed to overcome obstacles in off-road conditions.
Lightweight flywheel for drag racing, cross country and rally enthusiasts
Considering the advantages of this type of installation, it is difficult not to dwell on the disadvantages:
- When the propulsion system operates at low speeds, the crankshaft begins to rotate unevenly, which negatively affects the vehicle’s transmission;
- Installing an unbalanced flywheel can lead to major problems with the car, which is why budget tuning can lead to expensive repairs;
- The product makes braking much more difficult.
Dual mass flywheel, operating principle
However, this is often not the best flywheel option used on a vehicle. The fact is that the internal combustion engine operates unevenly, in addition, driving modes are constantly changing (acceleration, deceleration), which leads to additional loads on the crankshaft. Let there be the simplest situation - the car moves uniformly and straight. The road is clearing ahead, let’s assume that the tractor has turned to the side, having gained free space, the driver begins to accelerate.
This creates several additional sources of load. The unevenness of the fuel ignition processes leads to the fact that the crankshaft also rotates unevenly. It is partially smoothed out by the flywheel. But there is one more feature - when the car accelerates, the crankshaft spins at a higher frequency than before.
For the shaft, it exceeds the frequency of rotation of the flywheel; the shaft has already spun, but the flywheel, due to its inertia, has not, as a result of which additional loads arise, the so-called “torsional vibrations”. They are transmitted to the transmission, resulting in additional knocking, vibration in the gearbox and other similar gifts. A way out of this situation may be to use a dual-mass flywheel.
What kind of device is this that allows you to achieve excellent results? The dual-mass flywheel is shown in the photo; in fact, it consists of two disks connected by springs.
The design of a particular dual-mass device may differ from that shown above. In any case, these are two disks connected by a bearing. The first disk is mounted on the crankshaft, and there is a ring on it for connecting the starter, the second is connected to the clutch. A spring damper system is installed between the discs. The disks have the ability to rotate relative to each other, while the springs dampen jerks and various vibrations that occur during operation of the internal combustion engine.
However, not everything is good, in any case, the dual-mass flywheel cannot boast of widespread use, for example, like a regular VAZ 2108 flywheel.
And the whole point is that when driving at low speeds, especially on cars with diesel engines, which have increased torque, the unevenness of fuel ignition is maximum. The consequence of movement in this mode will be the occurrence of significant torsional vibrations, leading to an increased level of load on the damper springs. As a result, the dual-mass flywheel fails. It is worth noting that in addition to the dual-mass flywheel, there are other types of it, but this is a topic for another discussion.
Clutch repair and replacement - the best price in St. Petersburg, excellent quality
Prices for repairing clutches, gearboxes, replacing sensors, seals and other things
carries out clutch repairs in St. Petersburg on domestic and imported cars. Our experienced, qualified craftsmen will repair this unit of any degree of complexity, be it a complete replacement of the clutch assembly or repair of its individual element (for example, replacing a rocker).
At the same time, we guarantee all car owners the impeccable quality of all work performed and the spare parts and consumables used in them, as well as short deadlines and competitive prices for all our services!
Clutch replacement in St. Petersburg - a few words about this element of the car
The main purpose of the clutch is to regulate torque, in terms of its transmission from the engine flywheel to the transmission. In simple terms, this element allows you to smoothly disconnect and dock the engine flywheel with the transmission at the right moments. This device comes in two main types:
- Single-disc - this clutch is installed on the vast majority of passenger cars;
- Multi-disc - it is more often found in trucks and special equipment.
In addition, the clutch can be:
- Dry or “wet” (when the main mechanisms are immersed in a kind of oil bath);
- With electric, mechanical, hydraulic and combined drive;
- With a pressure disk pressure design in the form of a circular spring arrangement or with a central diaphragm.
Clutch repair prices
| See all advertisements in the archive |
| Name of works | Domestic cars: | Foreign cars: | SUVs, minibuses |
| Remove/install gearbox | from 3,000 rub. | from 4,500 rub. | from 5,300 rub. |
| Clutch cable adjustment | 300 rub. | 300 rub. | 300 rub. |
| REPLACEMENT: | |||
| — Gearbox cushions | from 500 rub. | ||
| — Speedometer cable drive | from 300 rub. | from 500 rub. | from 1,200 rub. |
| — Gear selector rod seal | from 500 rub. | from 500 rub. | from 800 rub. |
| — Drive oil seal | from 1,300 rub. | from 1,500 rub. | from 1,500 rub. |
| — Input shaft oil seal (on the removed gearbox) | from 350 rub. | from 350 rub. | from 350 rub. |
| — Speedometer cable | from 800 rub. | from 800 rub. | from 1,600 rub. |
| — Clutch cable | from 700 rub. | from 800 rub. | from 1,100 rub. |
| — Speed sensor | from 300 rub. | from 500 rub. | from 600 rub. |
| — Reverse gear sensor | from 300 rub. | from 500 rub. | from 600 rub. |
| — Clutch kit (basket, disc, release bearing) | from 3,300 rub. | from 4,800 rub. | from 5,600 rub. |
| — Clutch bracket | from 350 rub. | from 350 rub. | from 450 rub. |
| — Bearing fastening/guide elements (on the removed gearbox) | from 150 rub. | from 300 rub. | from 300 rub. |
| — Clutch master cylinder | from 500 rub. | from 600 rub. | from 800 rub. |
| — Clutch slave cylinder | from 550 rub. | from 700 rub. | from 900 rub. |
| — Clutch forks (on the removed gearbox) | from 150 rub. | ||
| — Clutch fork supports (on the removed gearbox) | from 150 rub. | from 300 rub. | from 300 rub. |
| — Flywheel | from 3,300 rub. | from 4,800 rub. | from 5,600 rub. |
Replacing the clutch - cost and signs of trouble with this unit
Symptoms that should alert the driver and which may indicate that clutch replacement is just around the corner:
- Difficulty switching between reverse and forward gears.
- Slipping (incomplete engagement) of the clutch, including lack of acceleration appropriate for a given gear and a noticeable loss of power on inclines.
- Jerking when the clutch is engaged, as well as extraneous noises and knocking.
- The clutch pedal squeaks and jerks when you press it.
- A pronounced smell of burnt plastic when operating the machine.
As for the price of replacing the clutch, it, of course, depends on the severity of the breakdown and on the number of parts of the assembly that require replacement (up to a complete replacement of the clutch assembly).
Clutch repair - the price depends on the complexity of the task and the broken element of the unit
Of course, this is not the cheapest service - clutch replacement, and the price for it, by definition, cannot be symbolic, because this procedure is very labor-intensive and responsible, since a faulty clutch can provoke a serious accident when the car is moving.
However, a complete replacement of the clutch assembly is not always required; sometimes the situation allows us to limit ourselves to updating one of its individual elements, such as:
- Replacing the clutch basket, which is rigidly connected to the engine flywheel and with release springs in the center, may require preliminary balancing of the new part on a specialized stand.
- Replacing the clutch disc (driven) is strictly indicated when its damper springs are weakened or completely broken or there is end runout and will almost certainly eliminate the strong noise when the clutch is engaged and the “driving” effect of the device when it is disengaged.
- Replacing the clutch cable can save the car owner from slipping and driving the device during operation; often replacing the clutch cable is accompanied by replacing the entire driven disk or its linings.
- Replacing the clutch cylinder will also save you from slipping and dragging of this device during its operation.
- Replacing the rocker (or, in scientific terms, the gearbox drive rod) will allow you to do it with little effort without labor-intensive disassembly of the entire clutch assembly, and a sign of its malfunction is usually the loss of control over one or more gears in the box.
- Replacing the clutch fork (more precisely, the clutch release fork) will correct the situation with slipping when changing gears.
Clutch replacement in St. Petersburg - contact the professionals
Of course, motorists are always tempted to try their own hand at repairing their “iron horse,” but the clutch is not the unit with which you can start your car mechanic experiments, because the safety of your driving this car is at stake! Therefore, it is better to entrust such important tasks as replacing a clutch disc or cylinder, its fork, cable and slides to our qualified craftsmen, who will accurately determine the cause of the malfunction and quickly eliminate it.
And finally, we want to give a simple recommendation, following which you will significantly extend the working life of your clutch, and you will not have to change it every year: try not to keep your foot on its pedal all the time, even if it seems to you that your foot does not touch its surface. After all, even the lightest pressure on the pedal wears out the driven disc. But even the most careful handling of car systems will not extend their service life indefinitely, and sooner or later you will need to replace the entire clutch or its individual elements (link, cable, cylinder, disc, basket, and so on).
Our service centers repair and replace clutches for cars of all brands and models, including VAZ 2107, VAZ 2109, VAZ 2110, Ford Focus 2, Peugeot, Chevrolet, Toyota, Nissan, Kia, Opel, VW Golf and many others!
Chainsaw starter repair
During frequent use, some components of the chainsaw may be subject to constant dynamic influences, which is why, for example, at the most inopportune moment the cable may burst, the shaft will begin to rotate at a much lower speed, or the teeth of the ratchet will crumble. Taking this into account, repair and inspection of a chainsaw starter can be an operation that is carried out more than once during one working season!
Spring repair
If the quality of the spring material is poor, the latter tends to burst, and usually the rupture occurs at the site of contact with the drum, in the place where a loop is formed
In this case, it is not necessary to change the spring at all! It is quite enough to simply thoroughly clean the surface of existing grease and dirt, and then carefully sand the damaged area. At the end, the spring is released at a temperature of 600-650 degrees until the steel gets a crimson tint. The part should cool gradually, where at 100-150 degrees it is already possible to carefully wrap the end of the spring on the inner surface of the drum according to the shape of the limiting protrusion so that the material obtains the desired plasticity
In this case, the elastic characteristics of the spring will remain the same
The part should cool gradually, where at 100-150 degrees you can carefully wrap the end of the spring on the inner surface of the drum according to the shape of the limiting protrusion so that the material obtains the desired plasticity. In this case, the elastic characteristics of the spring will remain the same
Replacing the cord
If the cord is pulled, the cable begins to rub against the starter housing. Replacing the cord begins with disassembling the unit body, during which the ratchet drum is carefully lifted so that the return spring does not slip from its socket. It is more correct and more convenient to do this together, where the second one will hold the spring while replacing the cable! After the cable is successfully fixed in the grooves of the drum and the handle, it is wound onto the roller, followed by the assembly of the housing.
Replacing the timing belt - VAZ 2109. Carburetor - Leading auto portal
The domestic car production plant produces cars that are not of the best quality, and the spare parts for them, although quite cheap, have the same conditioning problems as the cars themselves. Quite often it is necessary to change the timing belt; the wear period is on average 60 thousand kilometers. Here we will look at how to change the timing belt on a VAZ 2109 yourself. For the first stage, you need to drive the car to a fairly level place. Next, using a jack, lift the front wheel on the right side, having previously secured the position of the car with stops and a handbrake. We remove the wheel and place a stop under the sill.
To carry out the work of replacing the belt, you need certain devices: - Throw-on wrenches 8, 10, 17 and 19 mm - Wrench for turning the tension roller
— Thick slotted screwdriver
— Tension roller — New strap
We will need free access to the crankshaft pulley, for this we will need to remove the mudguard using a key number 8. Next we will need to remove the generator drive belt with a key number 19 and 17. To do this, we need to move the generator to the engine and move it as close as possible, then you can remove the belt. The next step is to remove the protective cover that covers the timing belt. Next, carefully unscrew the bolt that secures the drive pulley to the crankshaft. You need to remove the generator drive pulley, first aligning the marks correctly, as shown in the photo below.
After completing the procedures, screw the crankshaft pulley fixing bolt back in and turn it clockwise.
In order to remove the belt without any problems, reduce the tension of the tension roller or remove it completely.
We perform the operations in reverse order (carefully align the marks.)
The next operation is tensioning the timing drive.
Now you can safely remove the old belt and install a new one. Do not start tensioning until the marks match, as shown below.
We insert the key into the tension roller and turn it clockwise, lightly tighten the nut with the key, then, by hand, turn the strap 90 degrees.
We turn the crankshaft with a wrench until the belt makes two full revolutions.
Now you can tighten the nut securing the tension roller until it stops. You shouldn’t tighten it too much because you can bend the pin that secures the roller, which will cause the timing belt to slip off. We put back the crankshaft pulley, the drive casing, the generator strap, tighten it to the required elasticity and fasten the generator itself. We fix the mudguard in its place, screw the right wheel back and remove the car from the jack. In the attached video, you can familiarize yourself in more detail with the procedure for replacing the timing belt for the VAZ 2109:
Replacing the belt yourself will help you save money on the purchase of other spare parts that will undoubtedly be needed for your “nine”, since the process of operating any car, in our realities, requires significant costs and strong nerves. Good luck on the roads of our vast homeland.
Regular, damper flywheel and its other types
Structurally, the following types of its execution are distinguished:
- solid or regular;
- dual-mass or damper;
- lightweight.
The most common is the solid flywheel. In fact, it is an ordinary metal disk with a crown on the end.
Different car models have their own design, usually the disc diameter is thirty to forty centimeters. As an example, we can cite the VAZ 2101 disc, its weight is 6.7 kg, and the clutch diameter is two hundred mm, while for the VAZ 2110 it weighs 6.3 kg. There is no single option for any model; all VAZs, for example, such as 2112, 2114, 2110, have their own version.
What is used in VAZ cars?
It is not surprising that for VAZ cars, for example, such as 2112, 2114, 2110, as already noted, a variety of flywheels are used. In cars of this family, a conventional flywheel is used, not a dual-mass flywheel. True, for the representative of each VAZ family it is different, differing in the weight and size of the clutch disc.
So, all VAZ classics are equipped with a flywheel from 2101, Niva and Chevy Niva - from 21213. Eights are equipped with products from 2109. Tens, Kalinas, Priors, Grants use a flywheel from VAZ 2110. All types of flywheels, from VAZ of various families, for example such , like 2112, 2114, 2110, are distinguished by different seats, outer diameters and crowns.
The role and importance of the flywheel in an internal combustion engine is difficult to overestimate, and probably simply impossible. It is this that smoothes out jerks, creates normal conditions for the operation of the transmission and reduces vibration from the engine transmitted to the body. In order to increase its efficiency, various designs are used, although often the design in the form of a conventional disk works quite successfully in the engine.
What else is worth reading
VAZ 2103 engine design
VAZ 2112 generator device
How to decipher tire markings
Cause of knocking noise in front suspension
Lightening the flywheel
What is a timing belt for?
Modern cars with a carburetor are equipped with a gas distribution mechanism. When the timing belt is operating, the valves must open and close in a strict order. Their movements must be performed synchronously with the movements of the pistons. The transmission of motion from the crankshaft to the camshaft is carried out using a timing belt. If it breaks, the valve timing is disrupted, which can lead to serious damage. Depending on the design of the engine, the valves may bend when they meet the pistons.
Guarantee
We provide a special guarantee:
- one year - original spare parts
- month – non-original spare parts
- one year – completed work (installation of original spare parts)
- three months – completed work (installation of non-original spare parts)
| Name | Replacing the clutch. Price from) |
| Replacing the VAZ 2110 clutch | 4000 |
| Replacing the VAZ 2109 clutch | 4000 |
| Replacing the VAZ 2107 clutch | 6500 |
| Renault Logan clutch replacement | 9300 |
| Ford Focus clutch replacement | 9000 |
| Ford Transit clutch replacement | 10000 |
| Ford Fusion clutch replacement | 8000 |
| Ford Mondeo clutch replacement | 1200 |
| Ford Galaxy clutch replacement | 8400 |
| Ford Fiesta clutch replacement | 9100 |
| Replacing the Opel Astra clutch | 10600 |
| Replacing the Opel Vectra clutch | 9400 |
| Renault Logan clutch replacement | 9300 |
| Peugeot Partner clutch replacement | 9800 |
| Replacing the Skoda Octavia clutch | 6800 |
| Skoda Fabia clutch replacement | 8400 |
*Price depends on modification. For more information about the cost of replacing a clutch for specific brands of cars, please call +7(812)309-26-56.
